Army ants finals
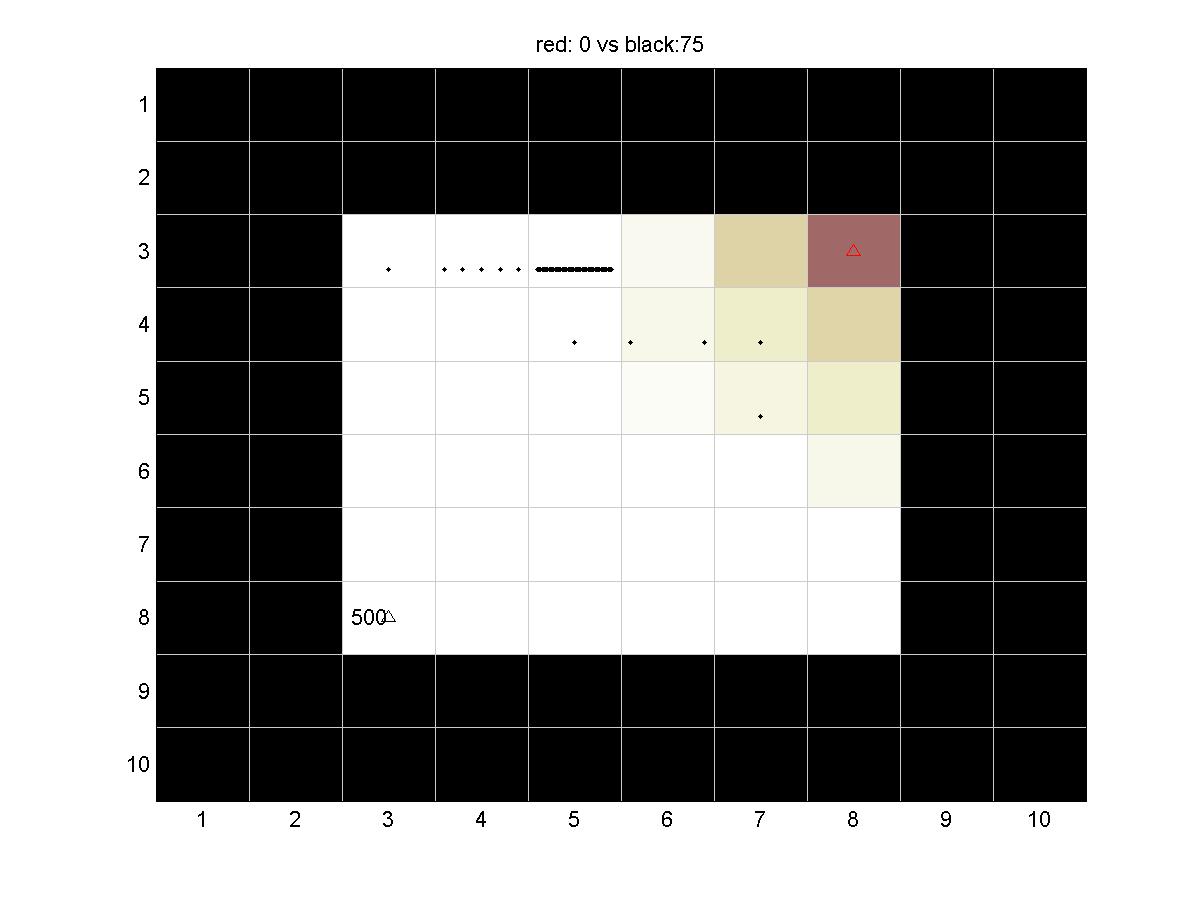
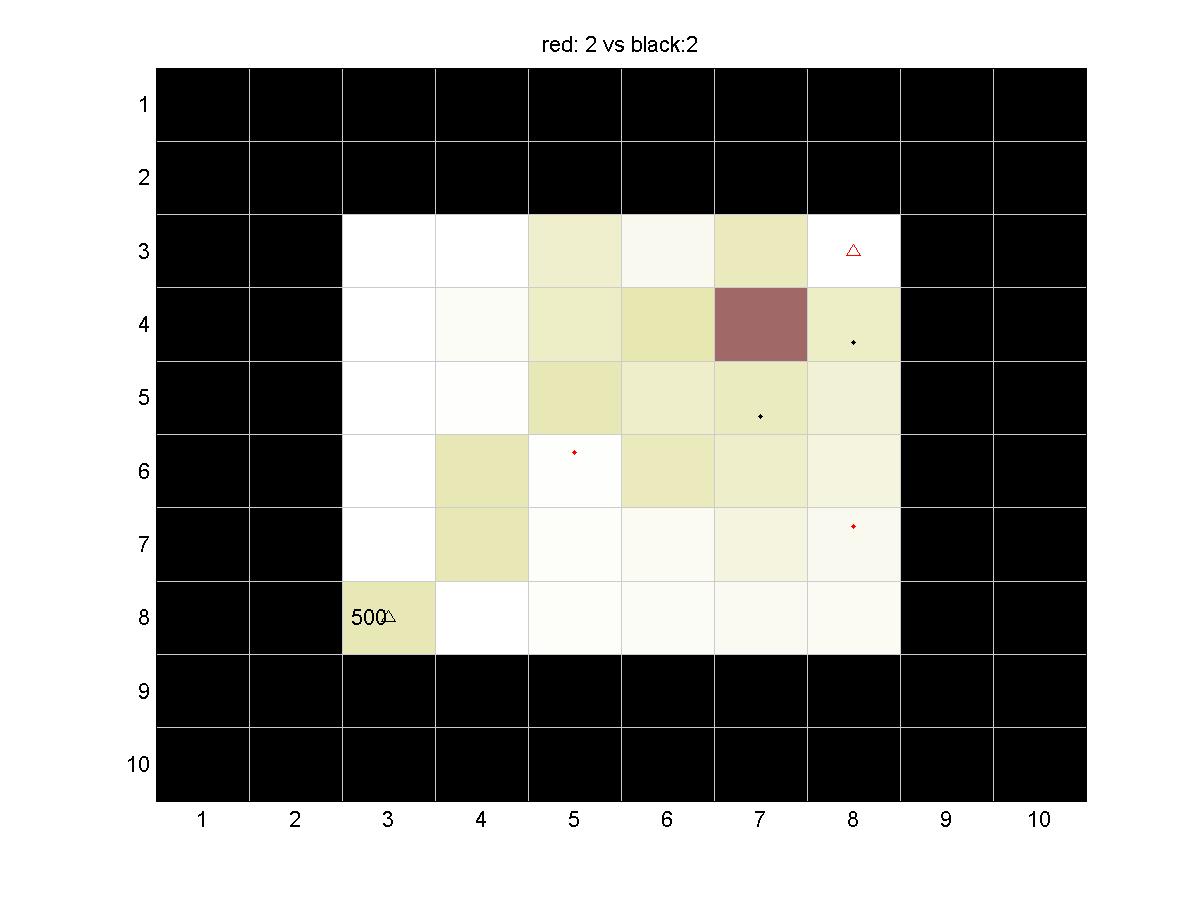
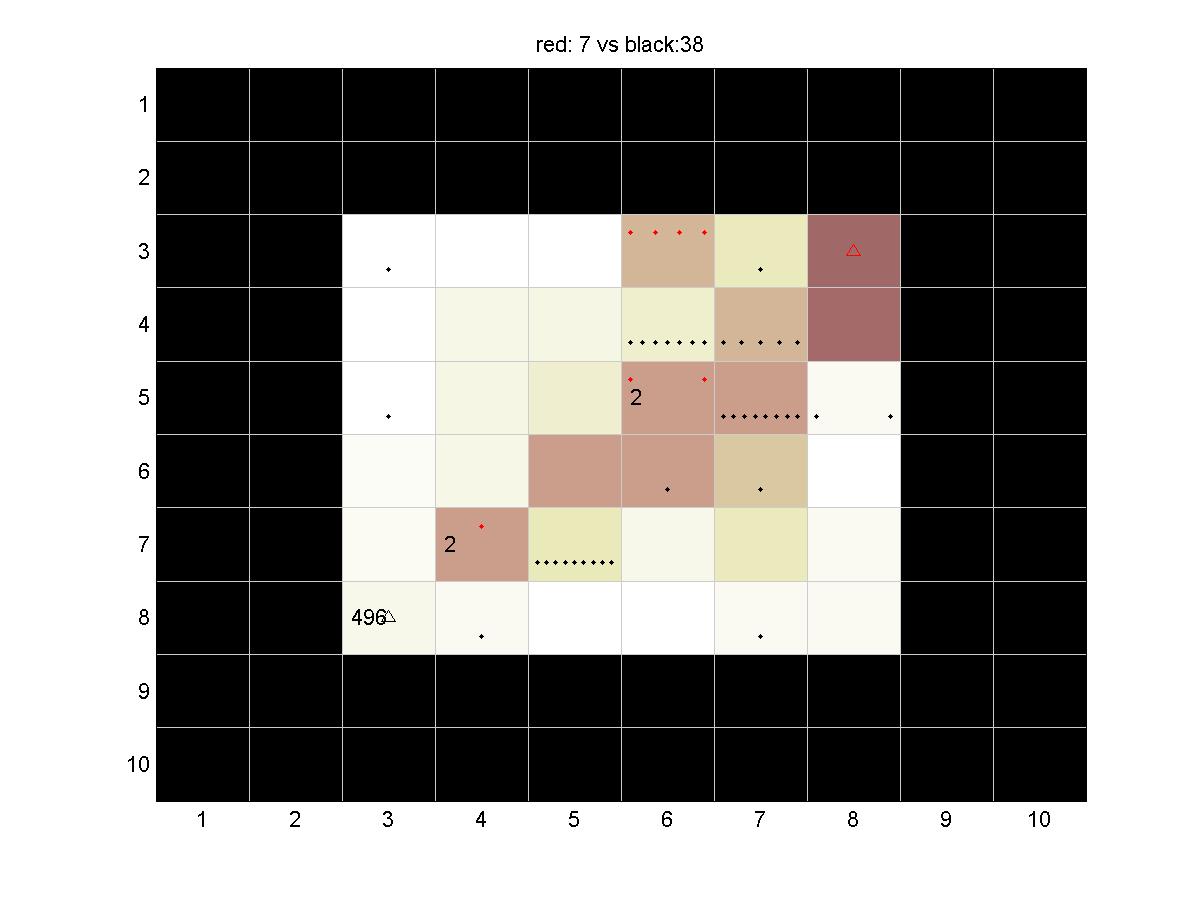
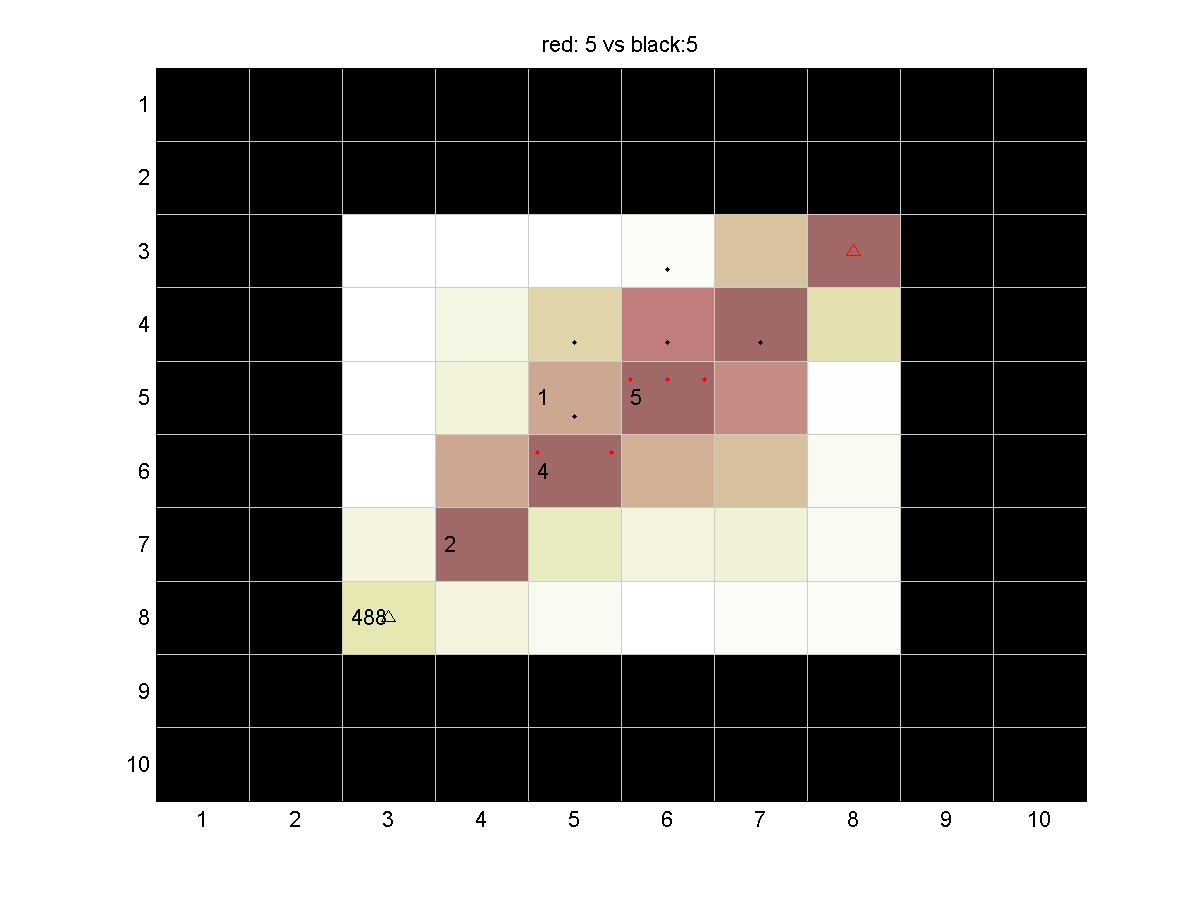
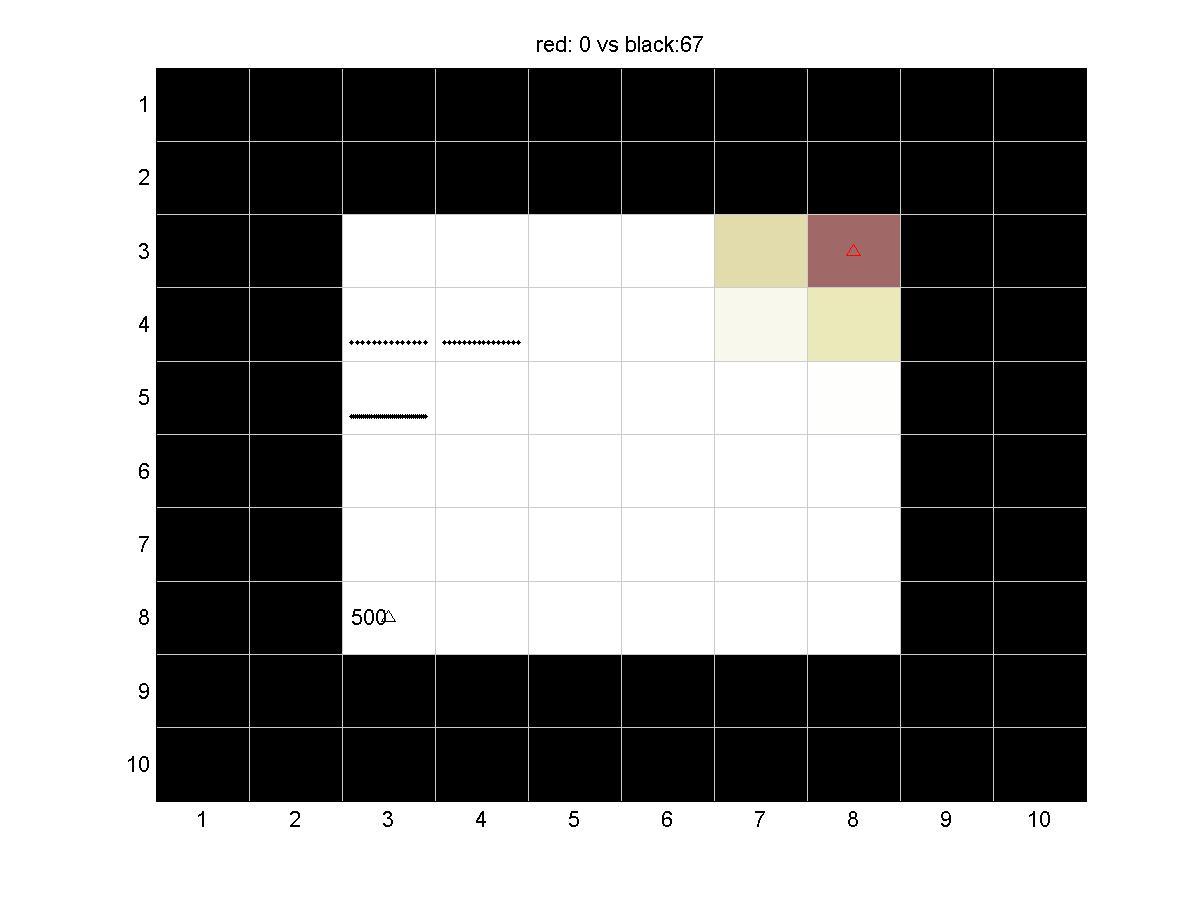
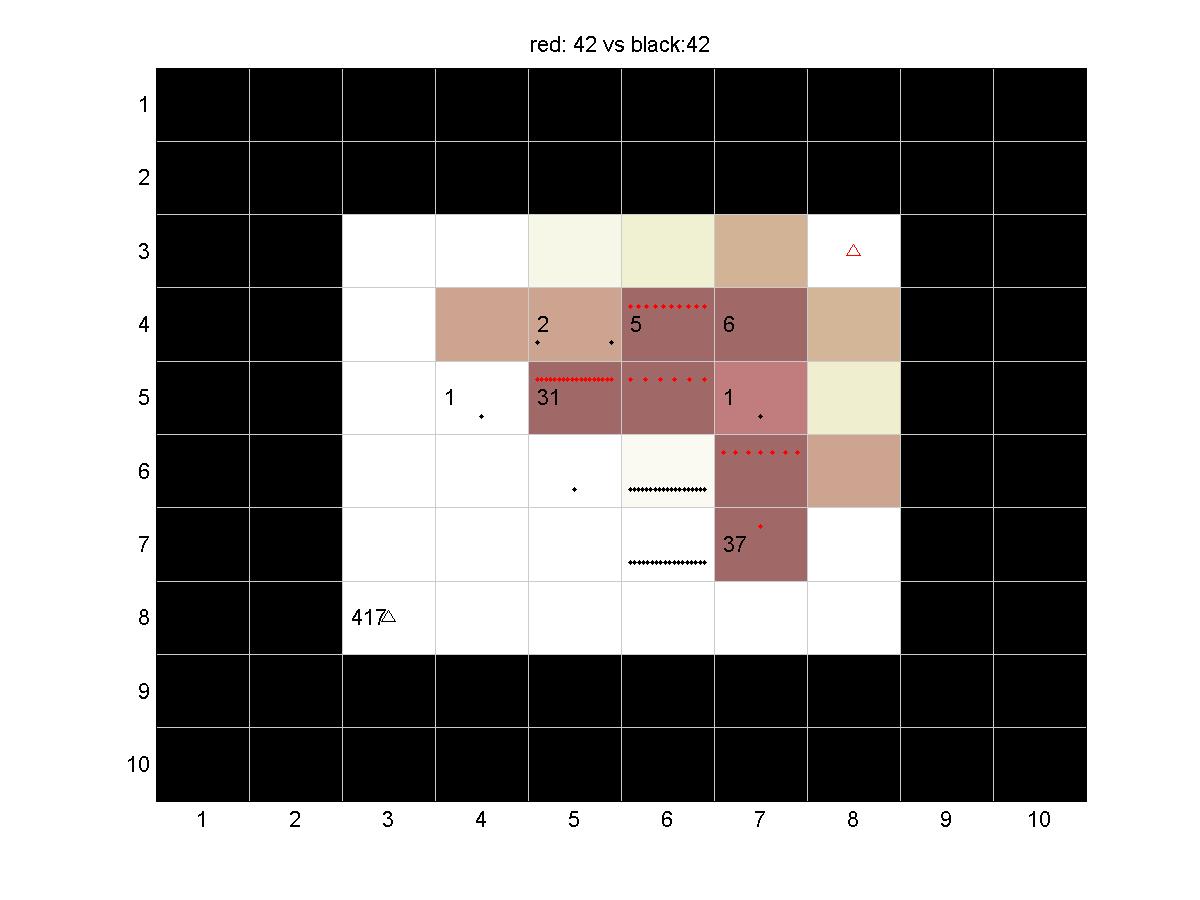
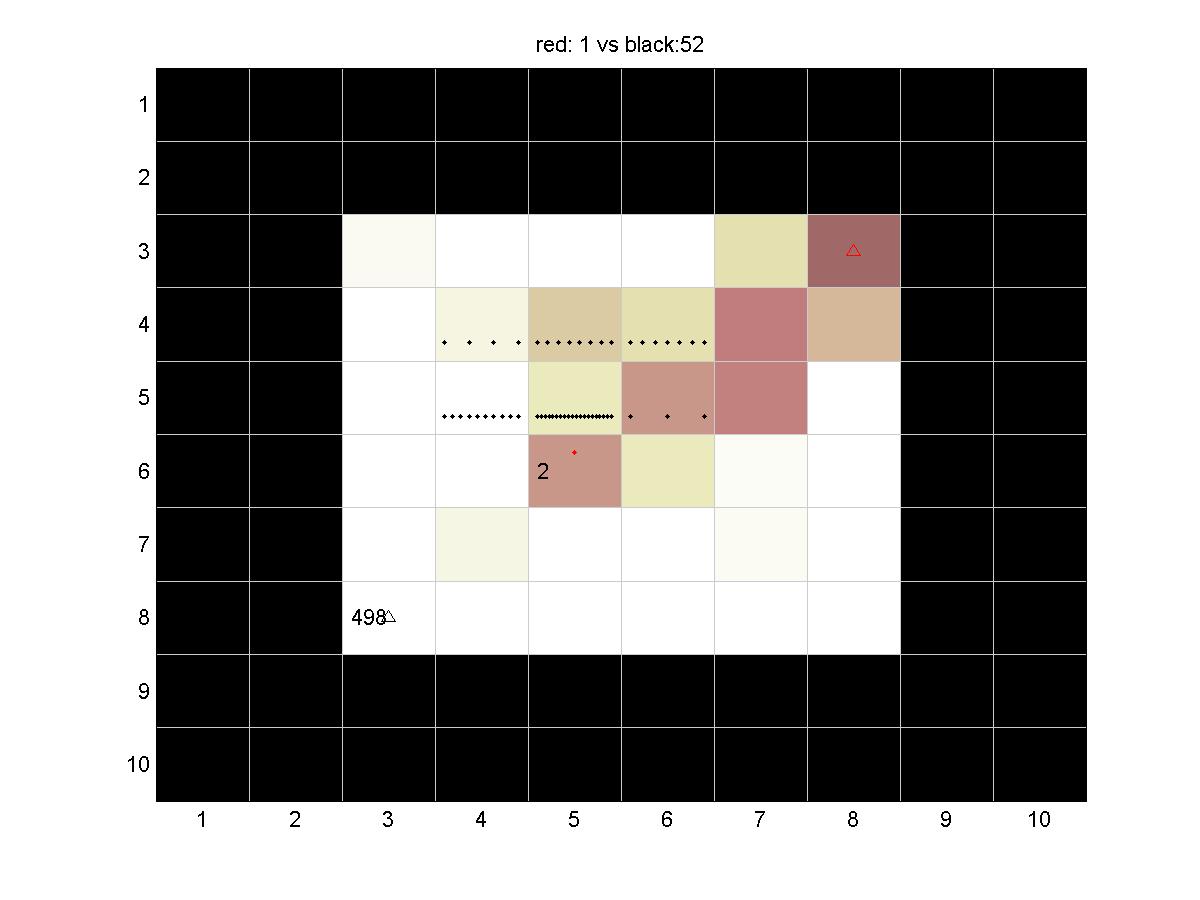
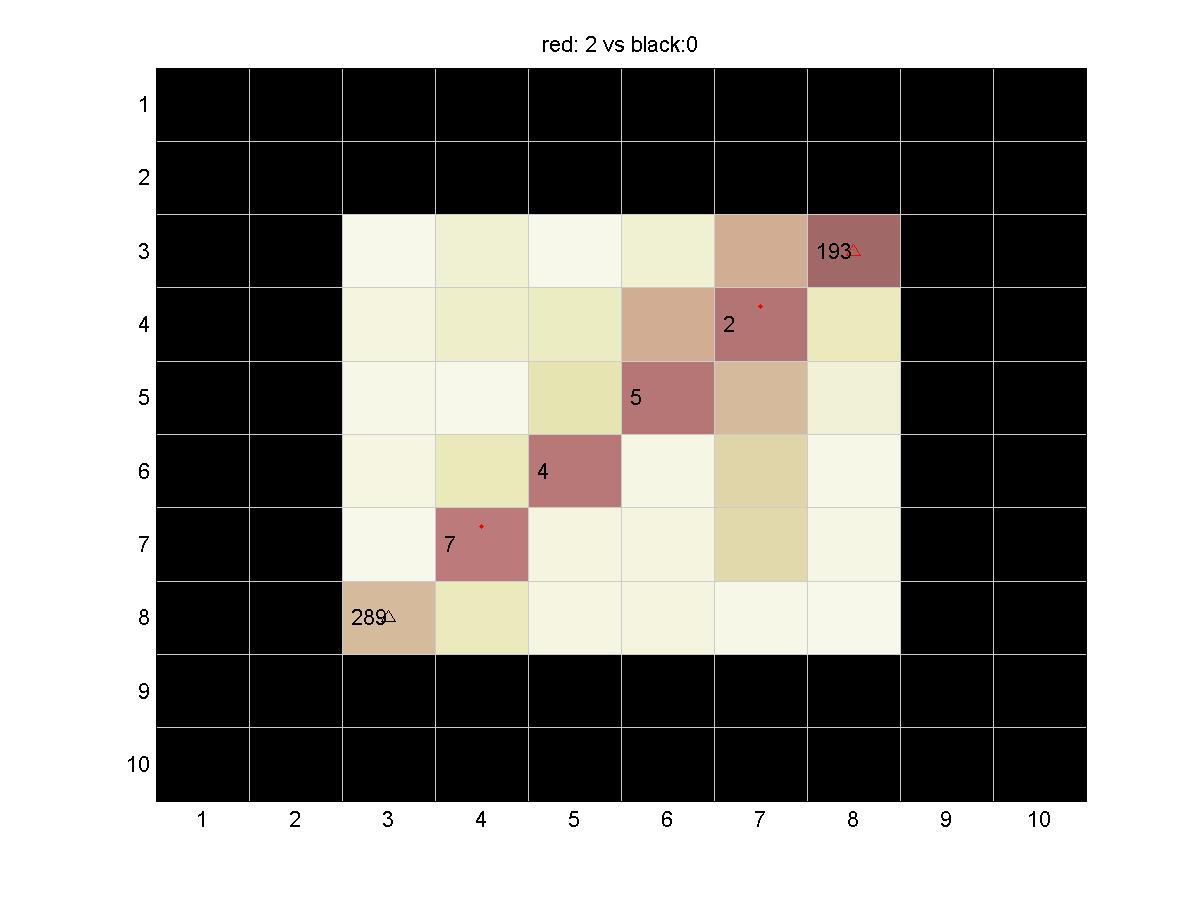
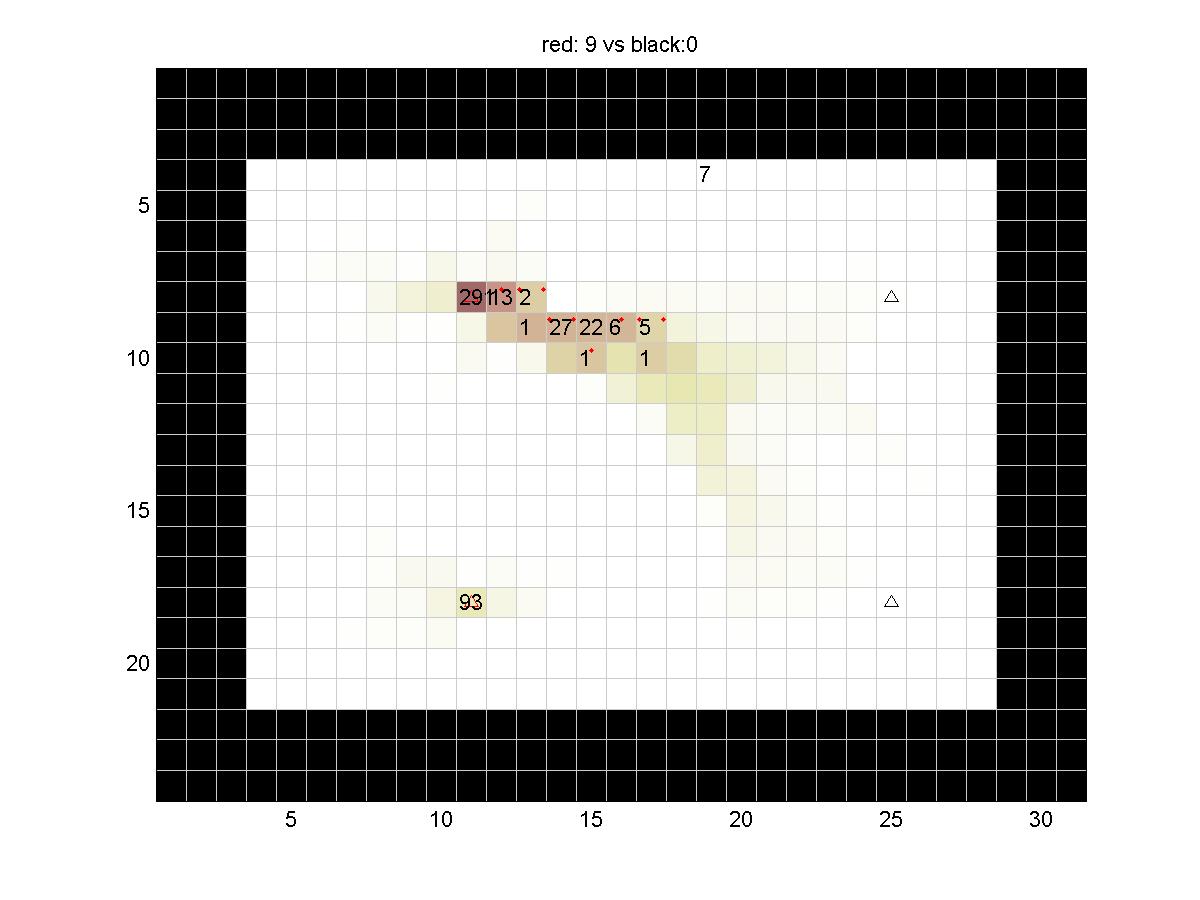
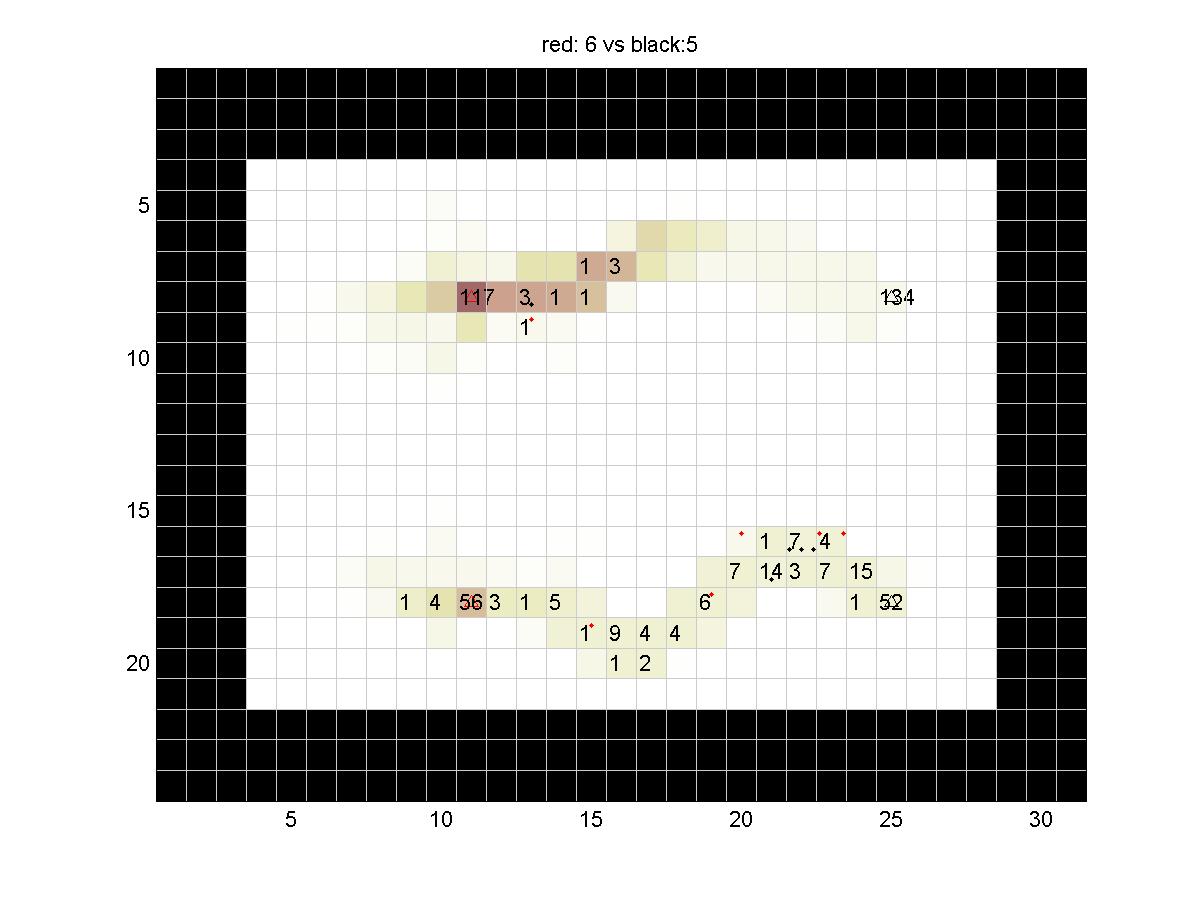
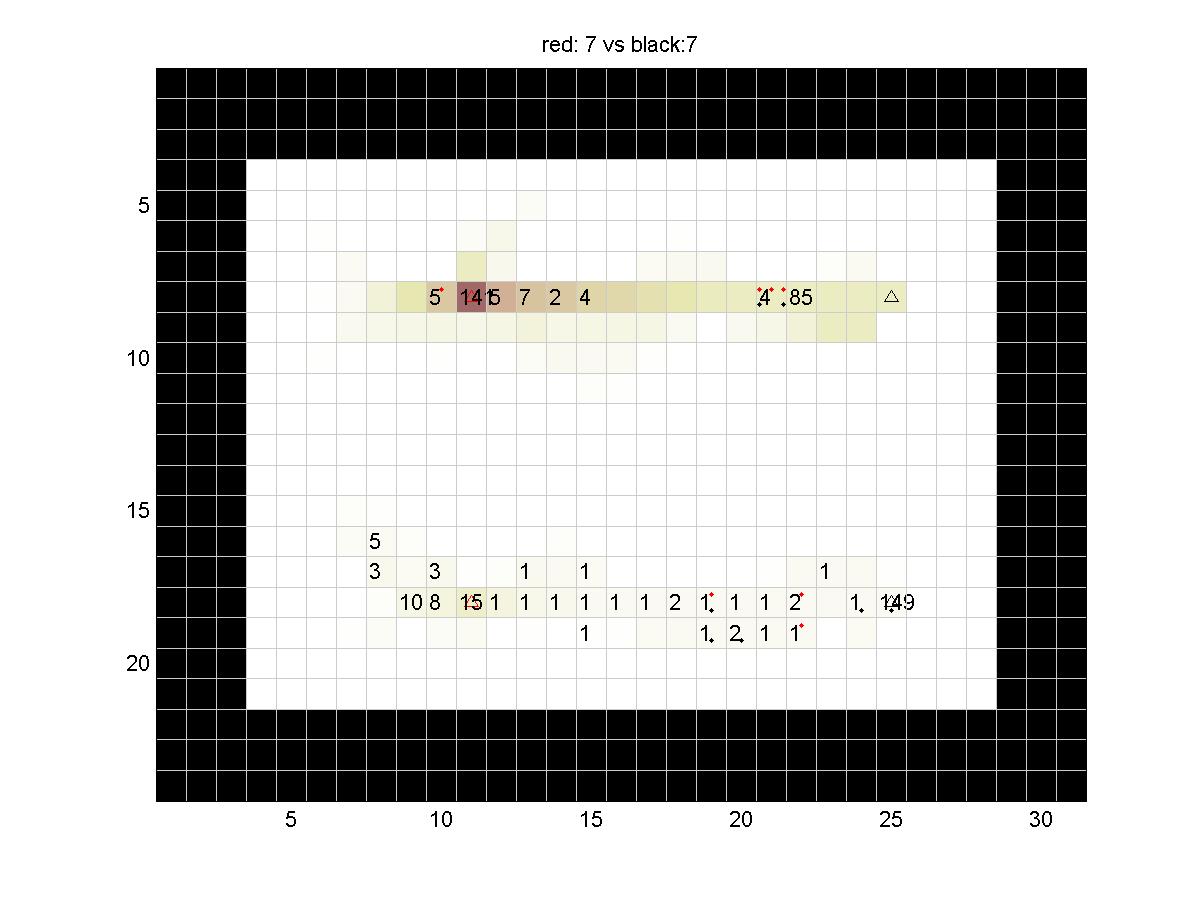
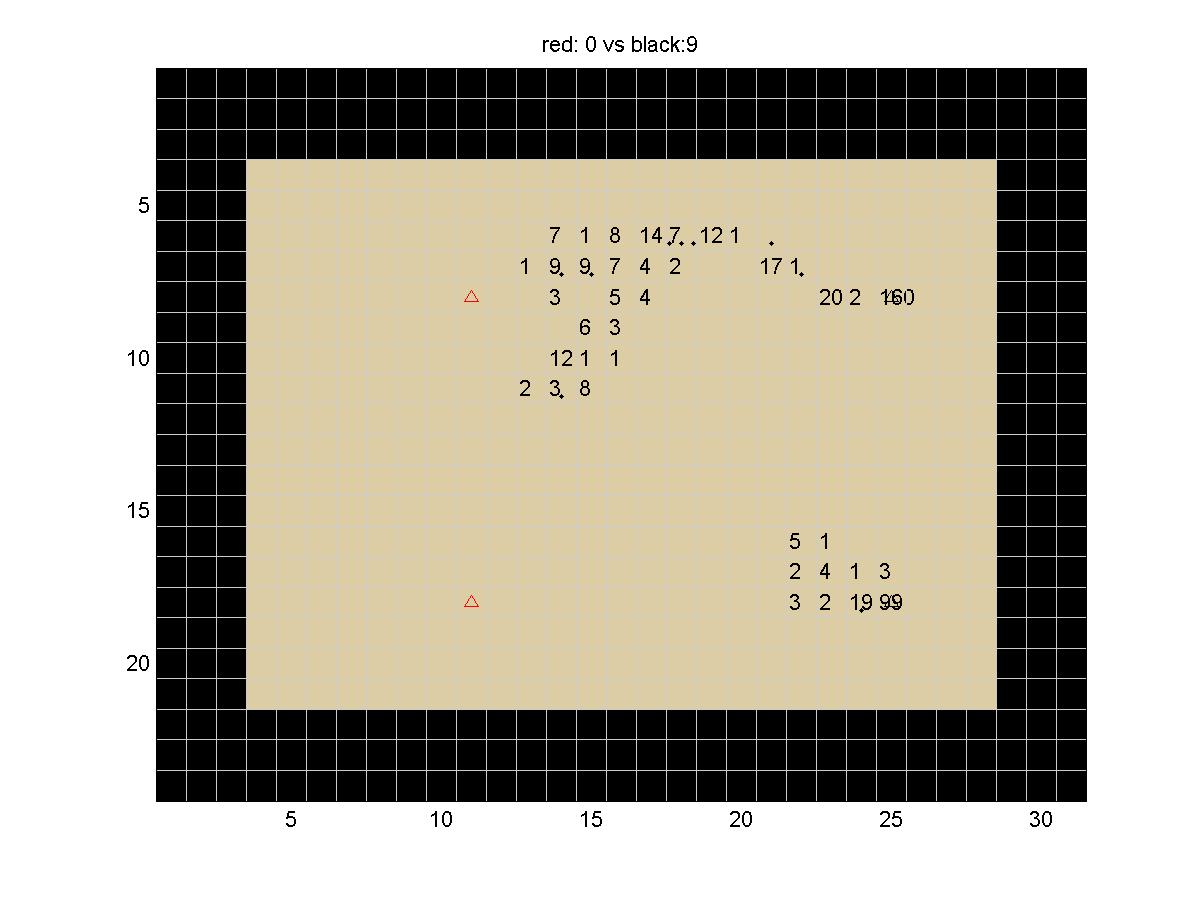
The charts below show each of the boards in the actual test suite and the results of each pairing of different Kings of the Hill. To make it easier to understand, the score is 100 for moving all the sugar to red's anthill, 0 for not moving any sugar, and it can go negative if the sugar is moved farther away. |
|---|
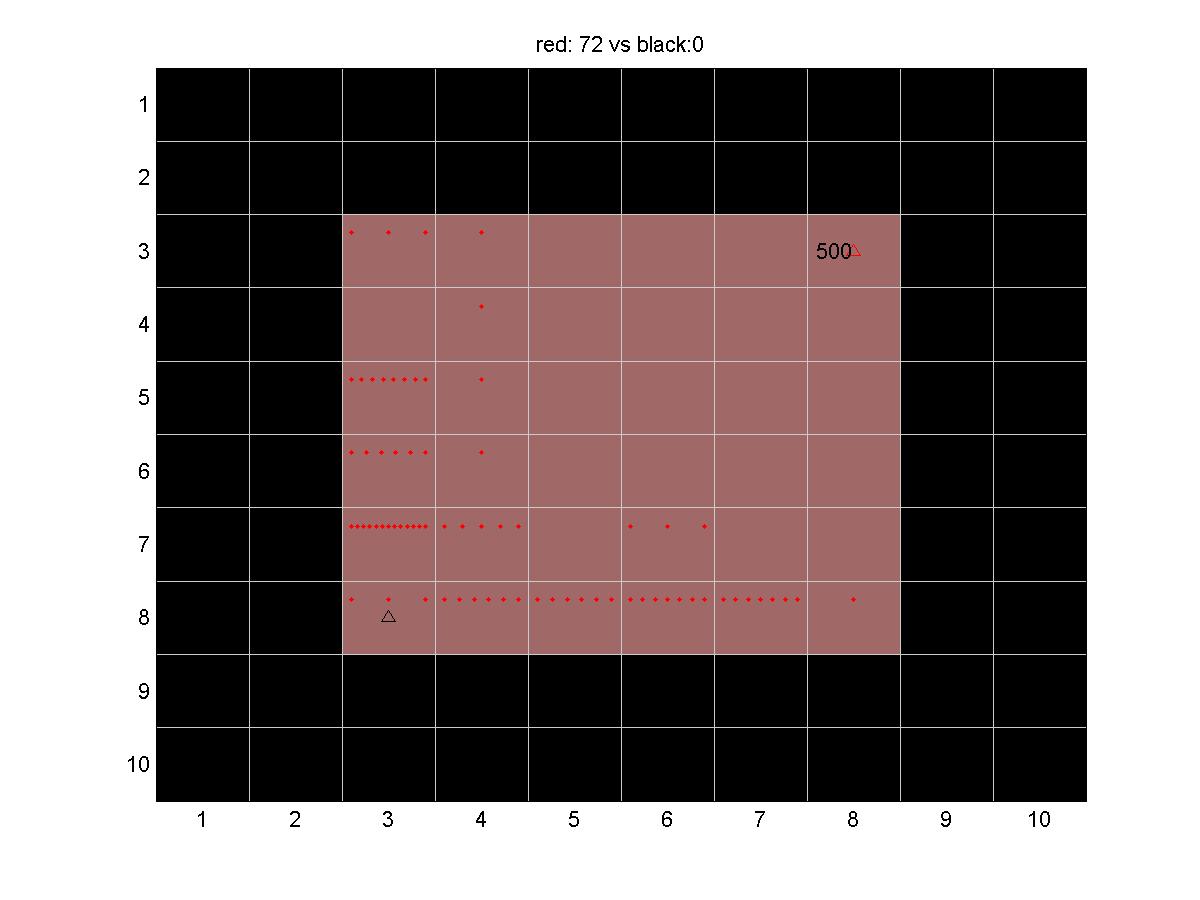
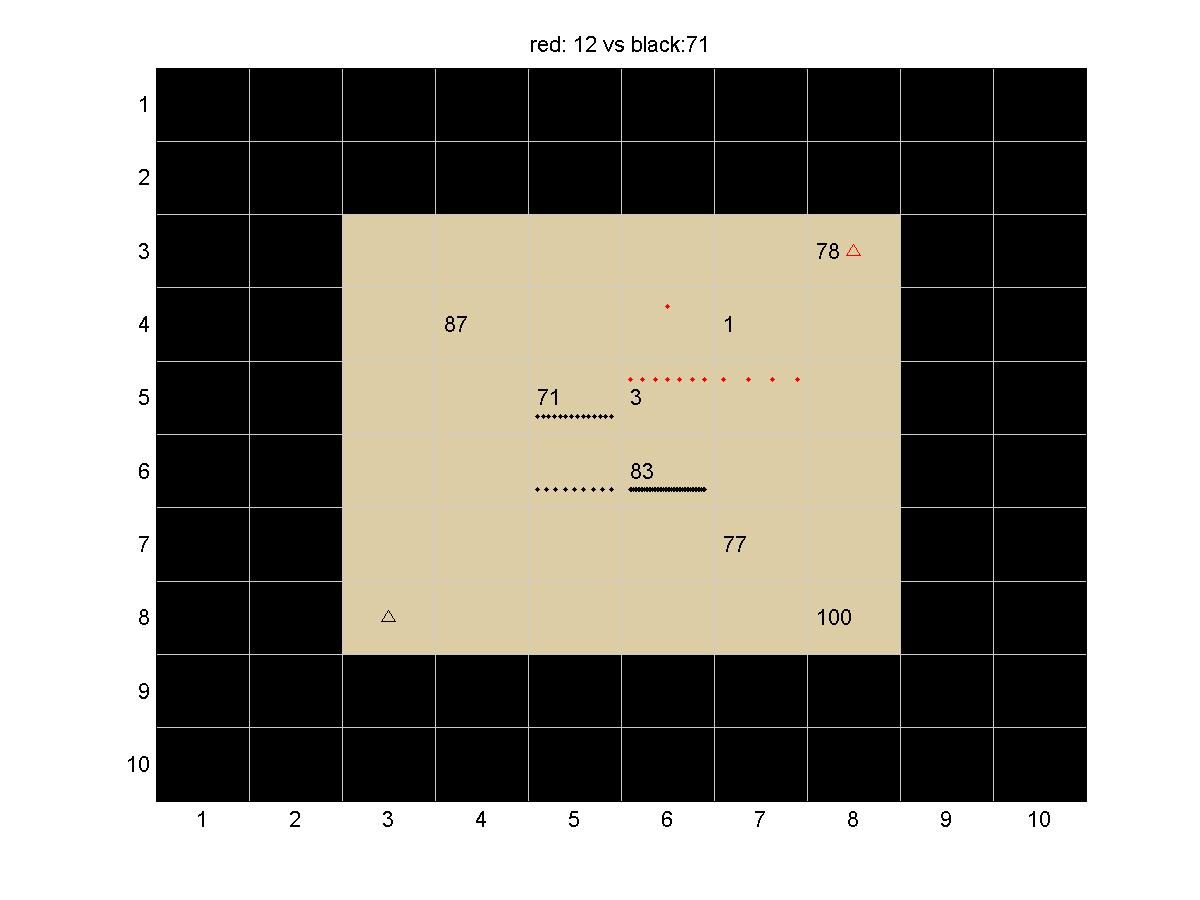
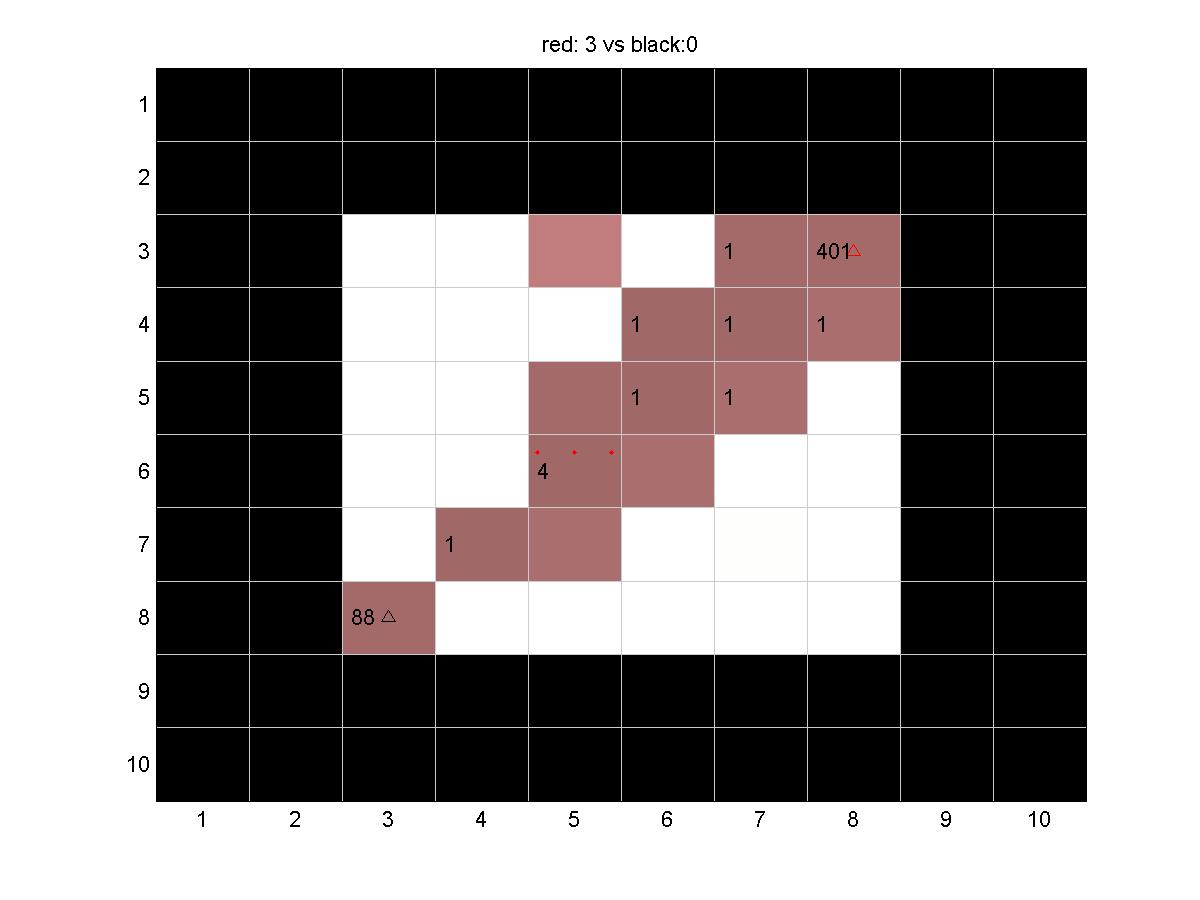
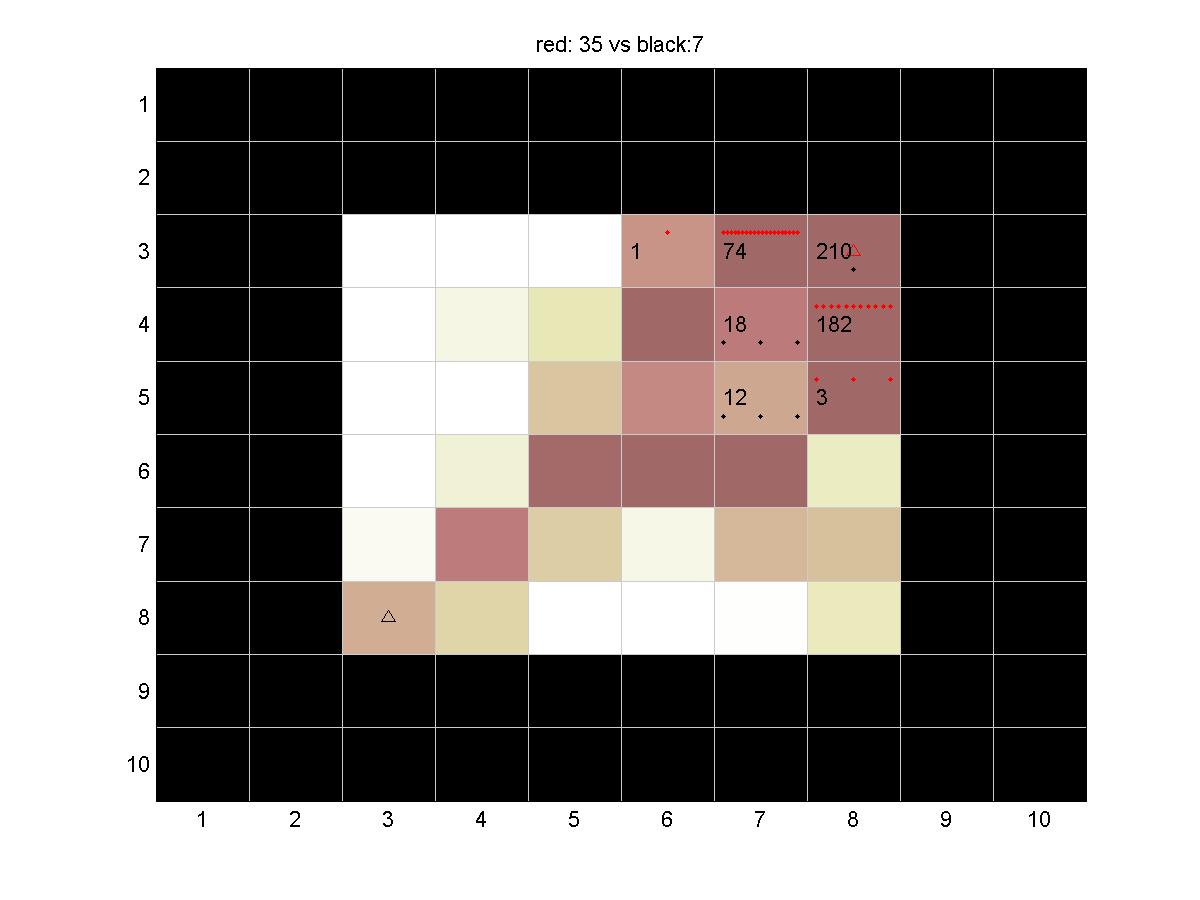
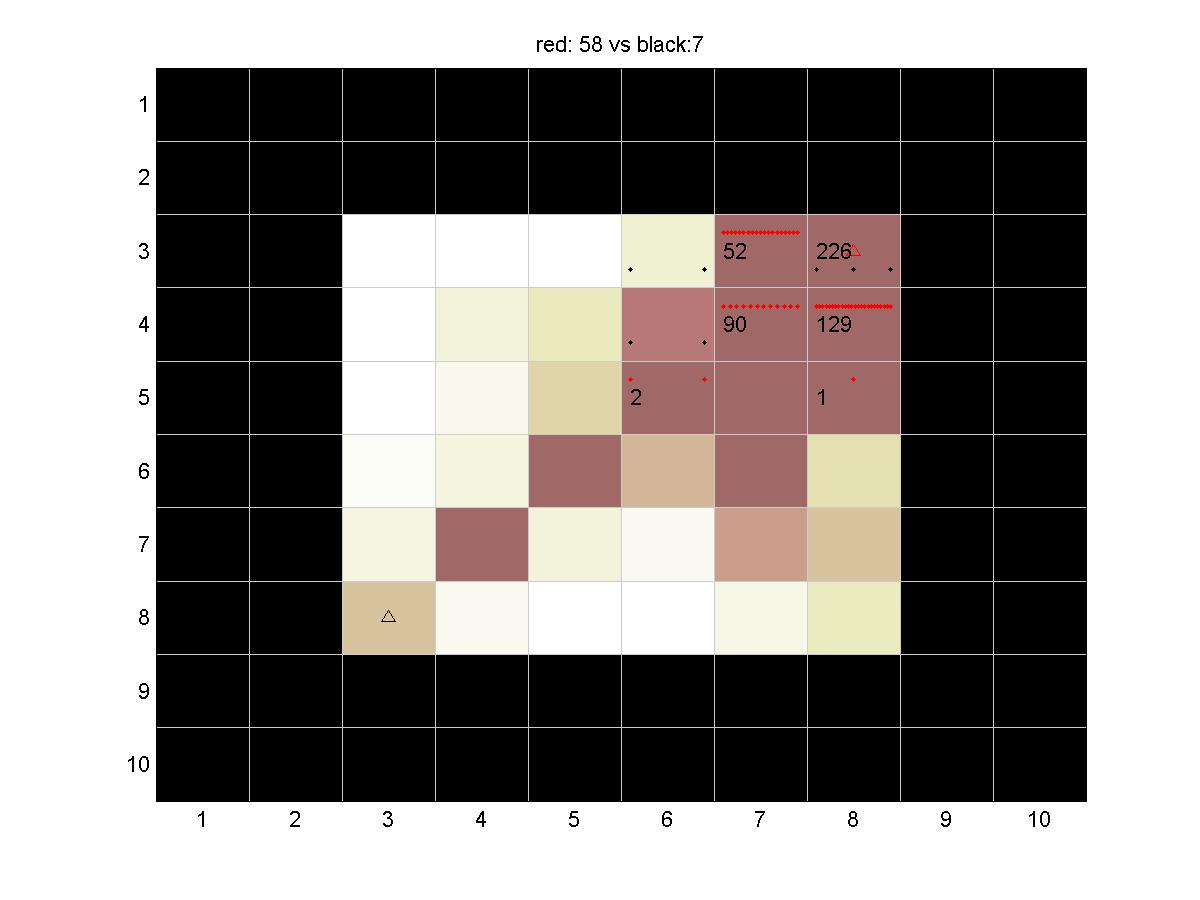
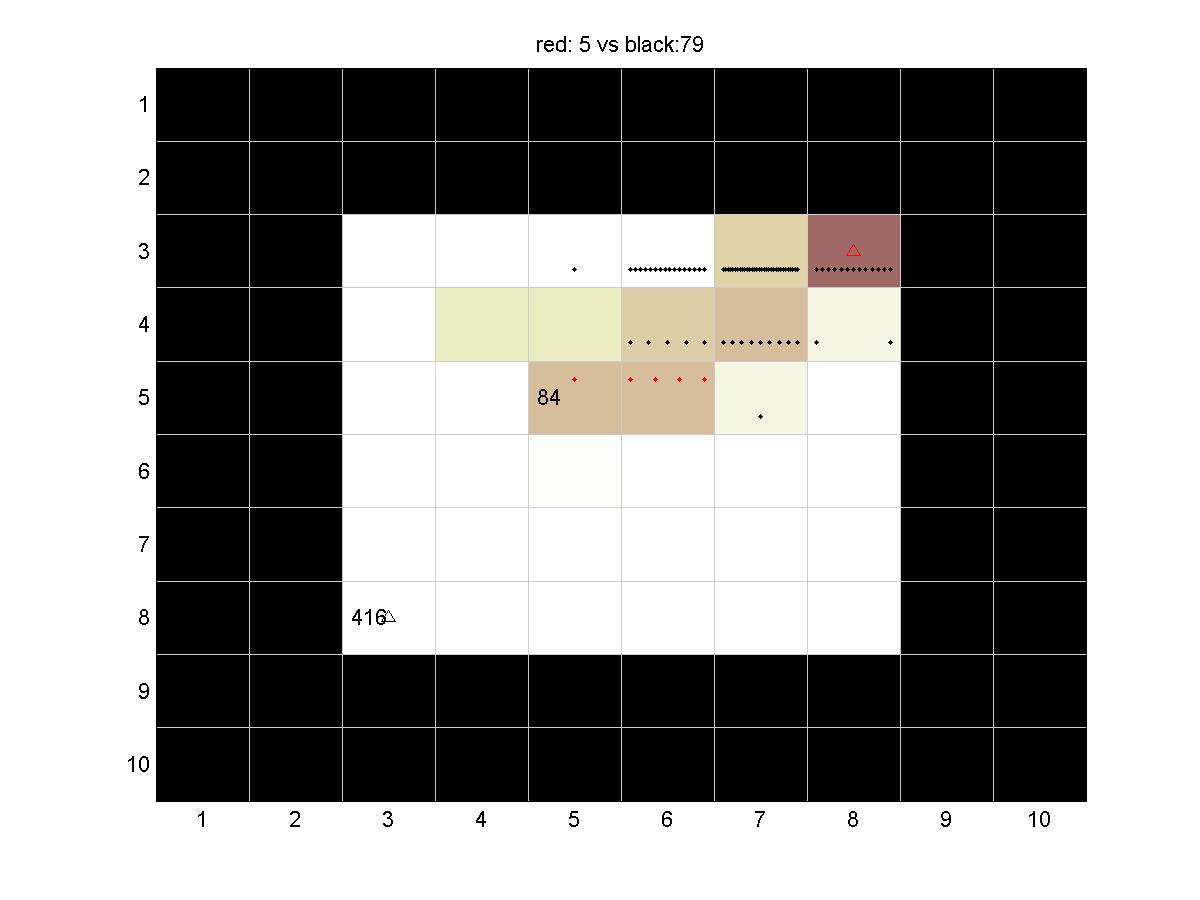
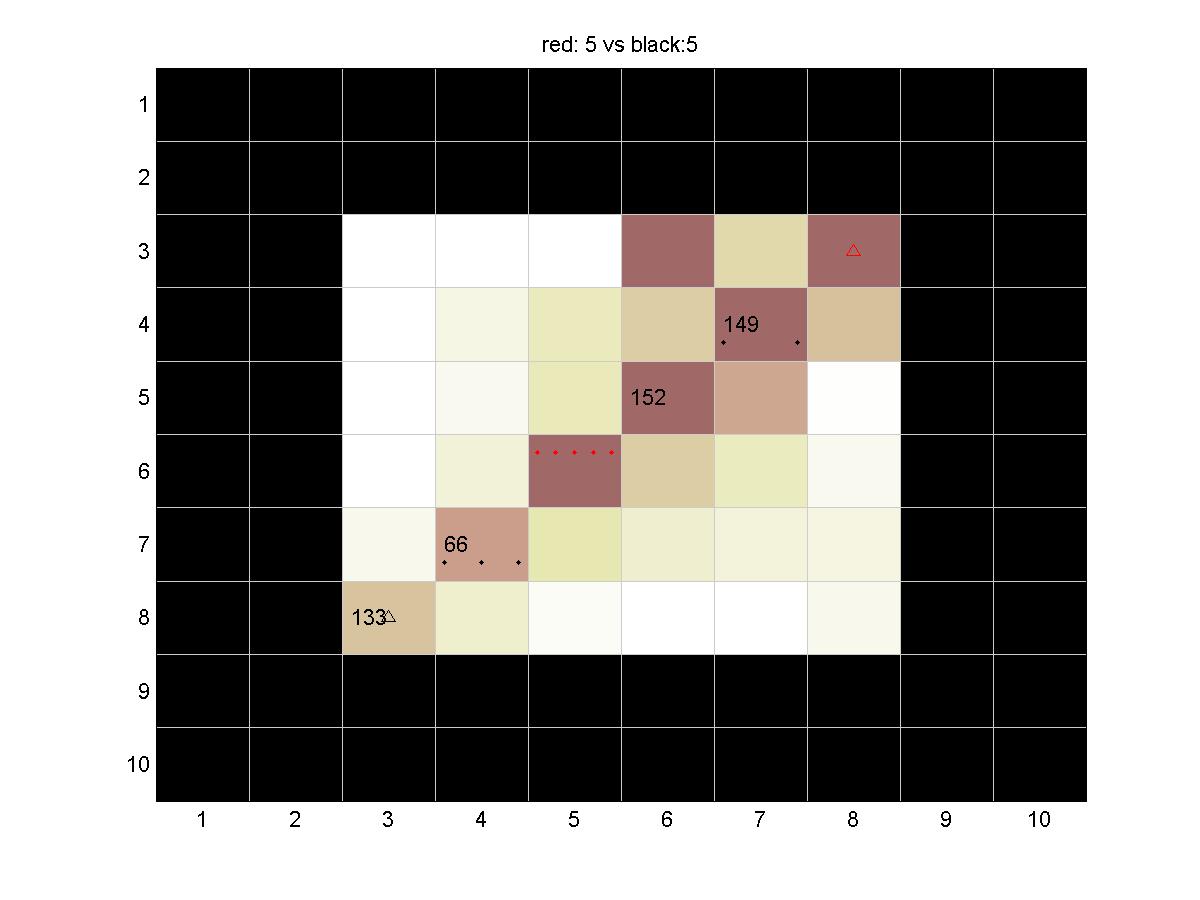
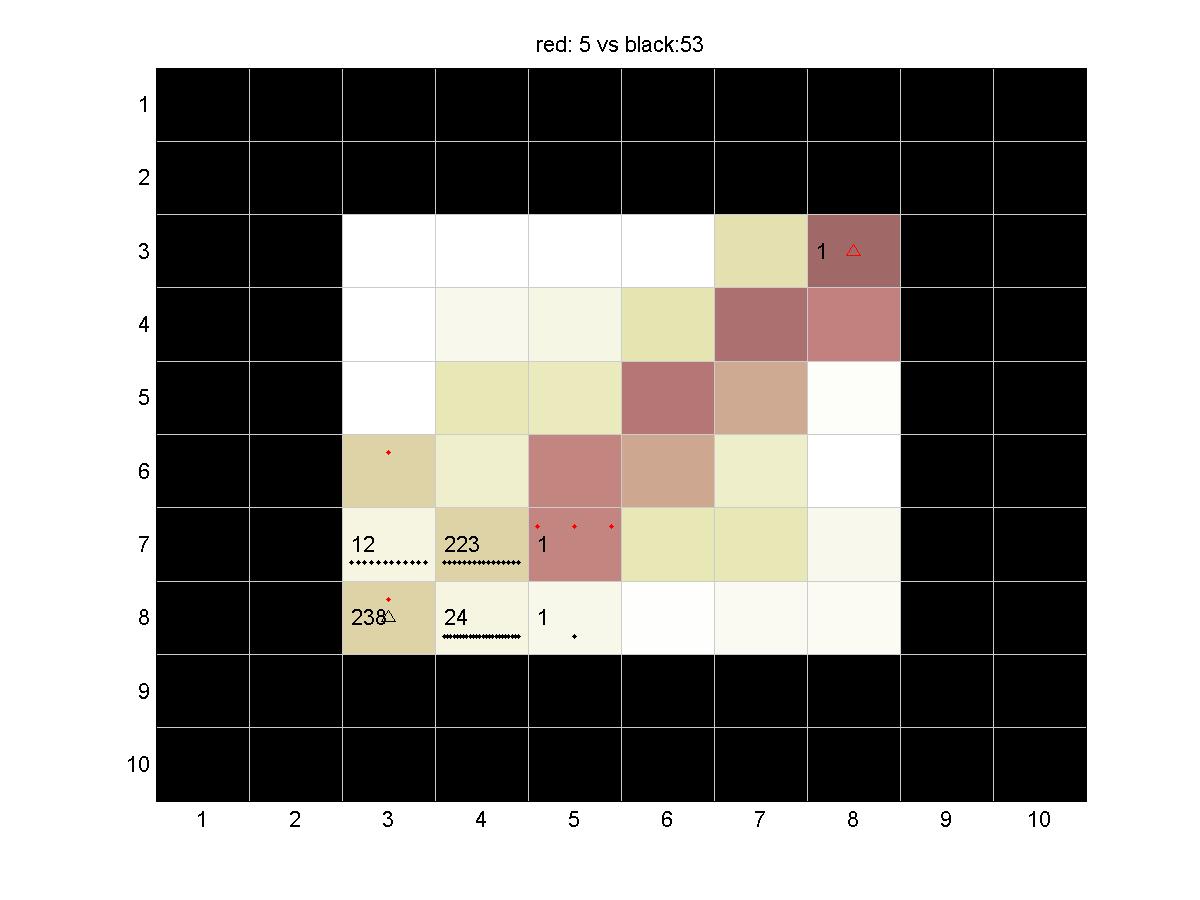
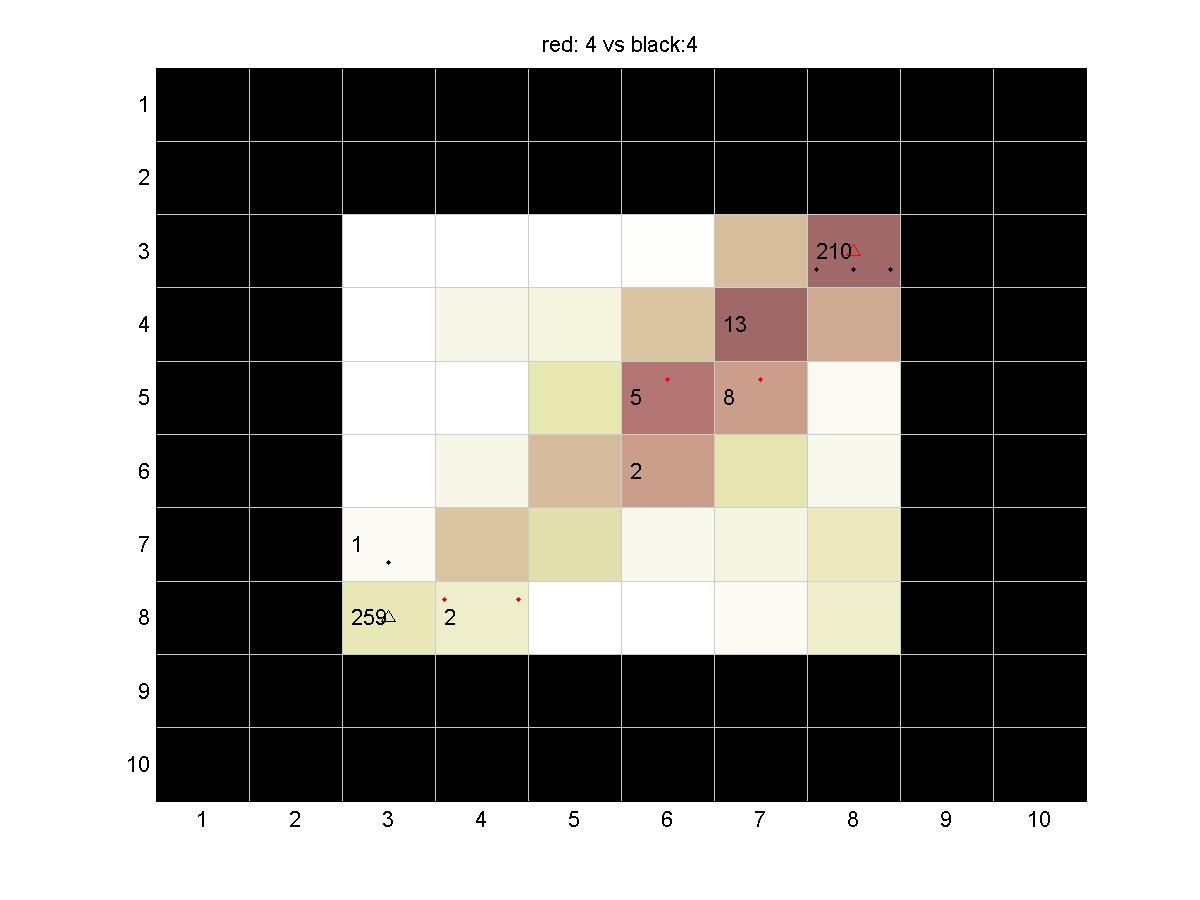
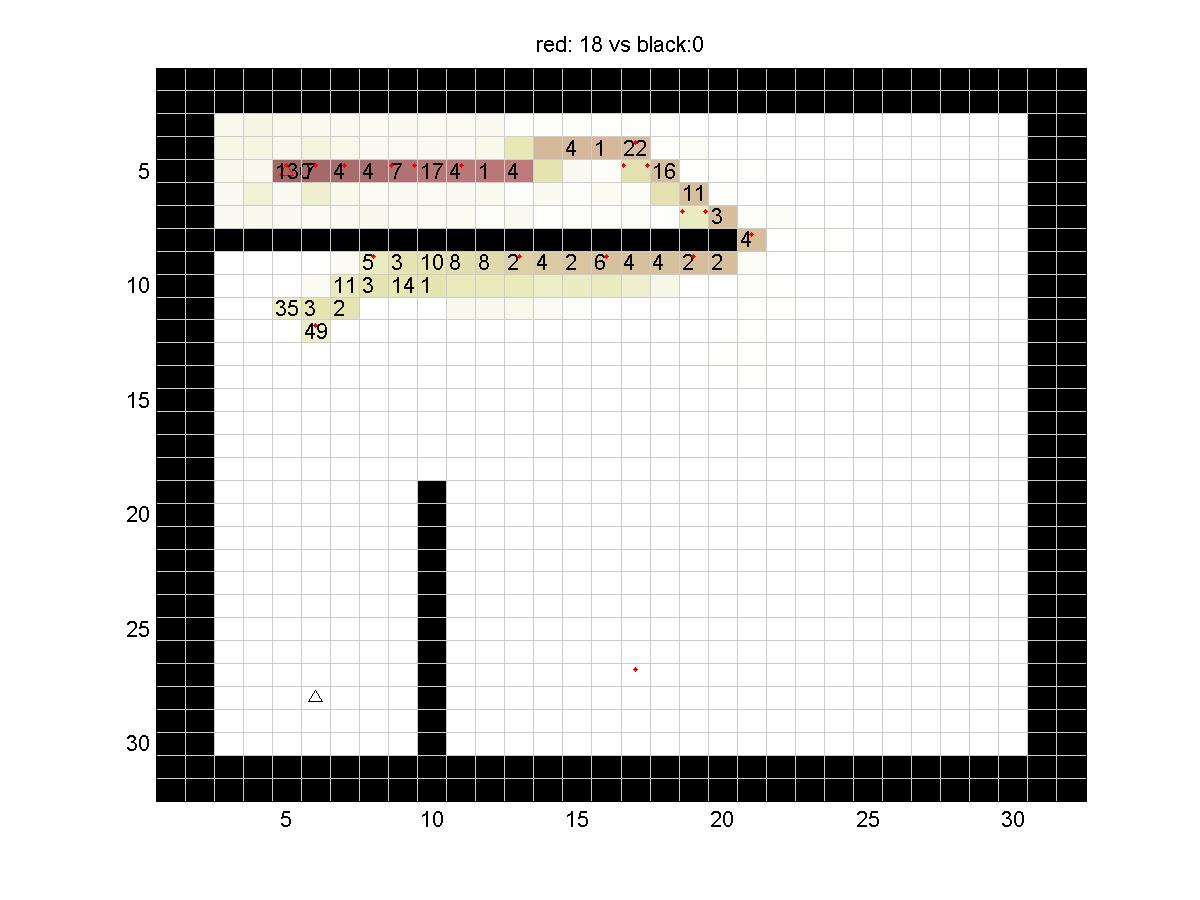
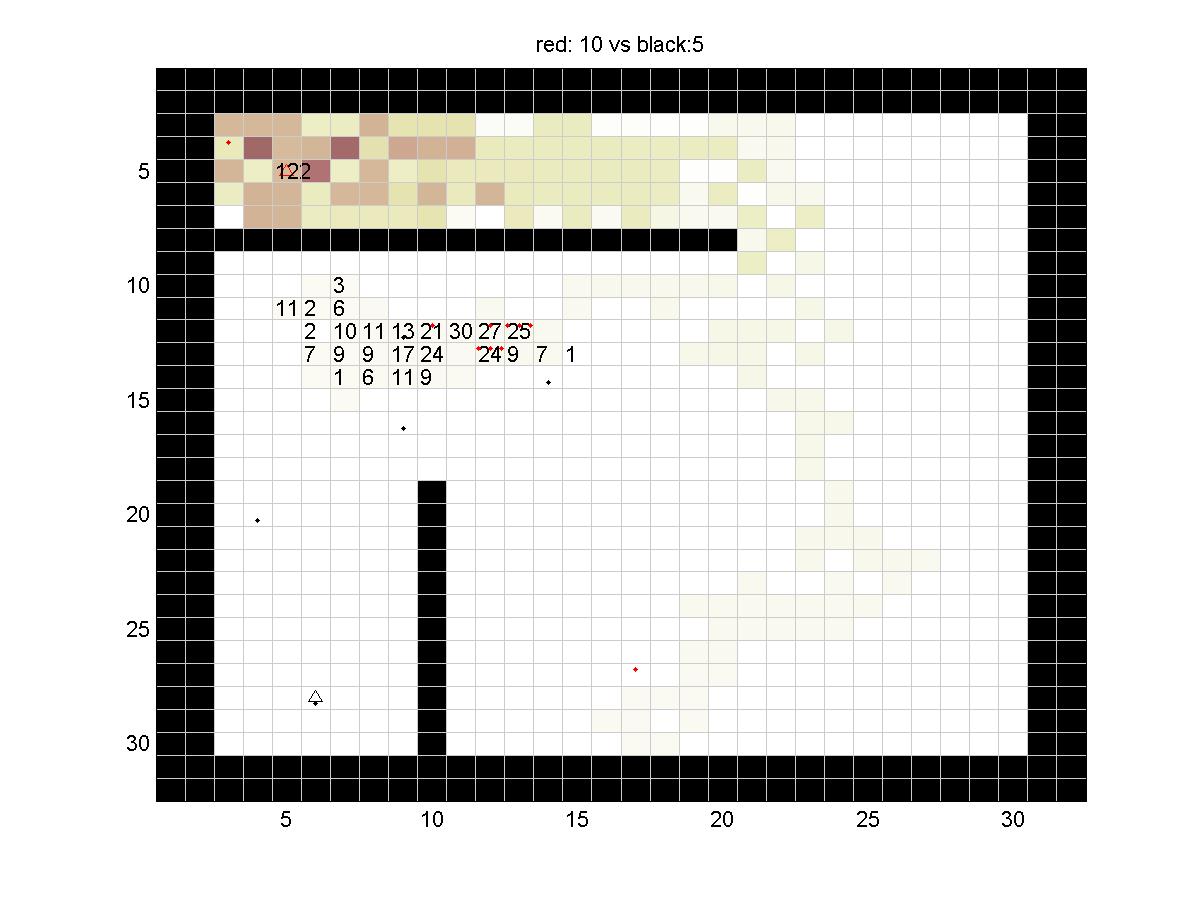
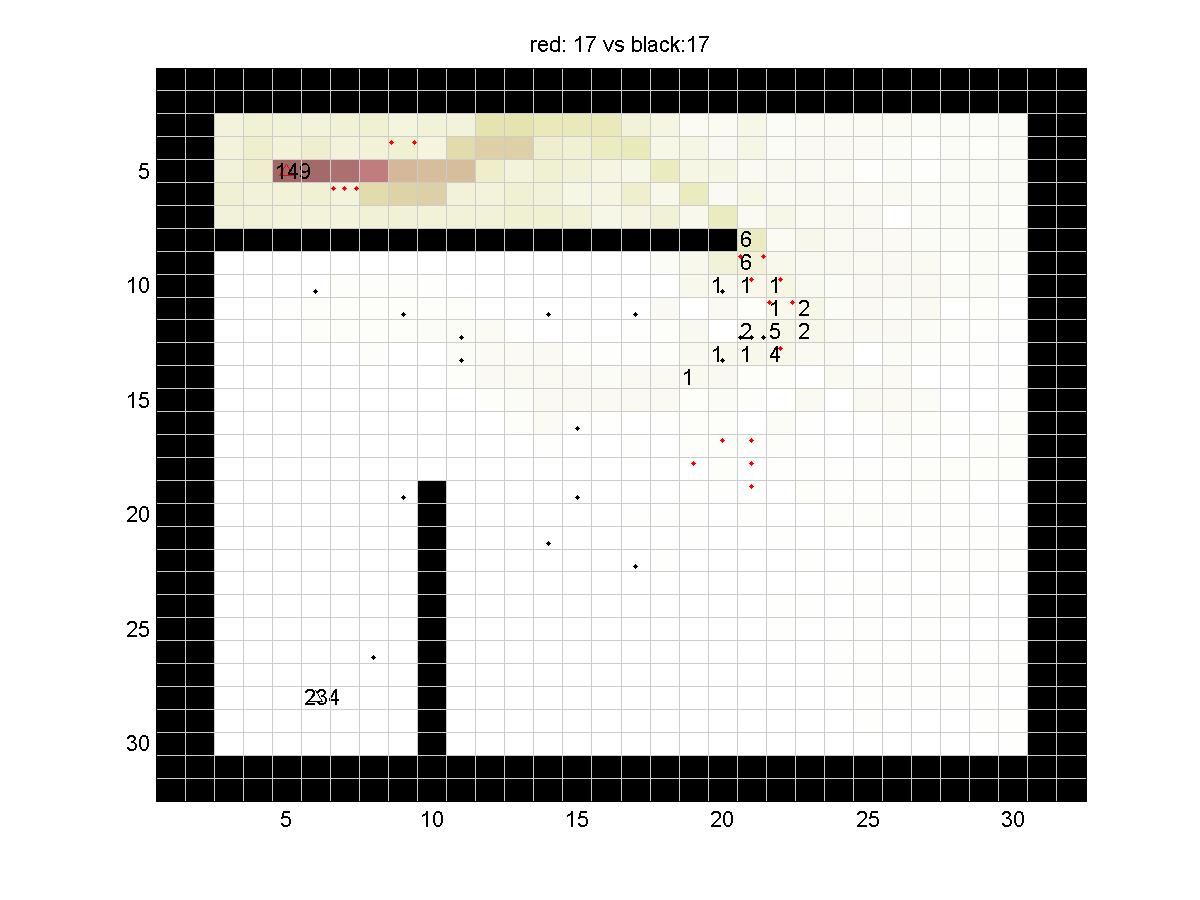
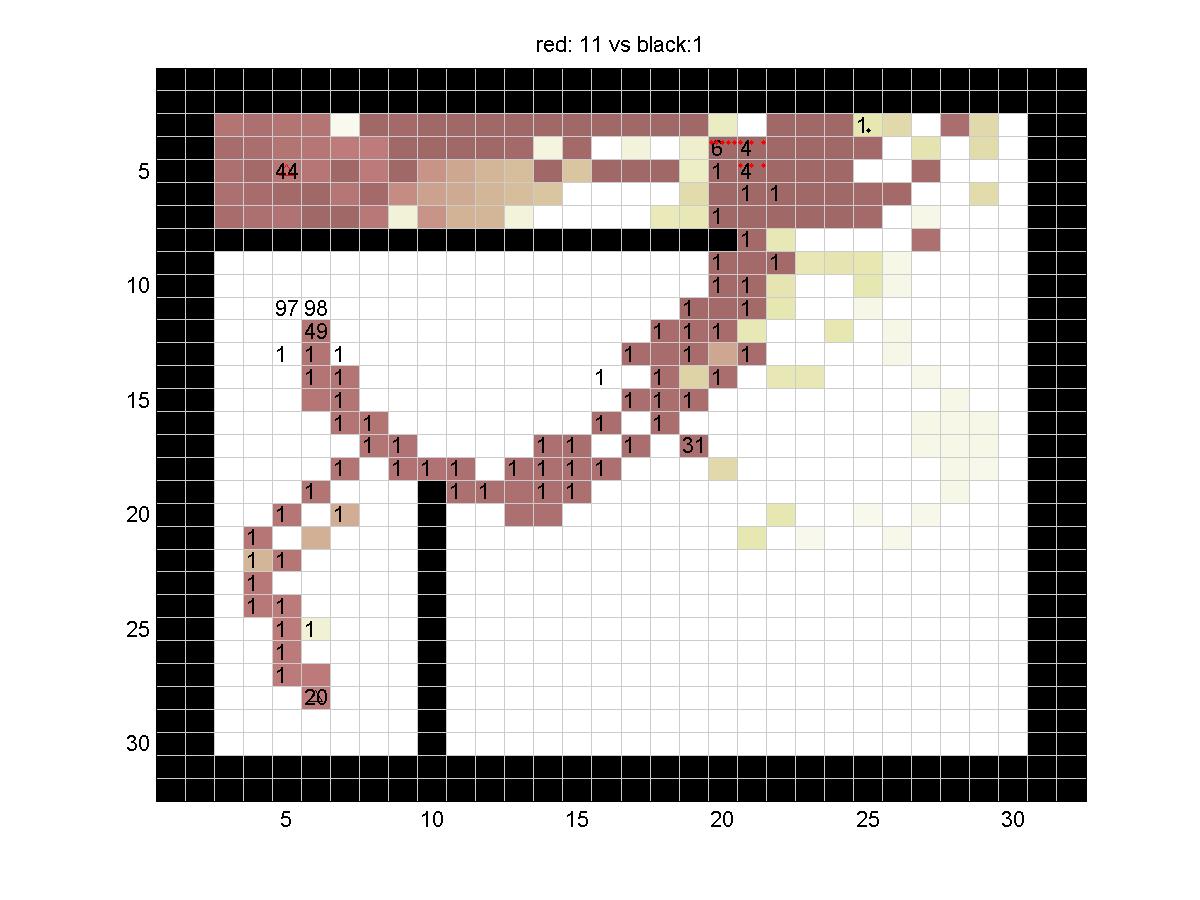
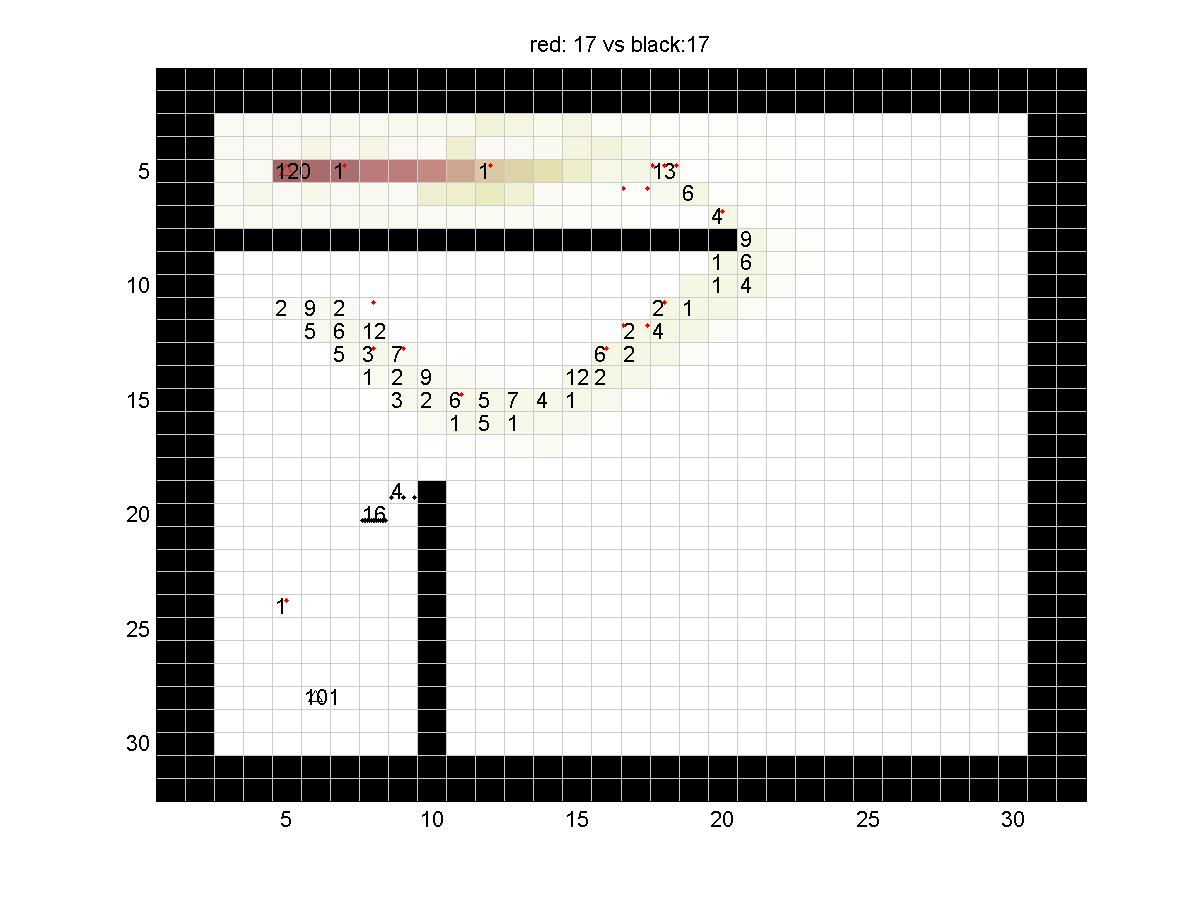
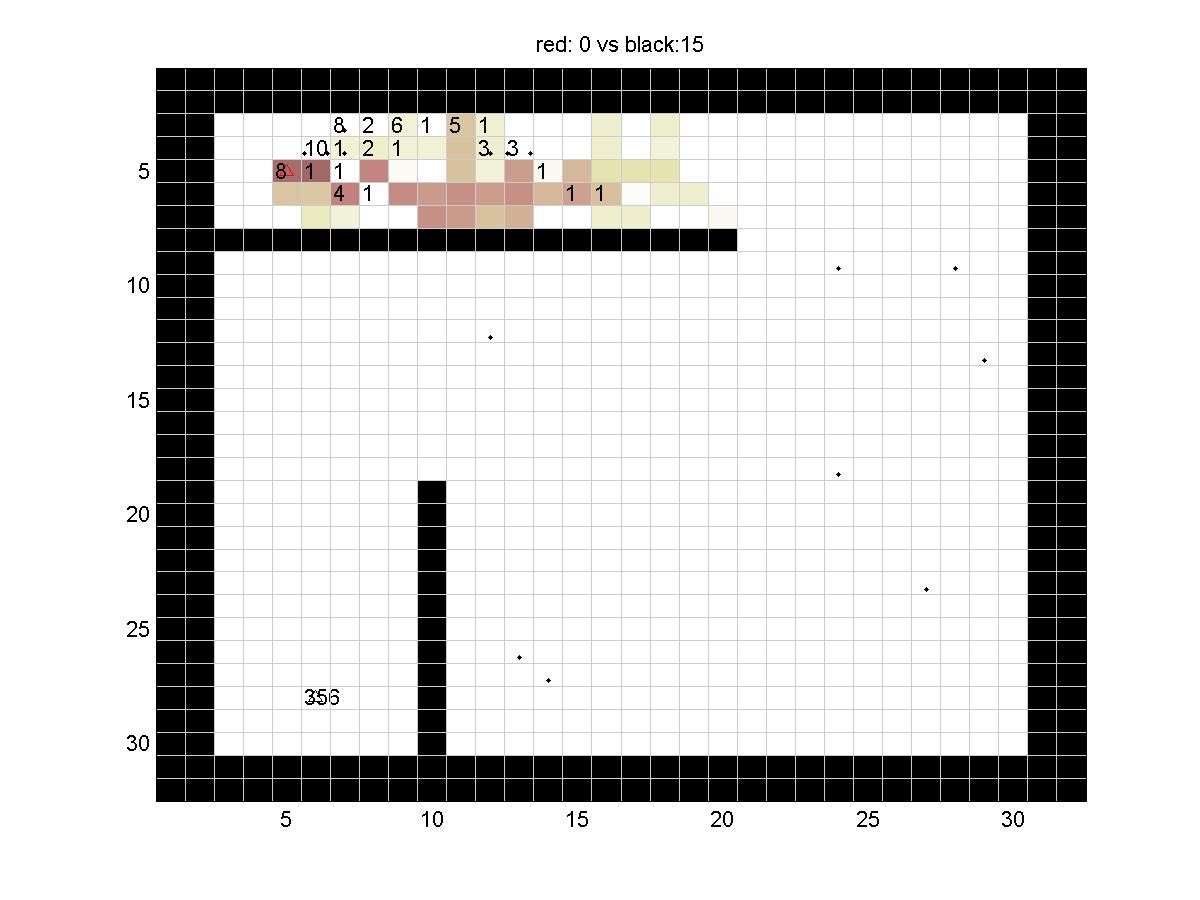
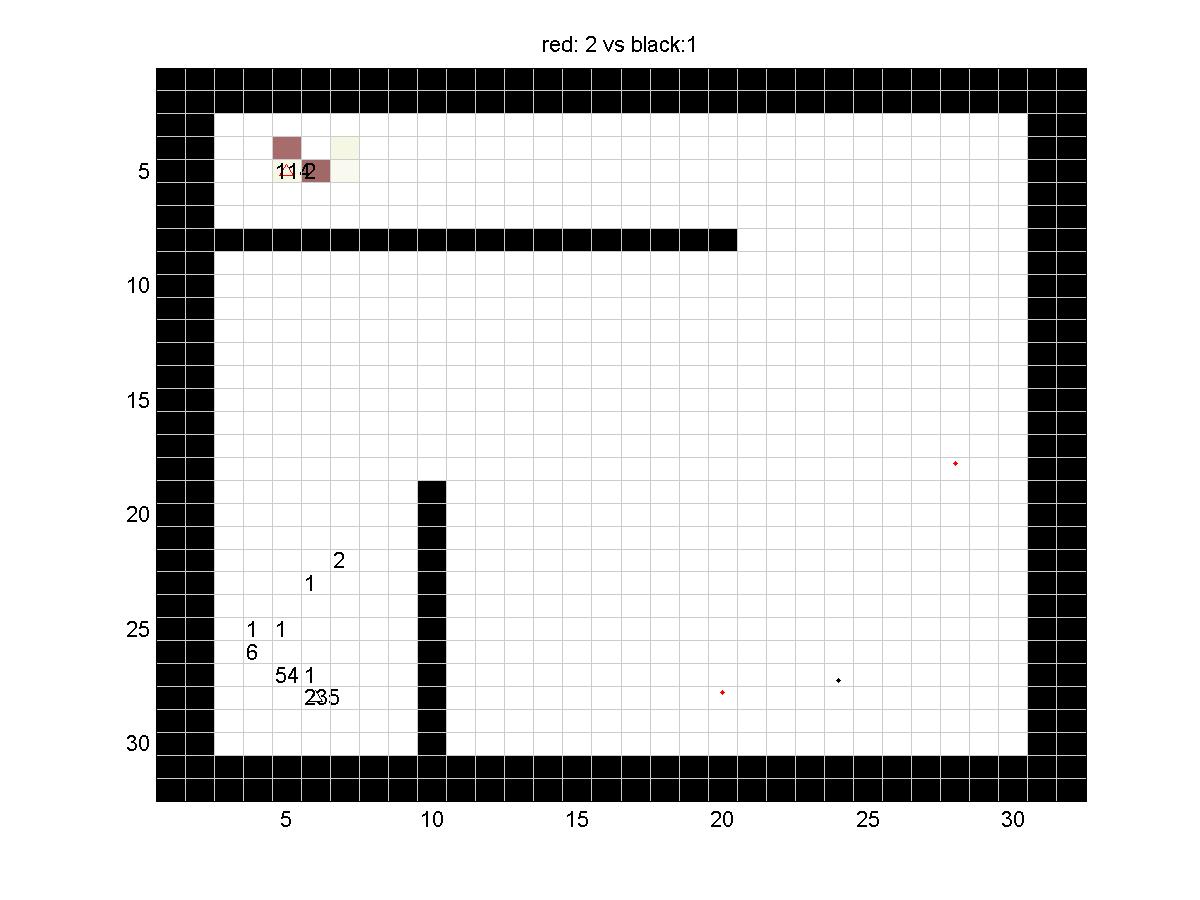
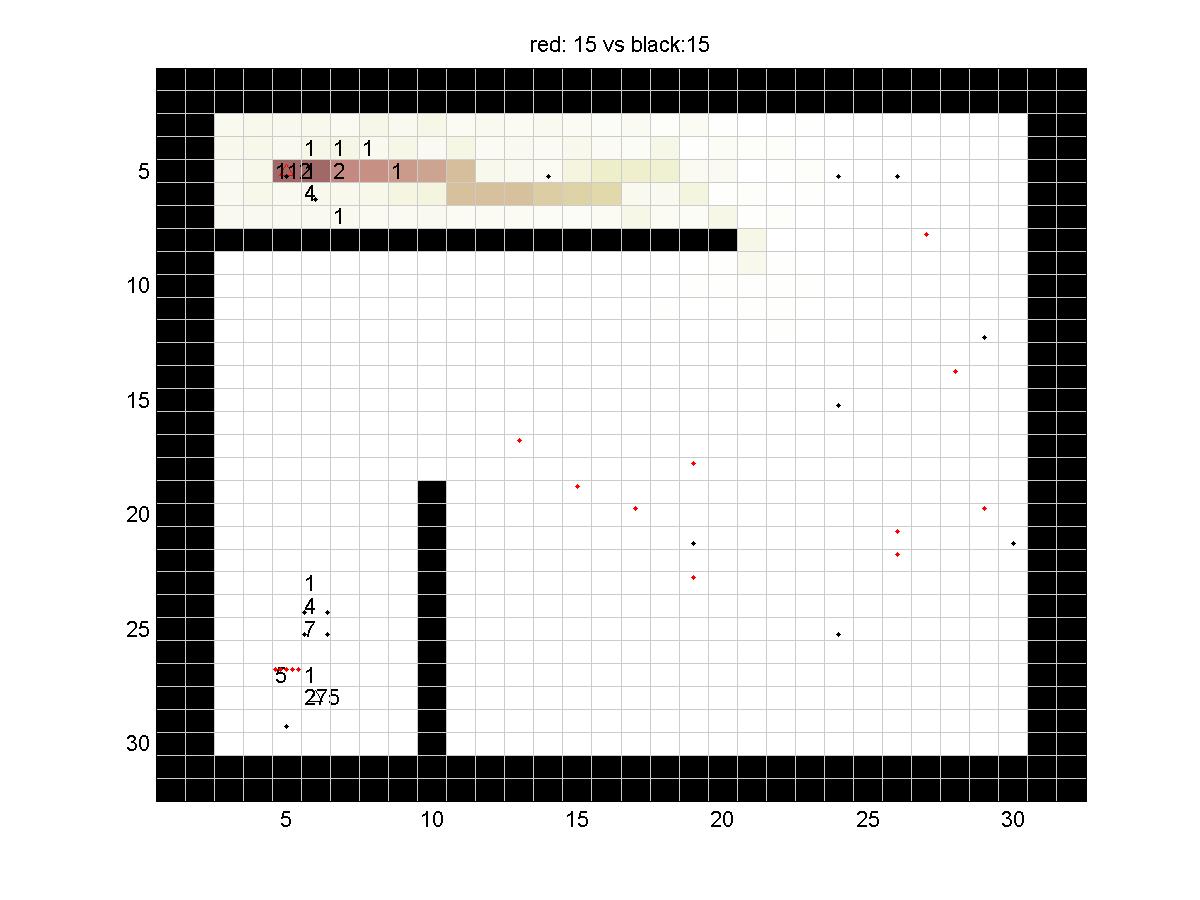
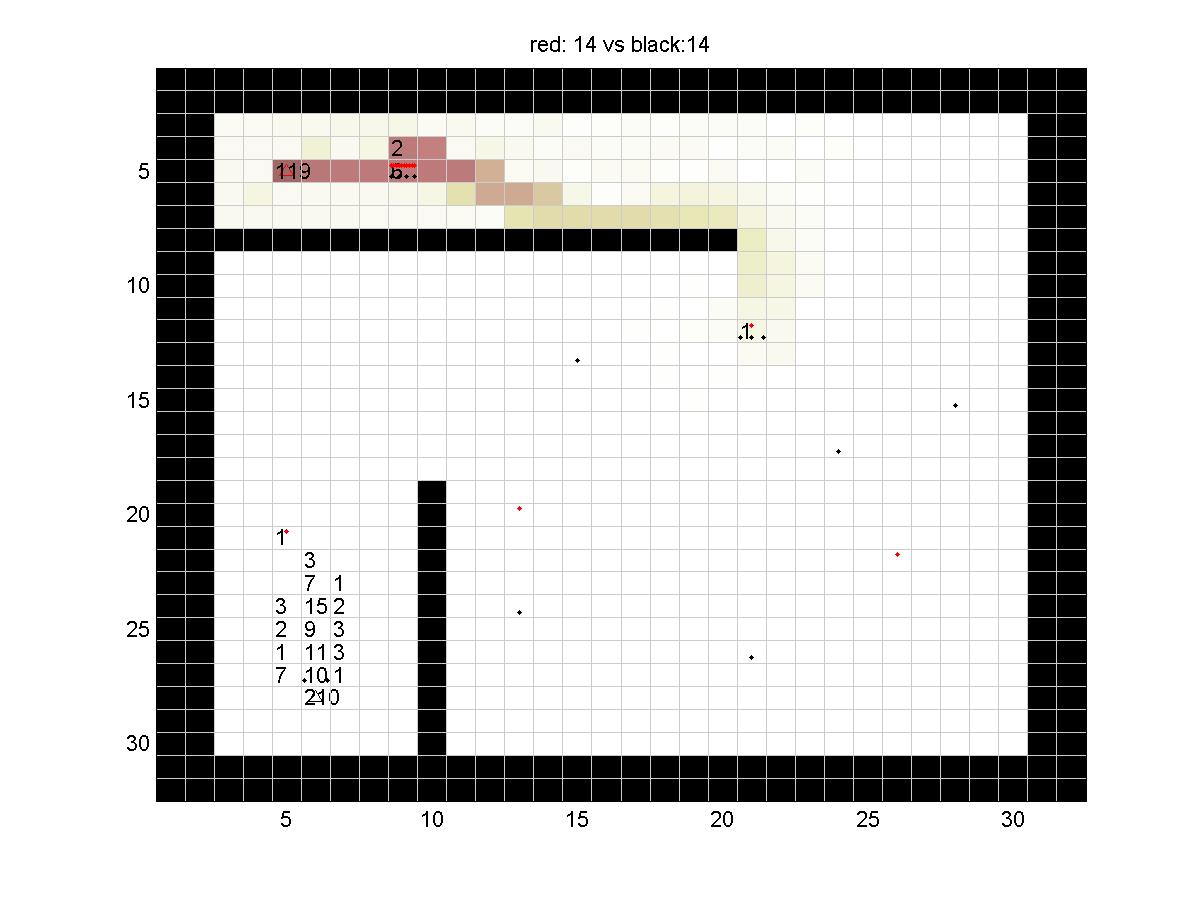
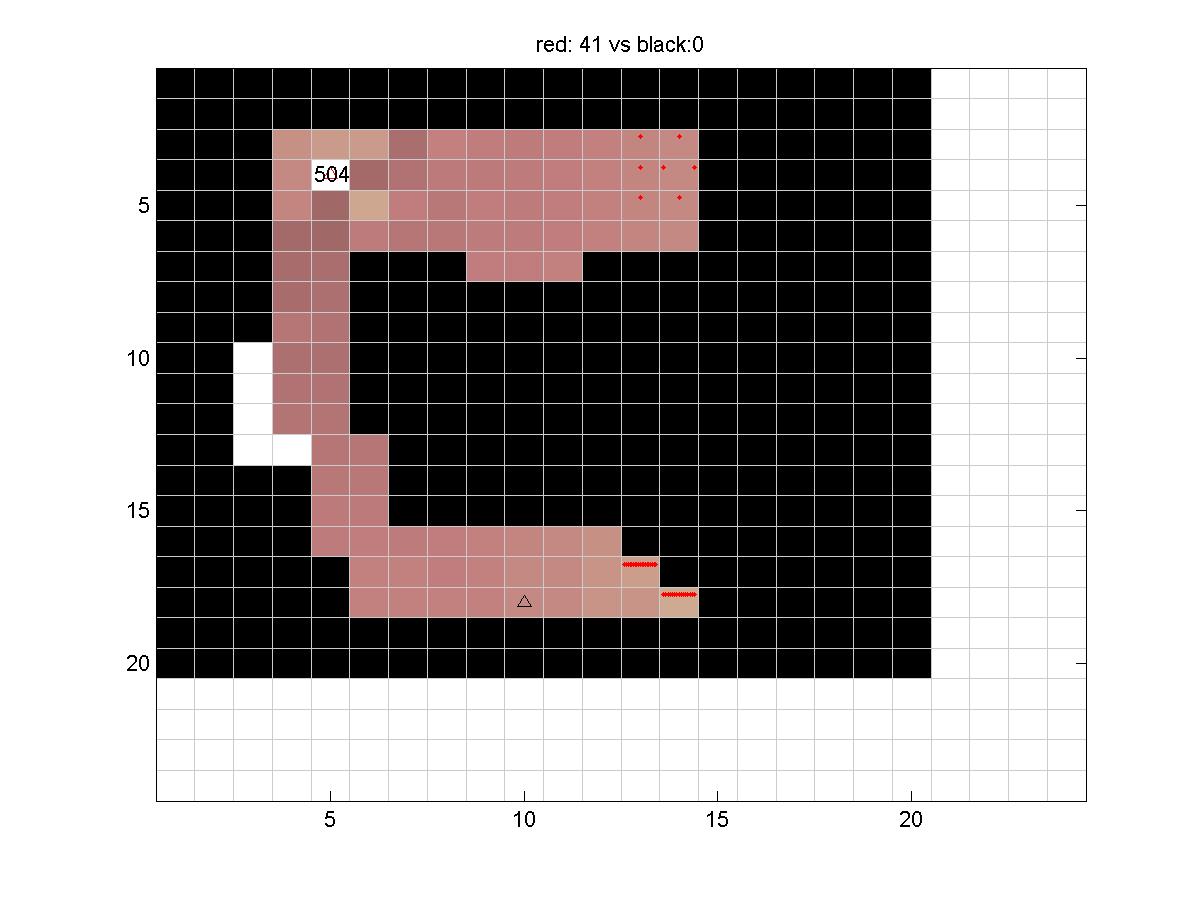
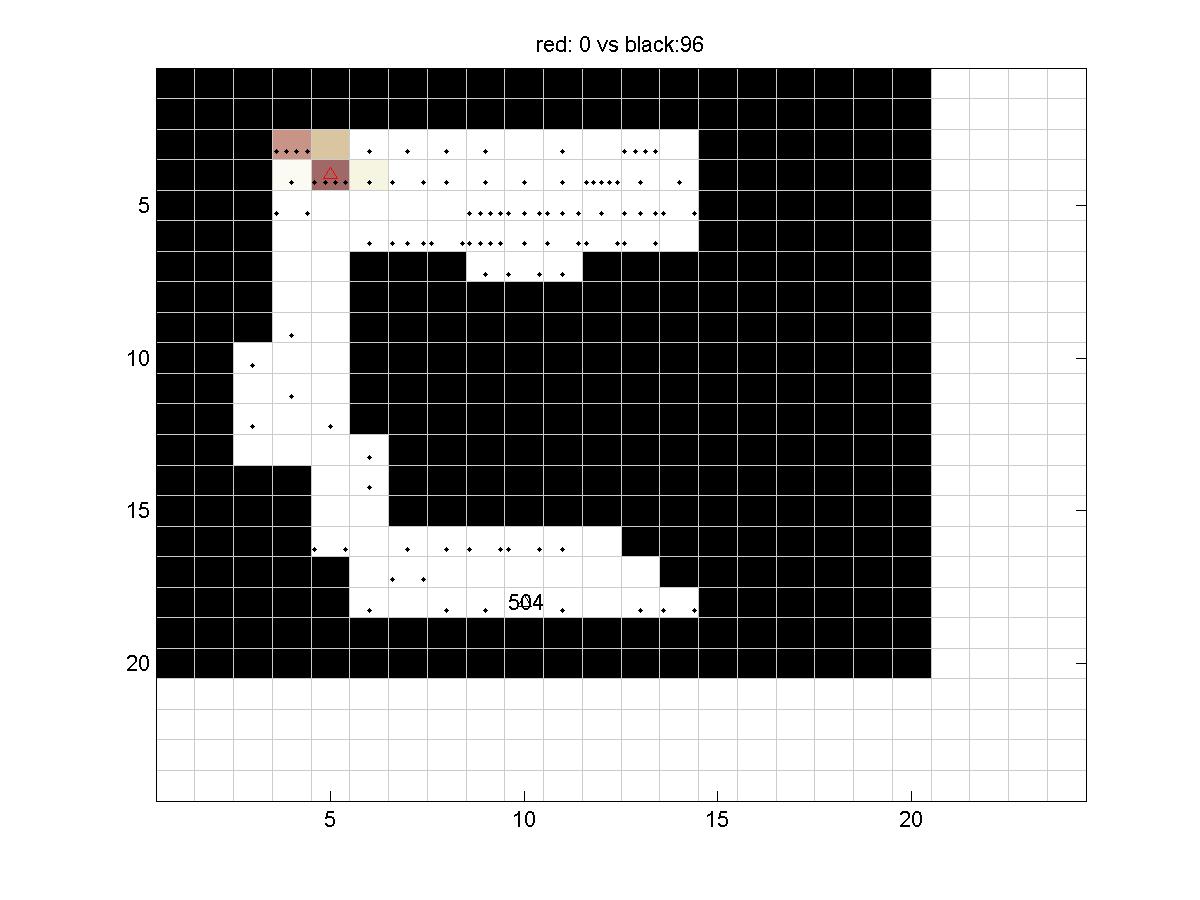
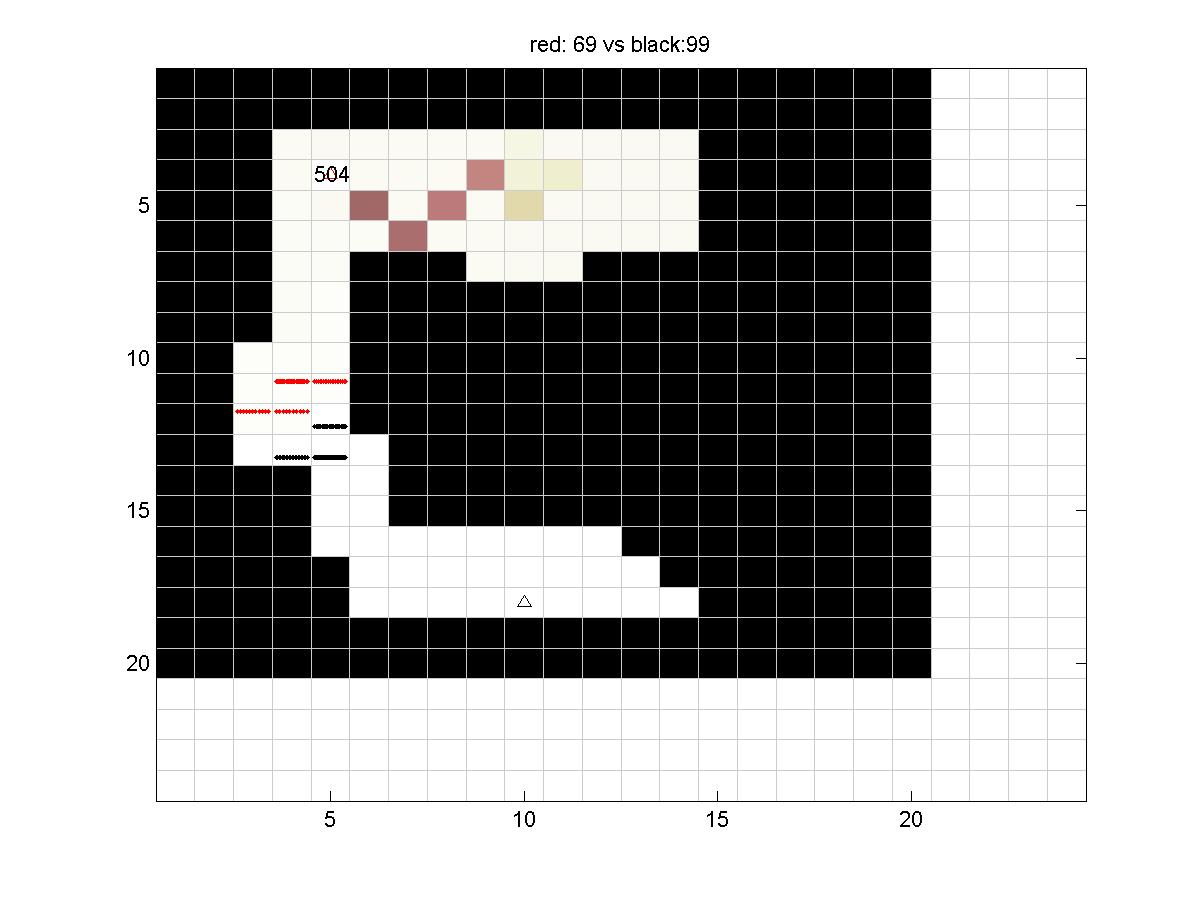
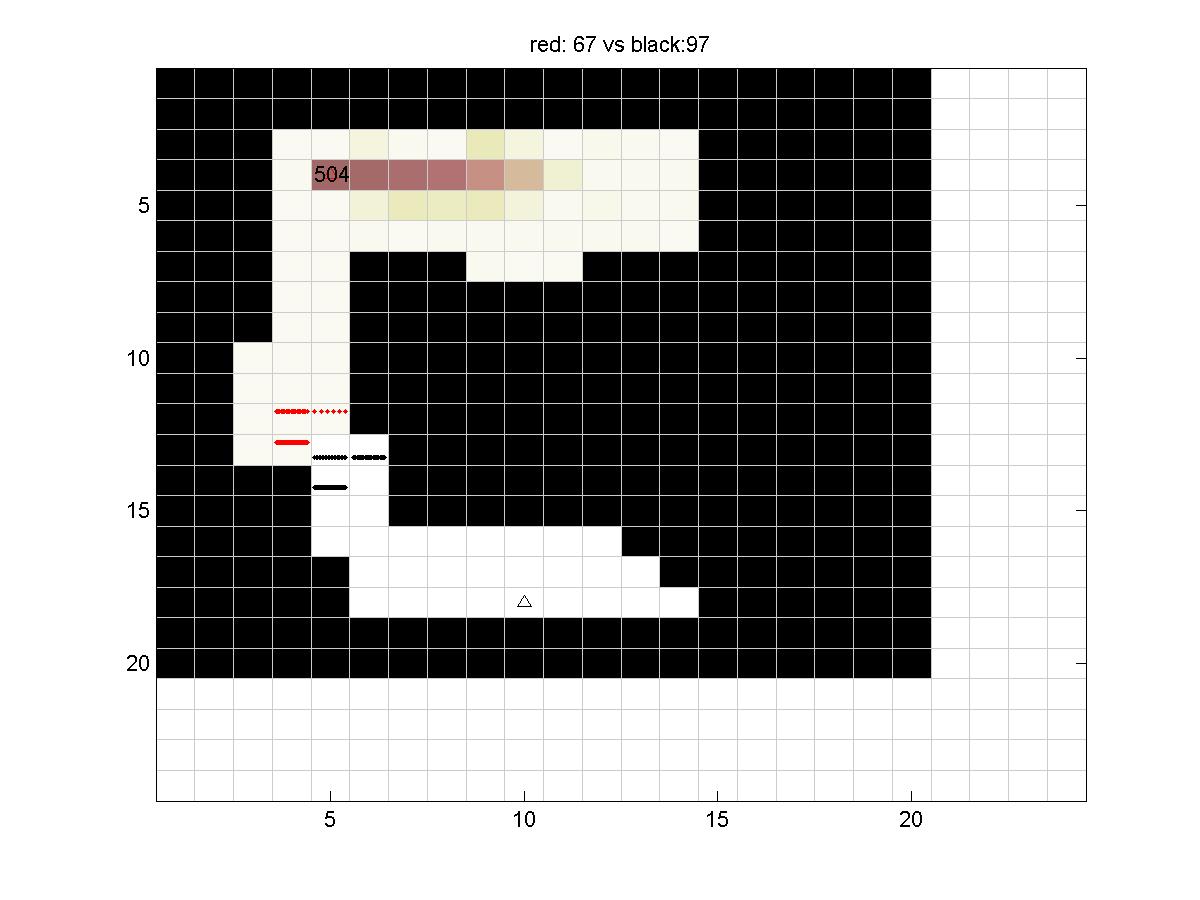
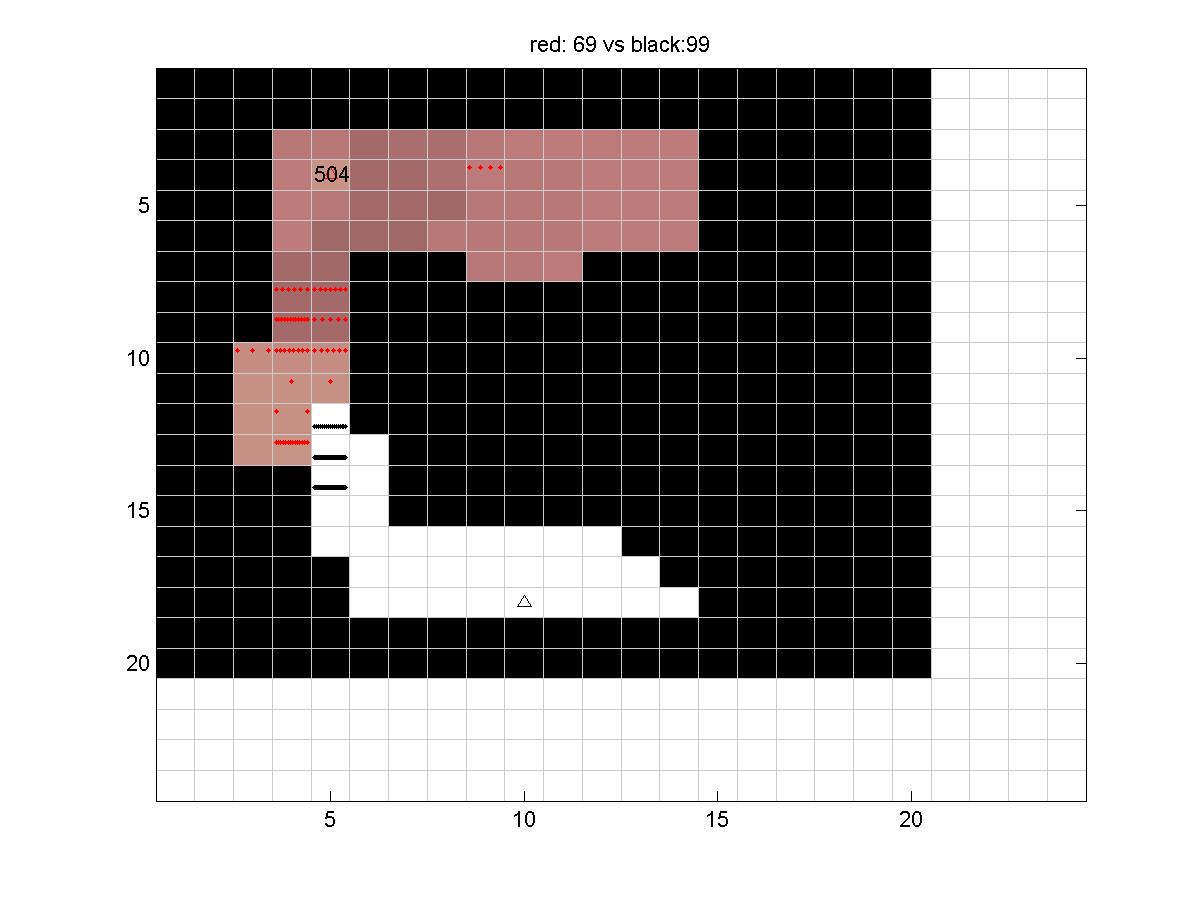
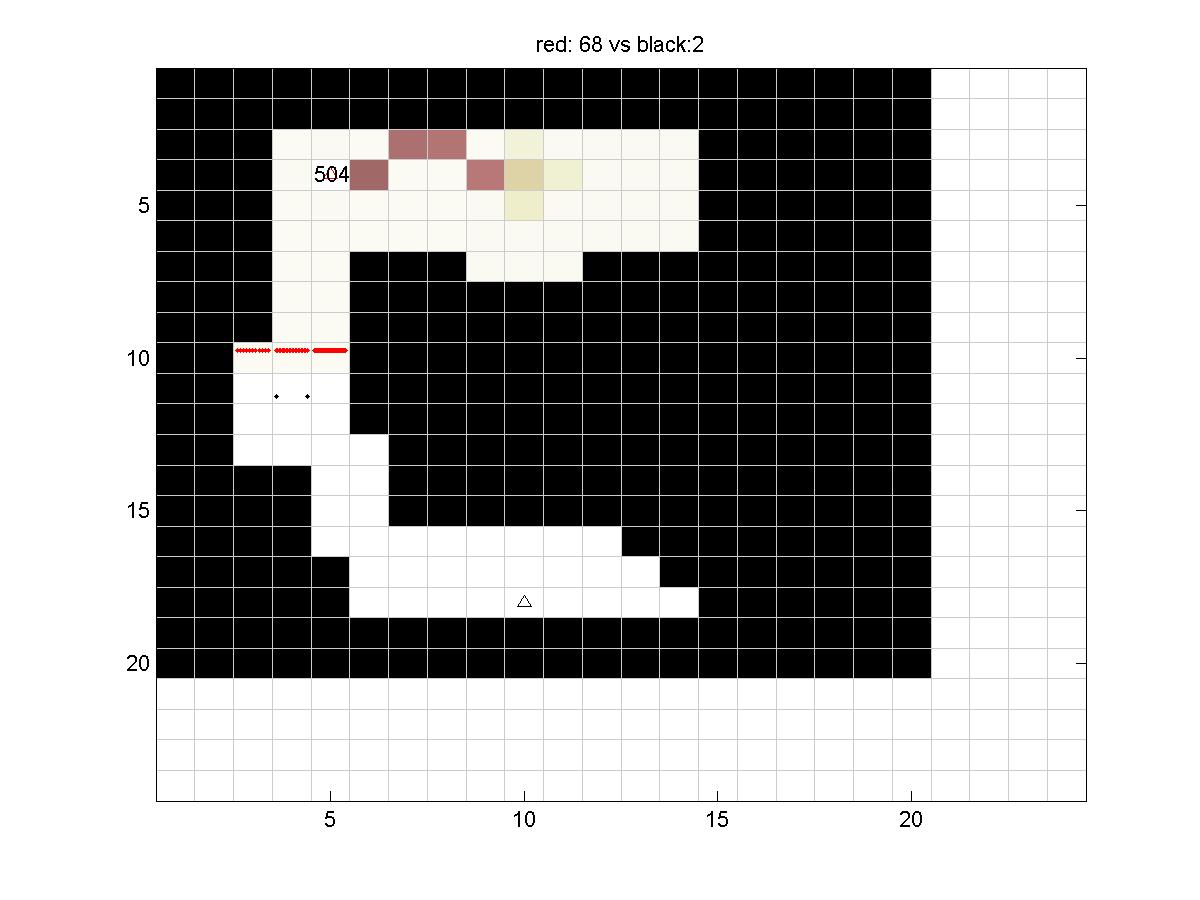
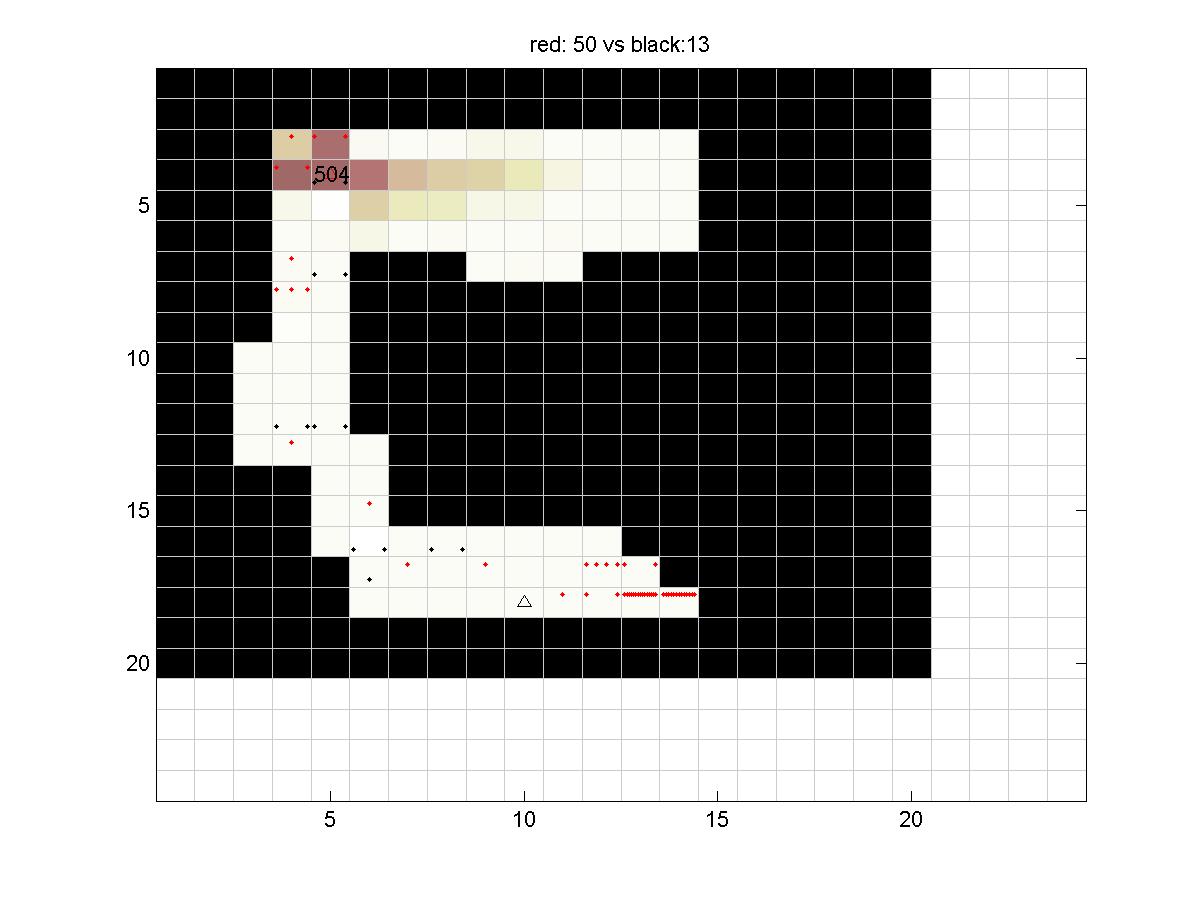
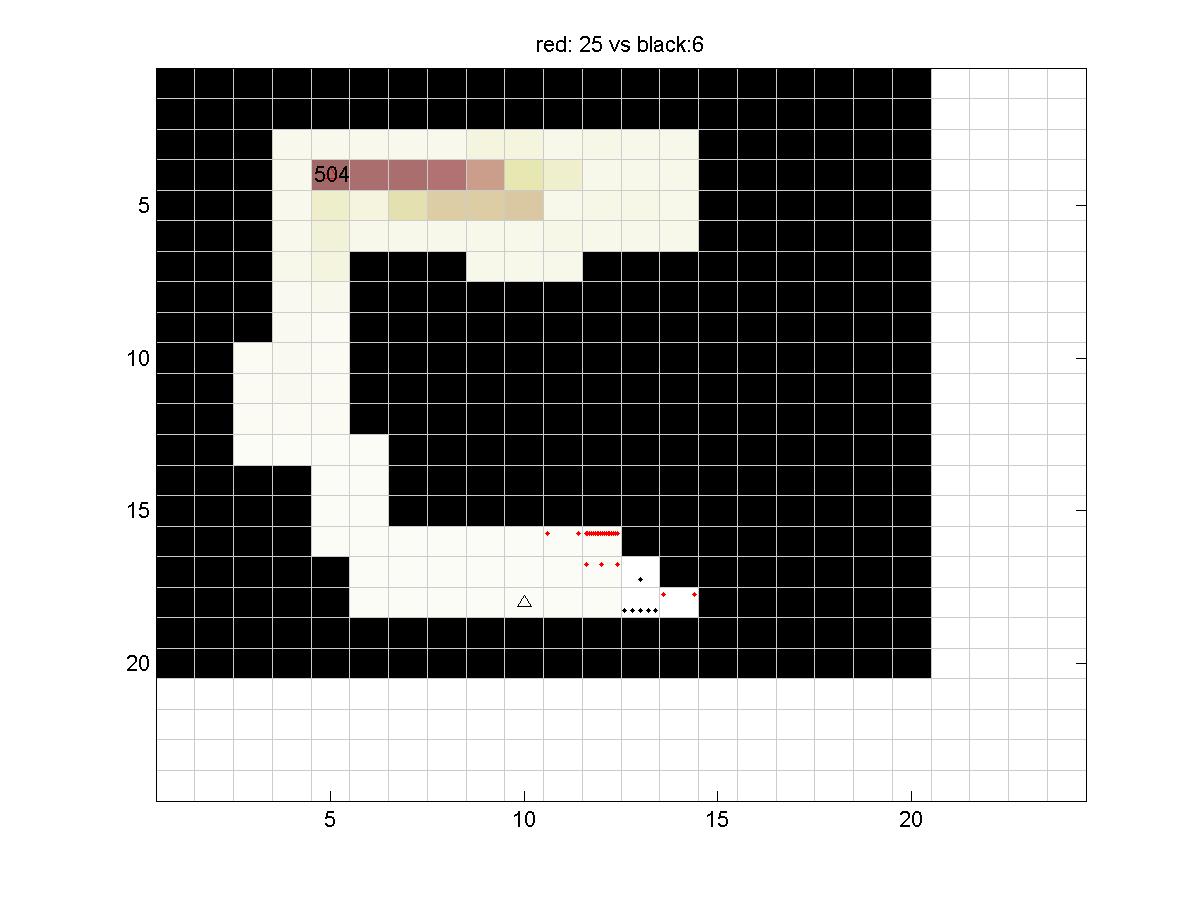
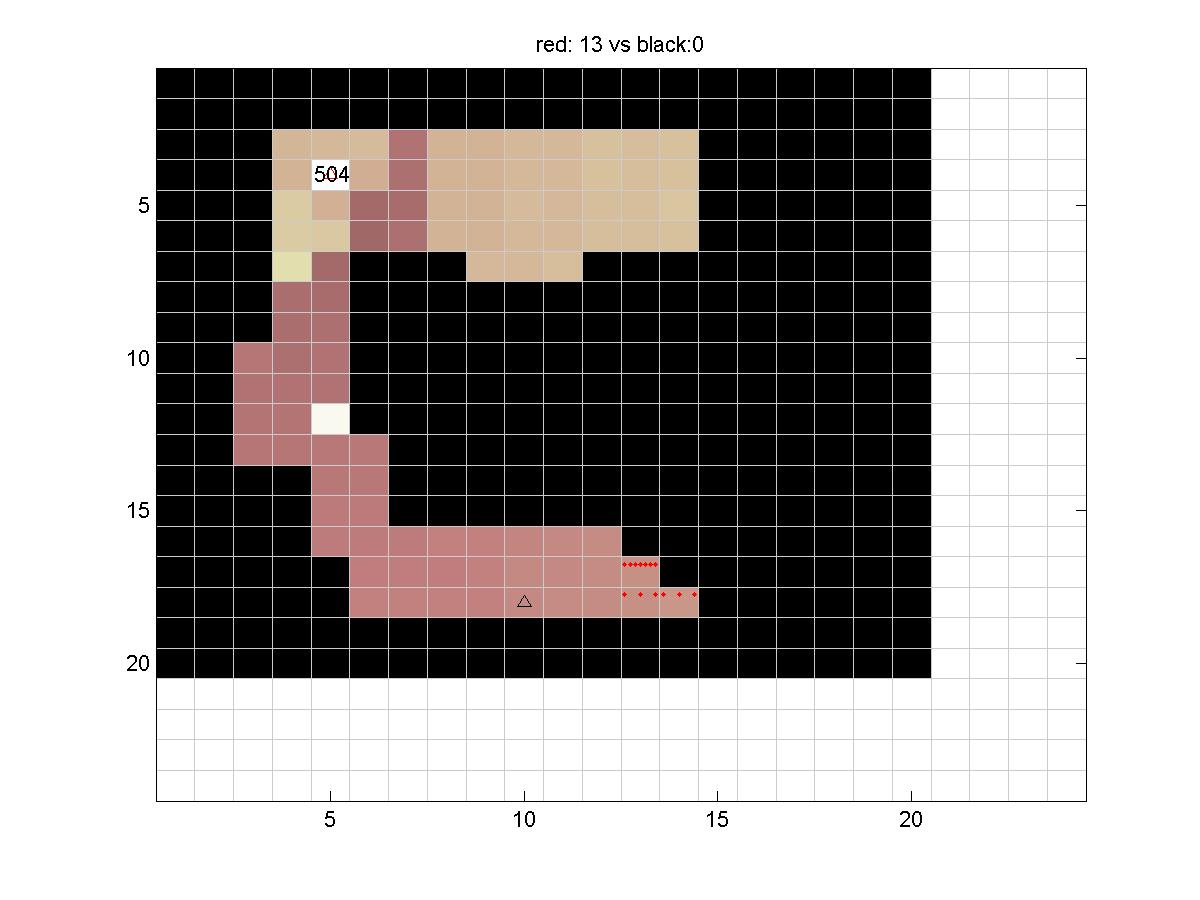
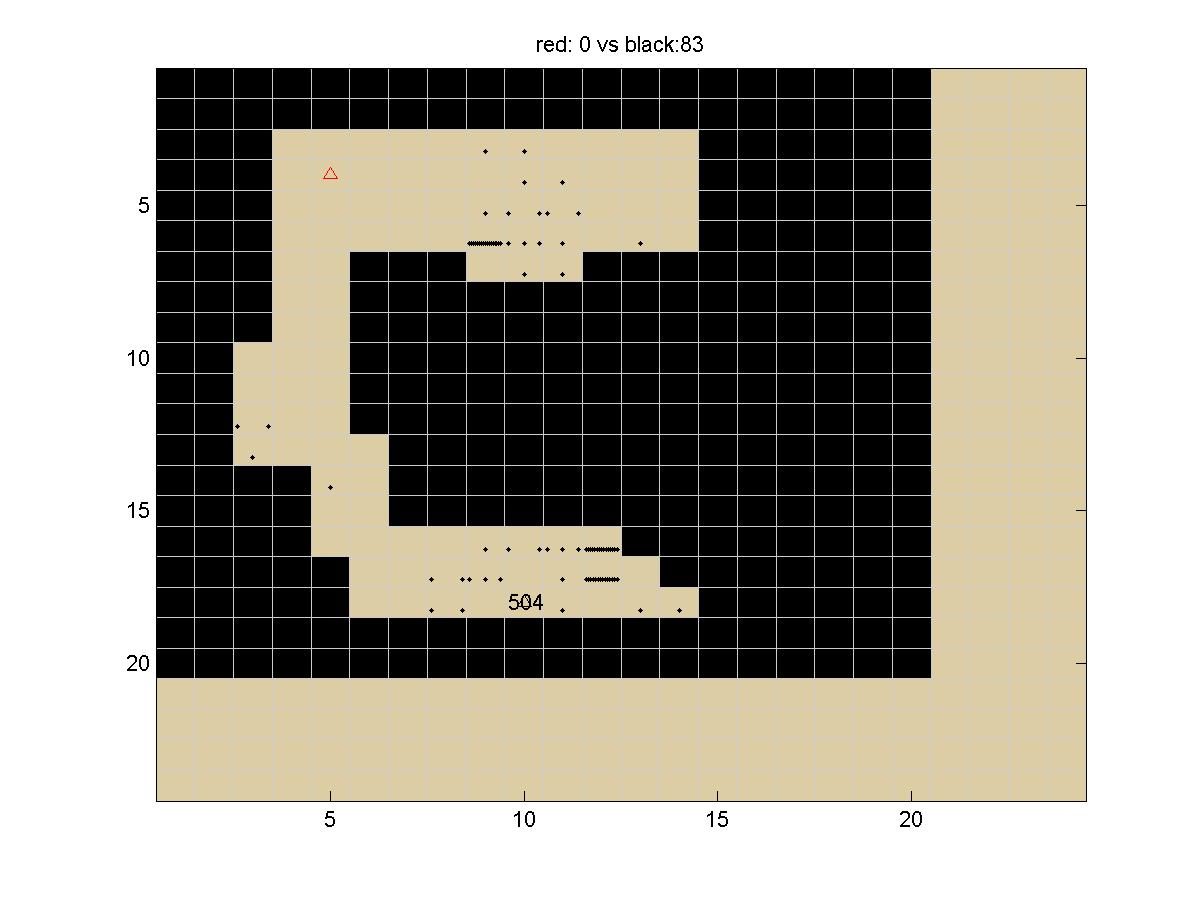
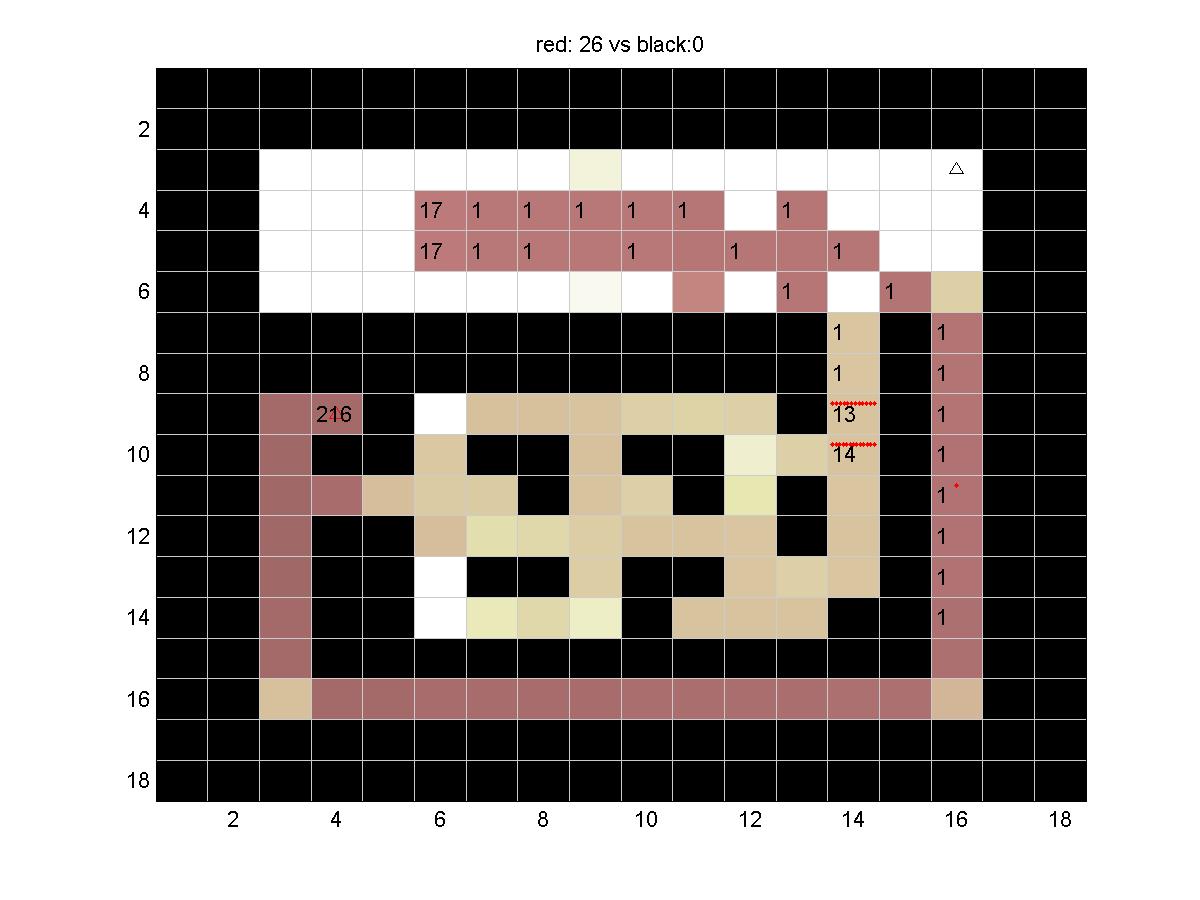
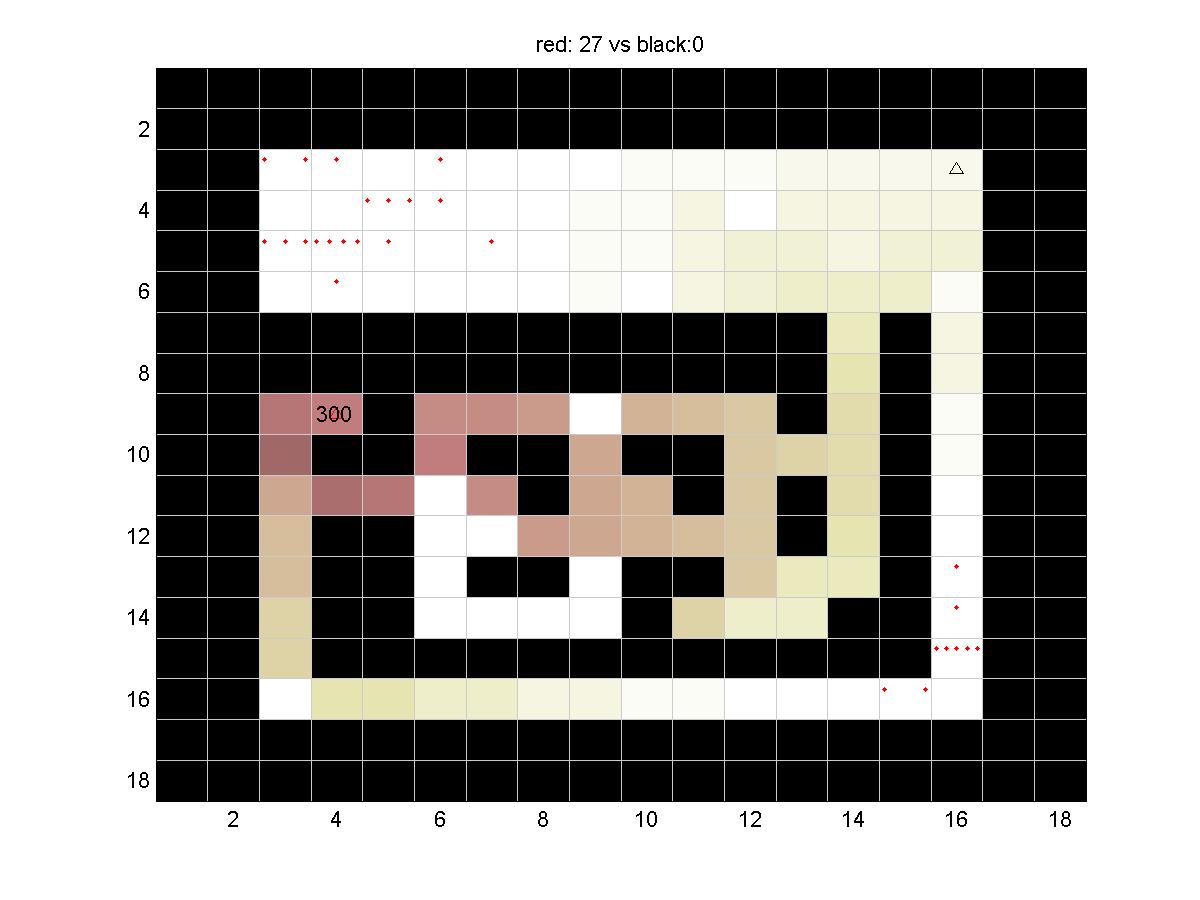
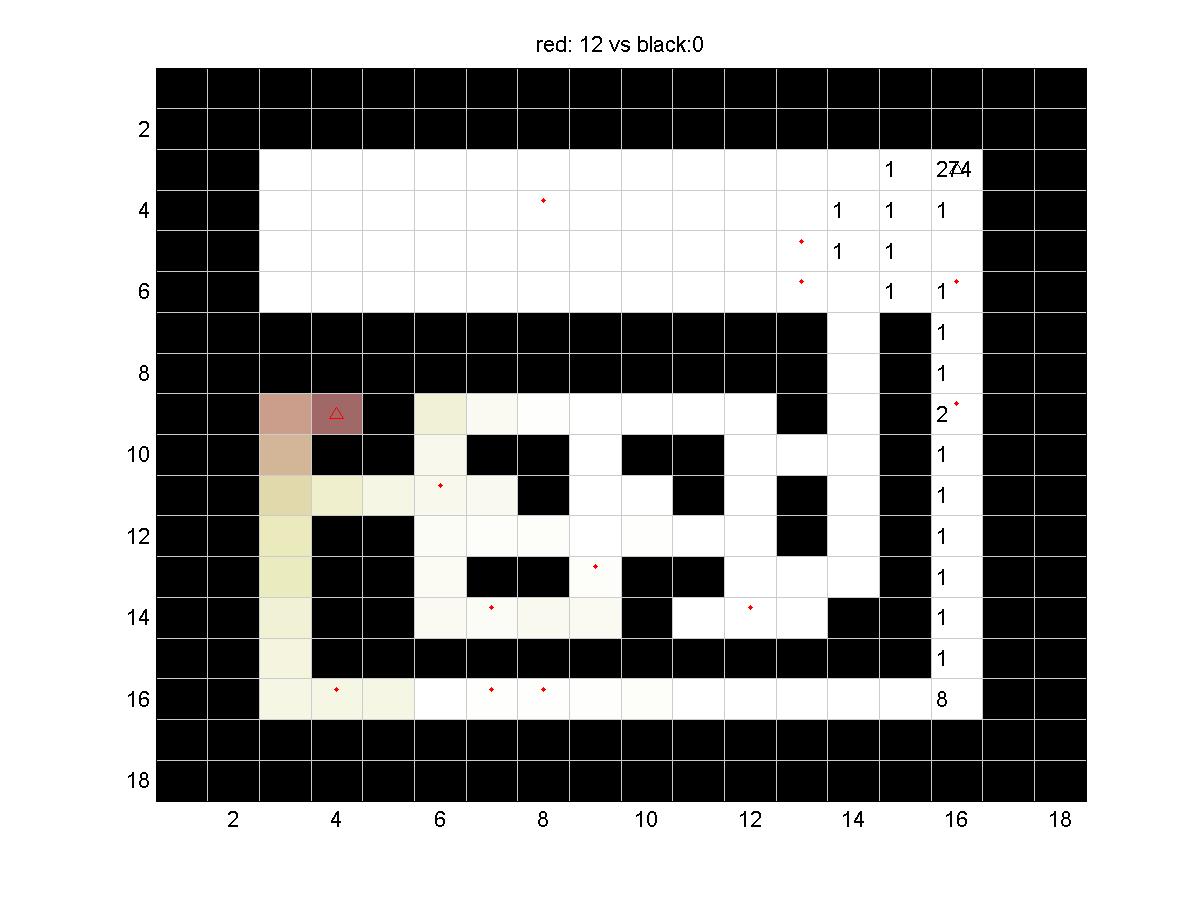
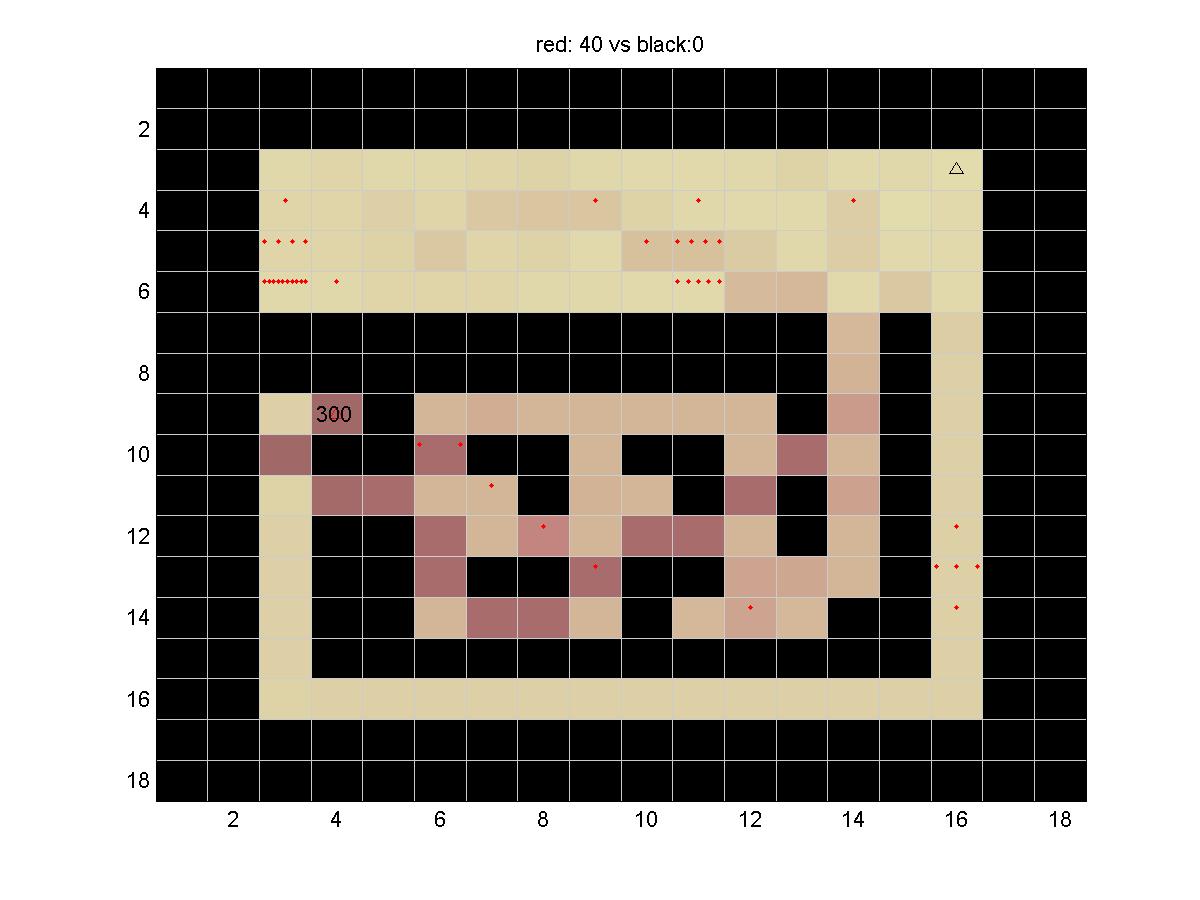
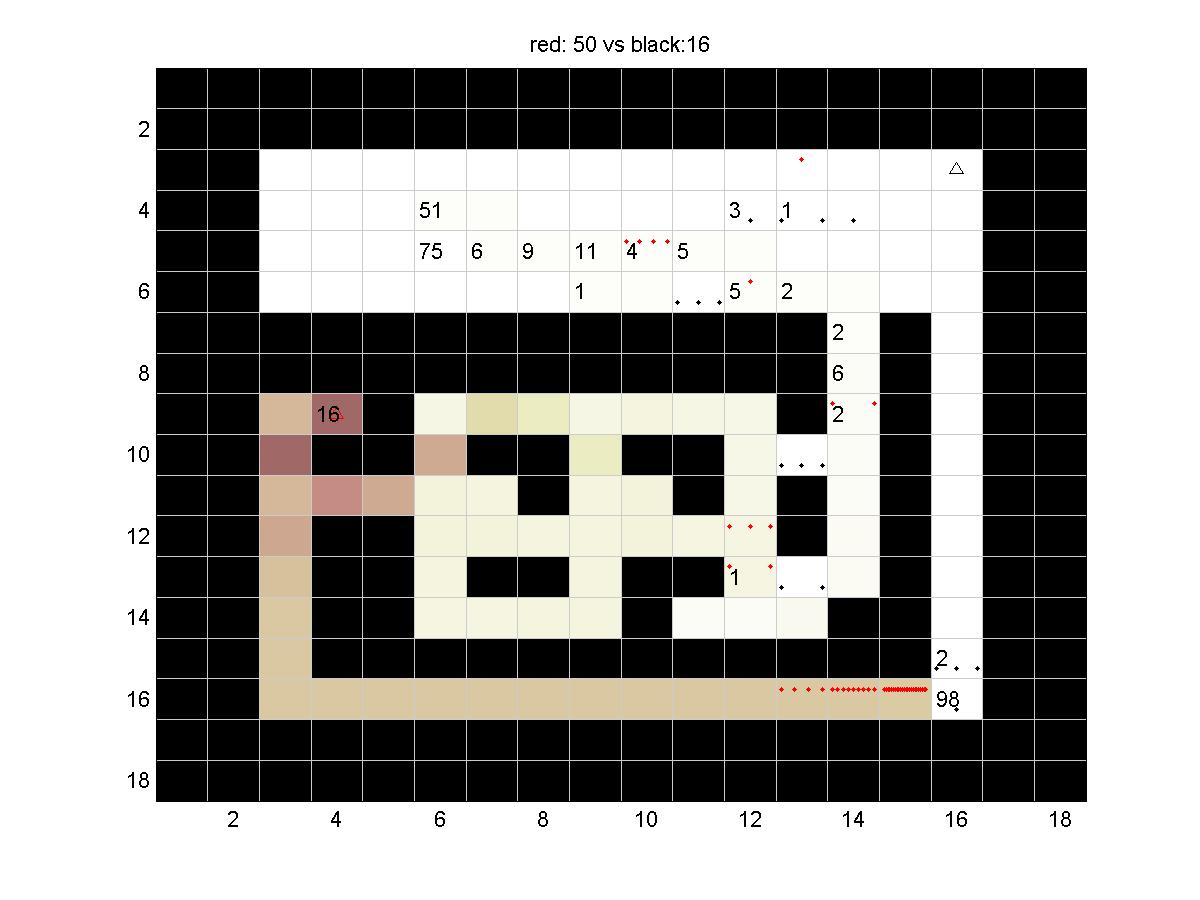
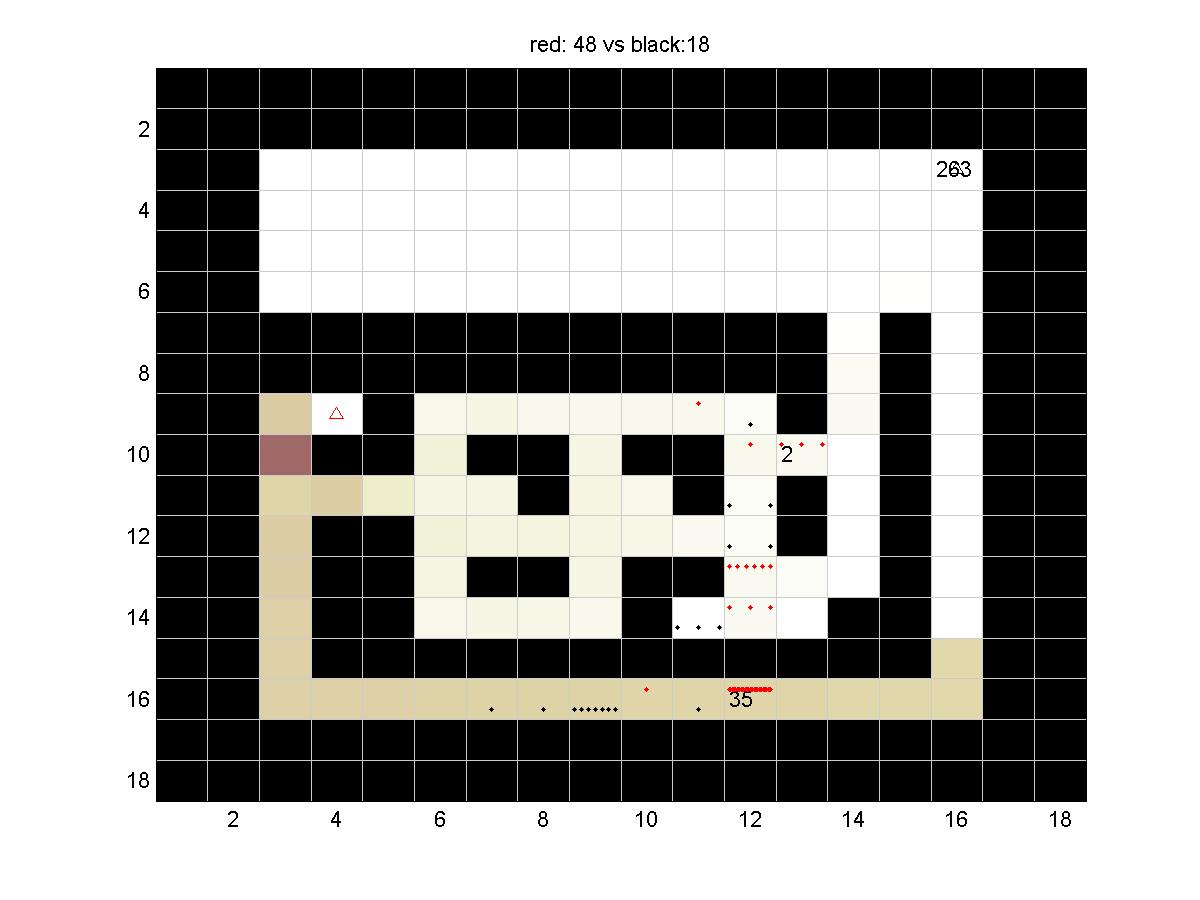
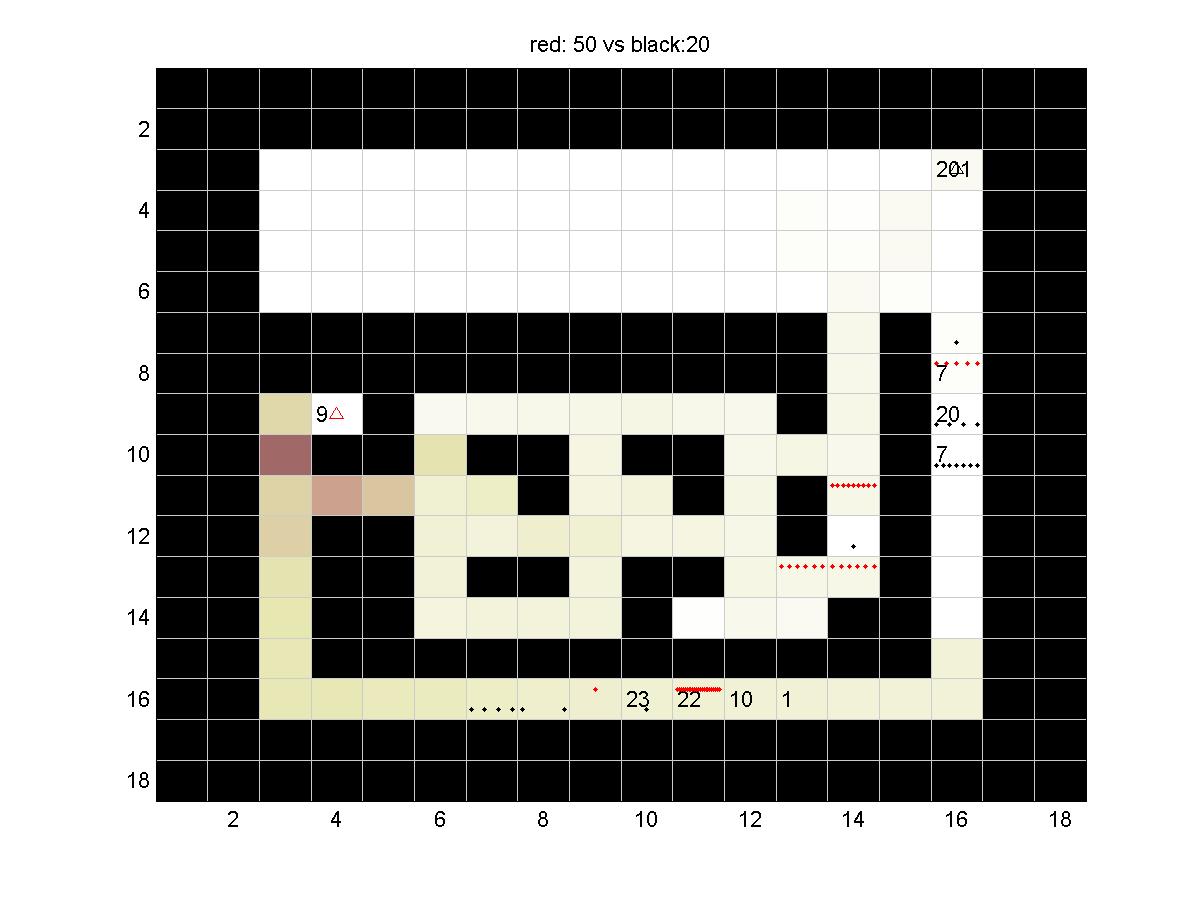
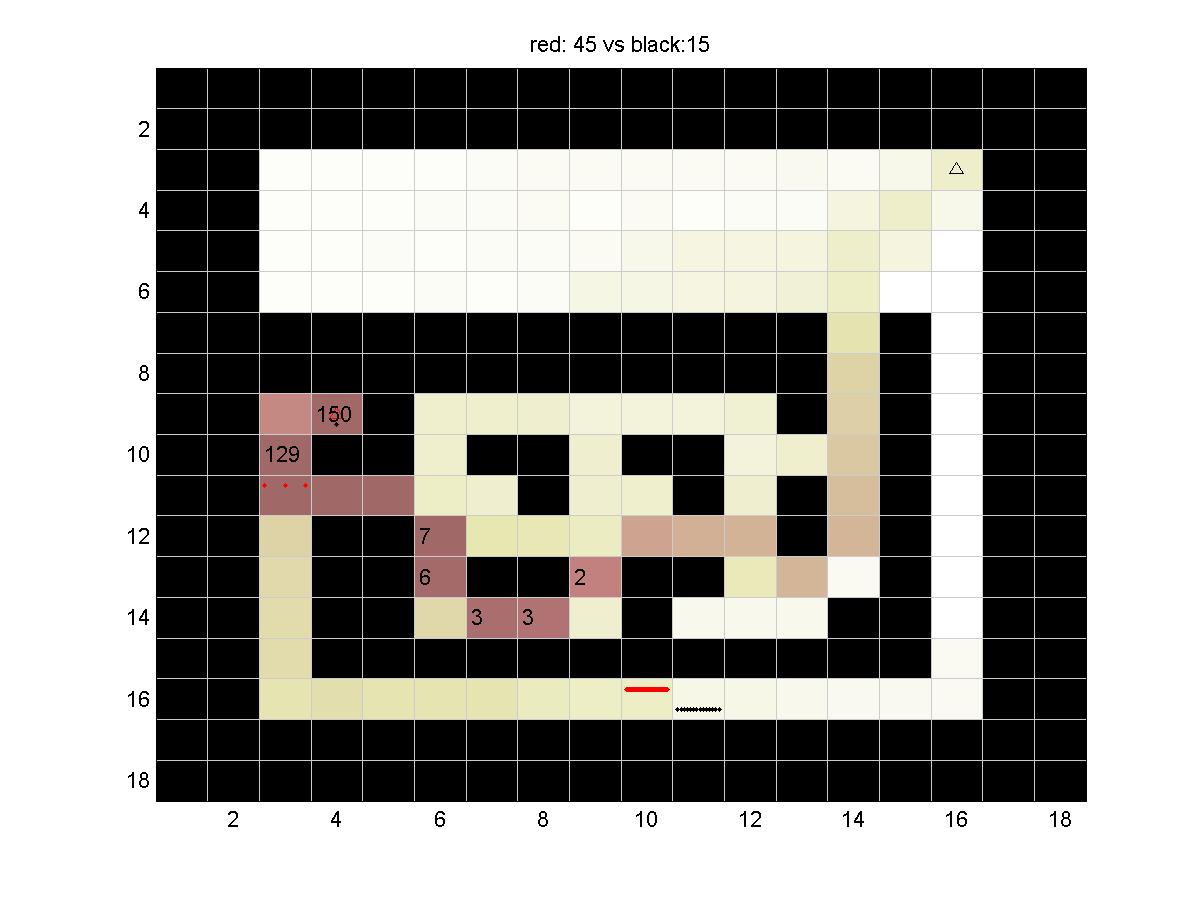
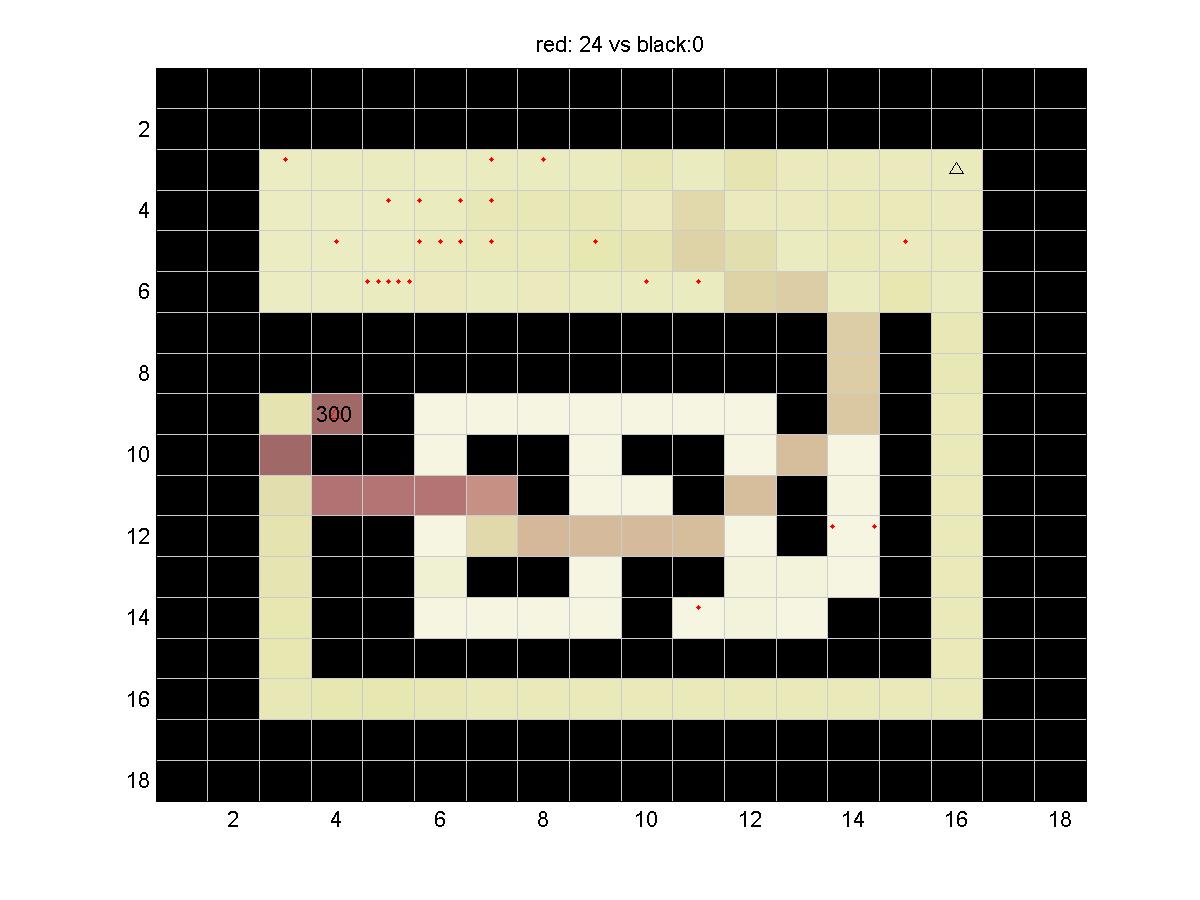
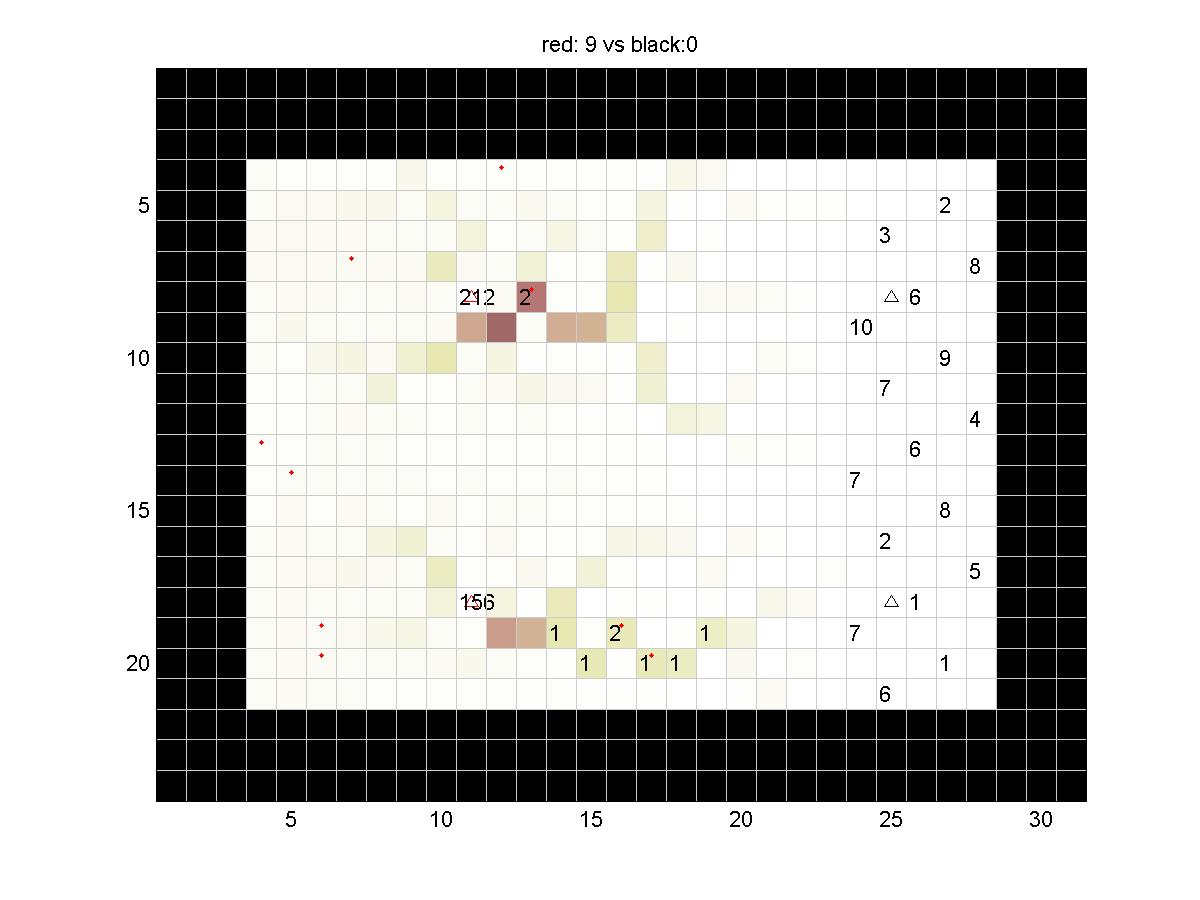
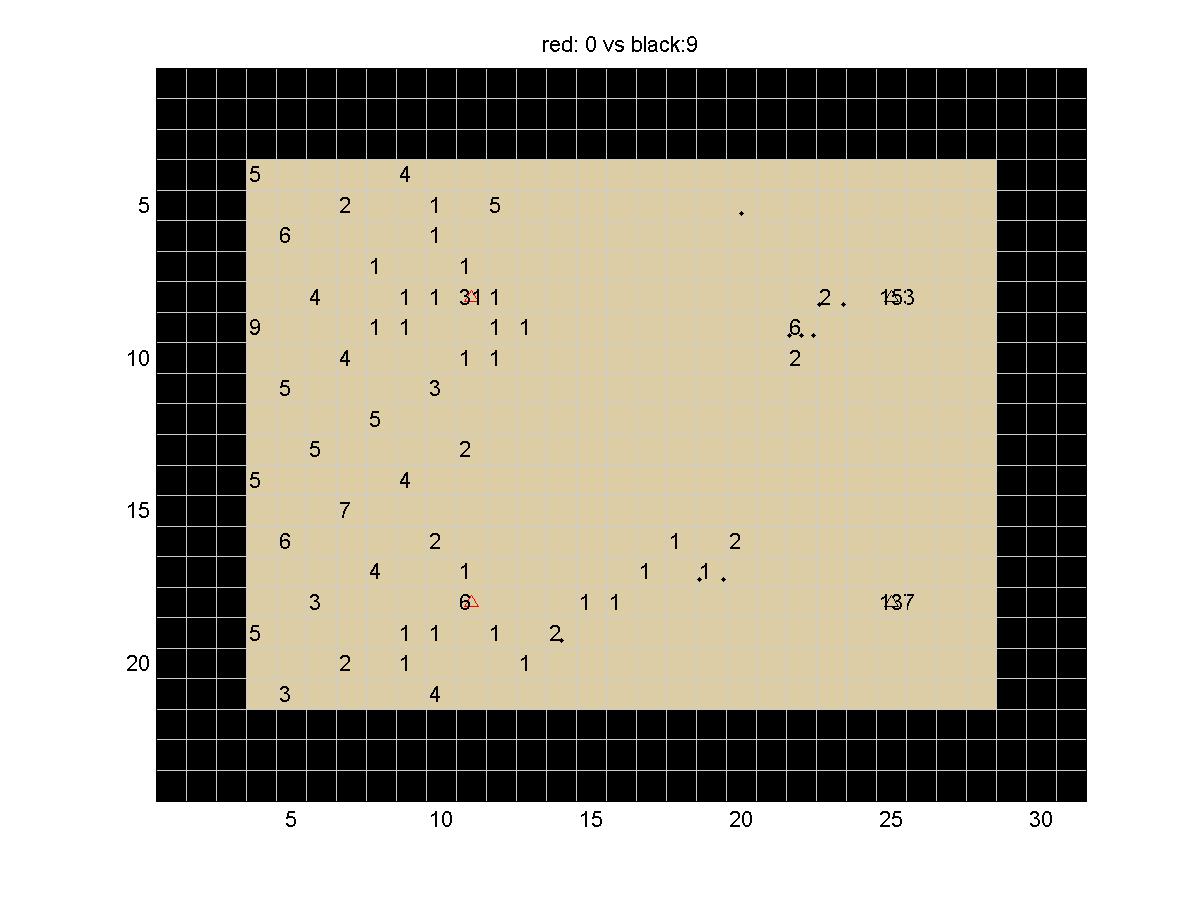
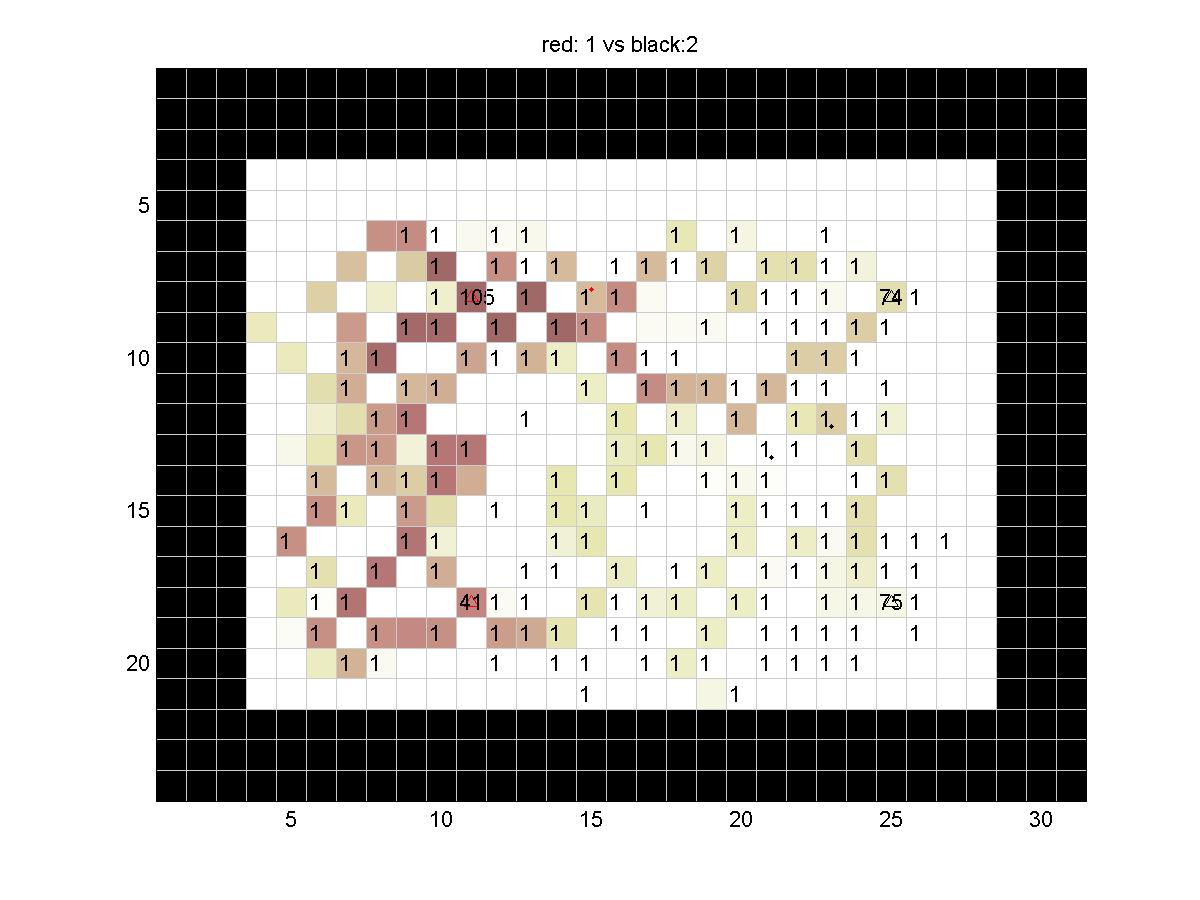
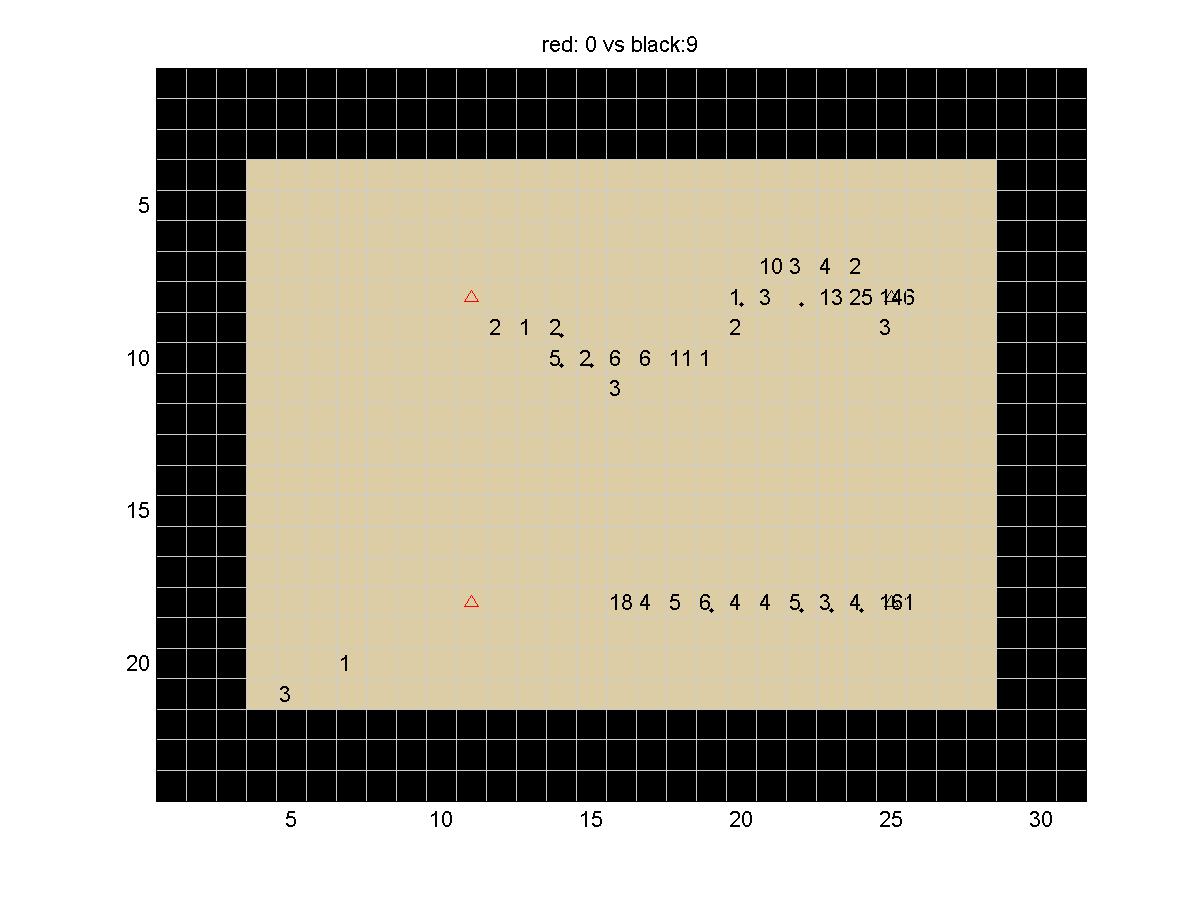
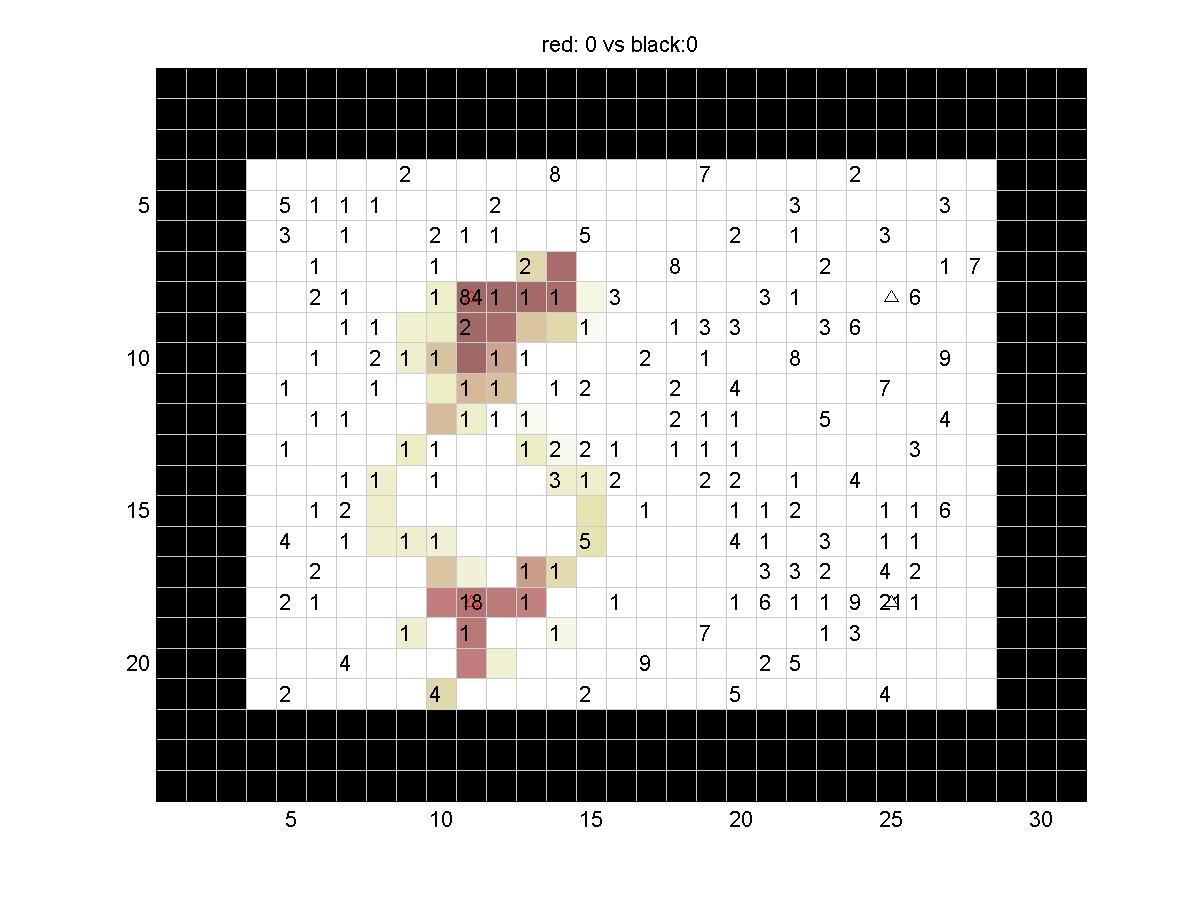
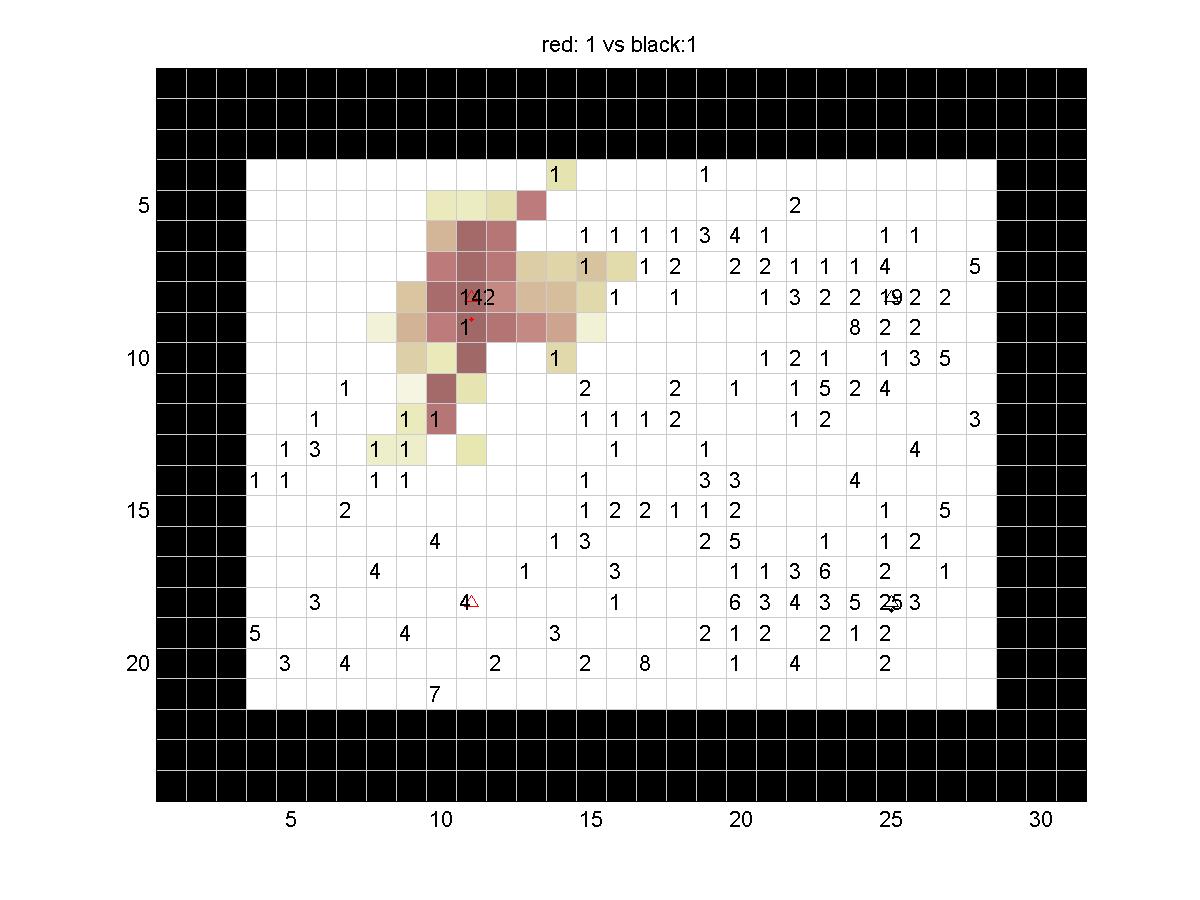
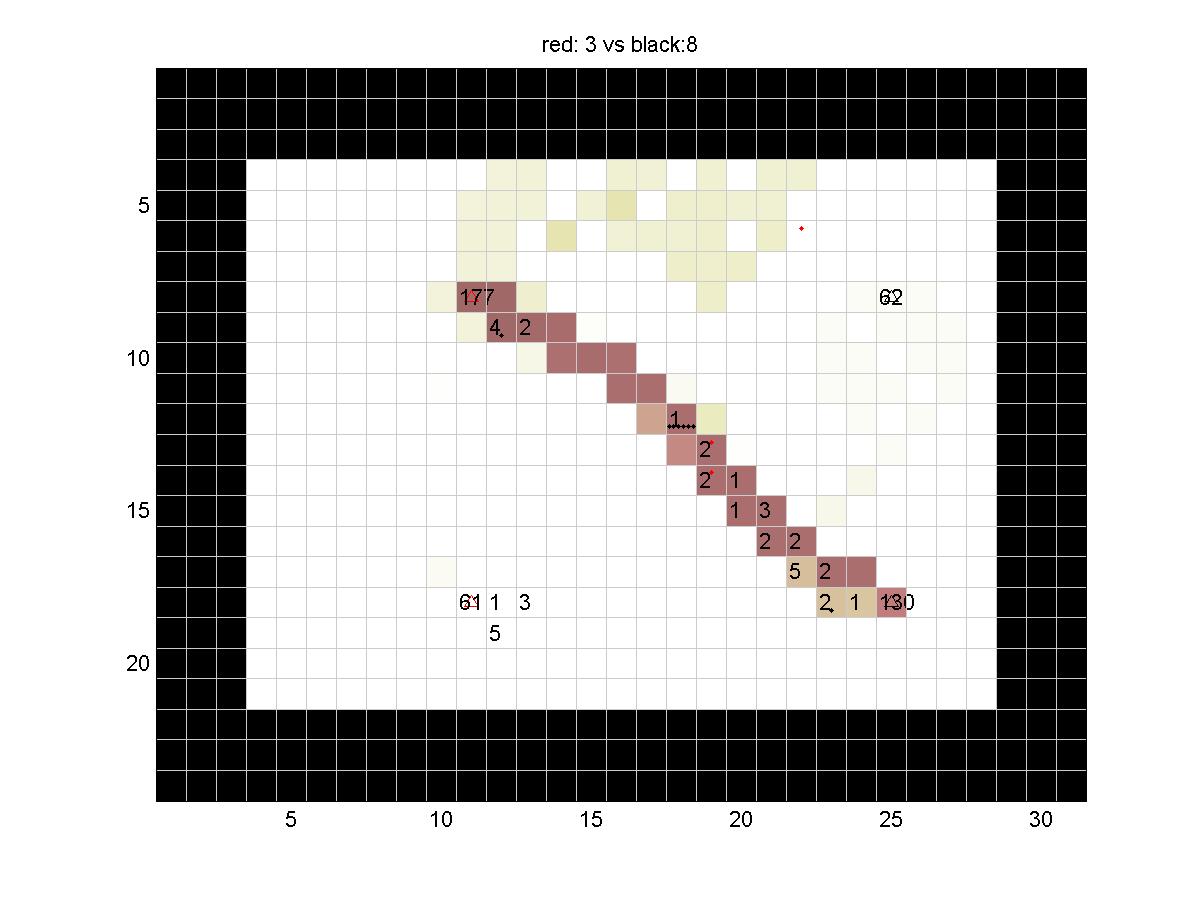
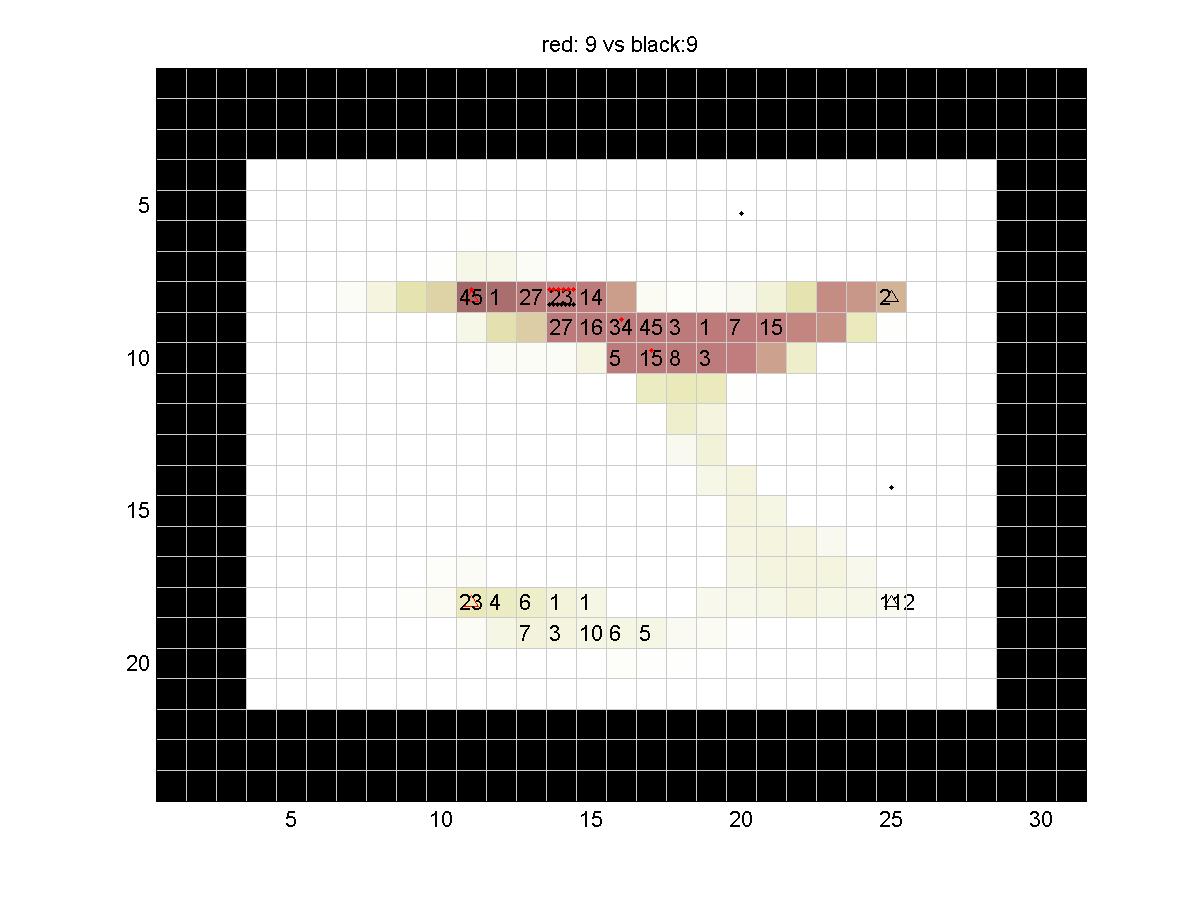
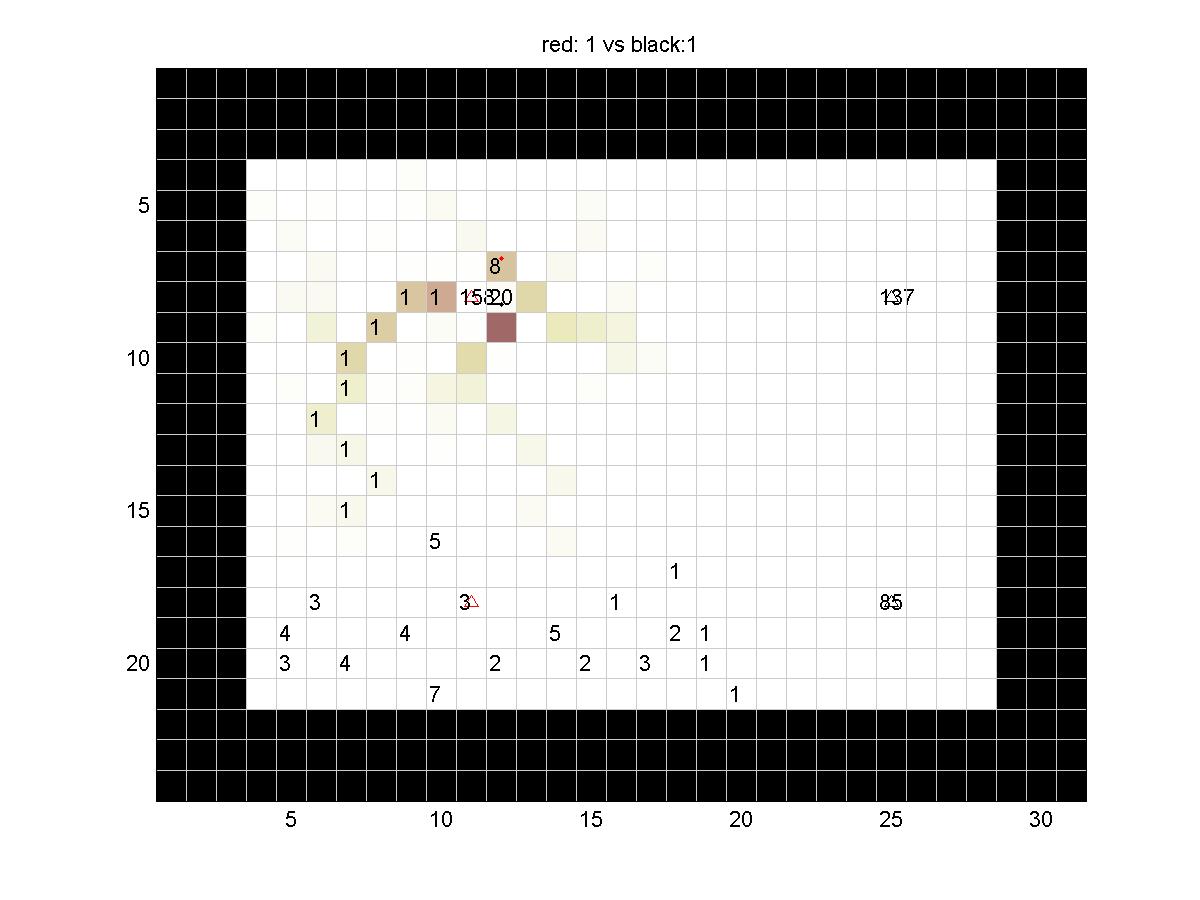
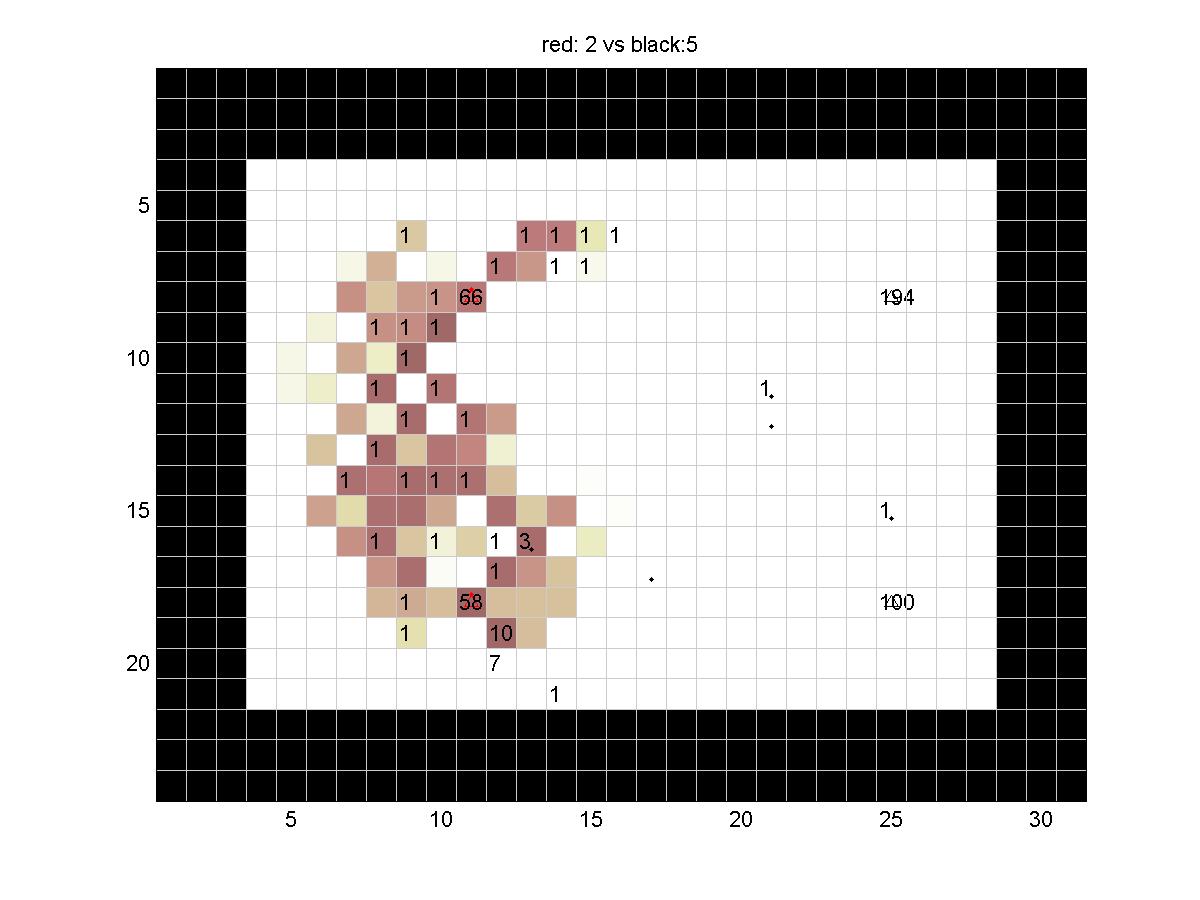
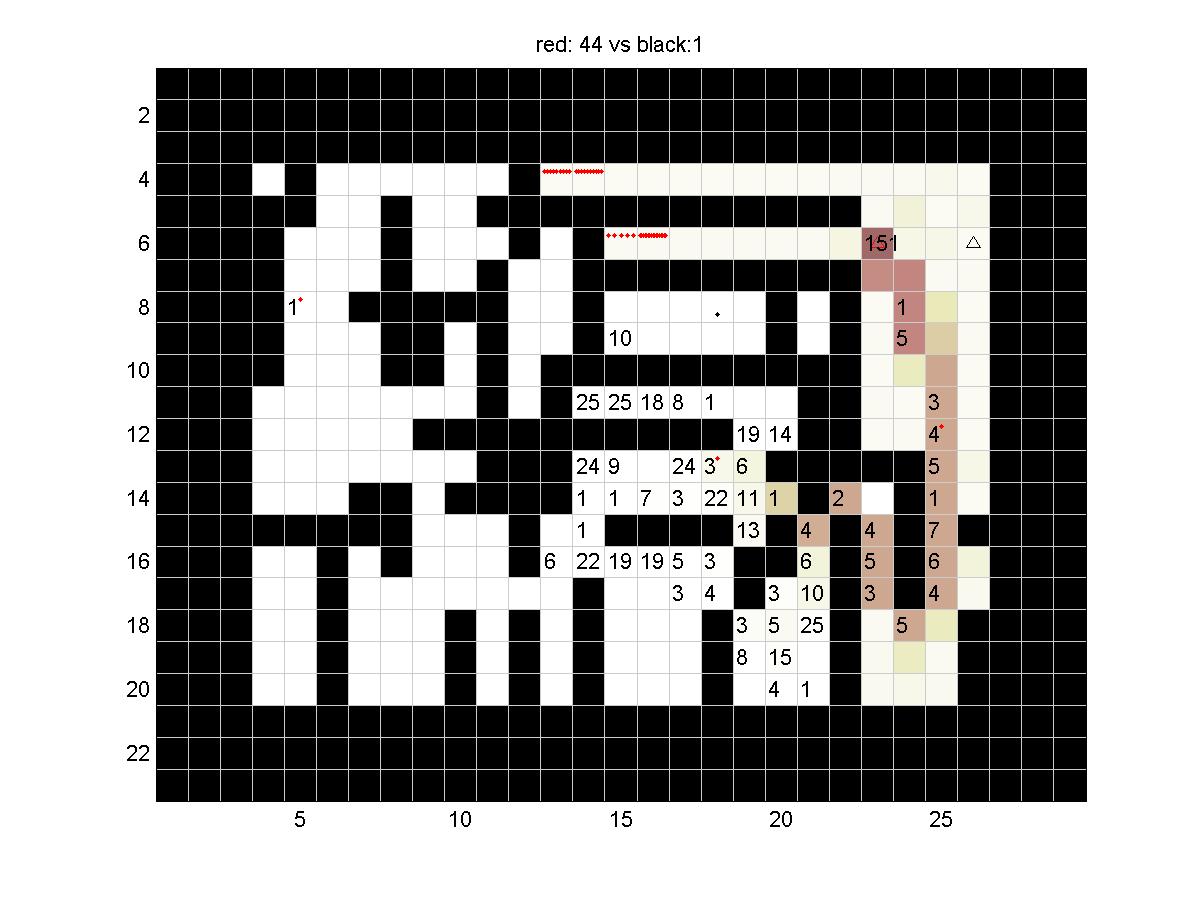
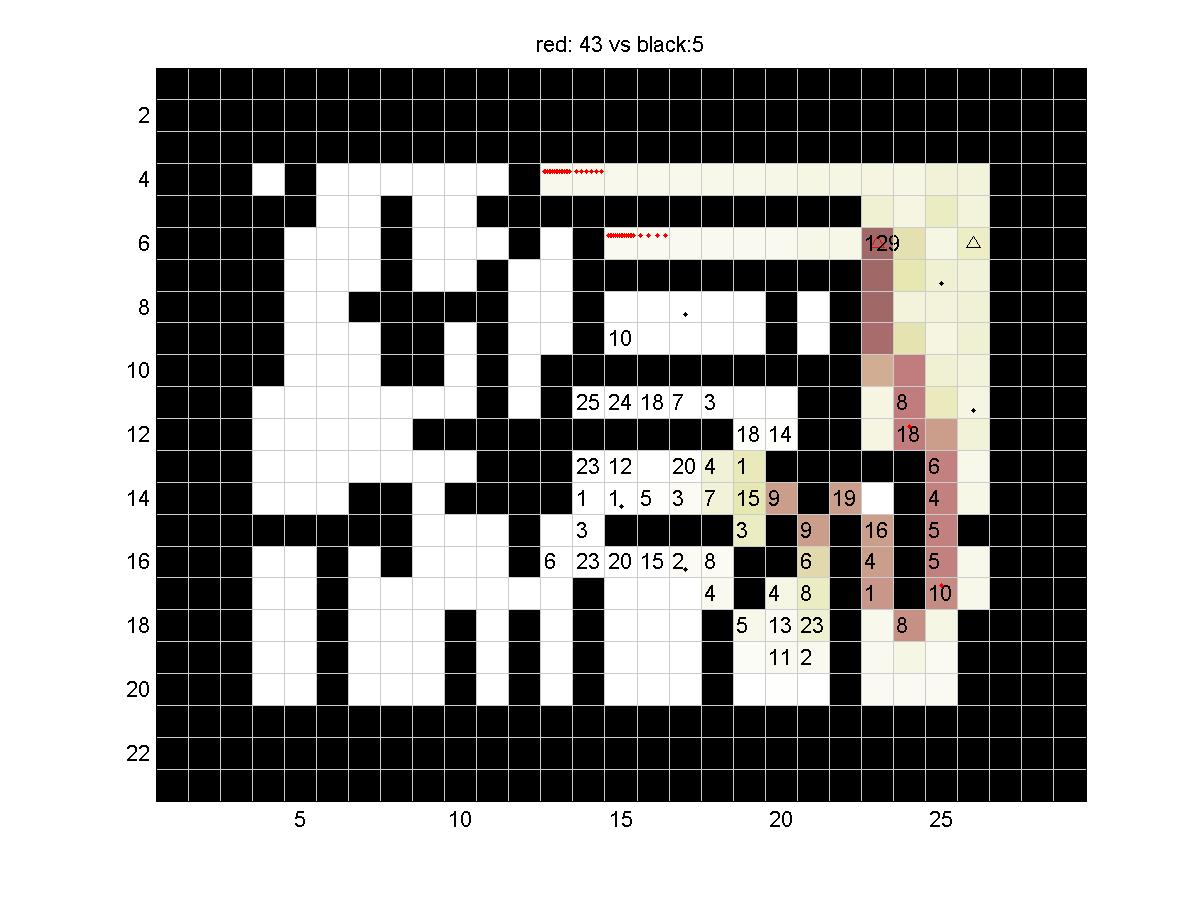
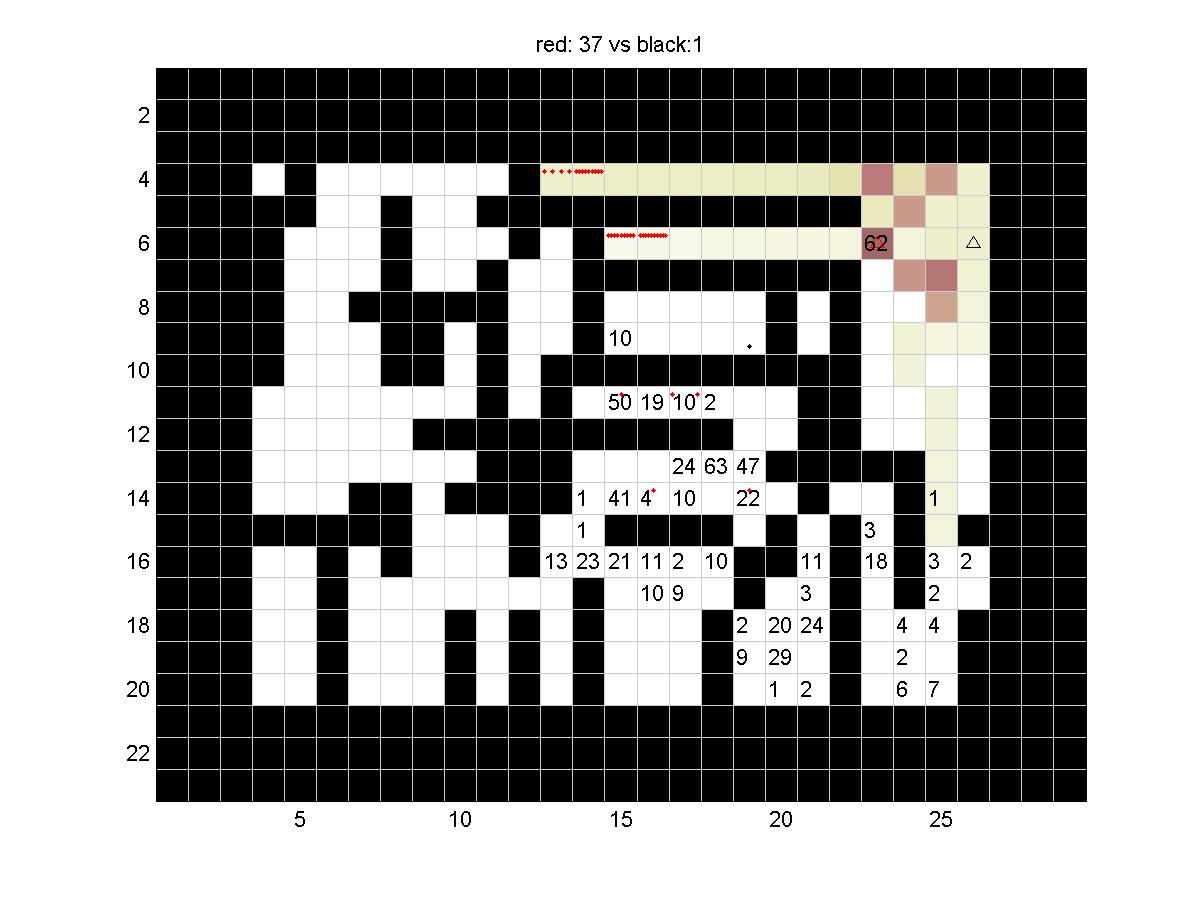
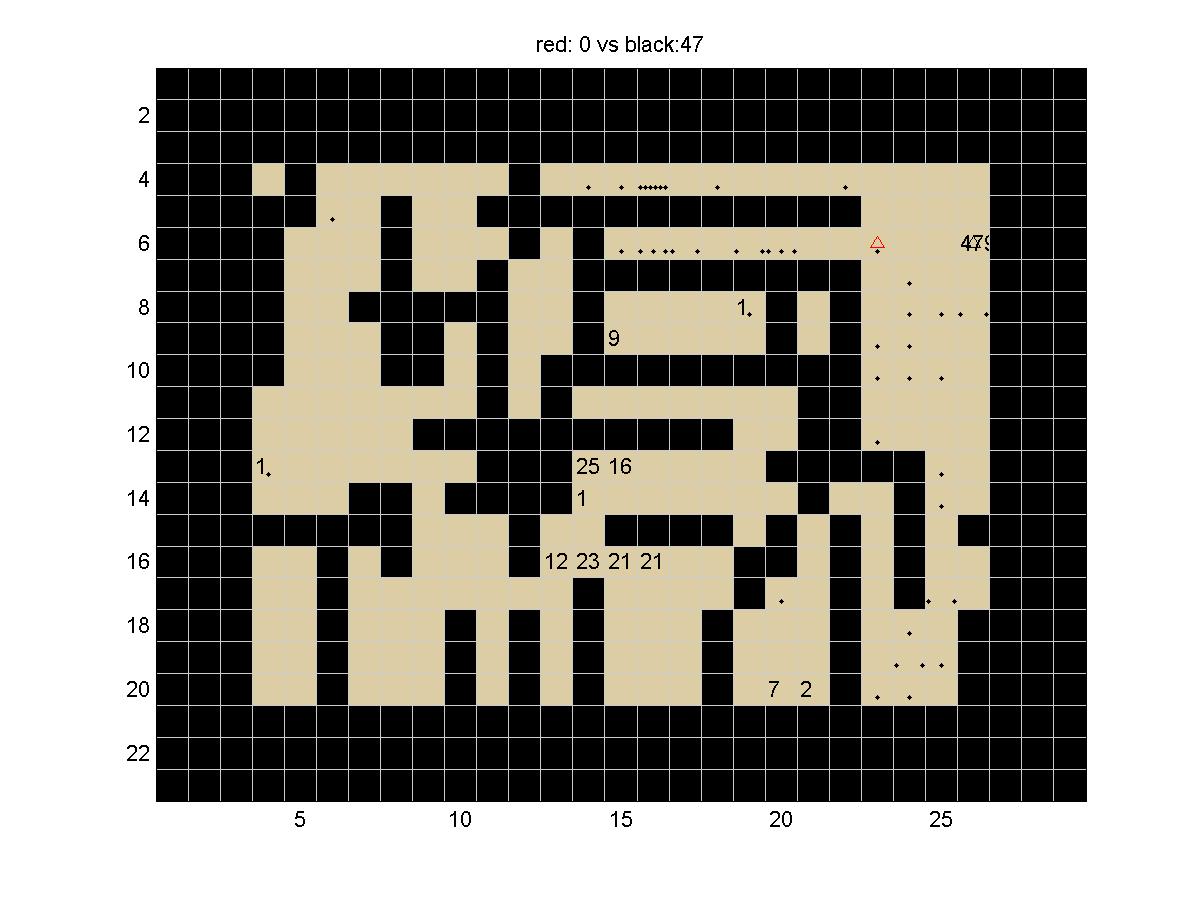
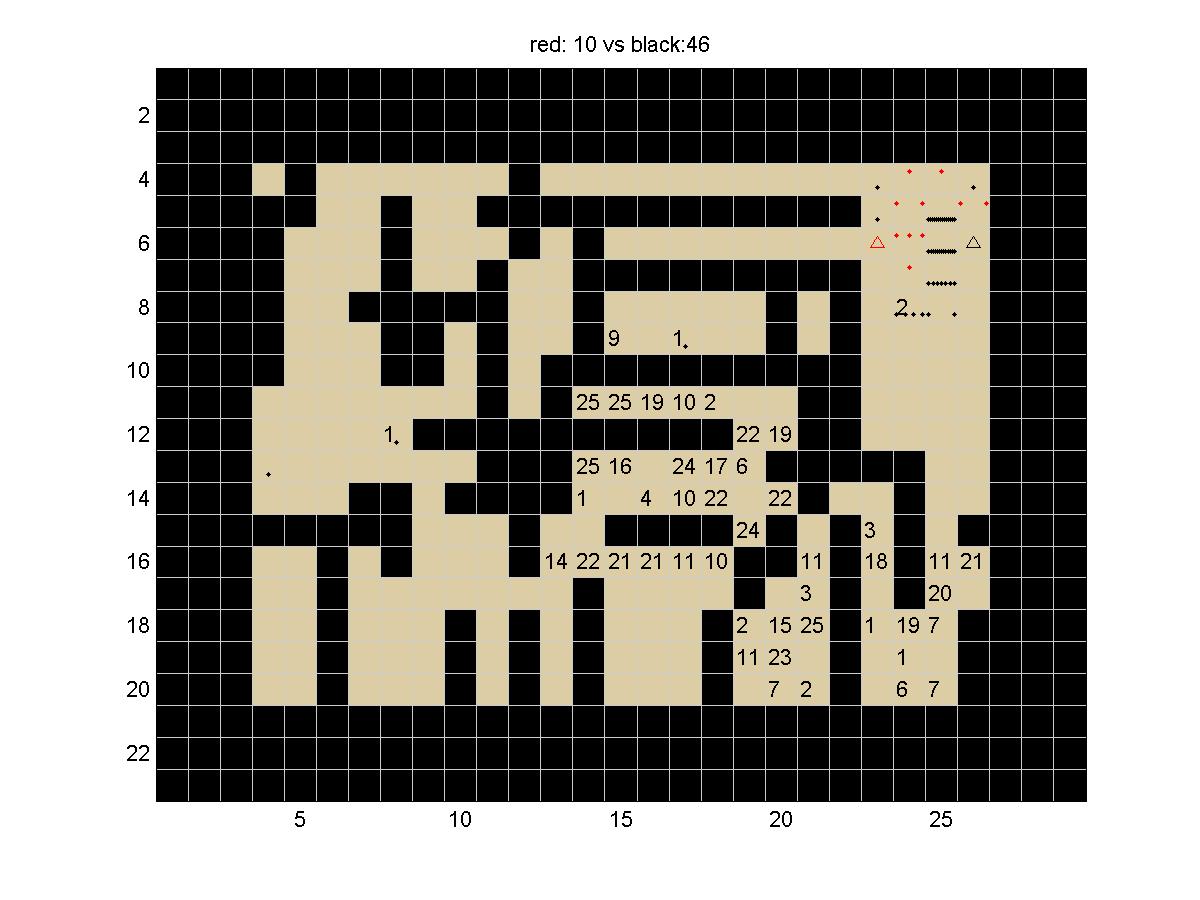
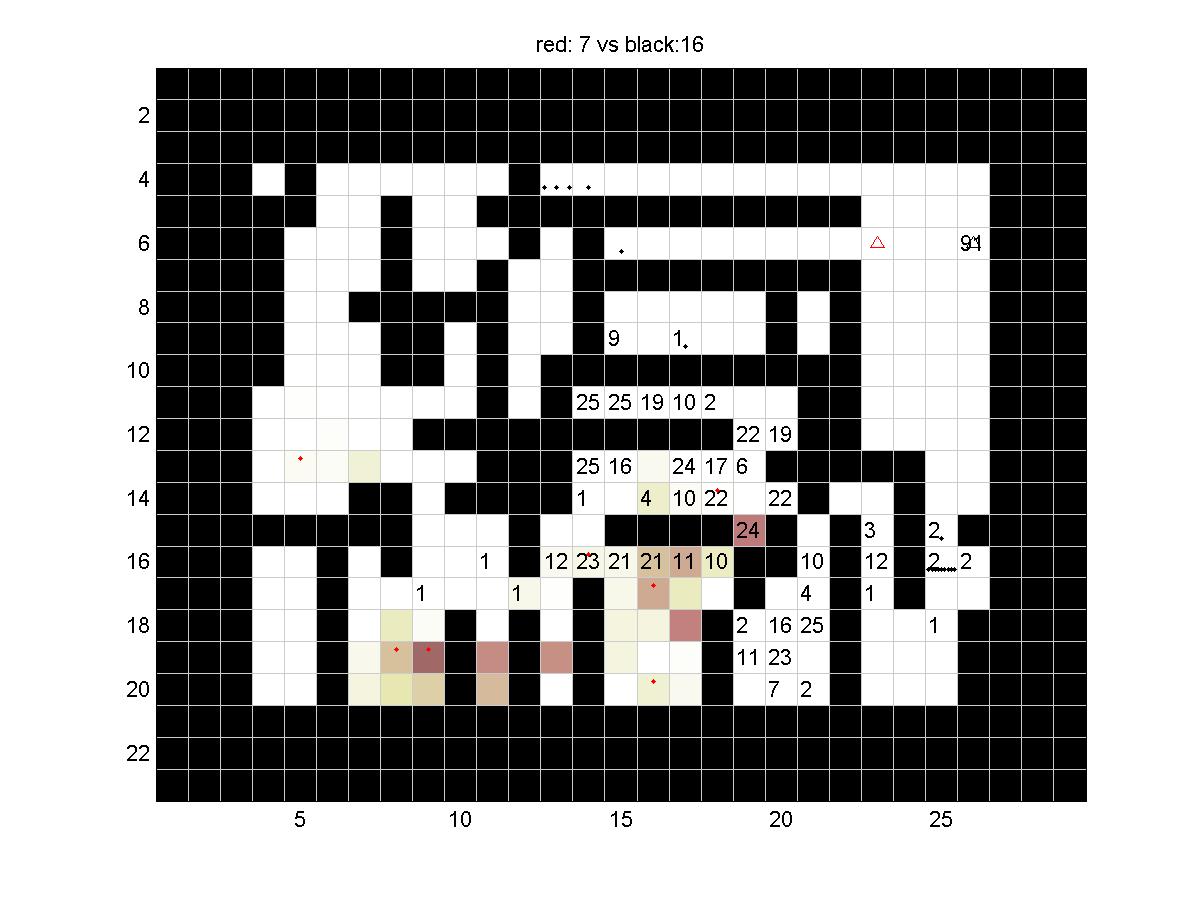
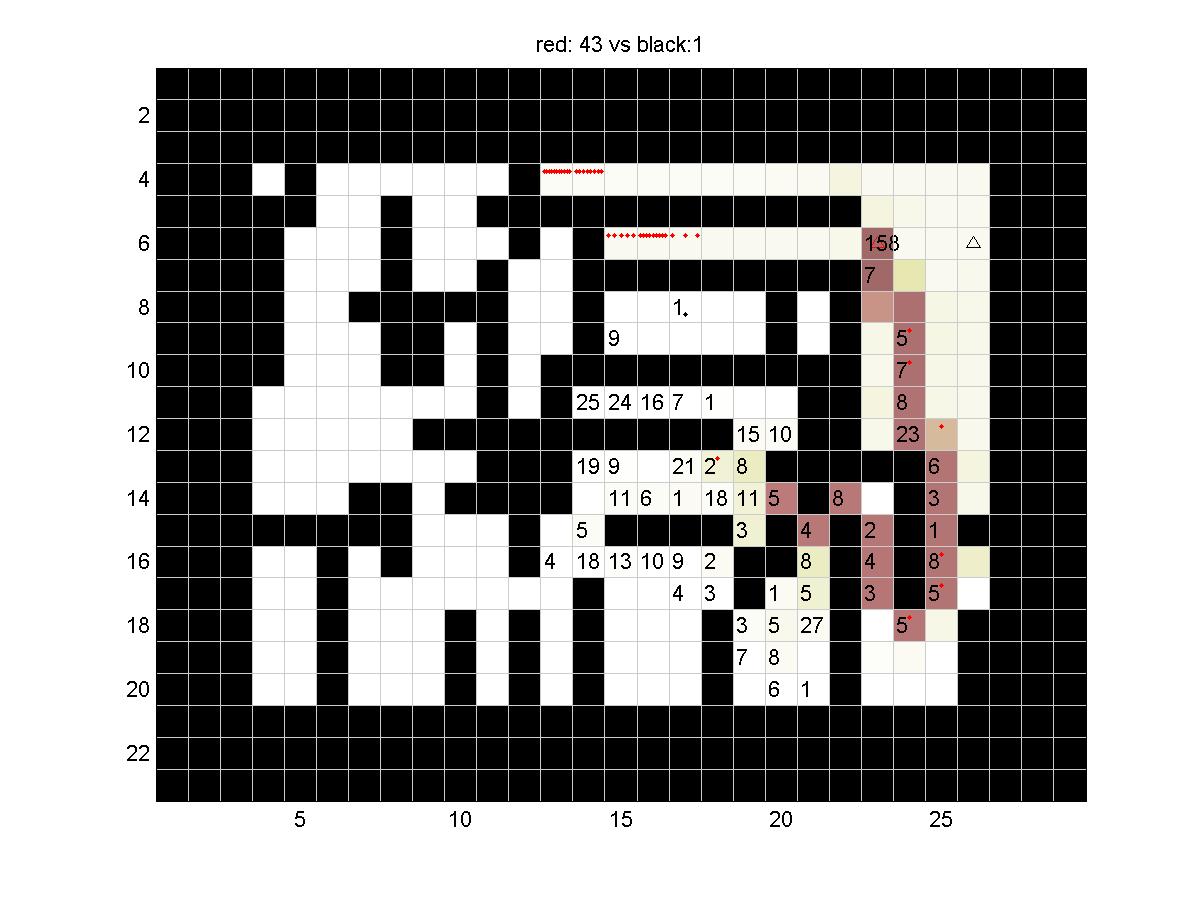
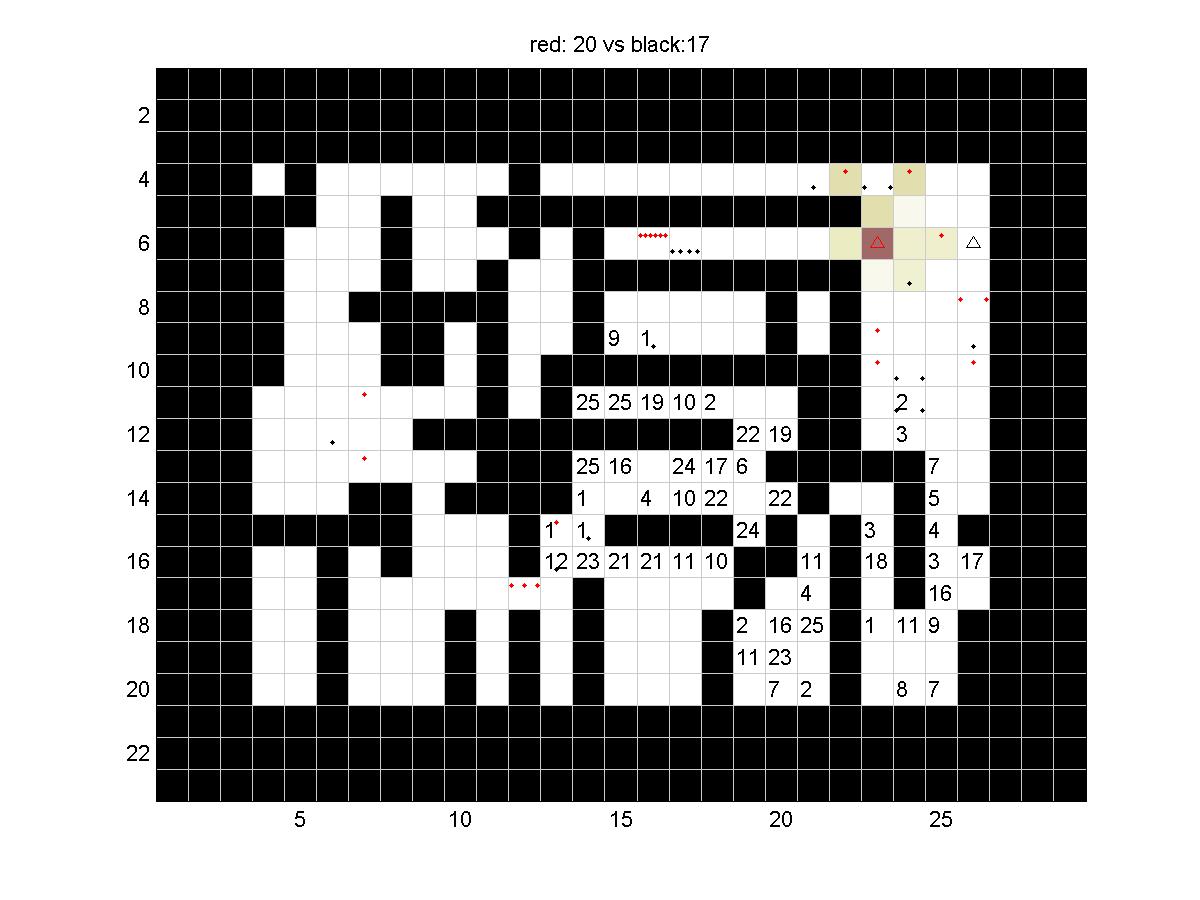
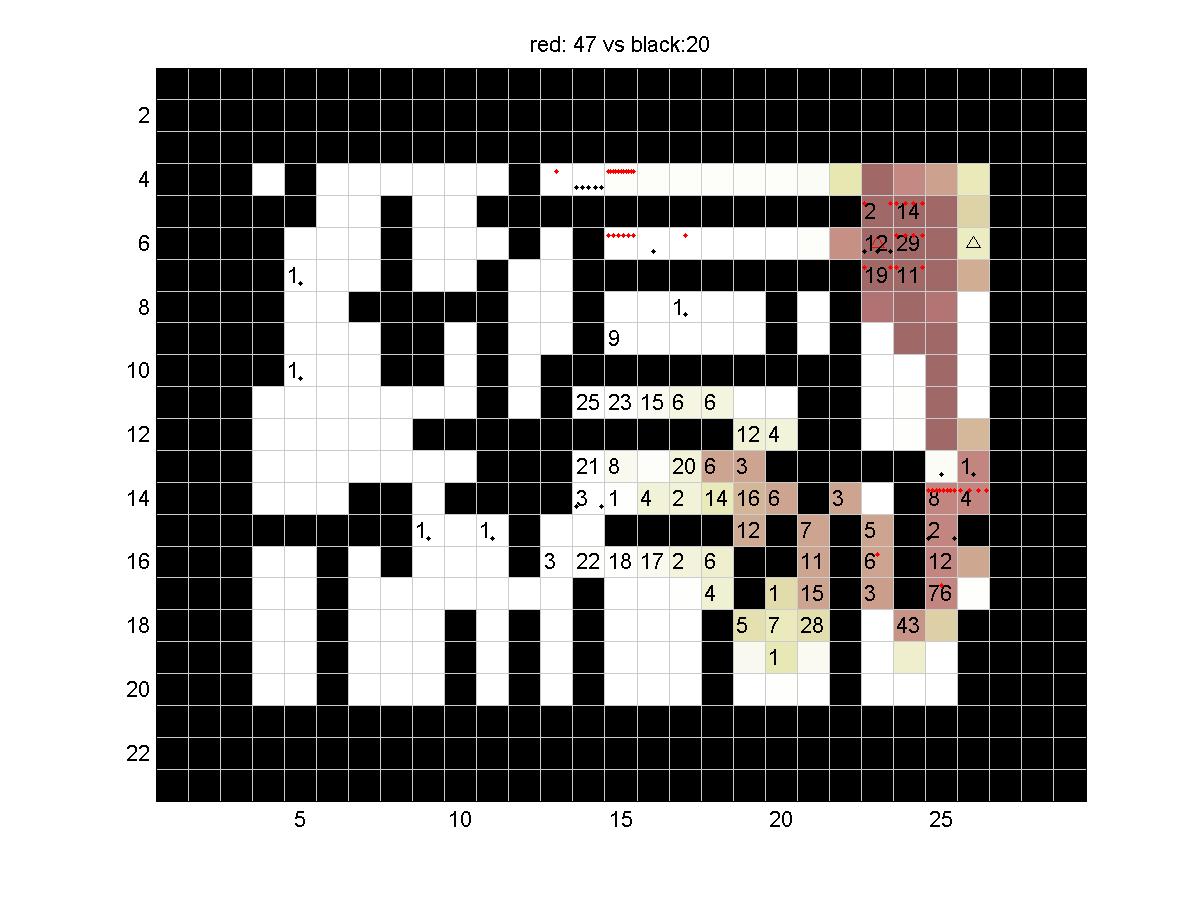
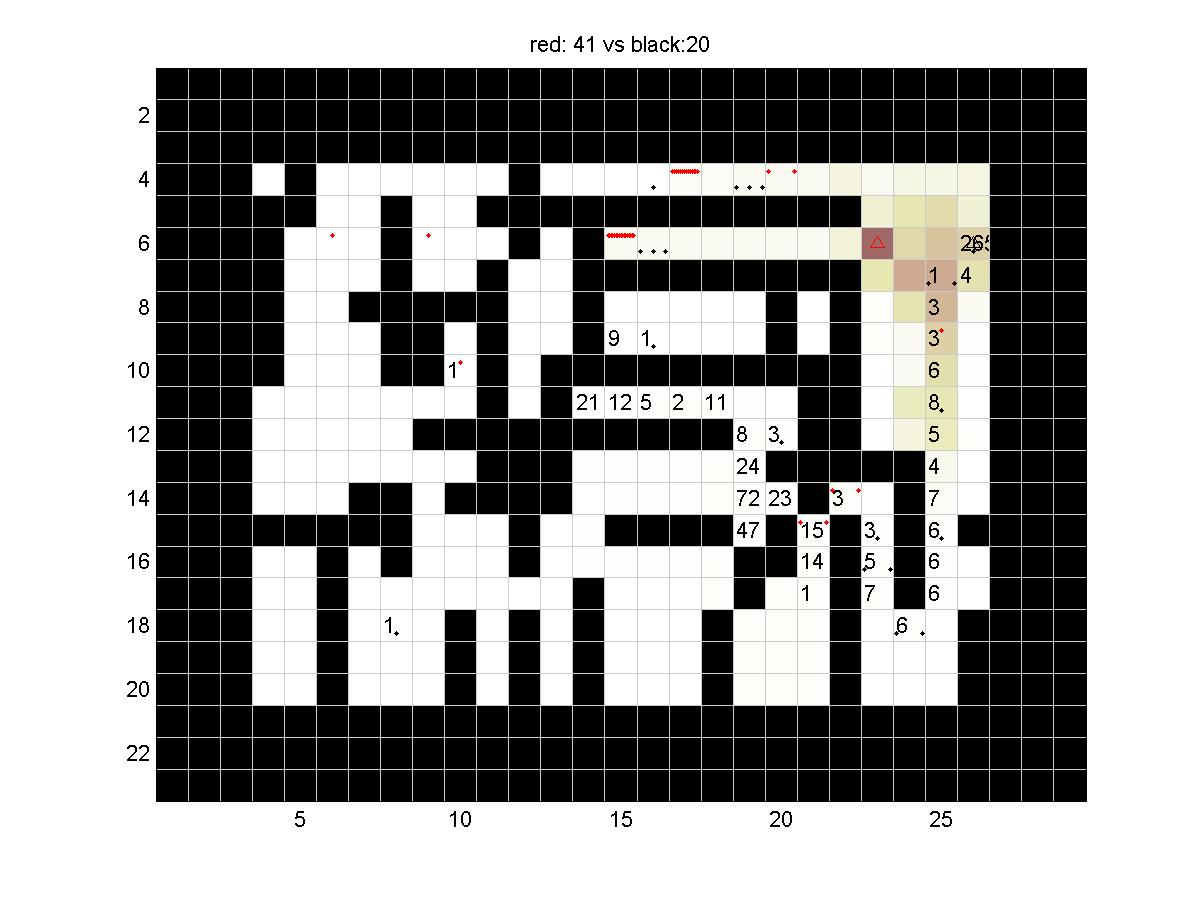
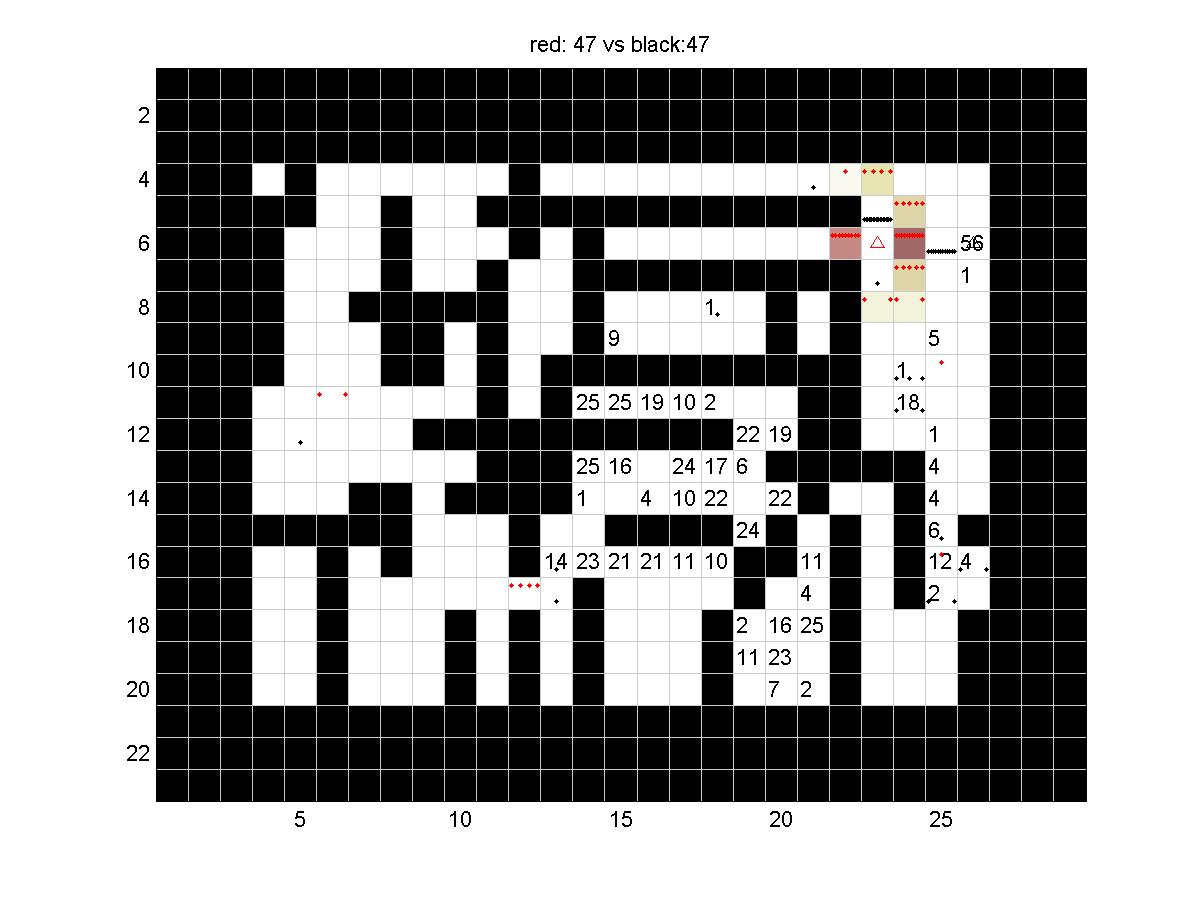
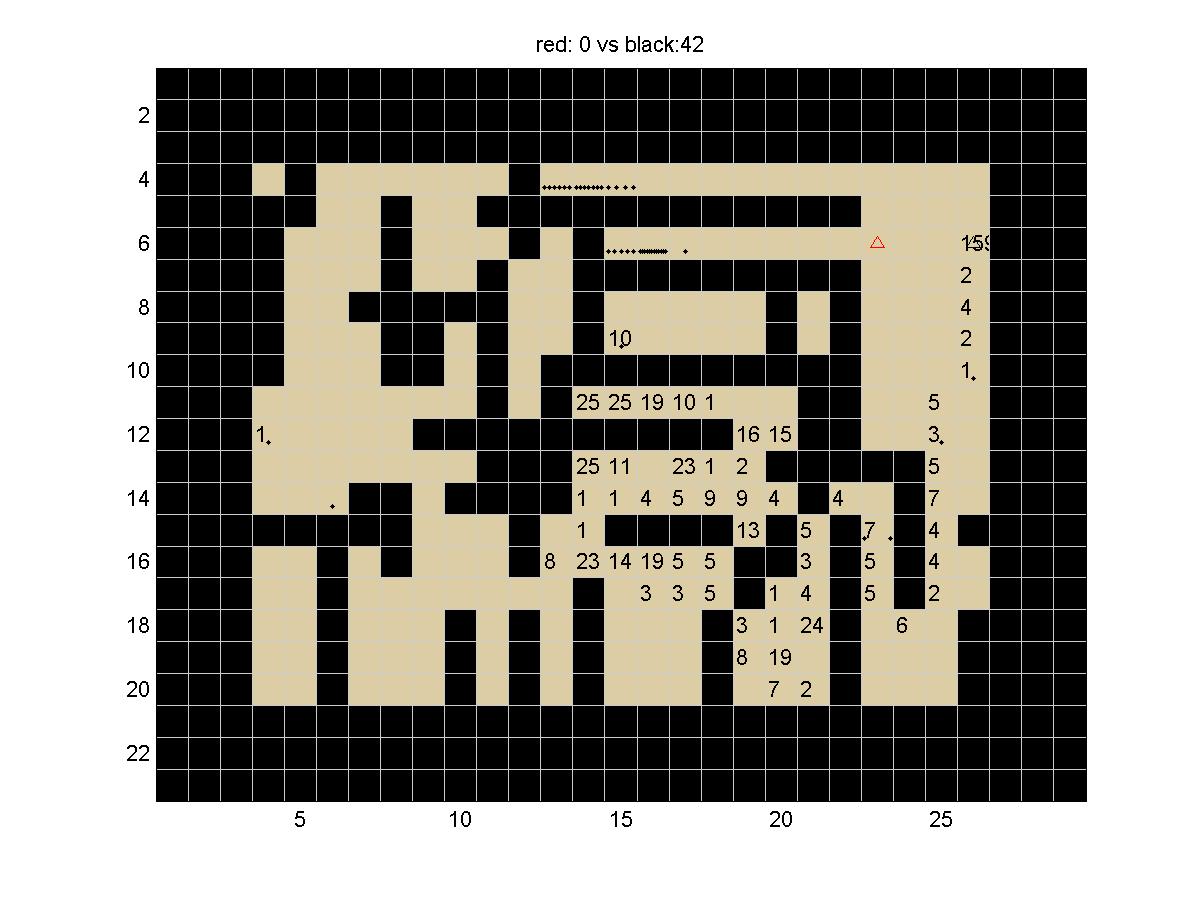
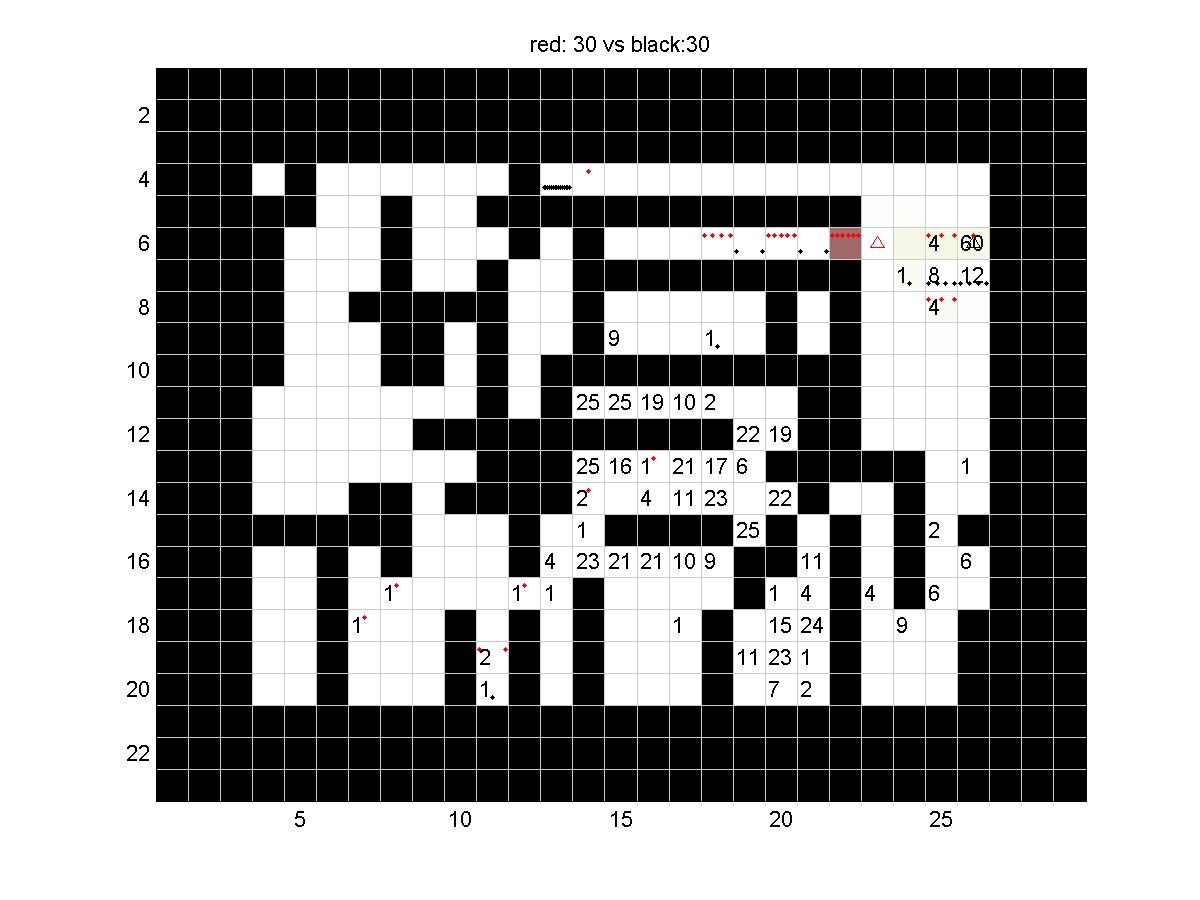
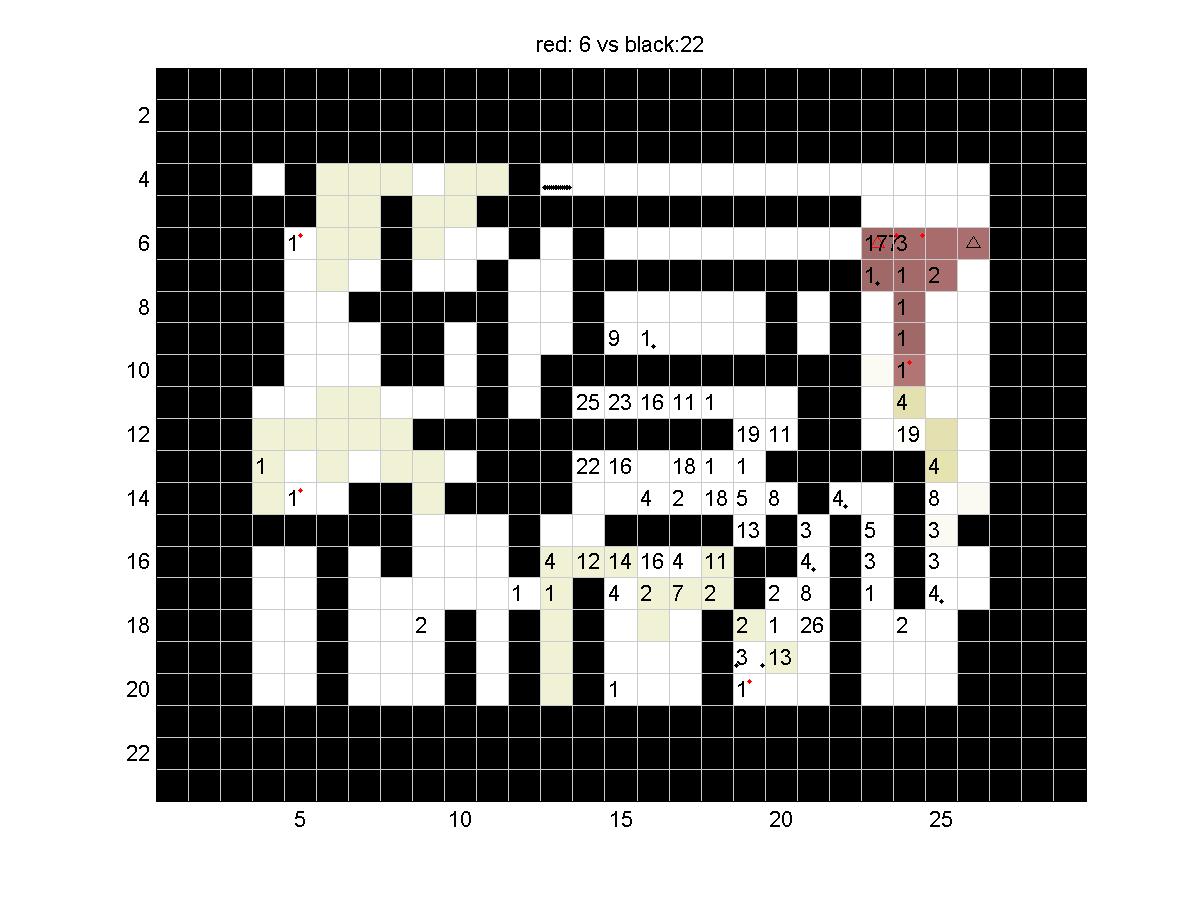
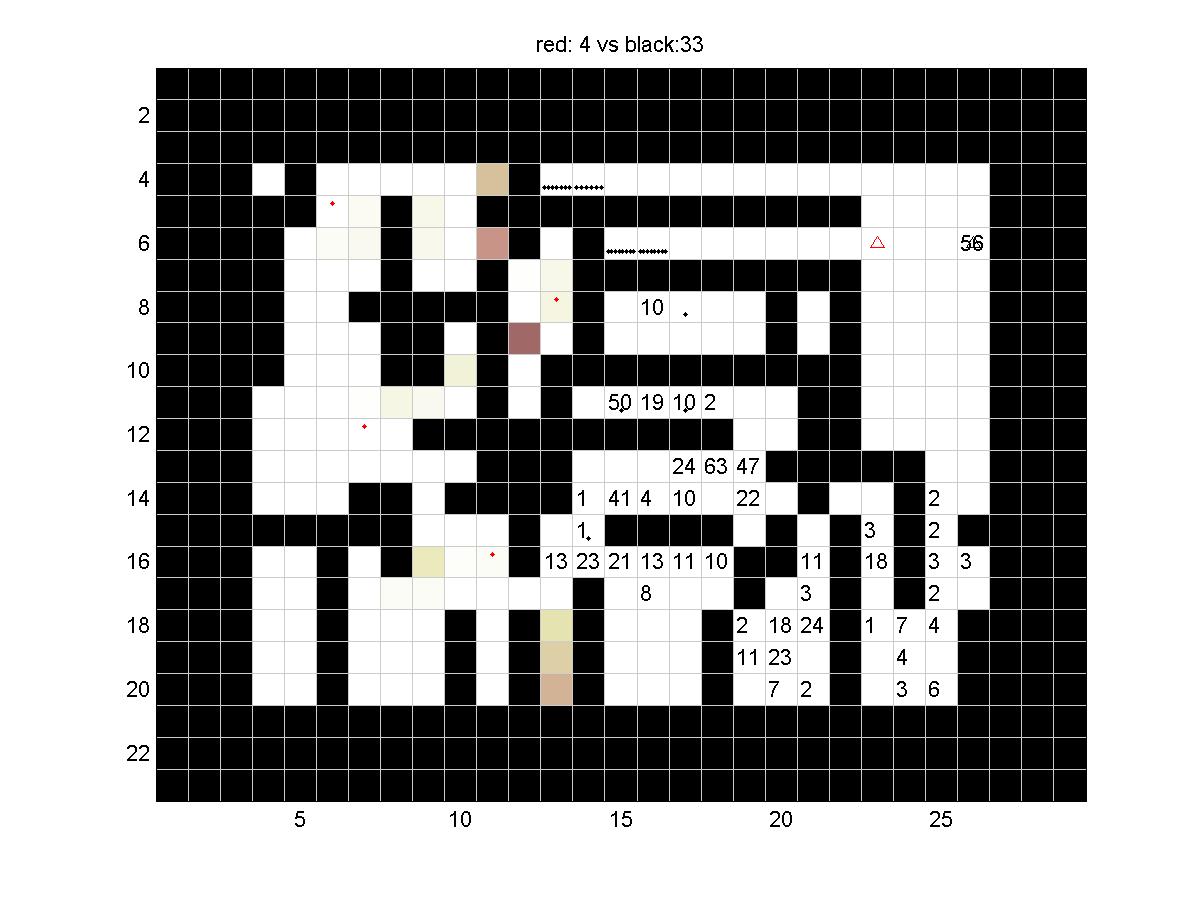
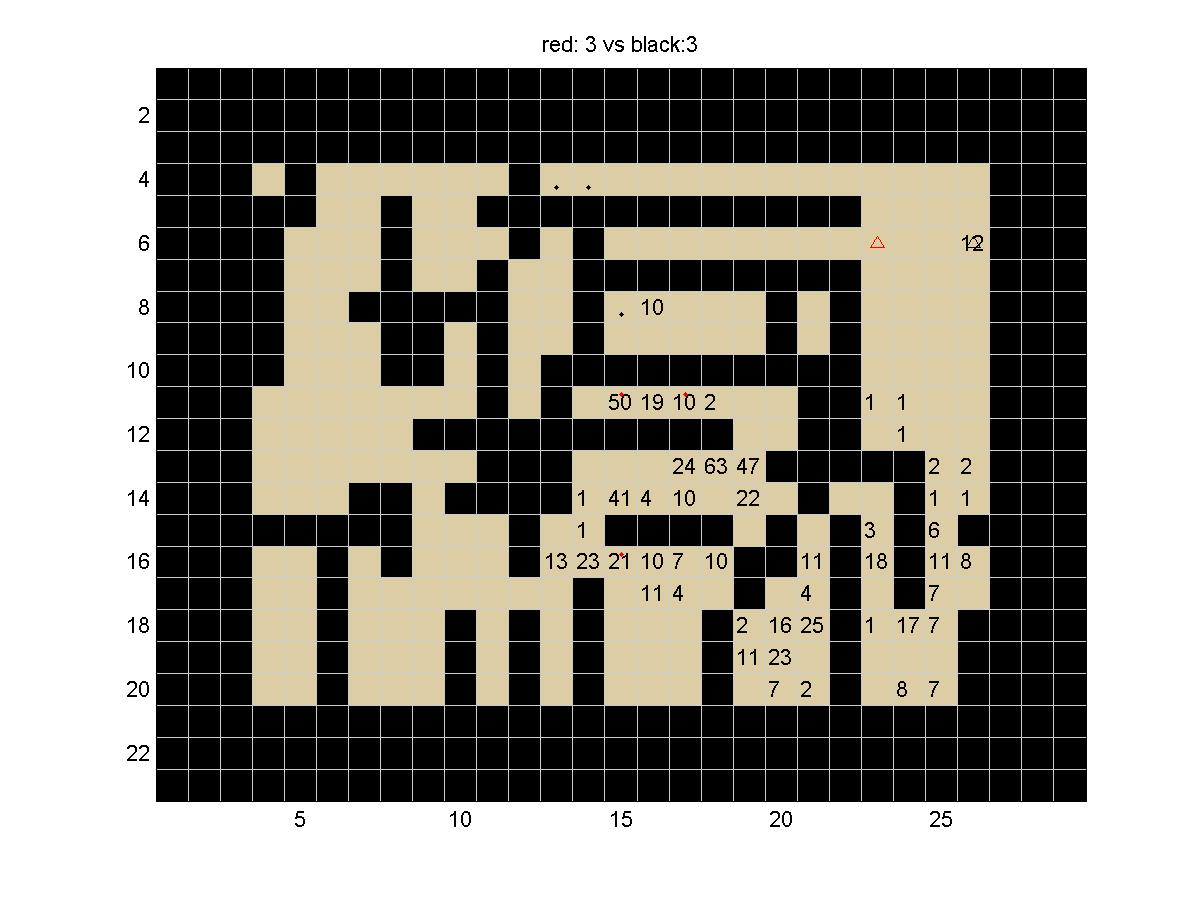
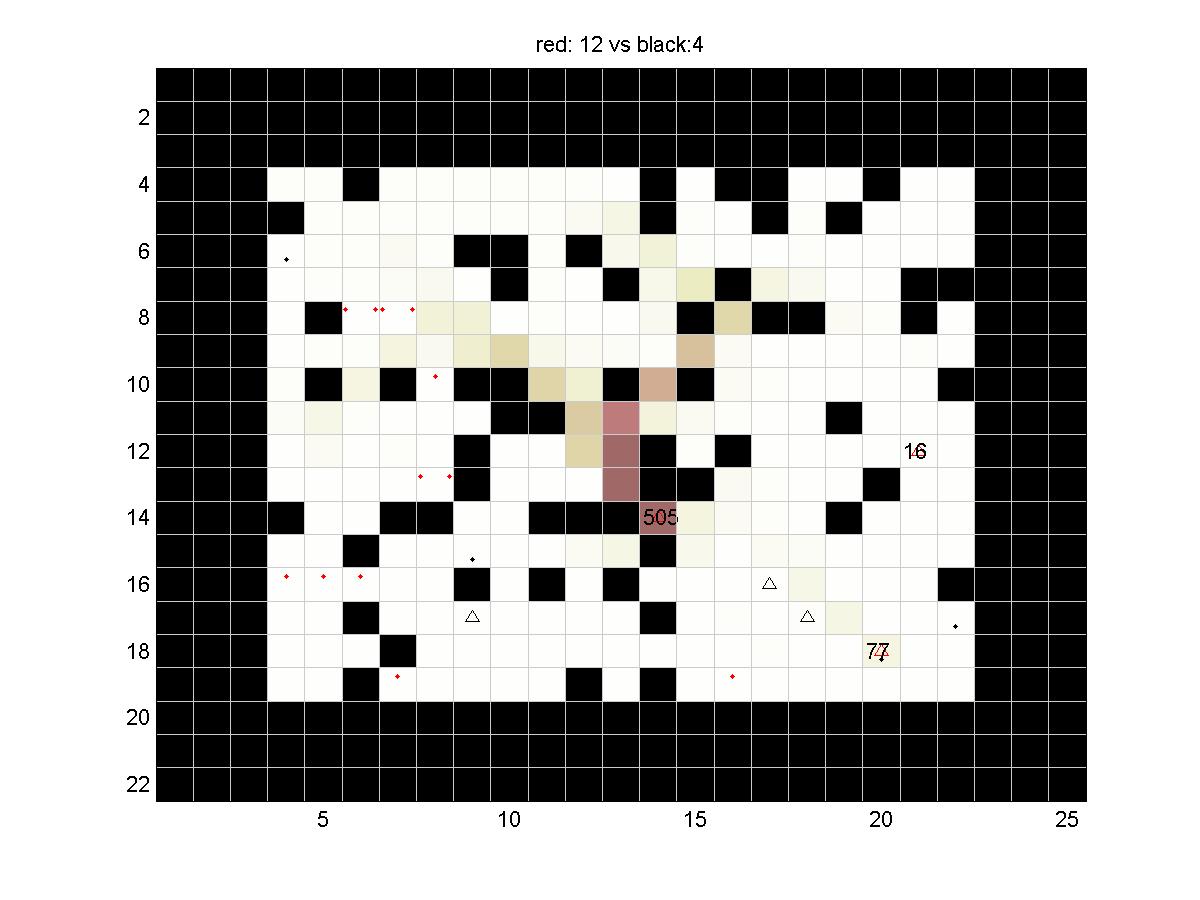
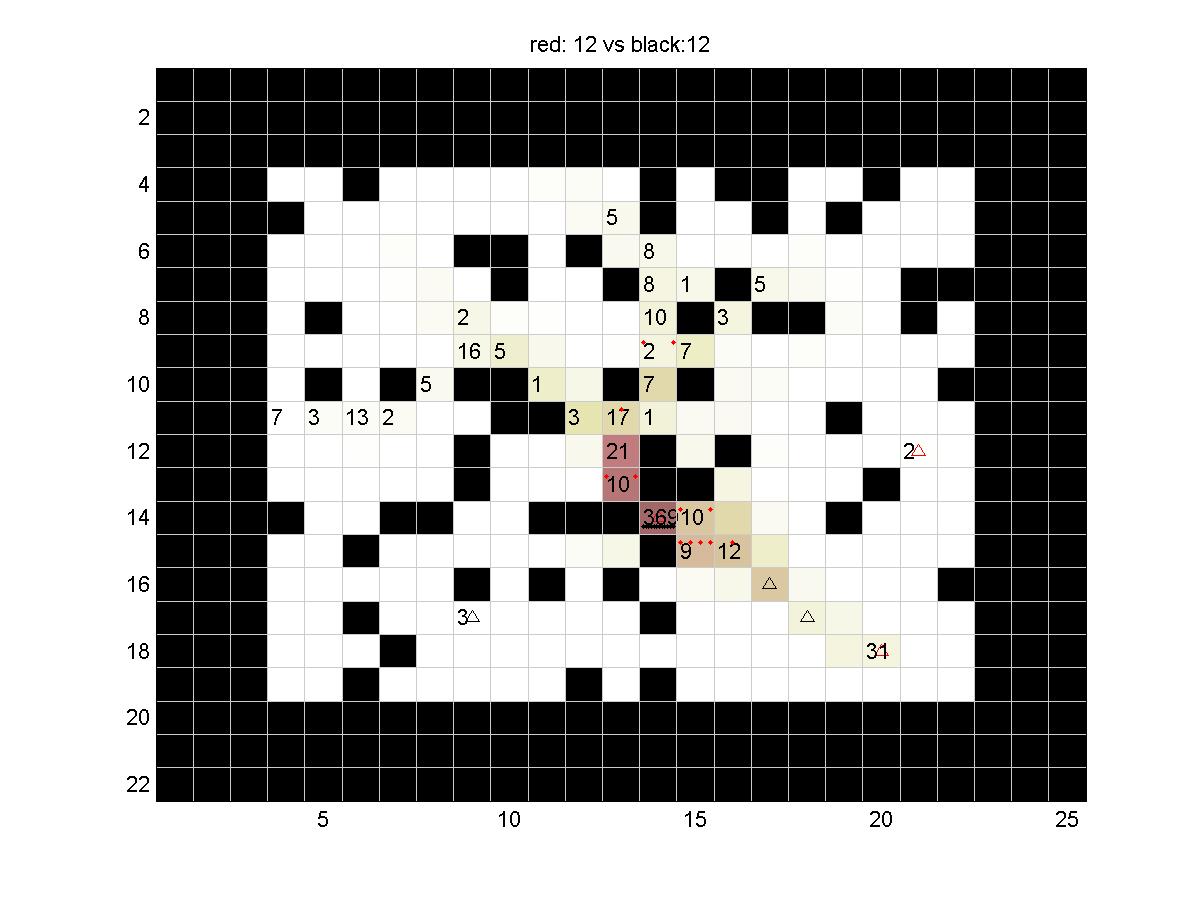
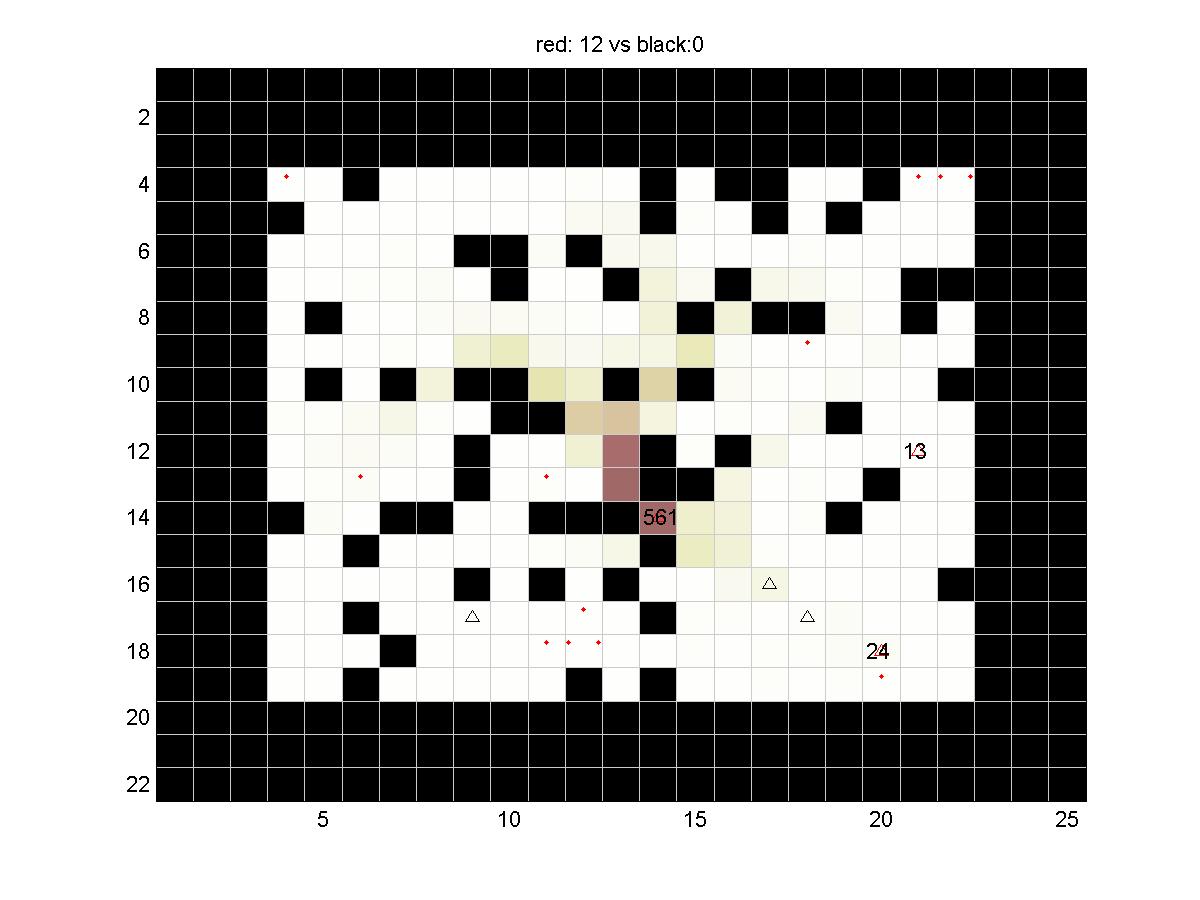
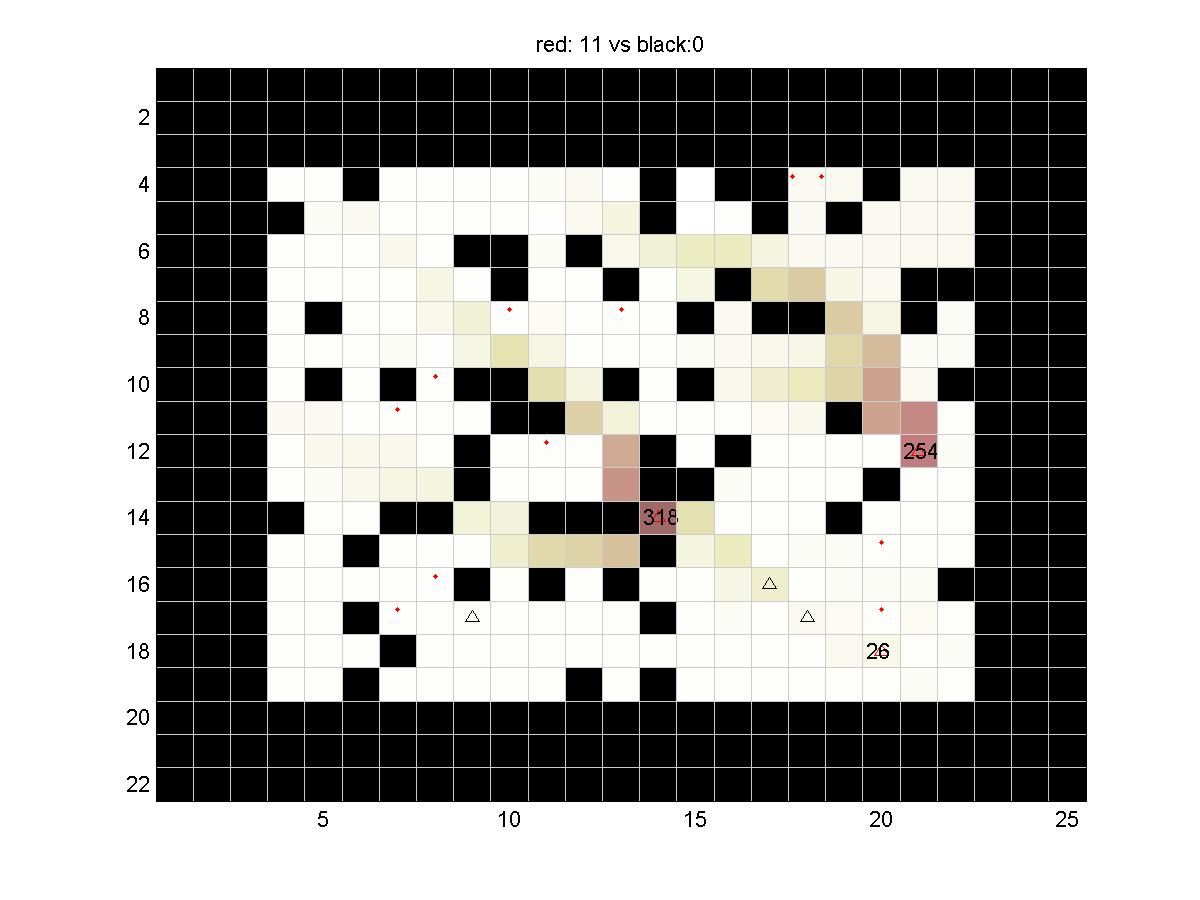
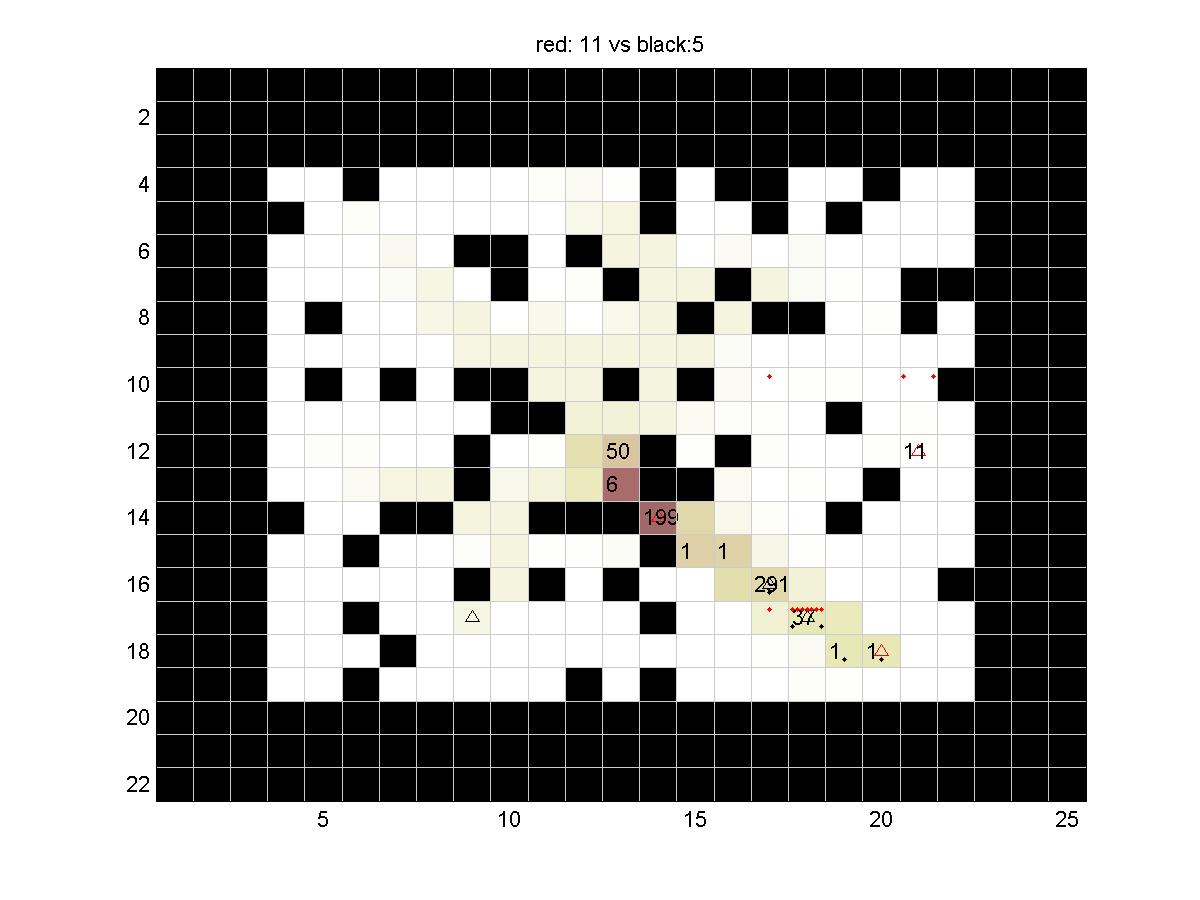
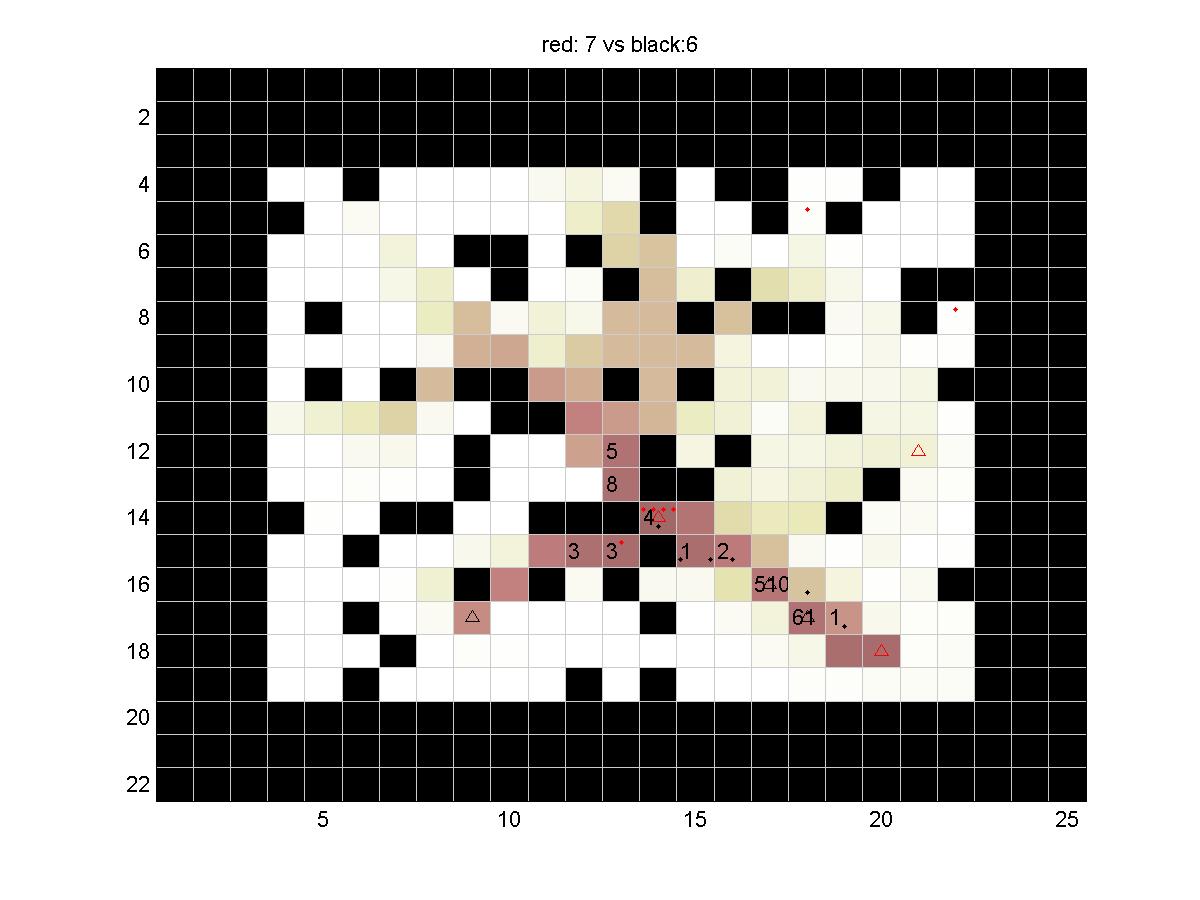
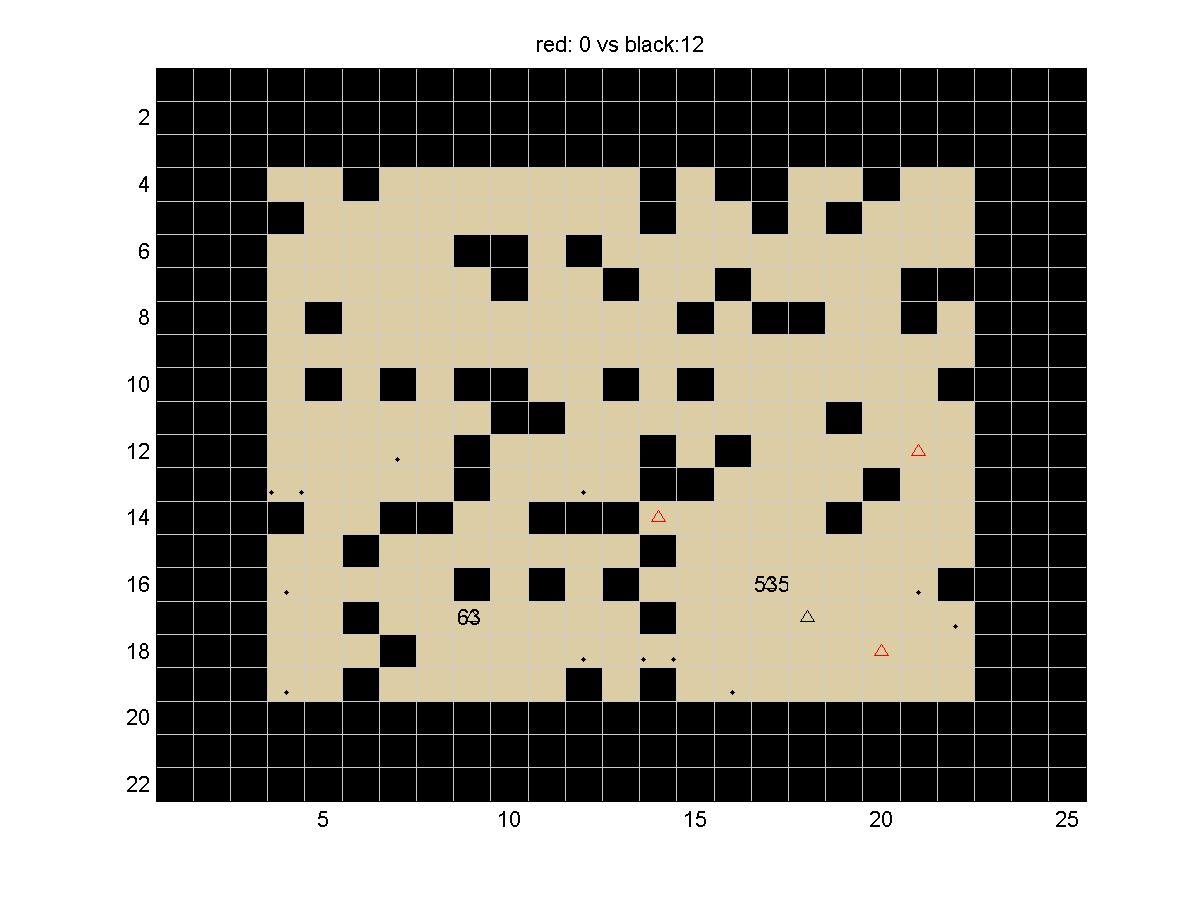
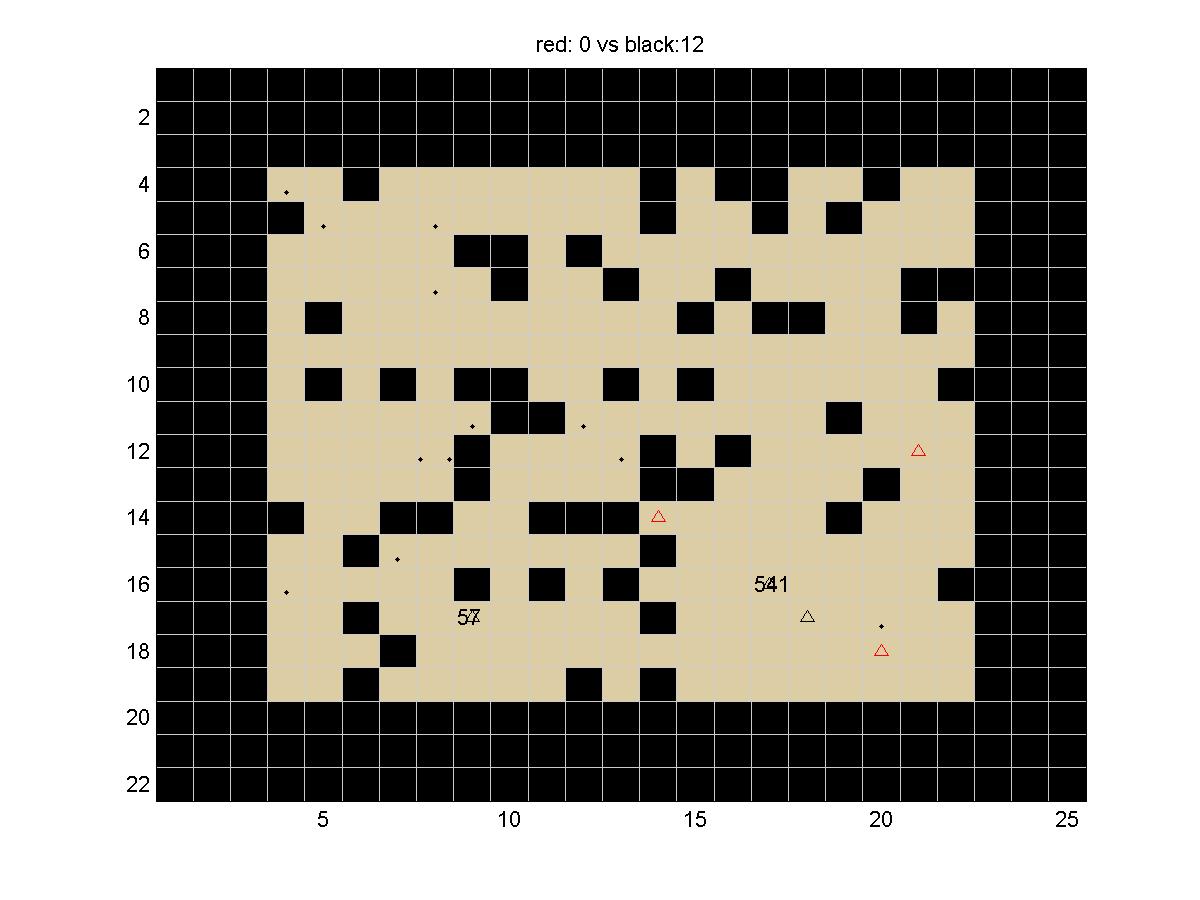
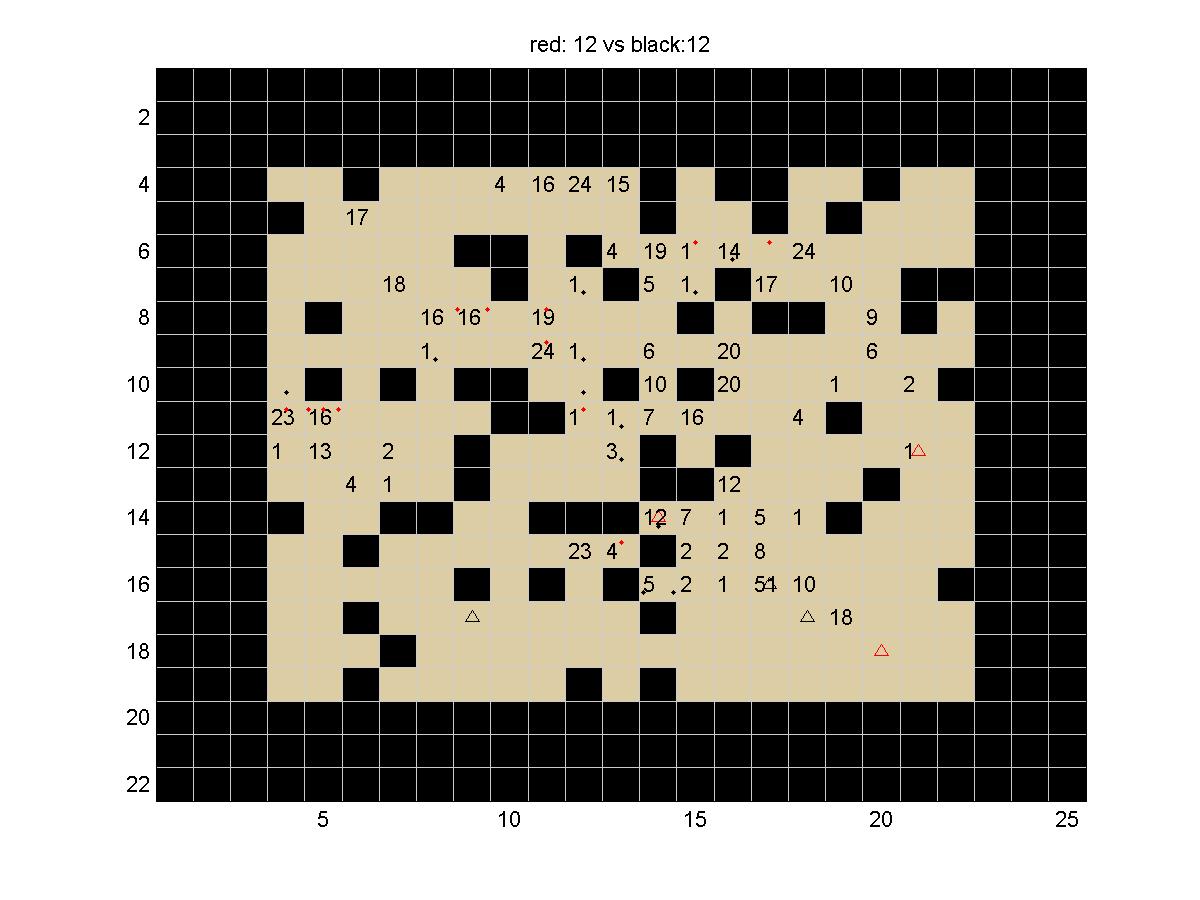
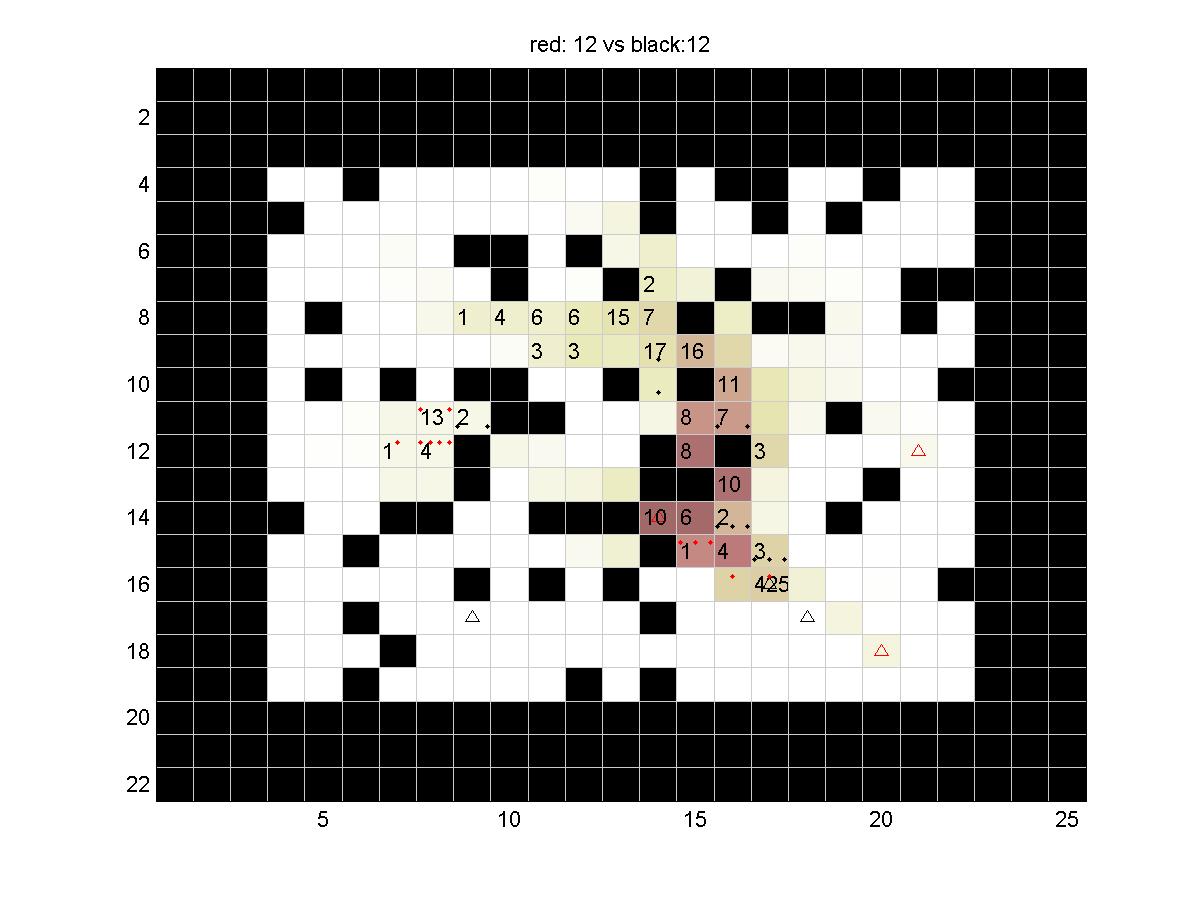
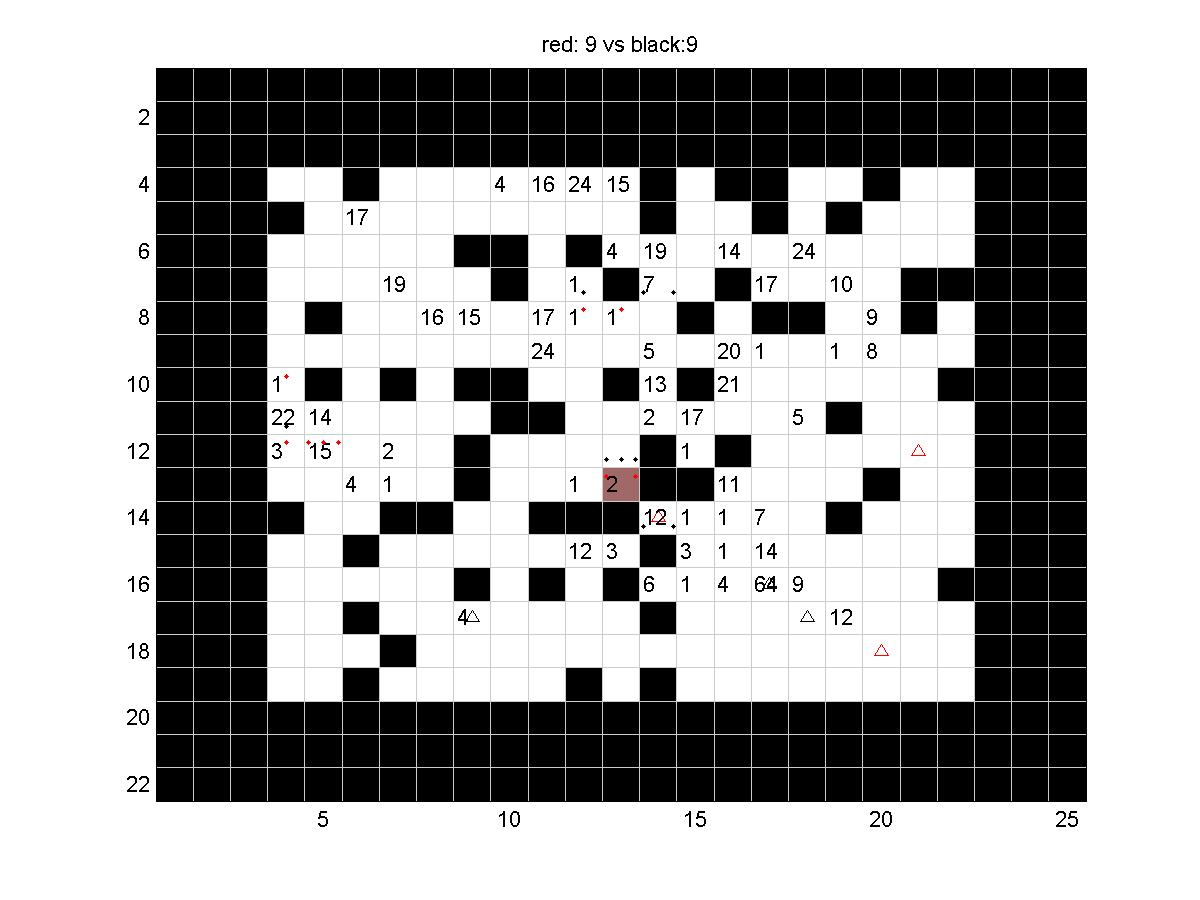
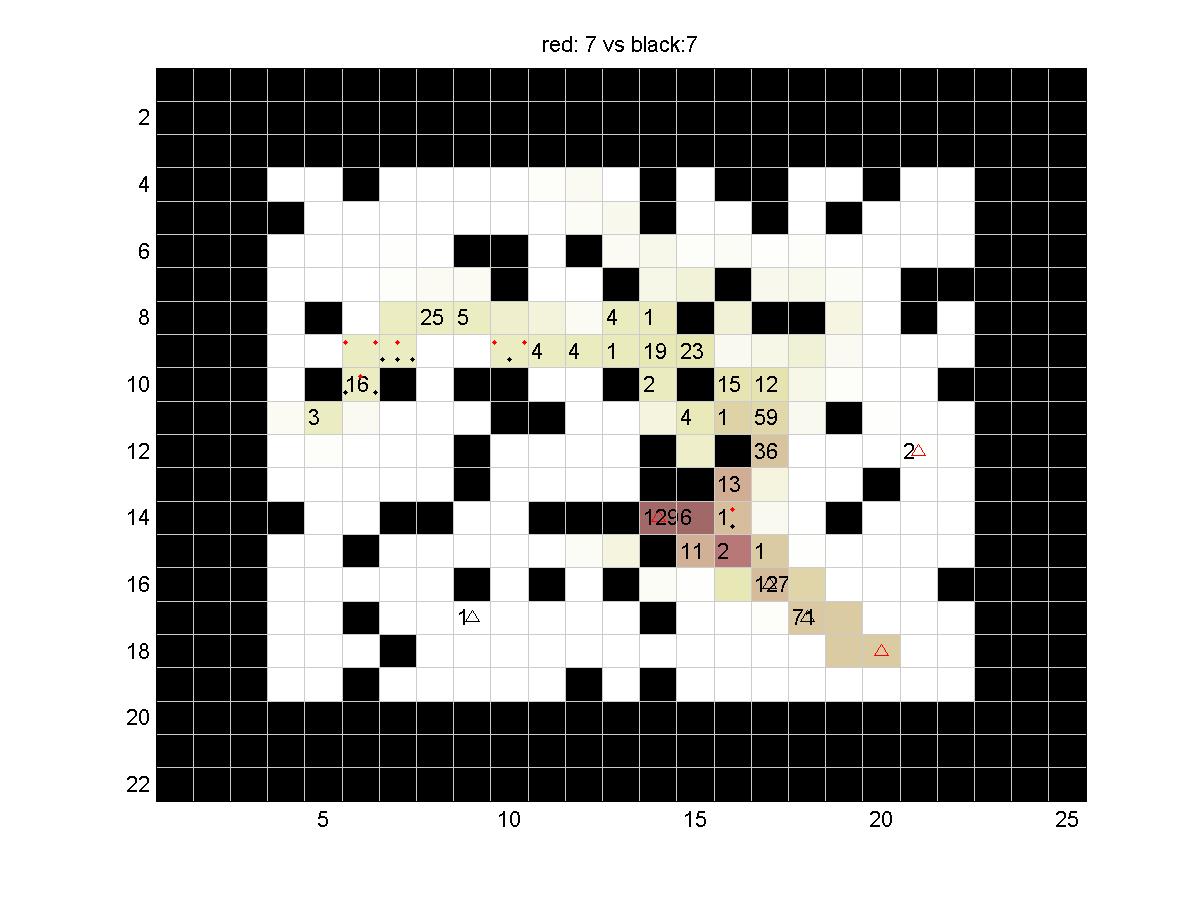
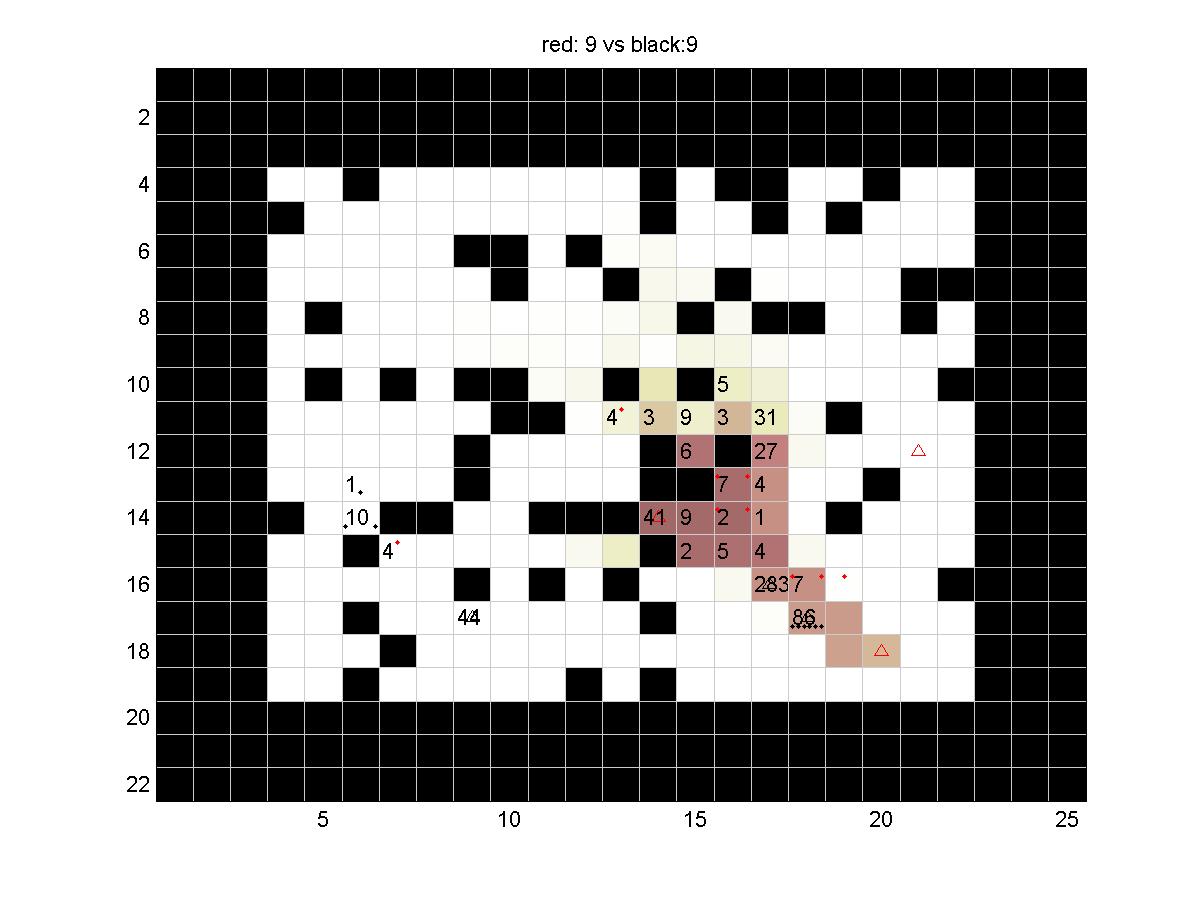
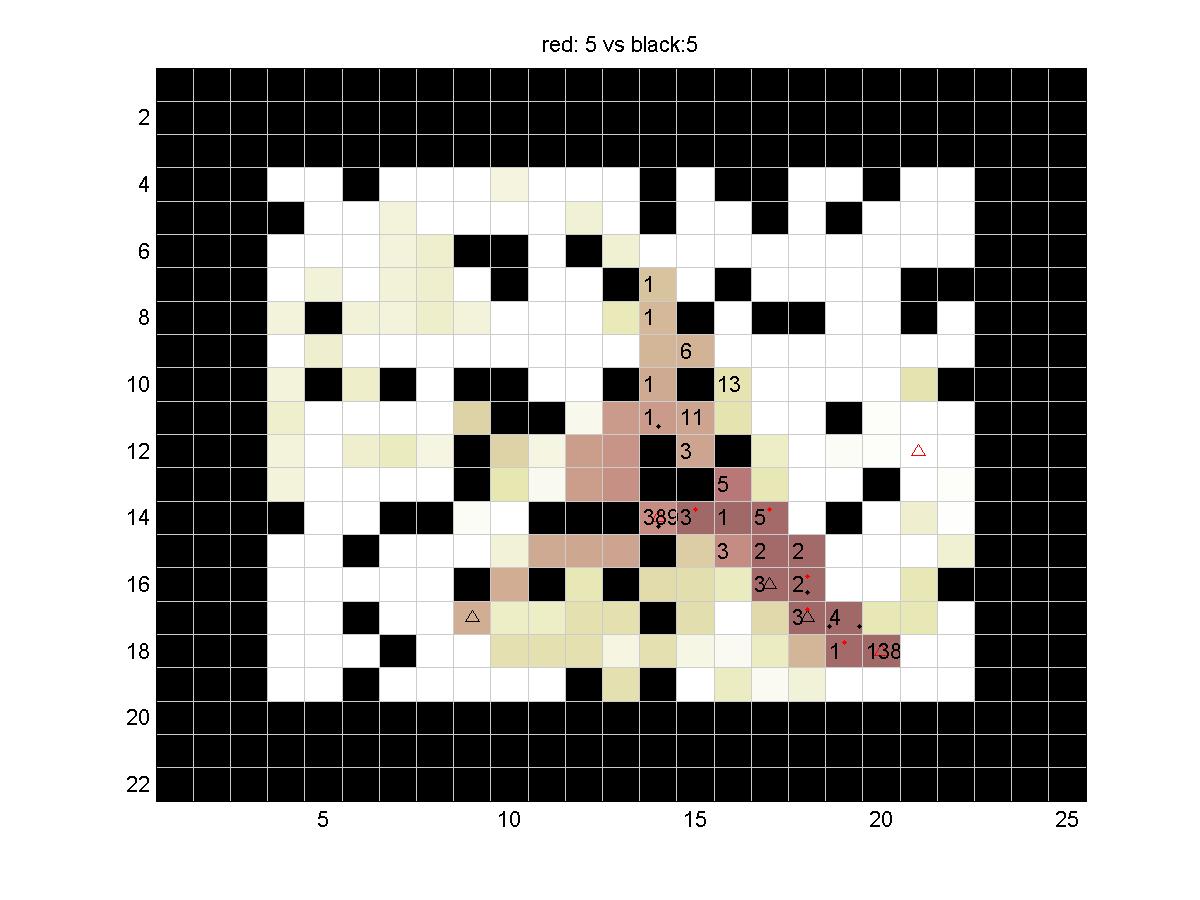
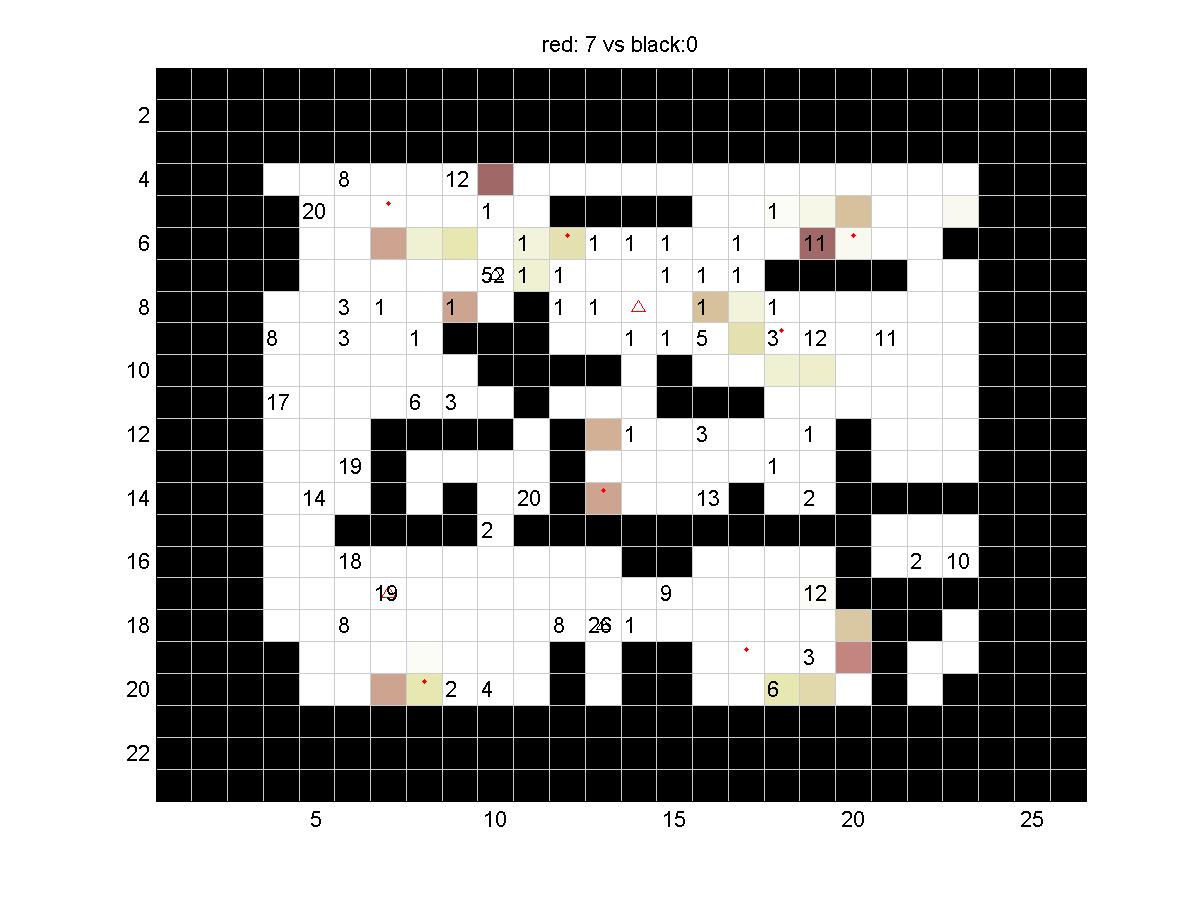
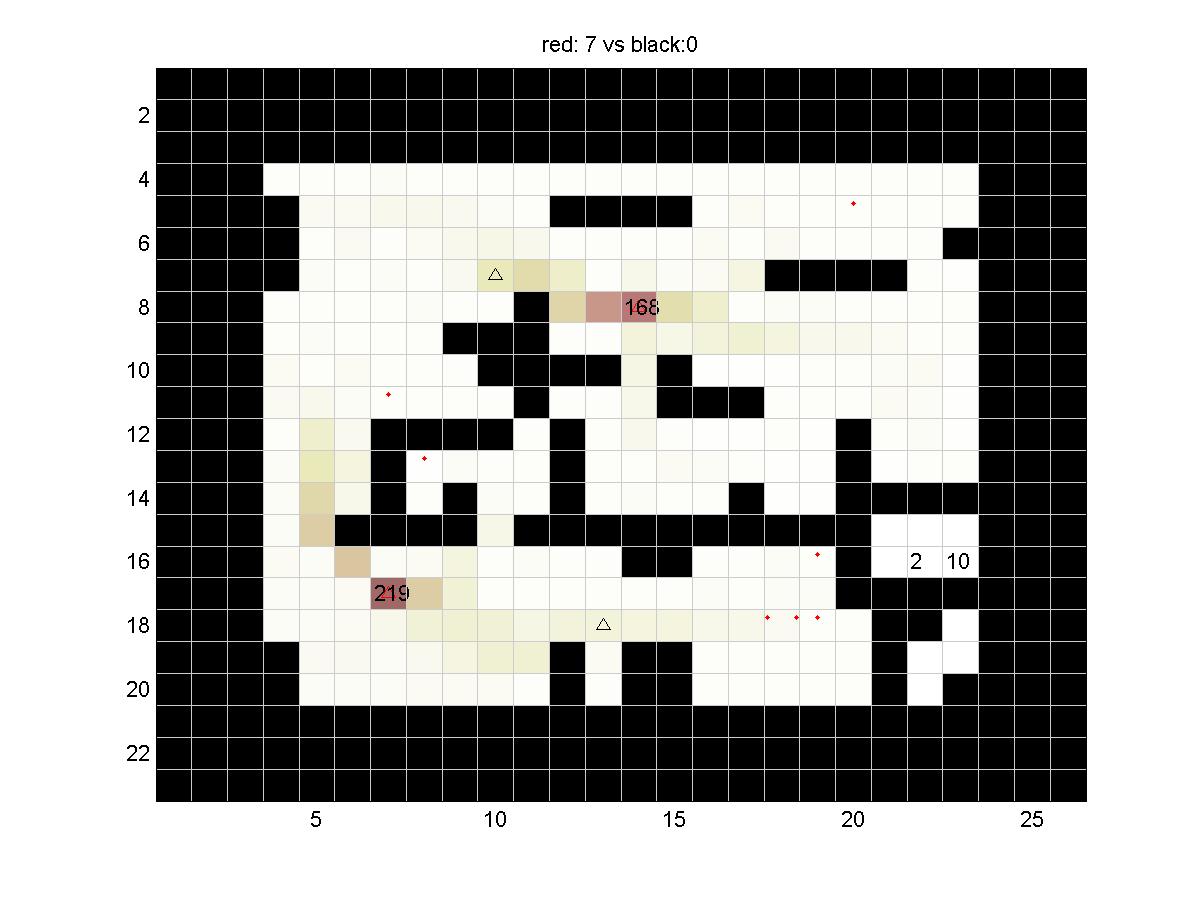
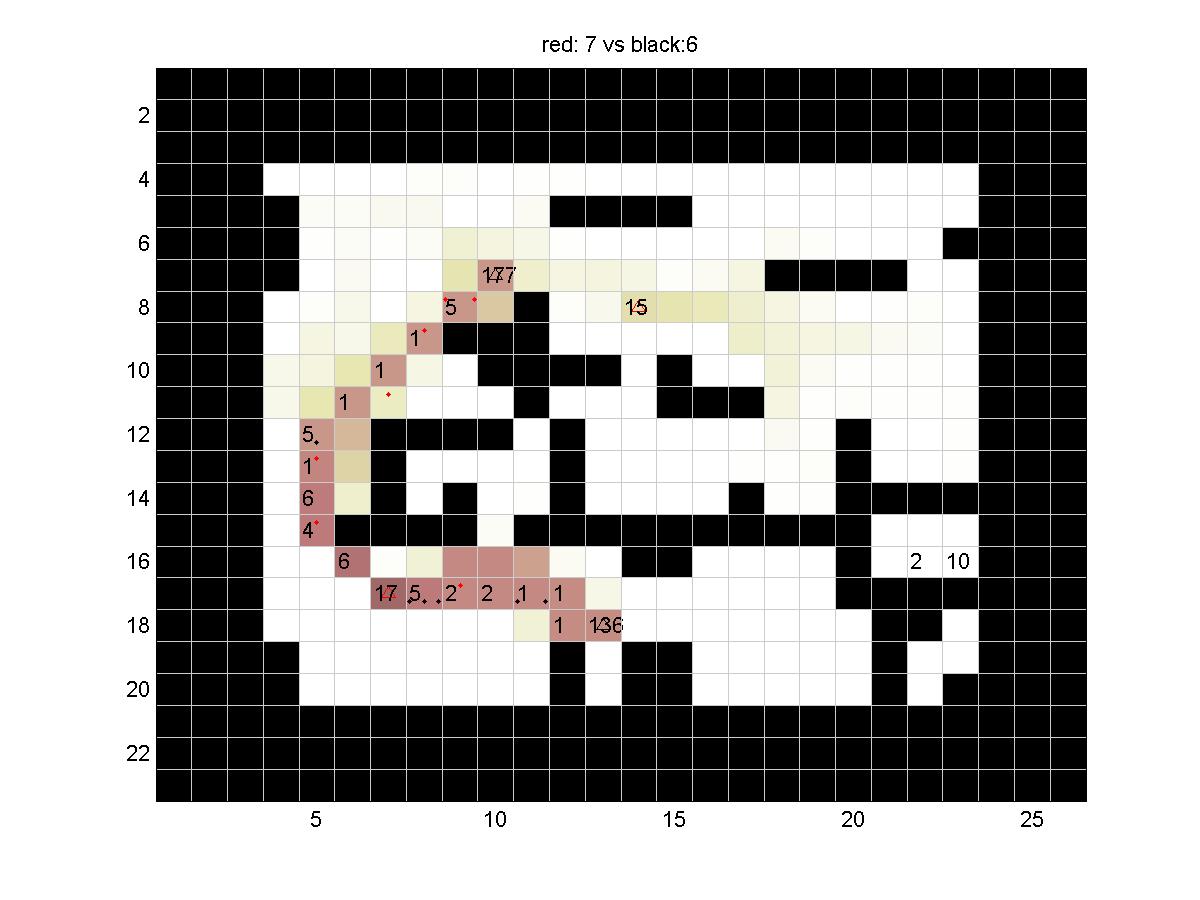
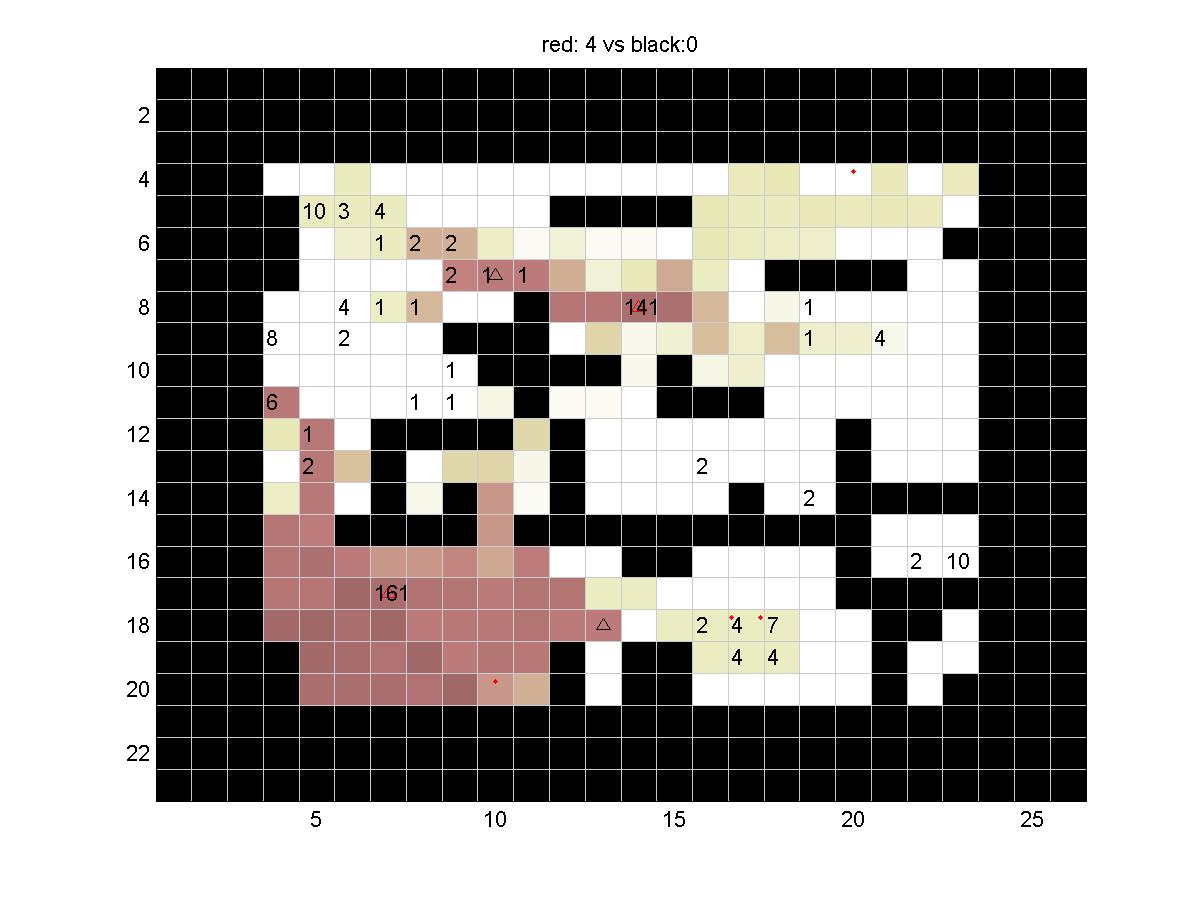
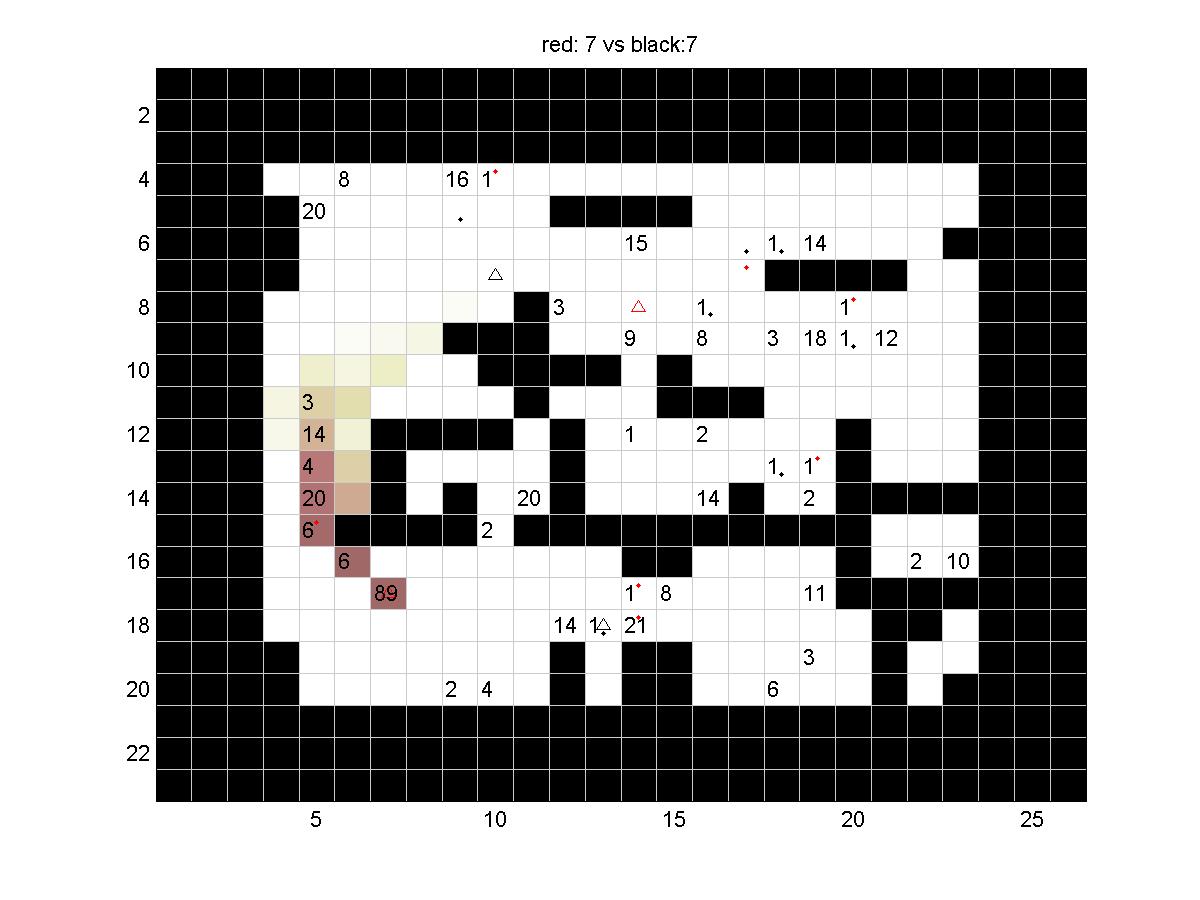
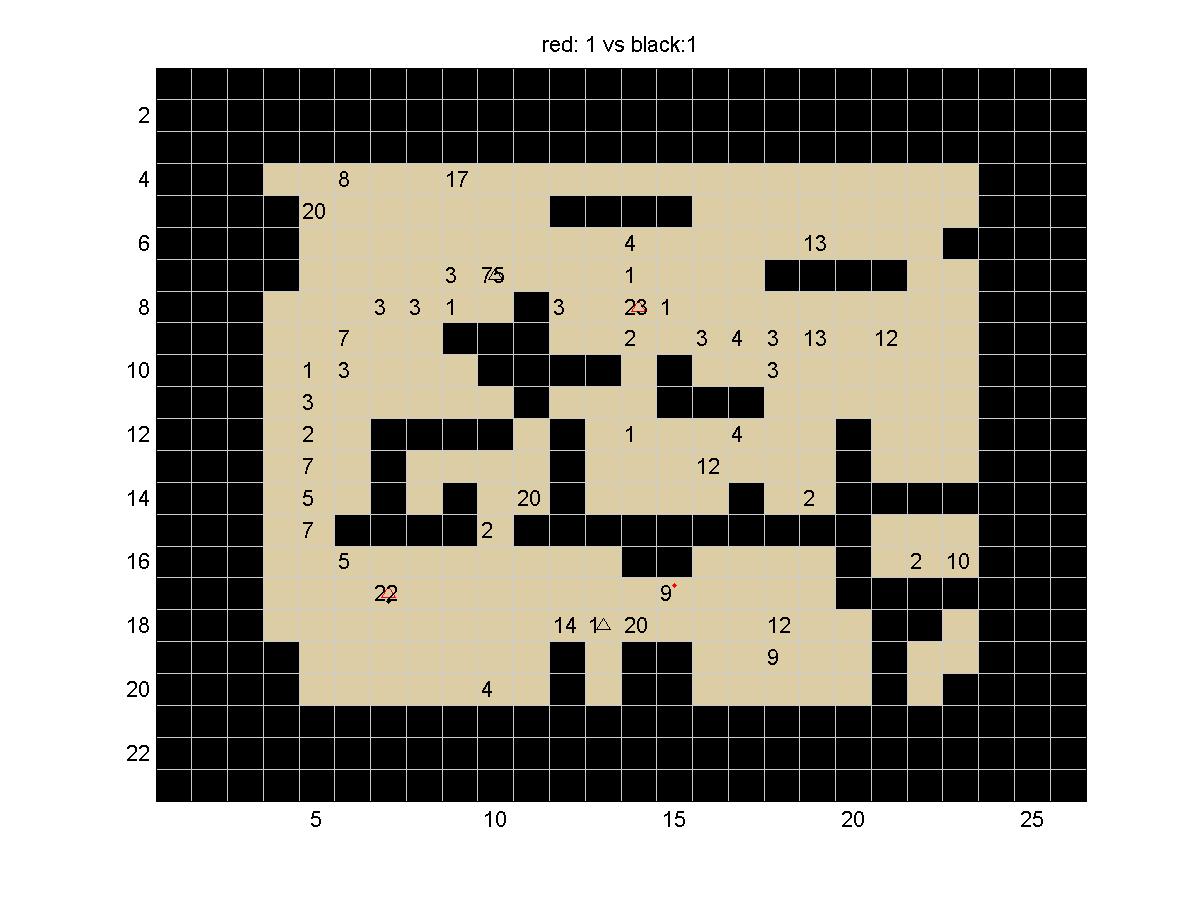
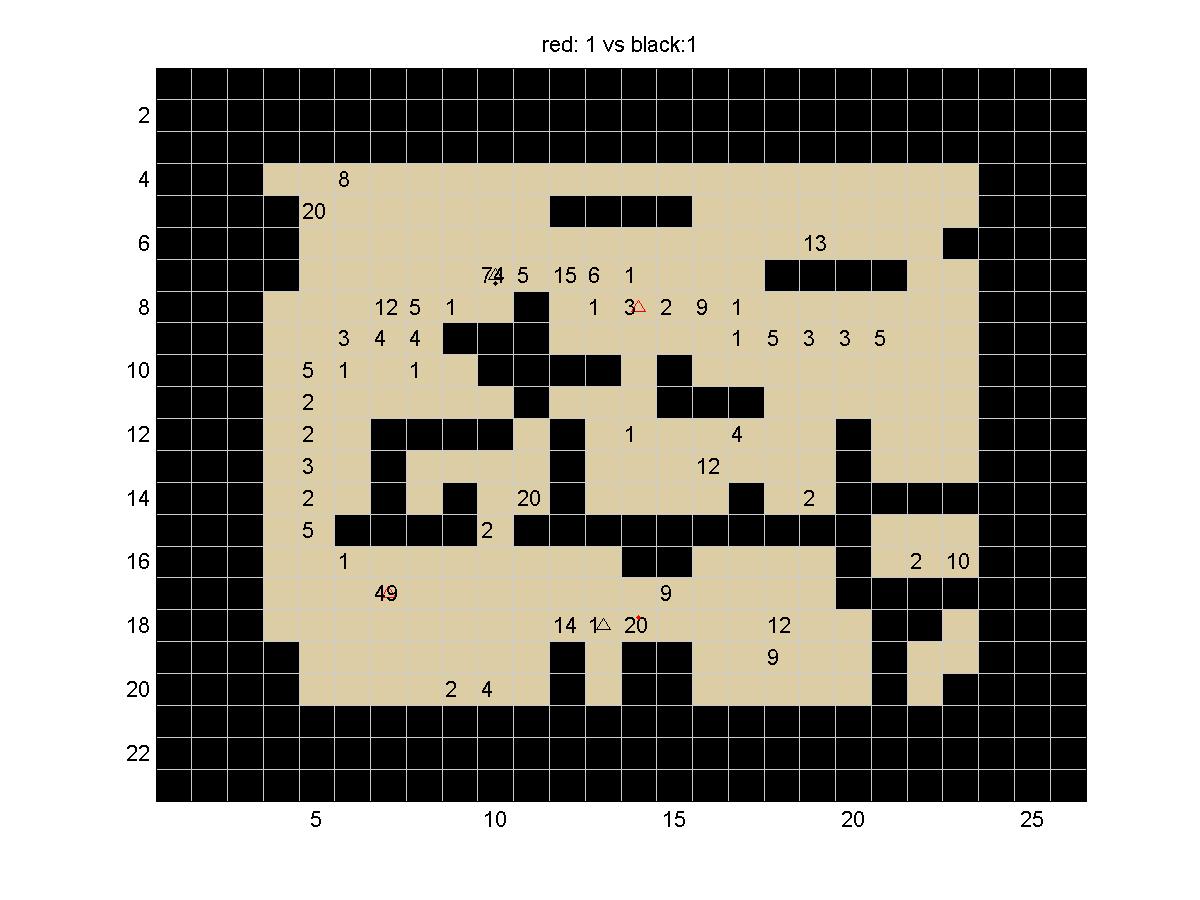
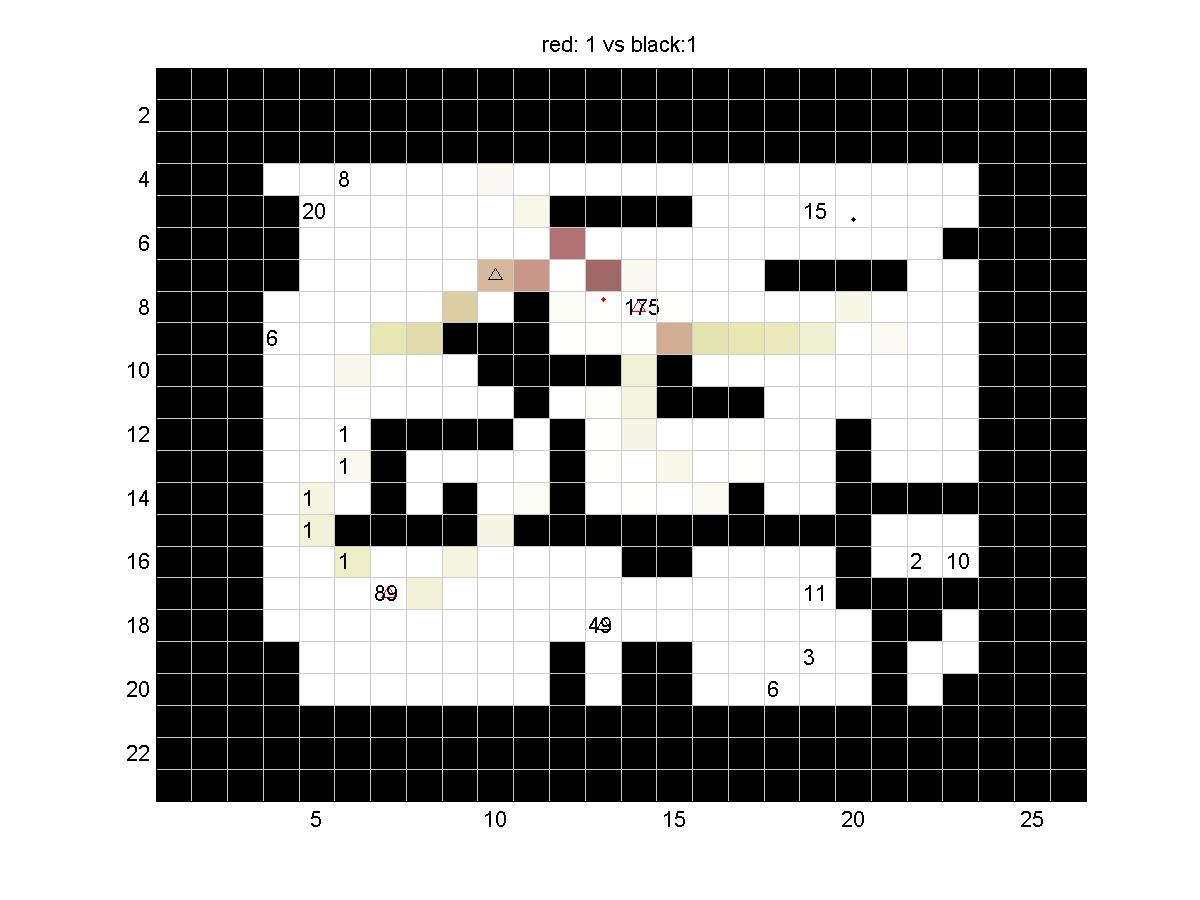
Board: 1
This board is meant for battle, with the winner using the remains of his army to move the sugar home. The big winners usually, but not always, we able to route the entire other army. 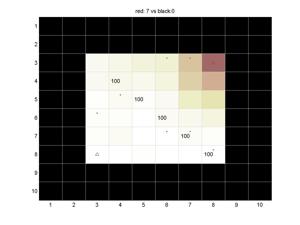
|
|---|
| Sample | Jan | Nathan | David | Markus | Nathan | Edin | Fabio |
|---|
| Sample | 0 | 100 | 100 | 100 | 100 | 100 | 100 | 100 |
| Jan | -73 | 0 | 15 | 5 | 0 | 89 | 100 | 84 |
| Nathan | -73 | -18 | 68 | 100 | 100 | 100 | 100 | 100 |
| David | -73 | -1 | -68 | 7 | 99 | 85 | 85 | 100 |
| Markus | -73 | 0 | 63 | -59 | 0 | 98 | 97 | 37 |
| Nathan | -73 | -73 | -73 | -72 | -71 | -1 | 4 | -11 |
| Edin | -73 | -60 | -73 | -56 | -39 | 20 | 10 | 25 |
| Fabio | -73 | -59 | -73 | -73 | -3 | NaN | 7 | 16 |
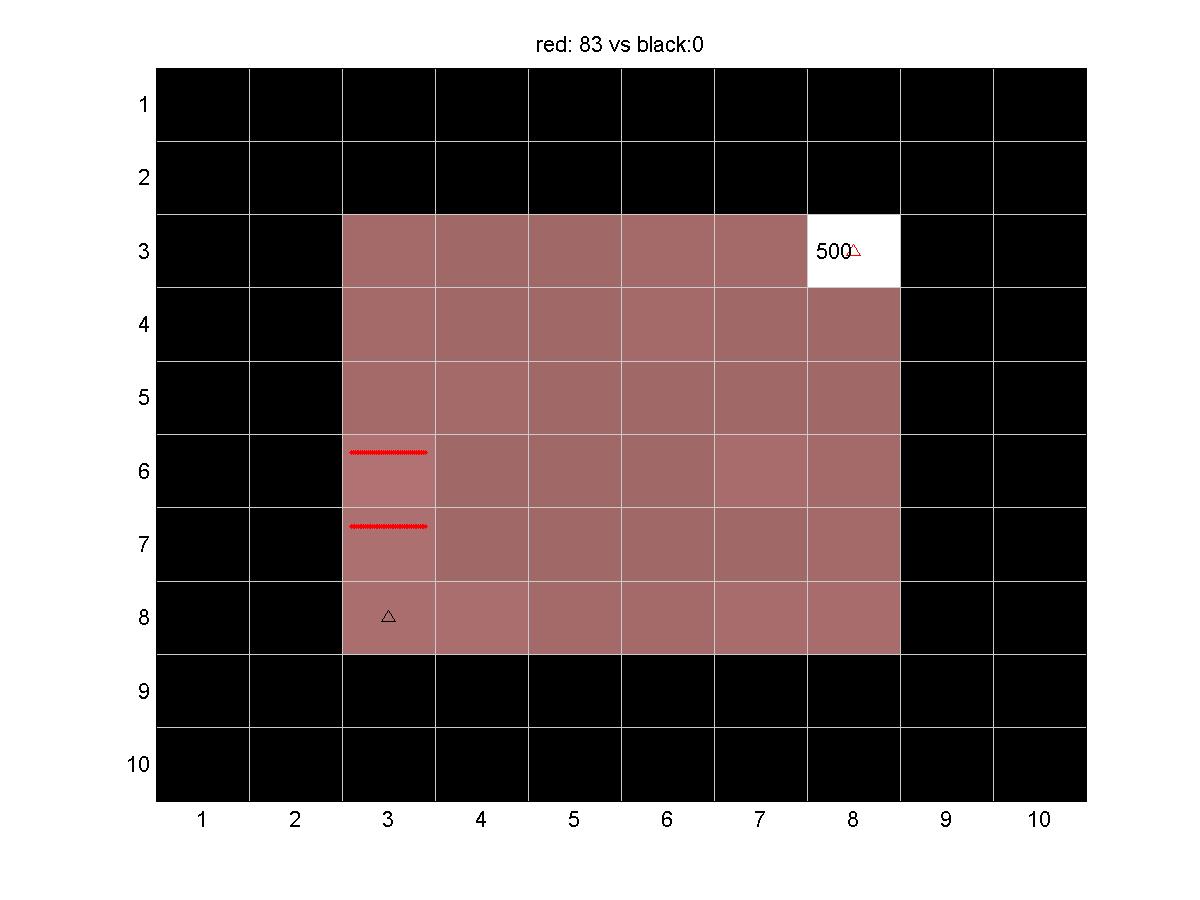
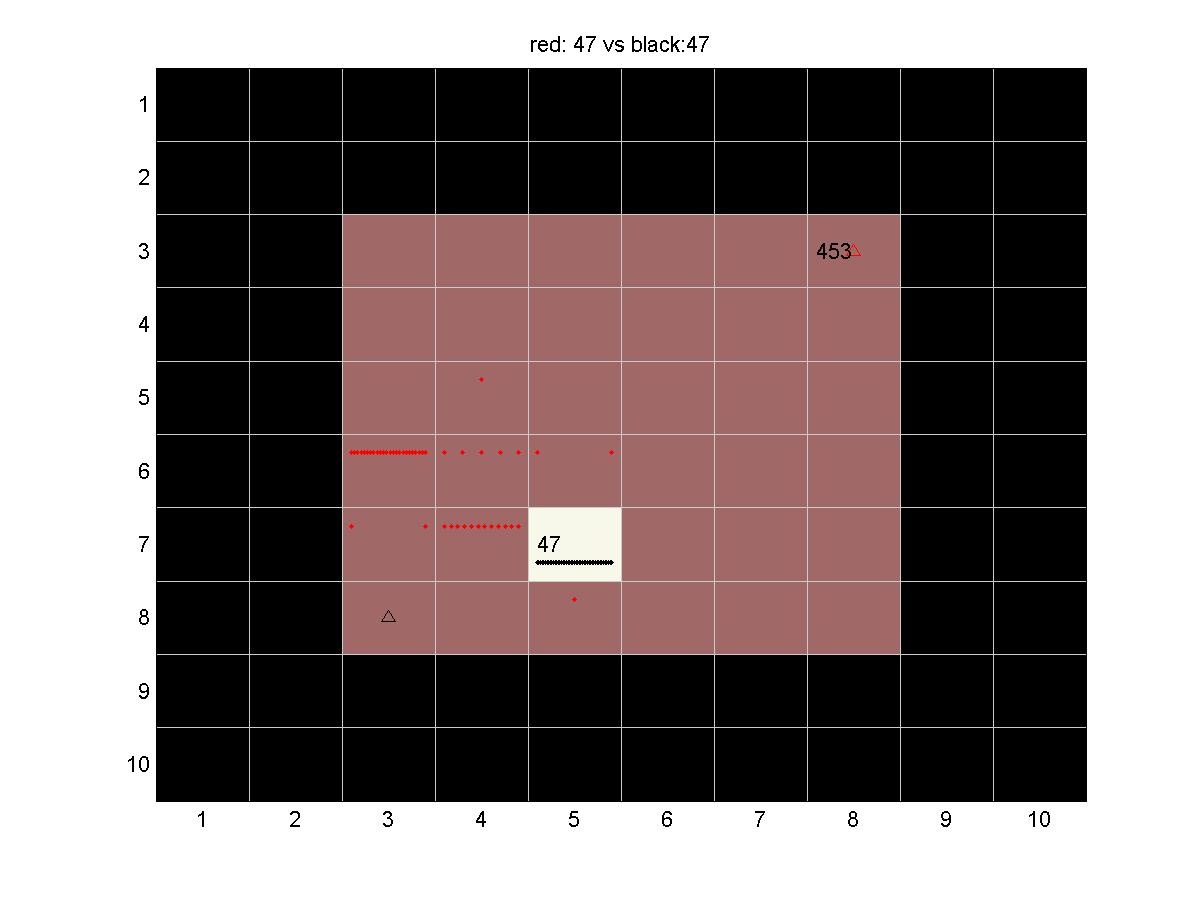
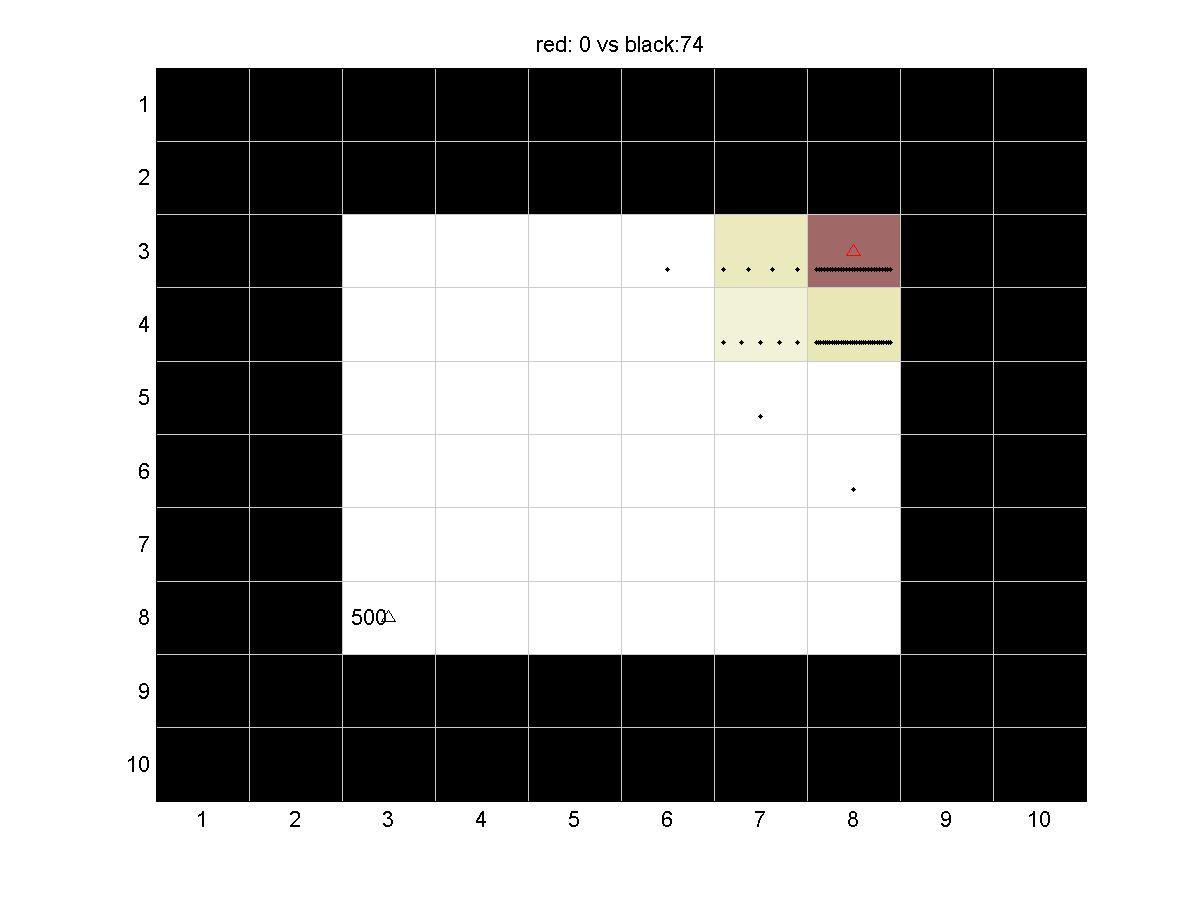
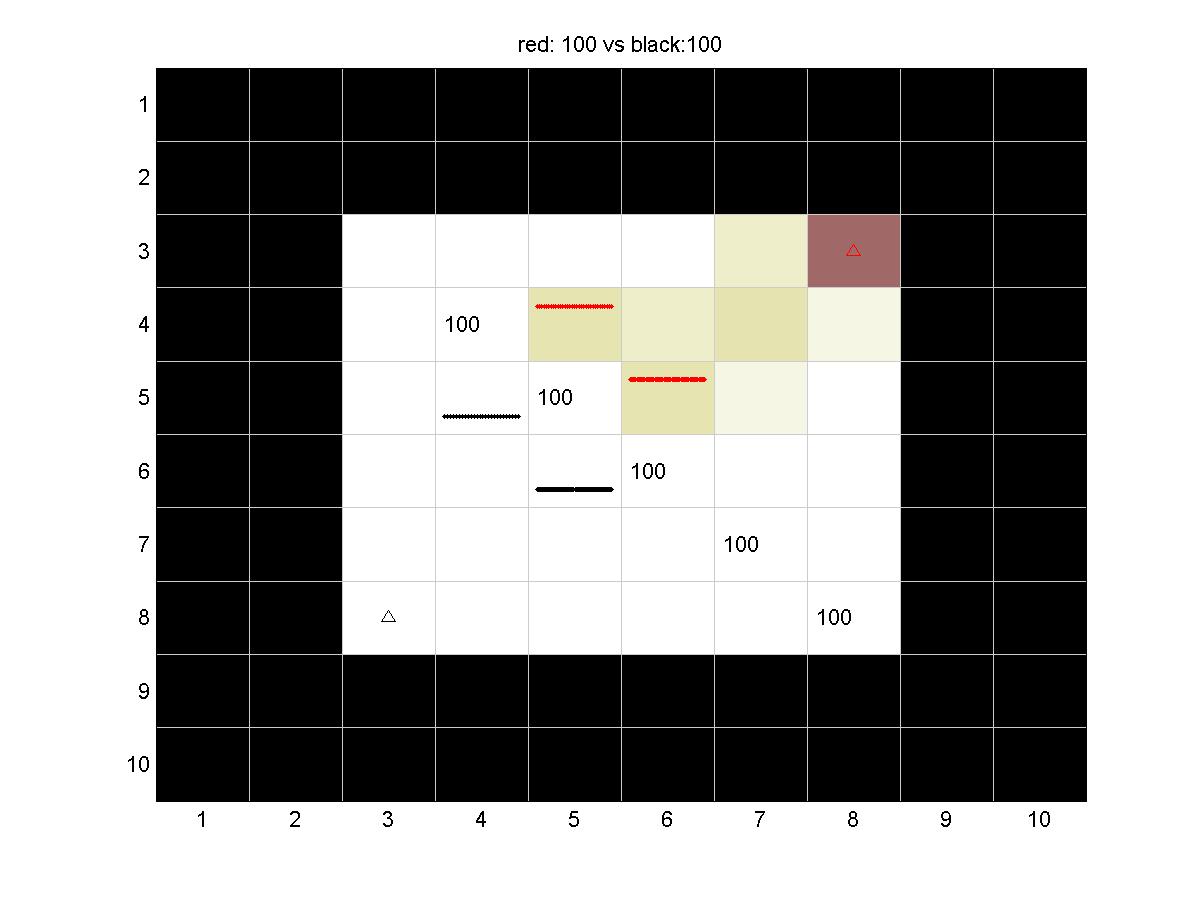
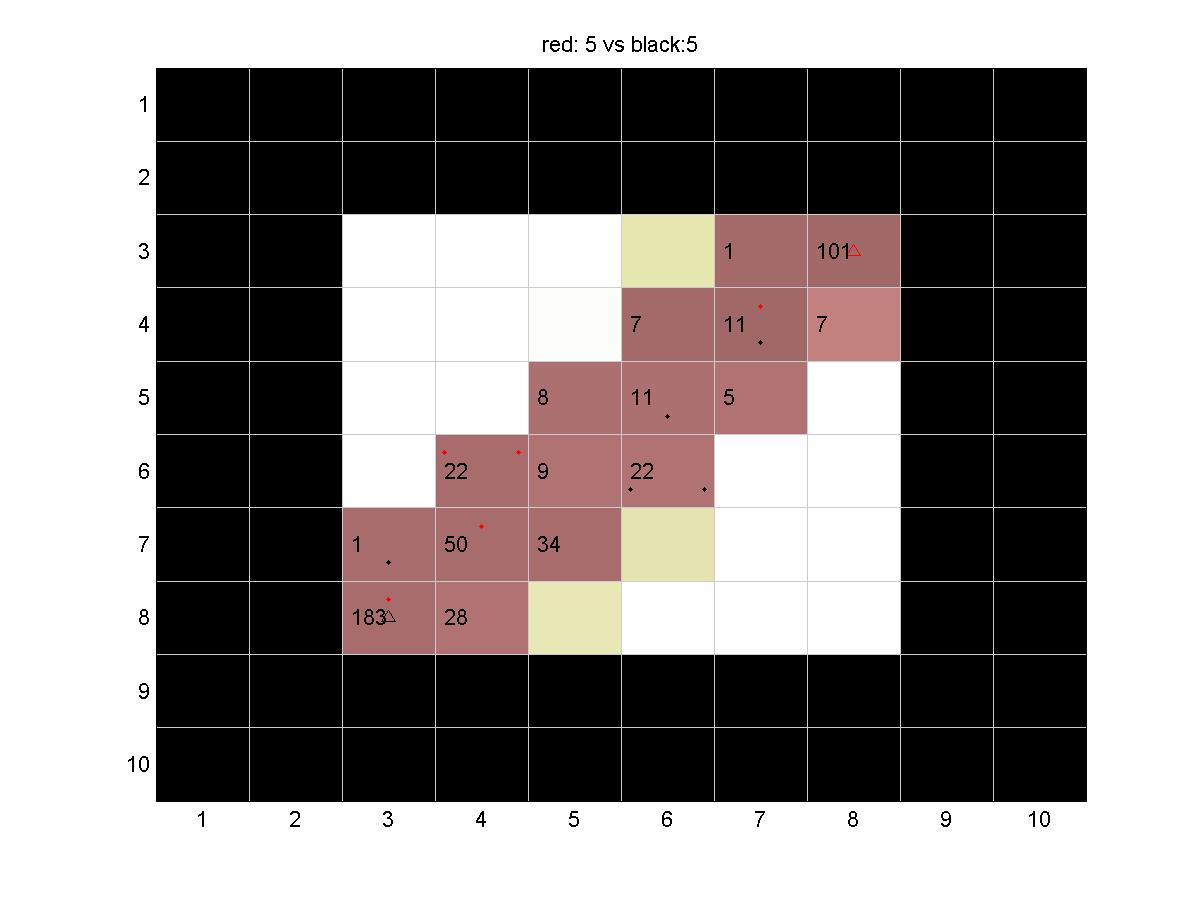
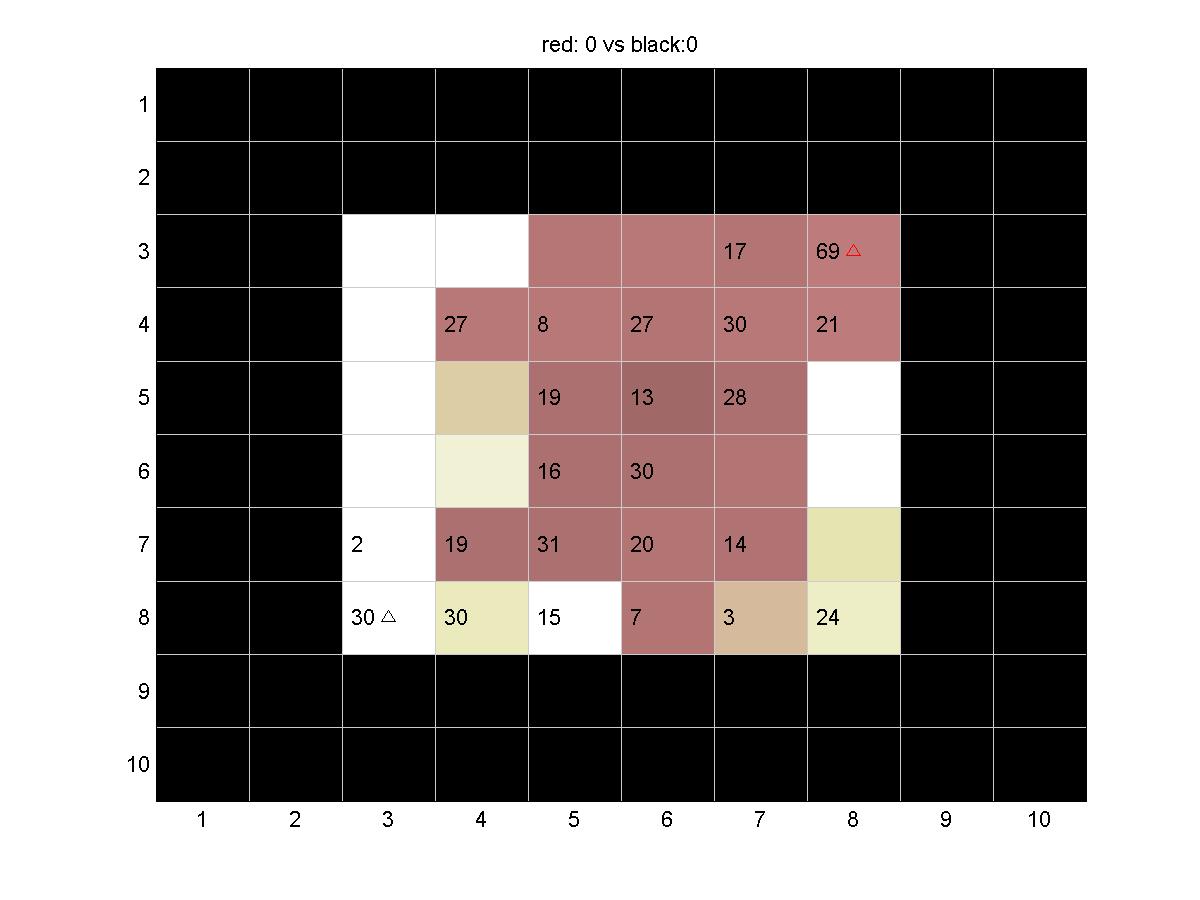
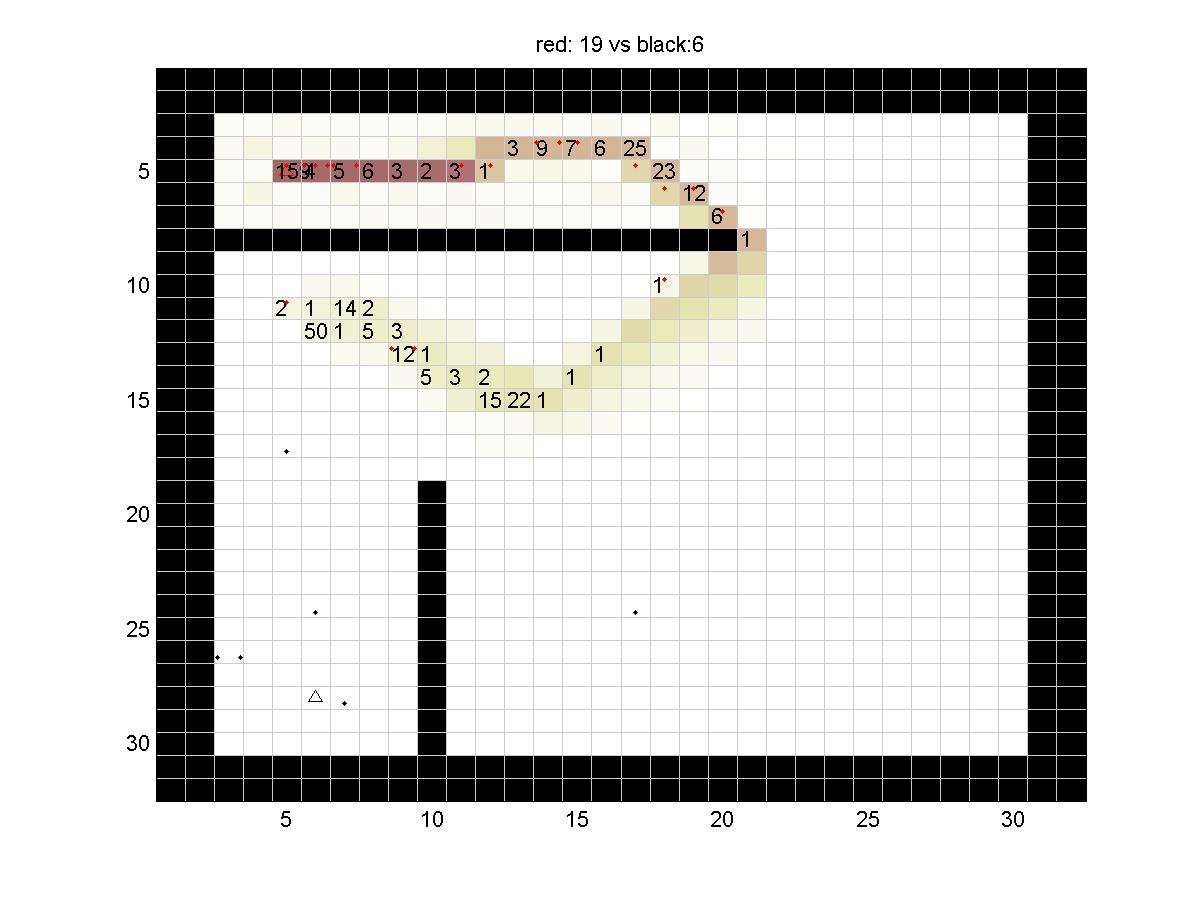
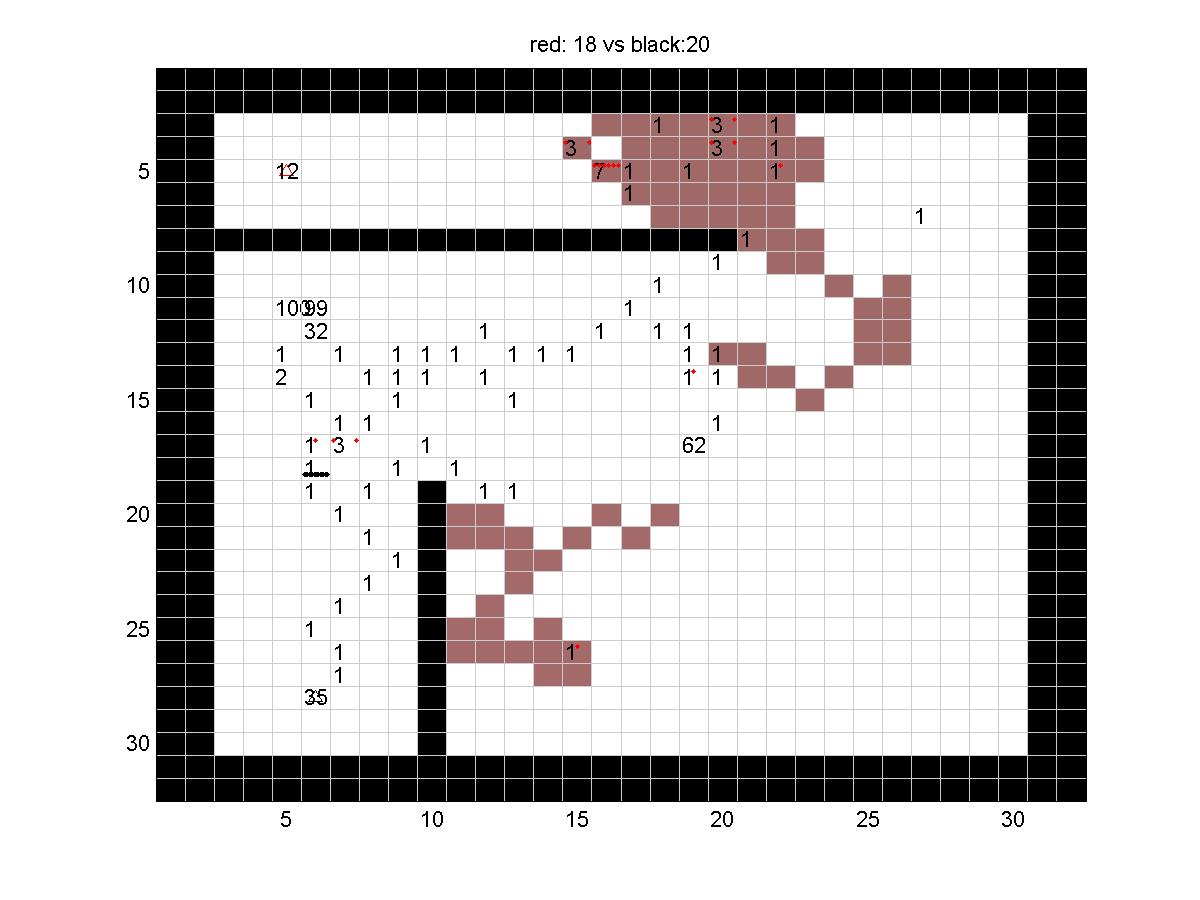
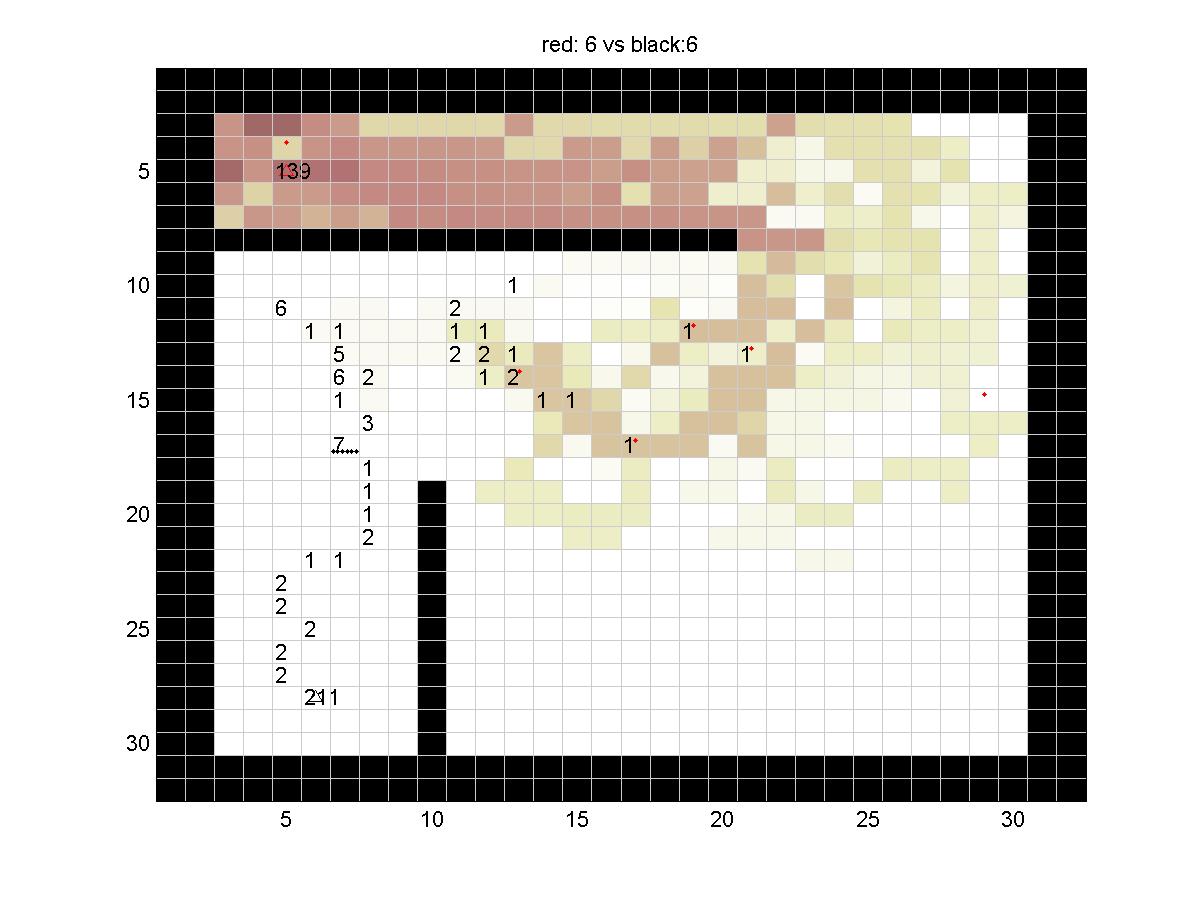
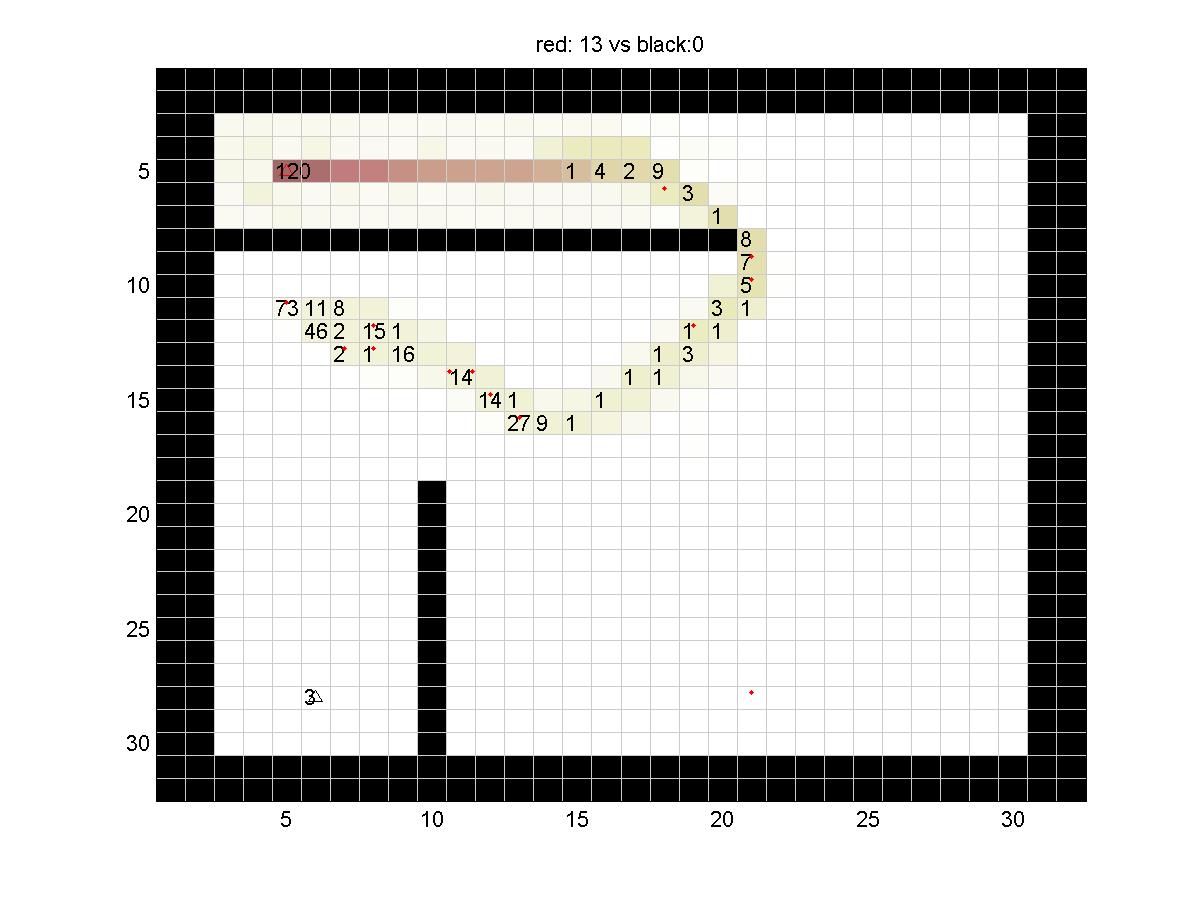
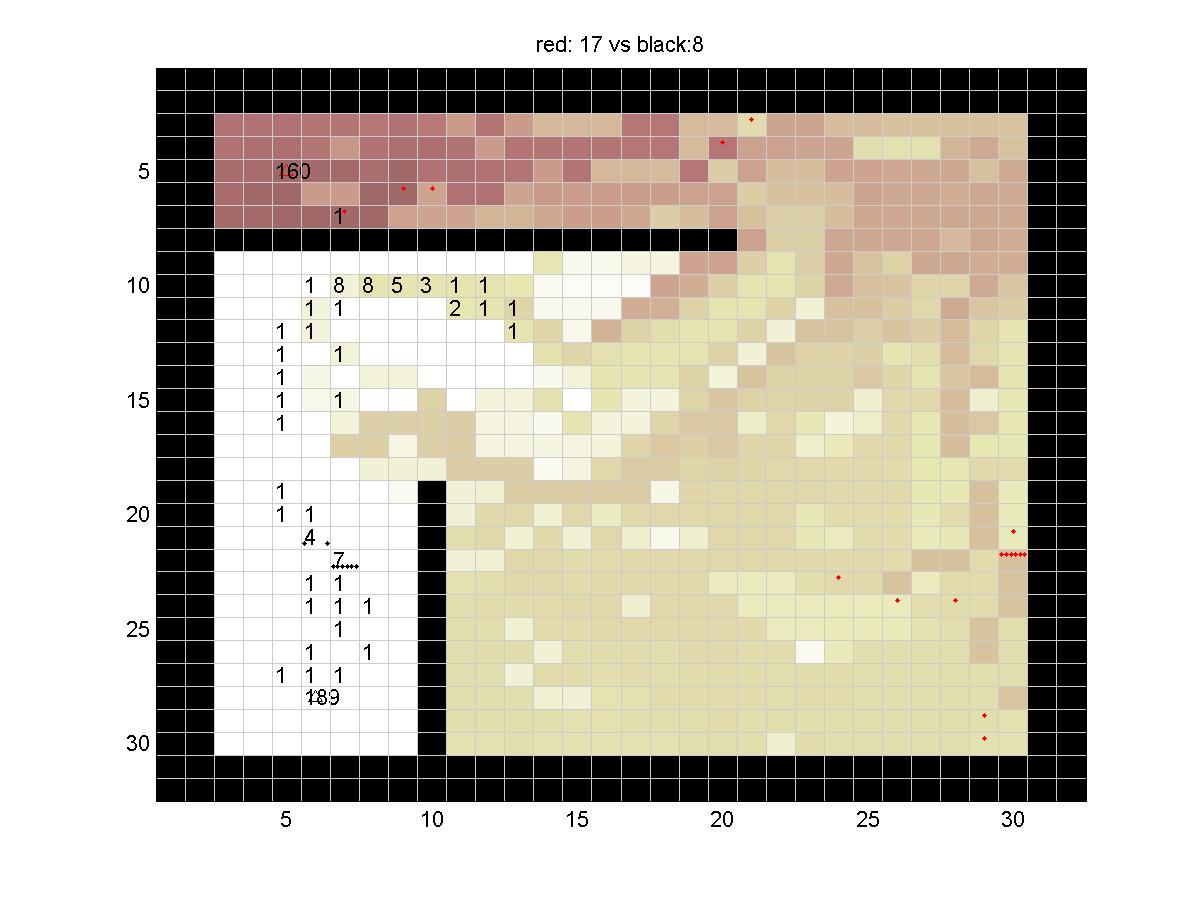
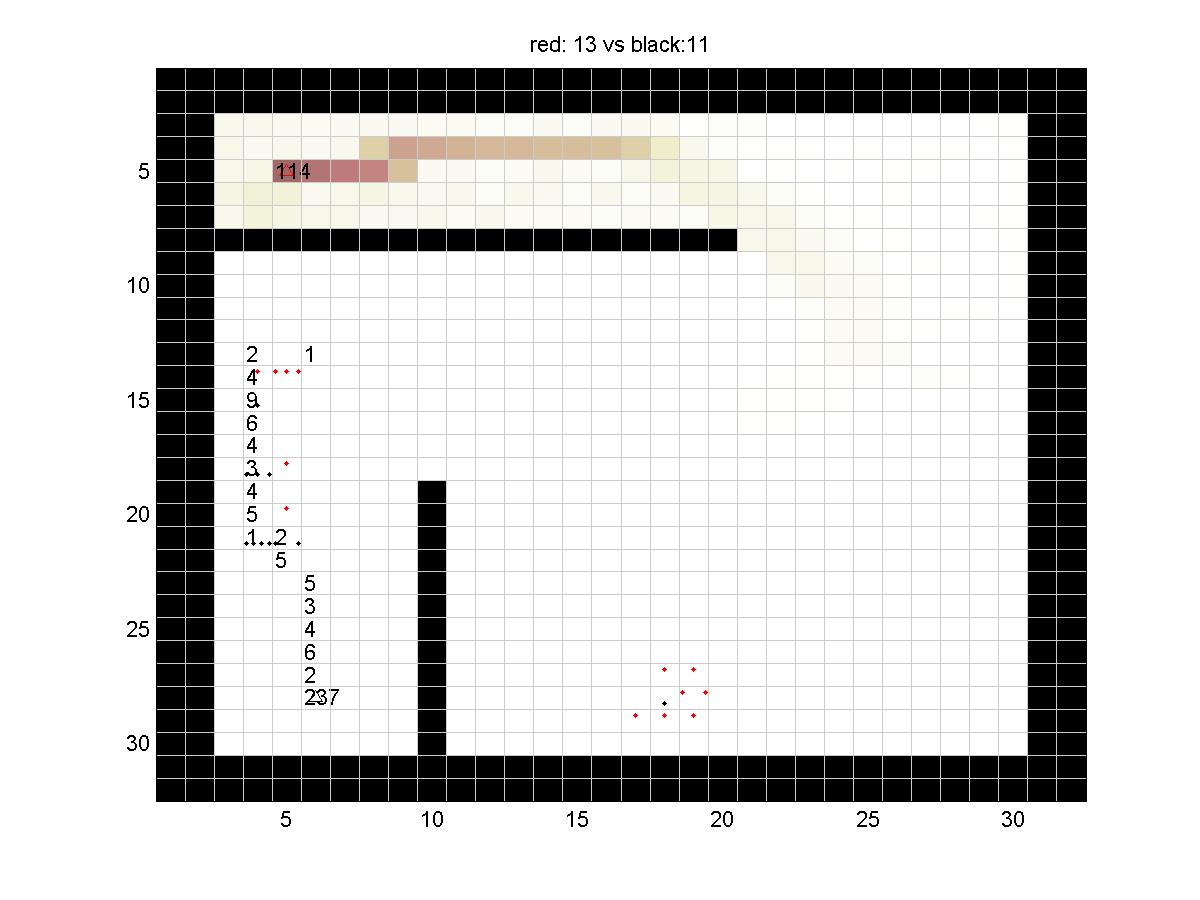
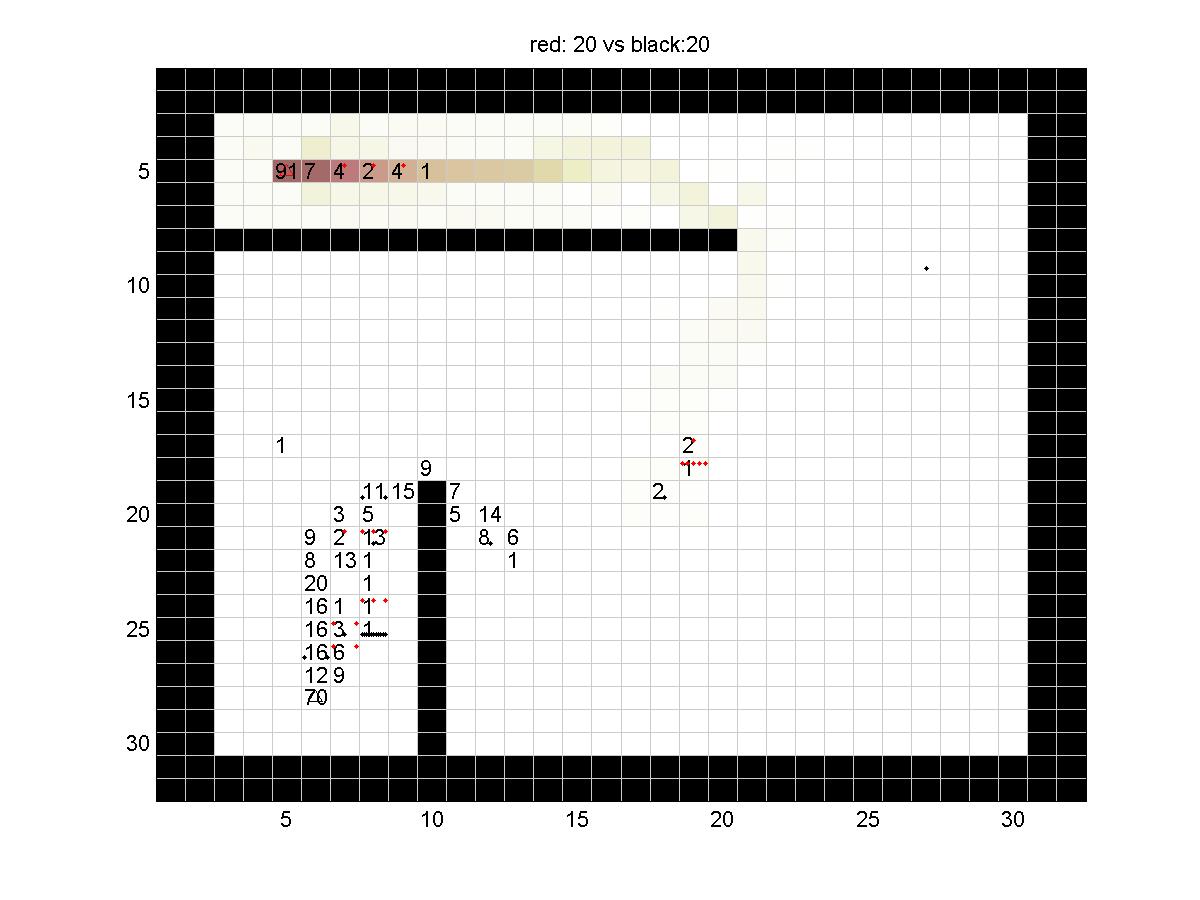
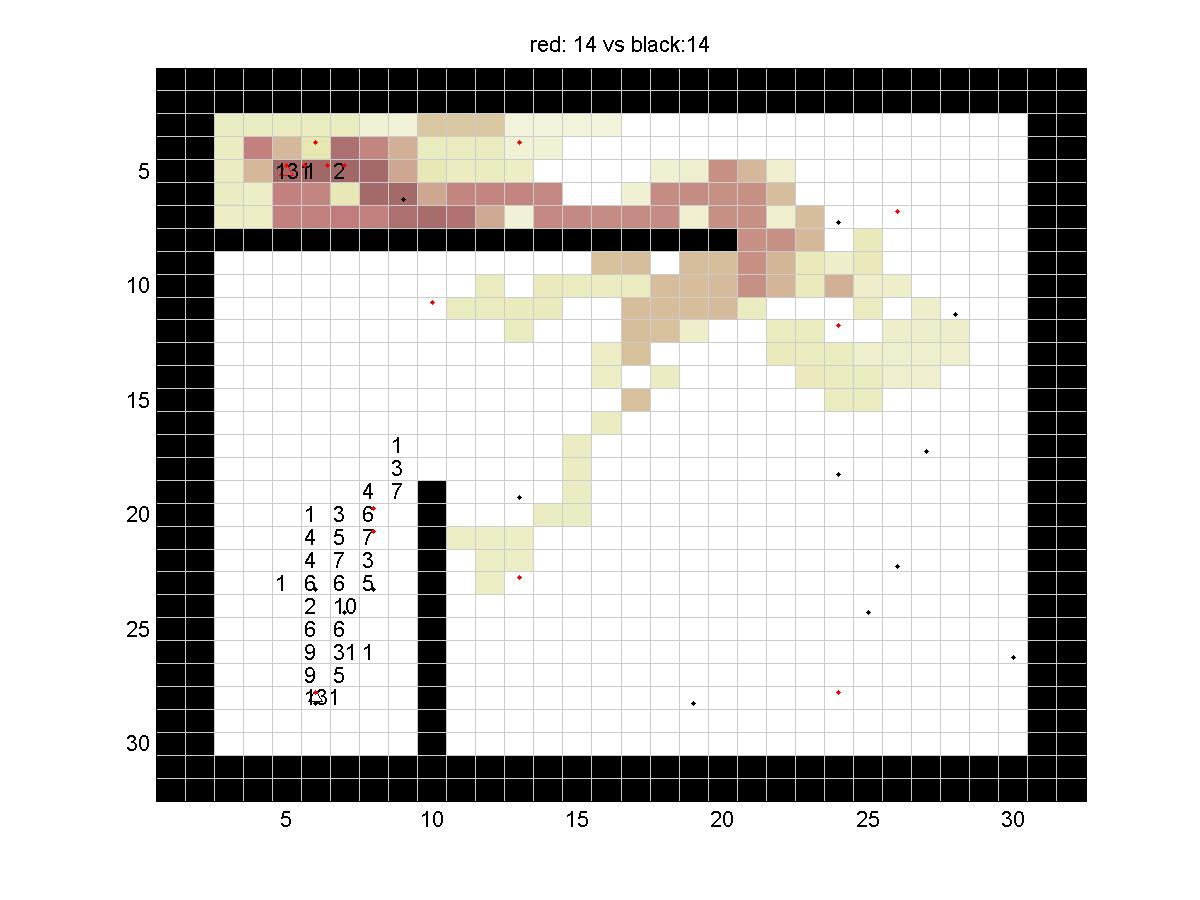
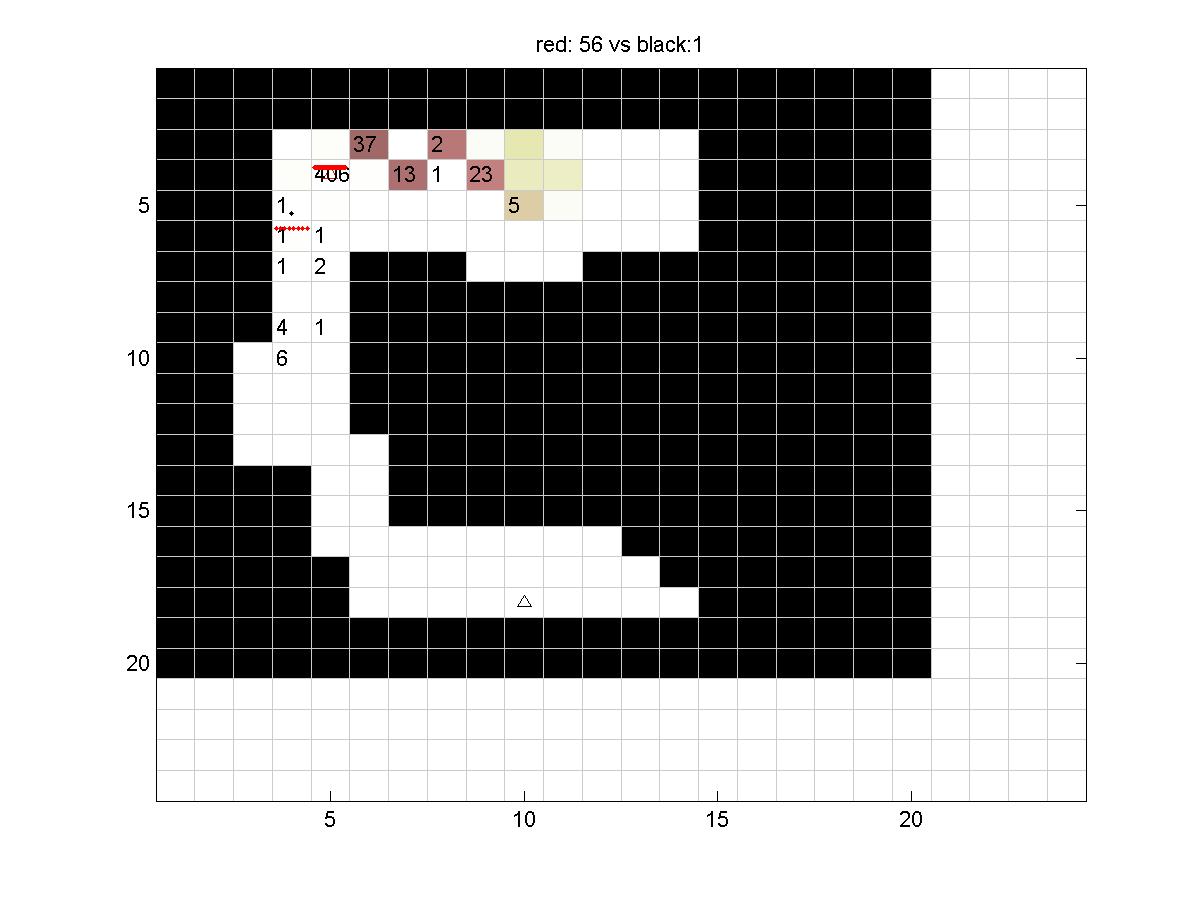
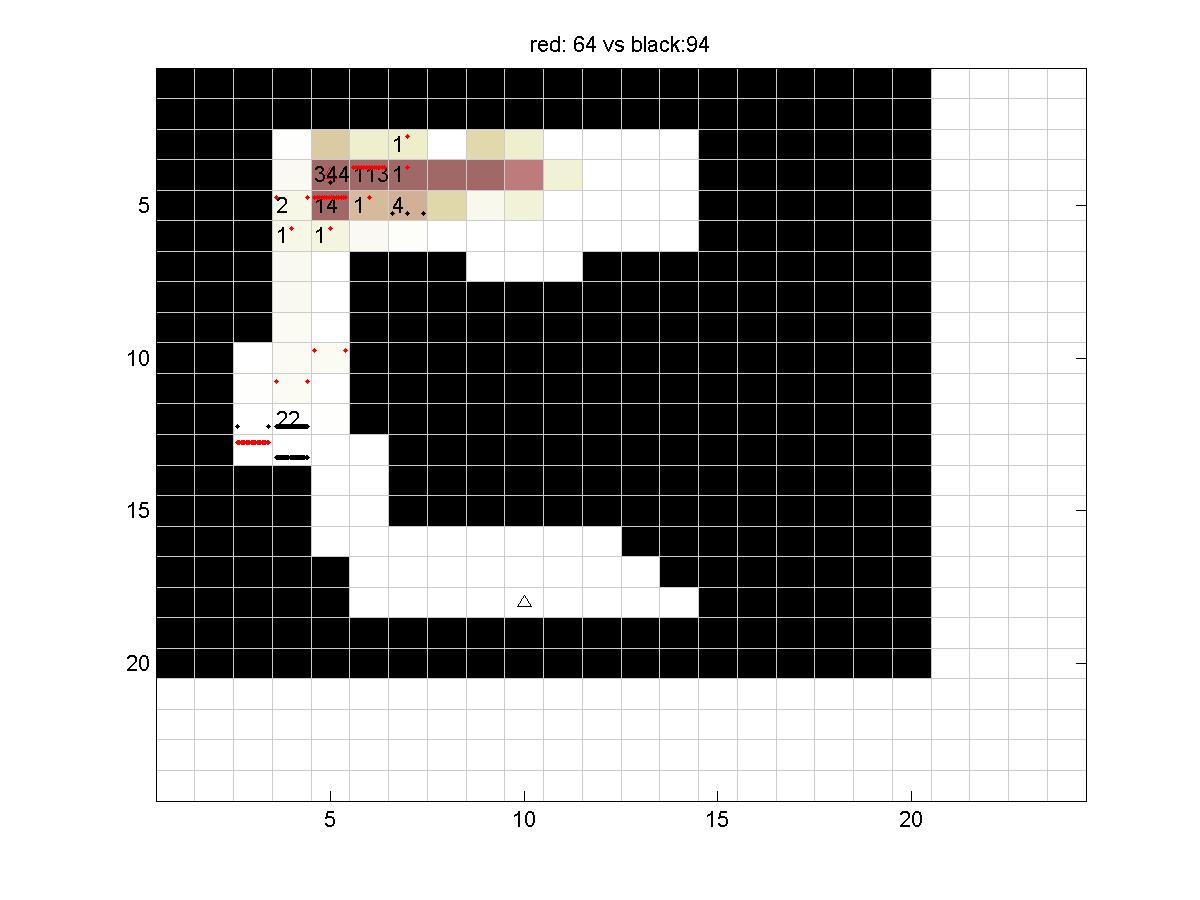
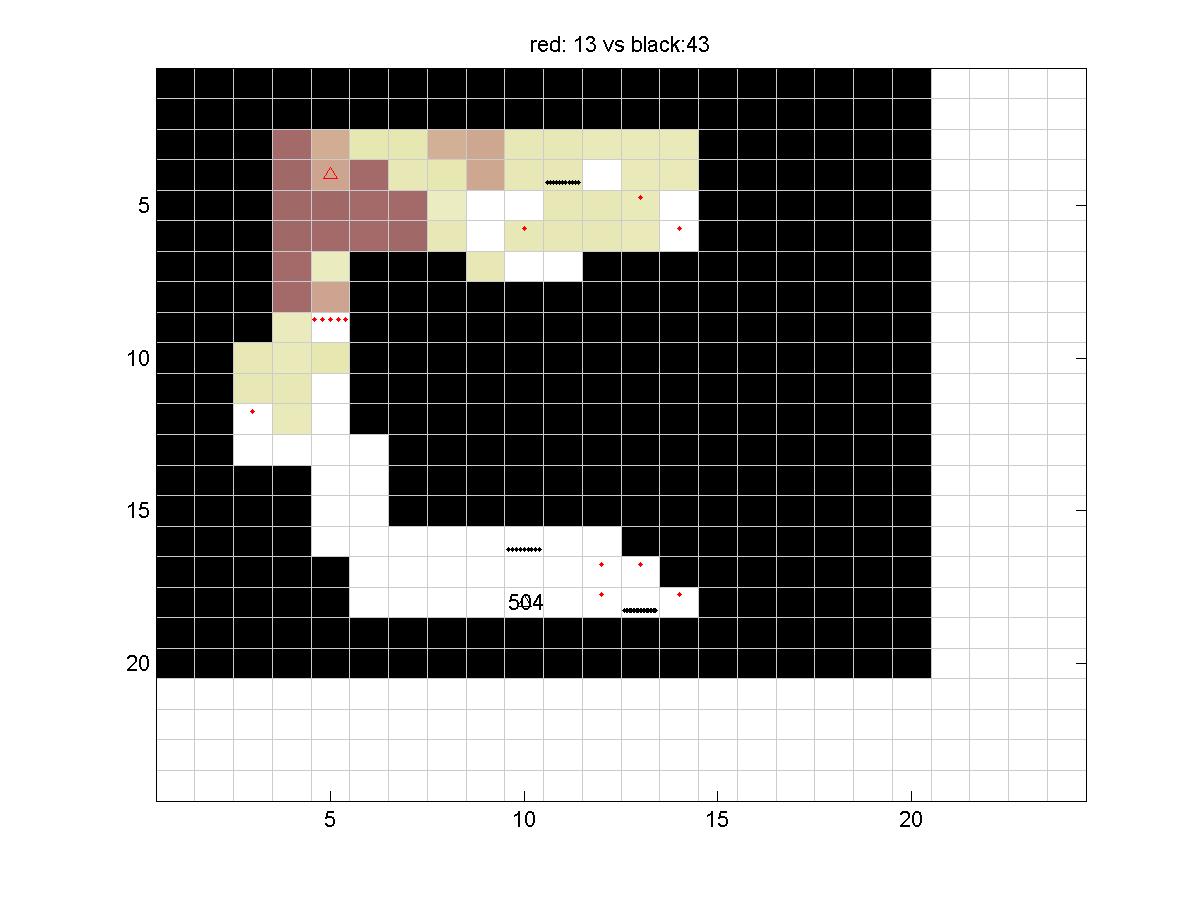
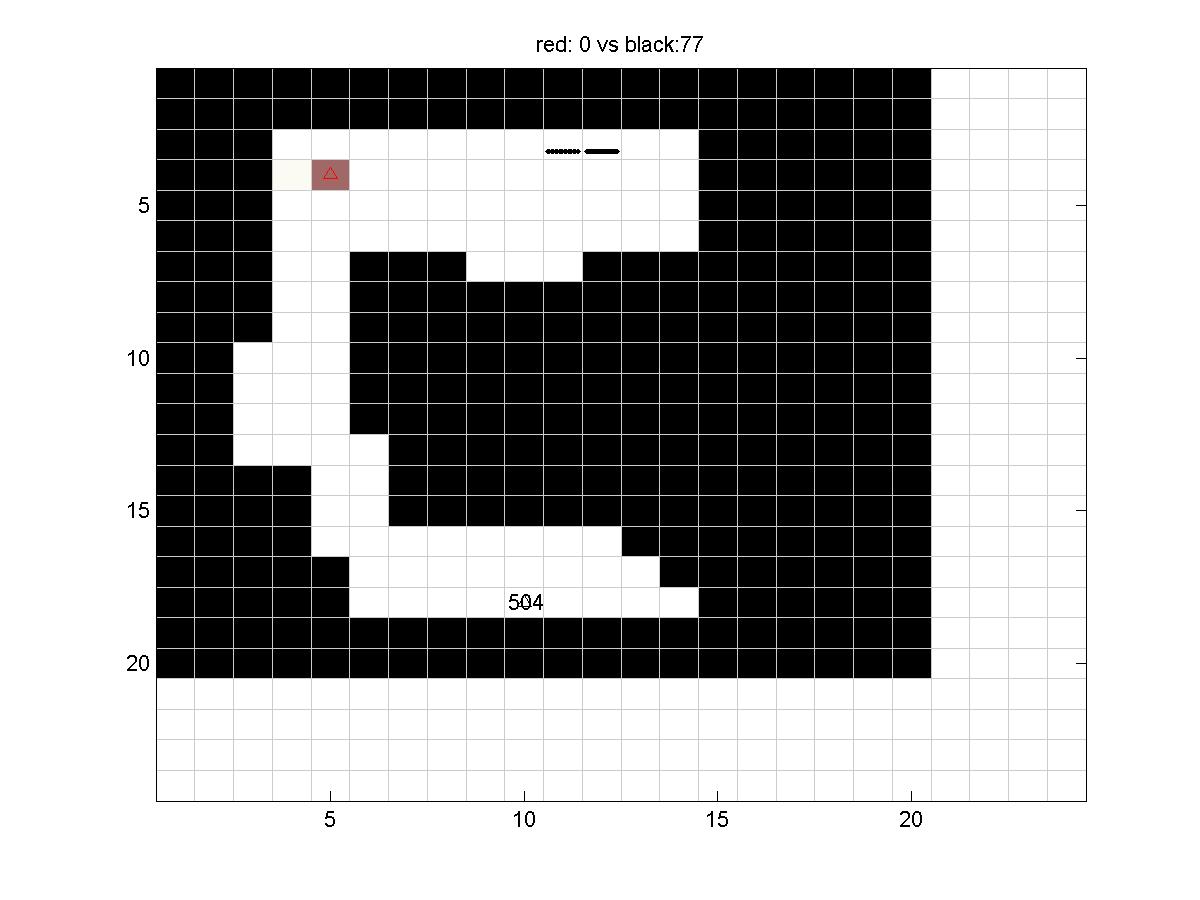
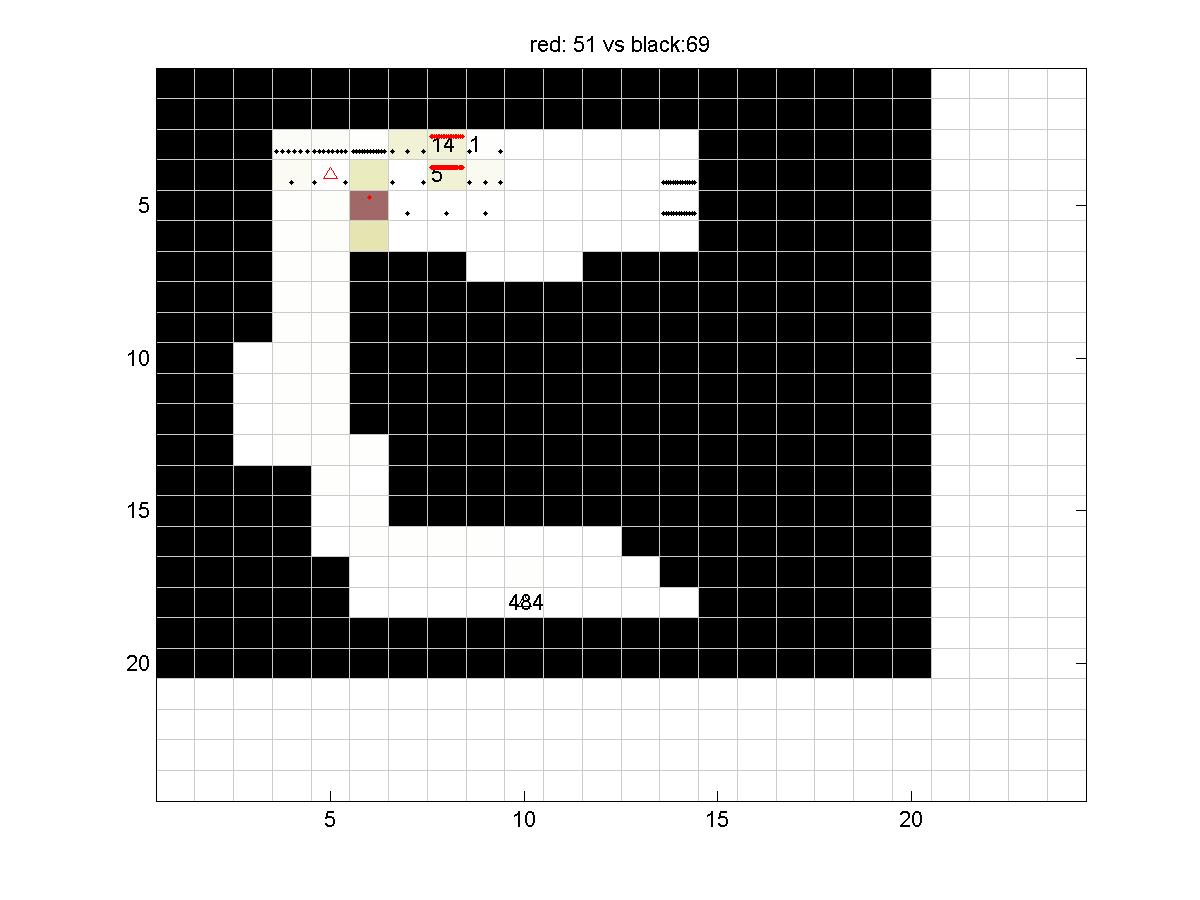
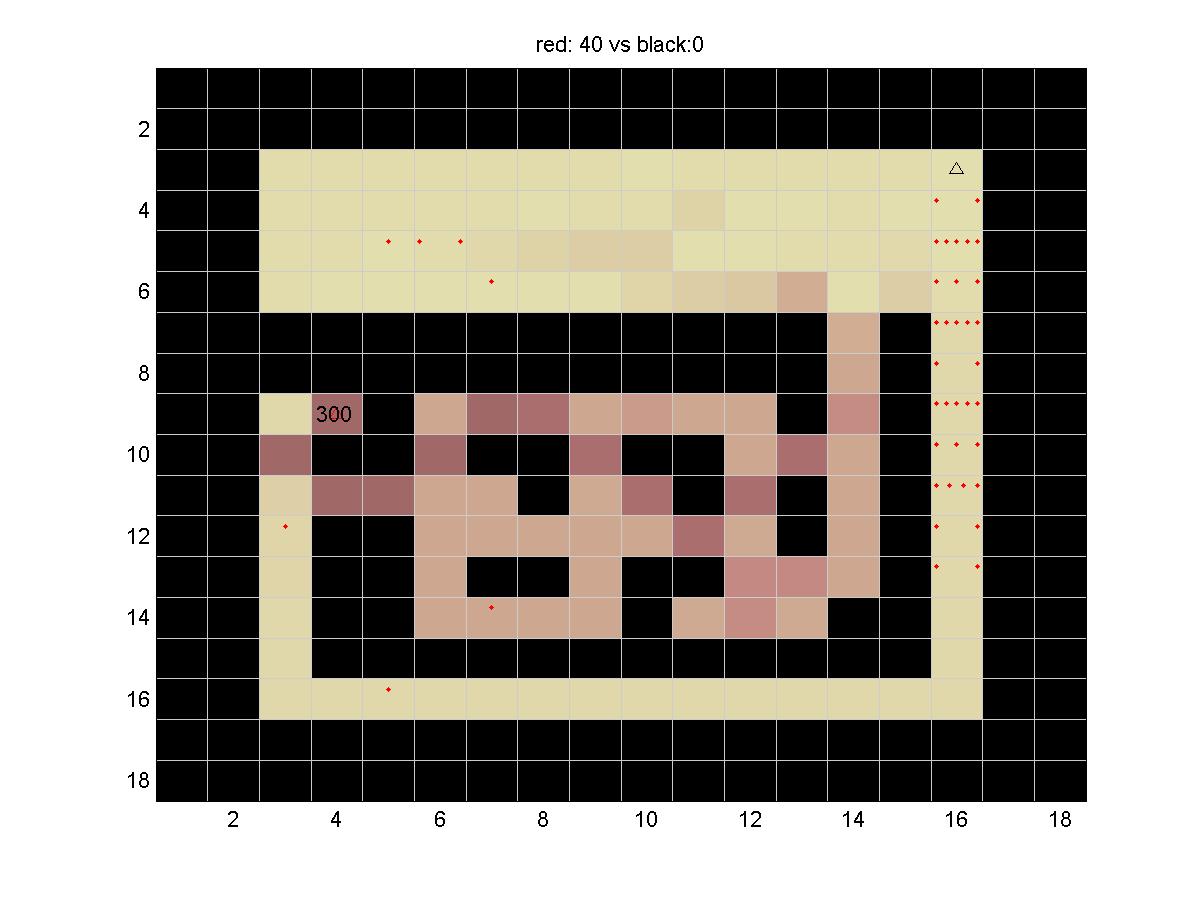
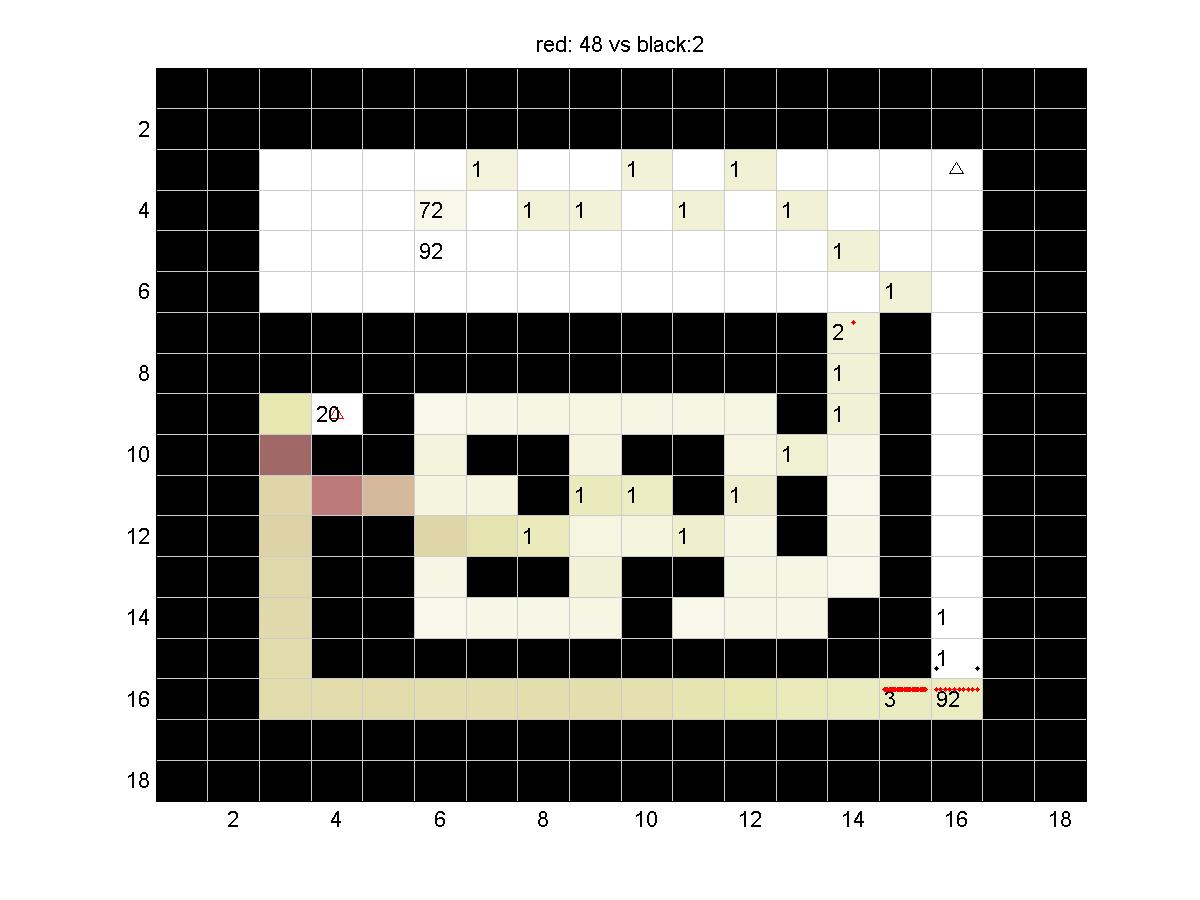
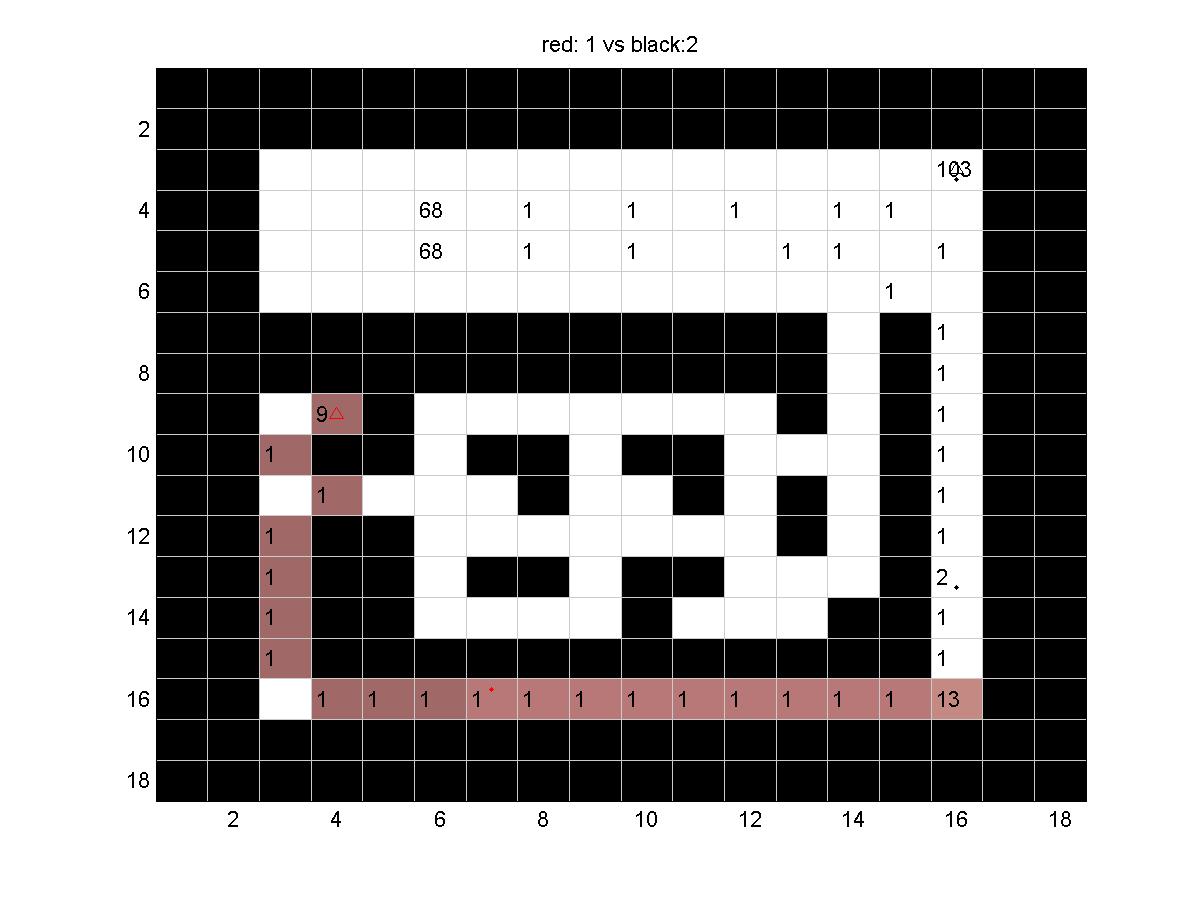
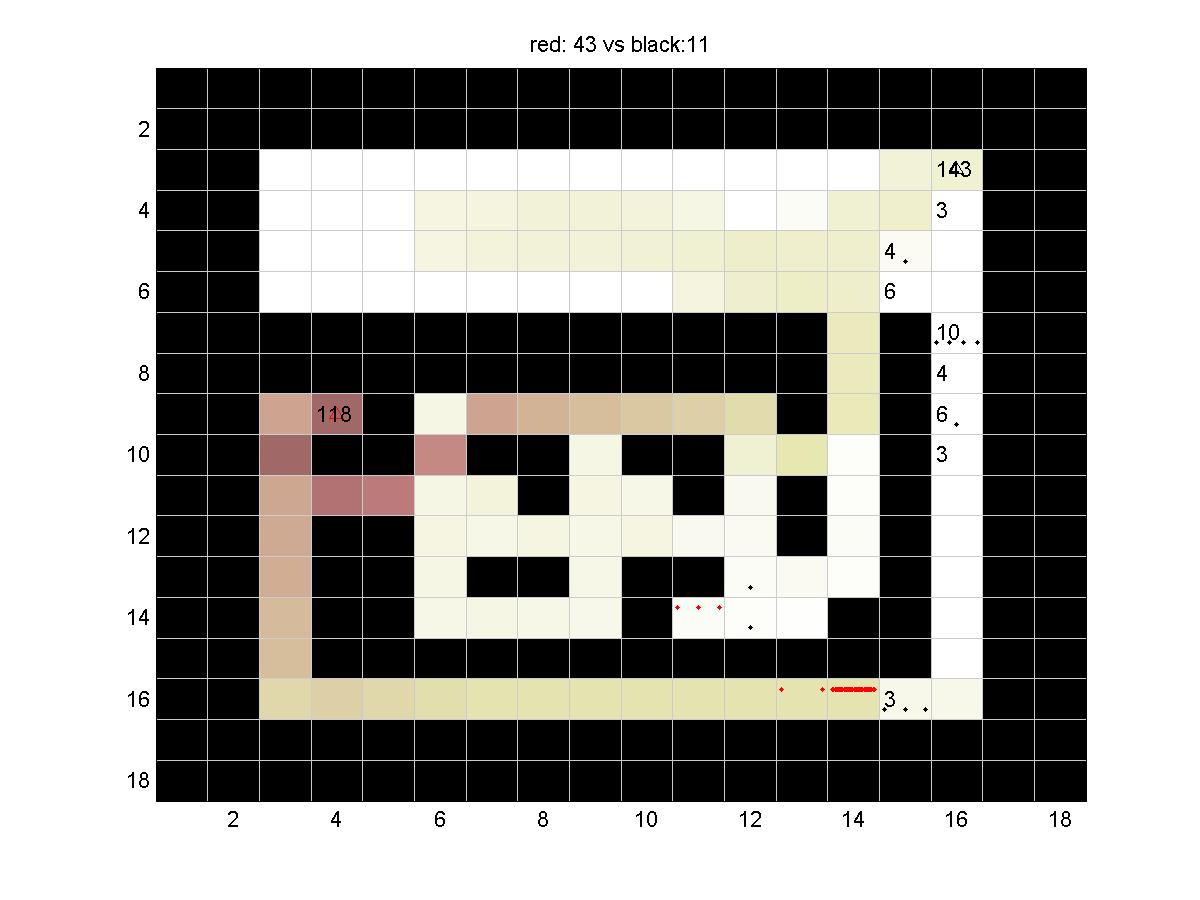
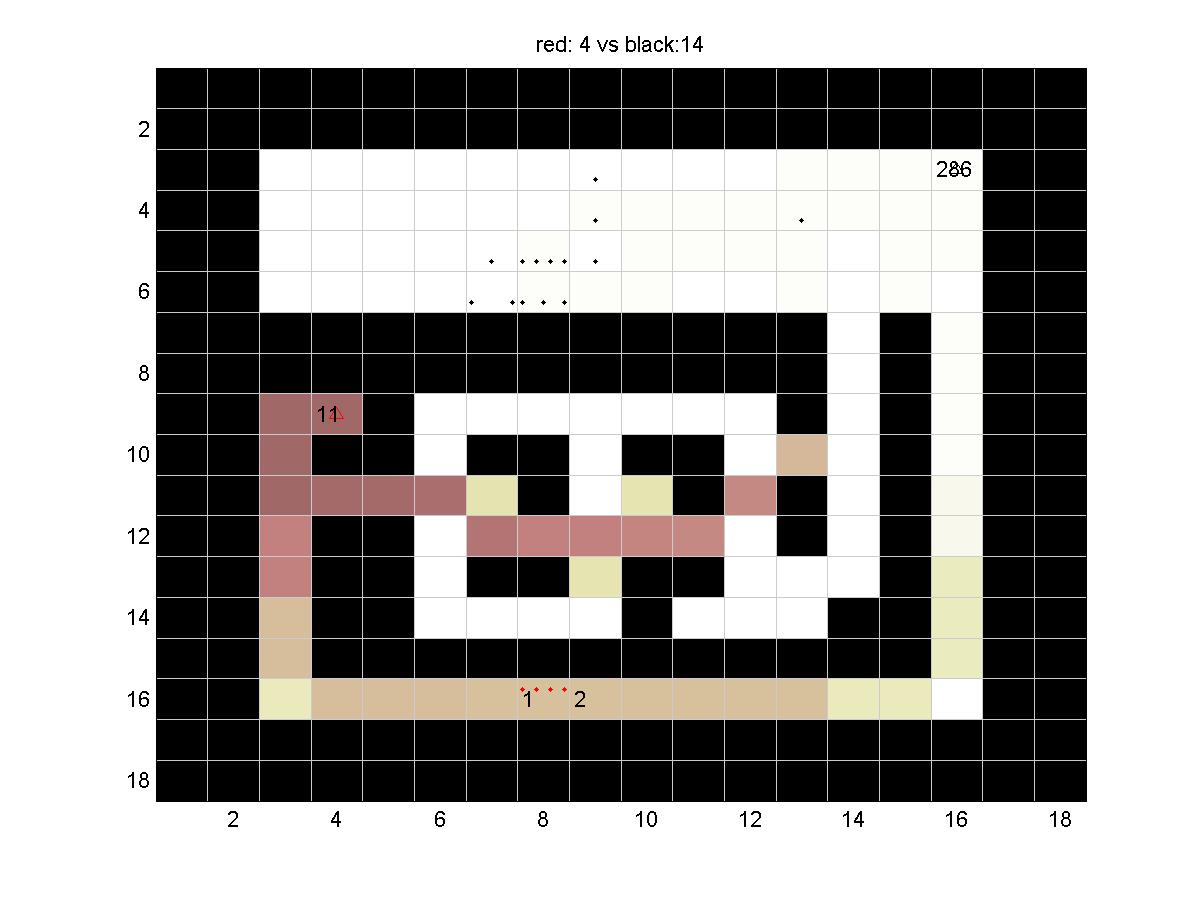
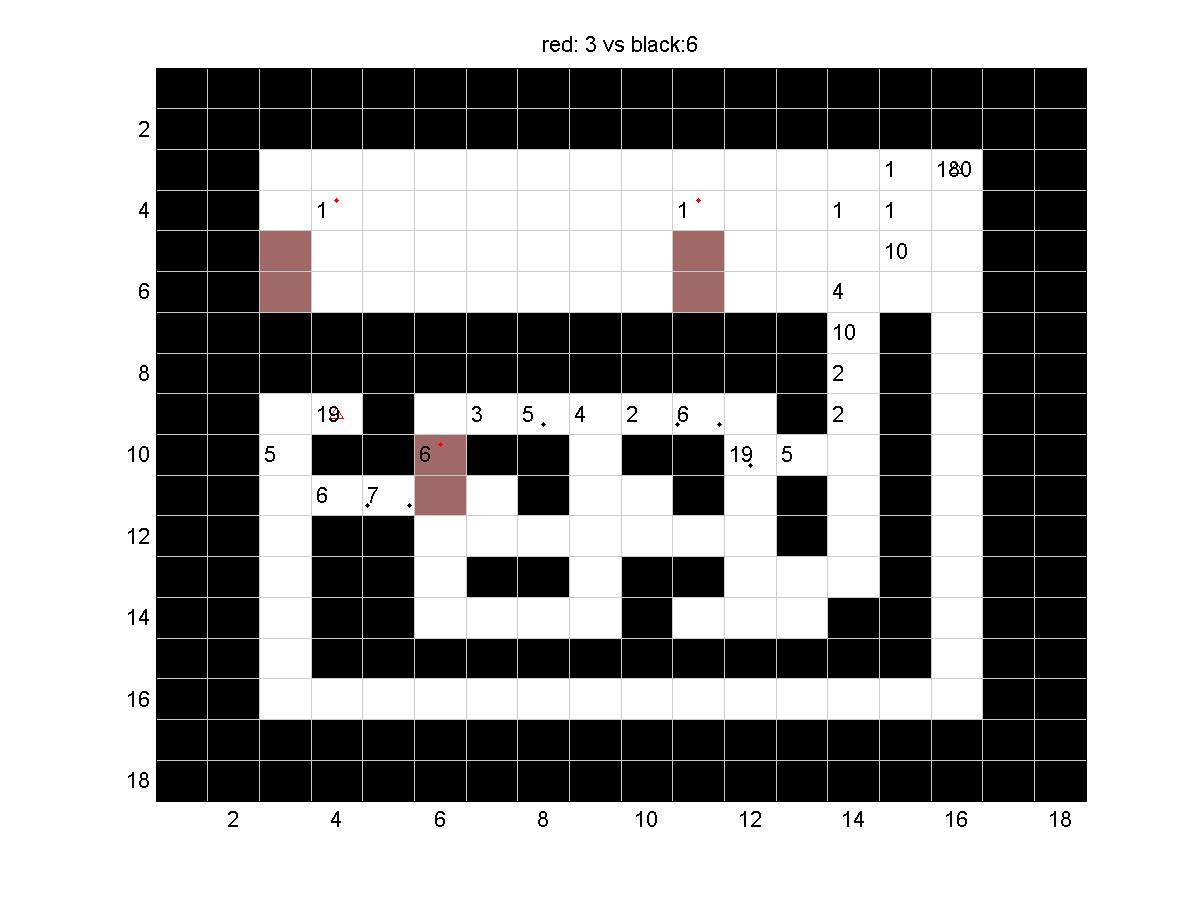
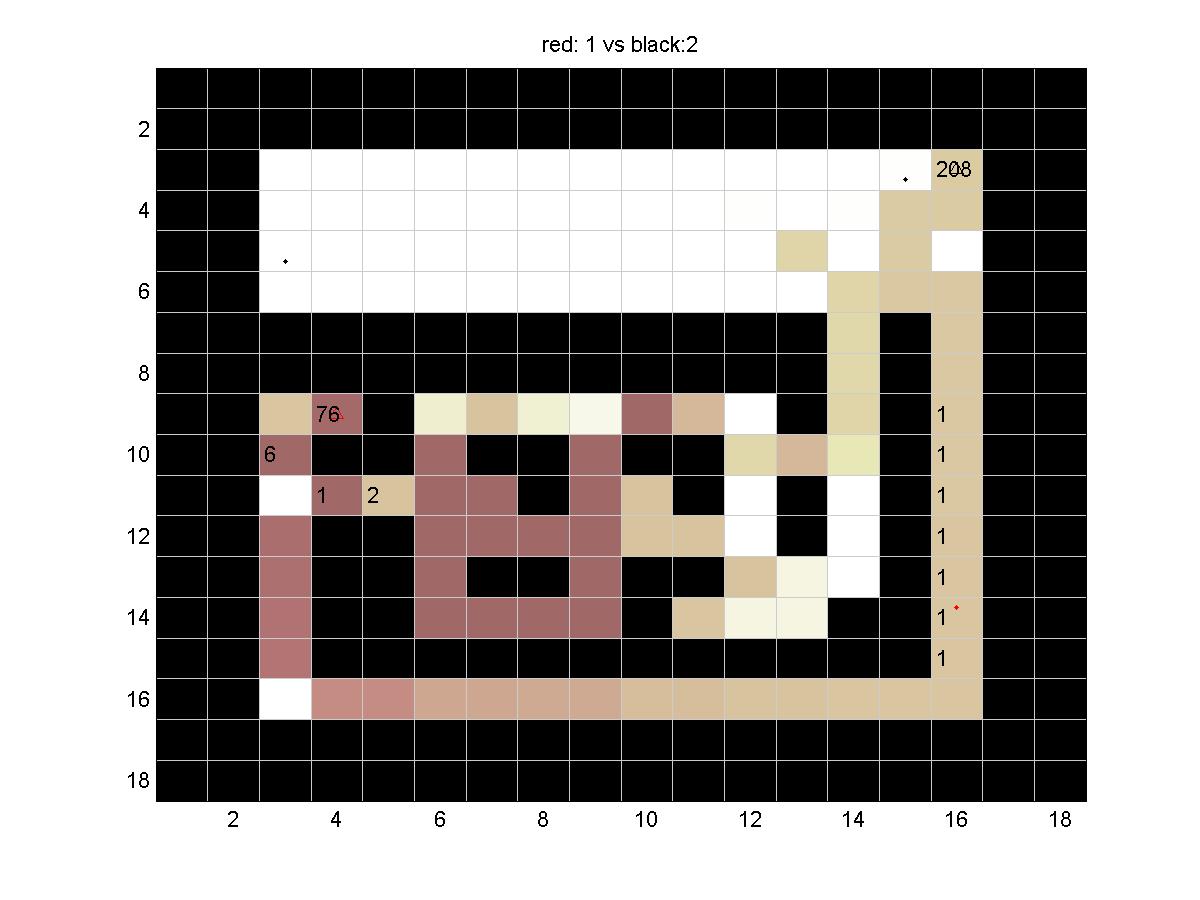
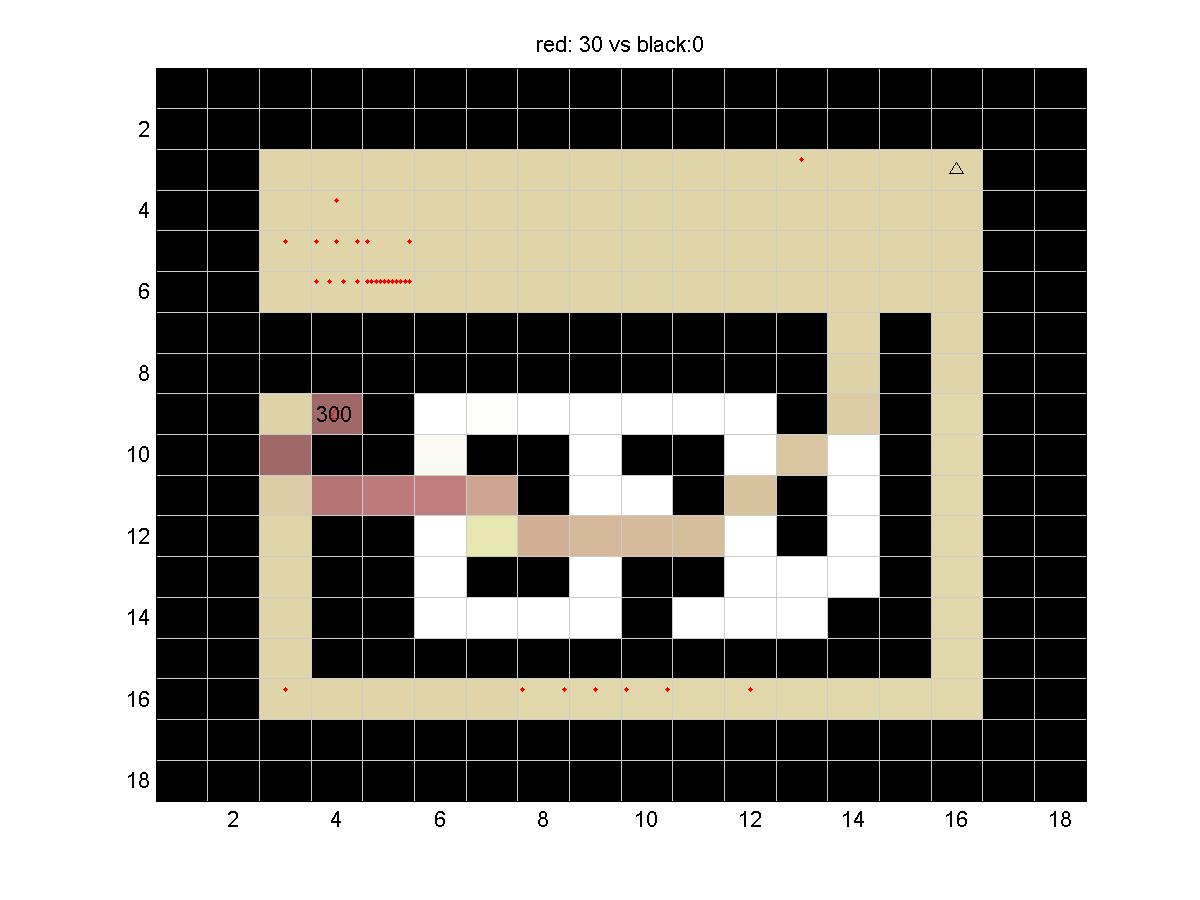
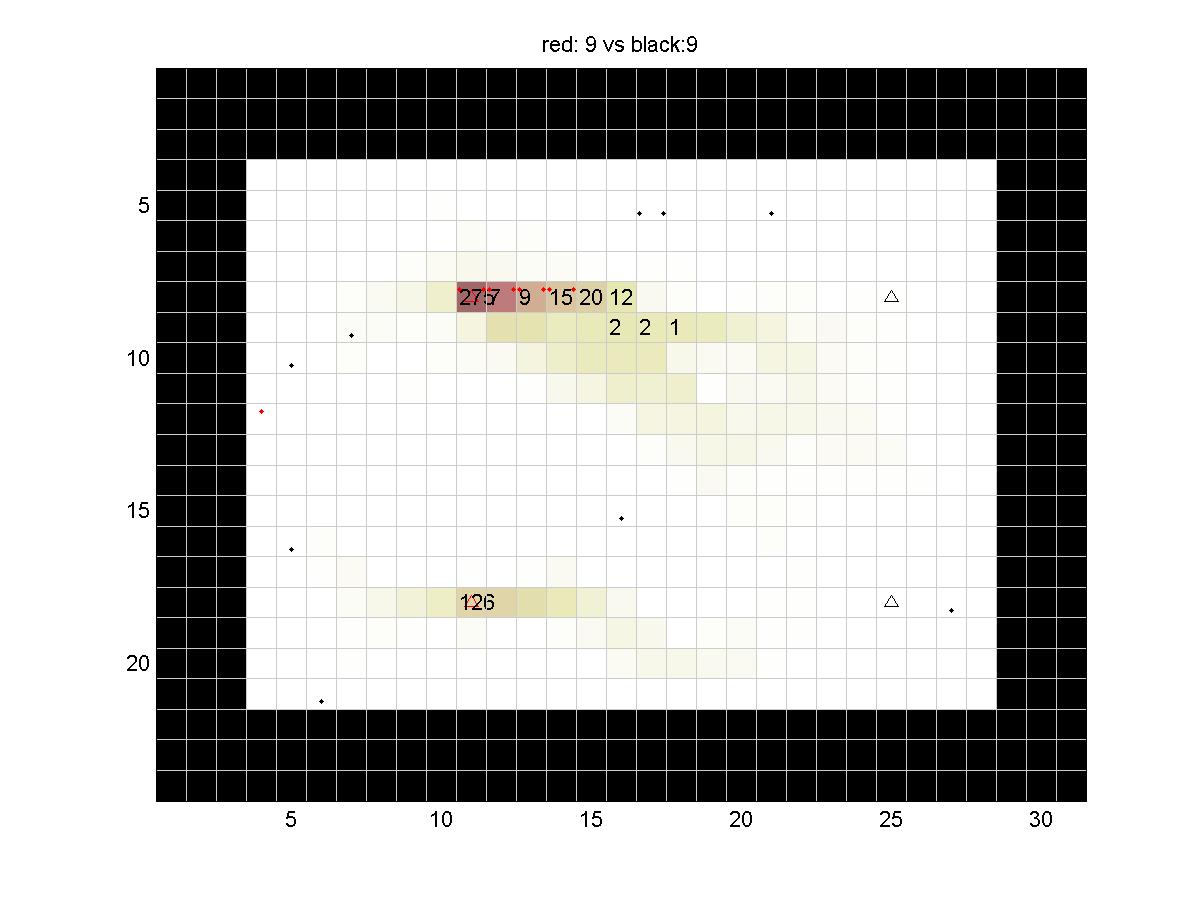
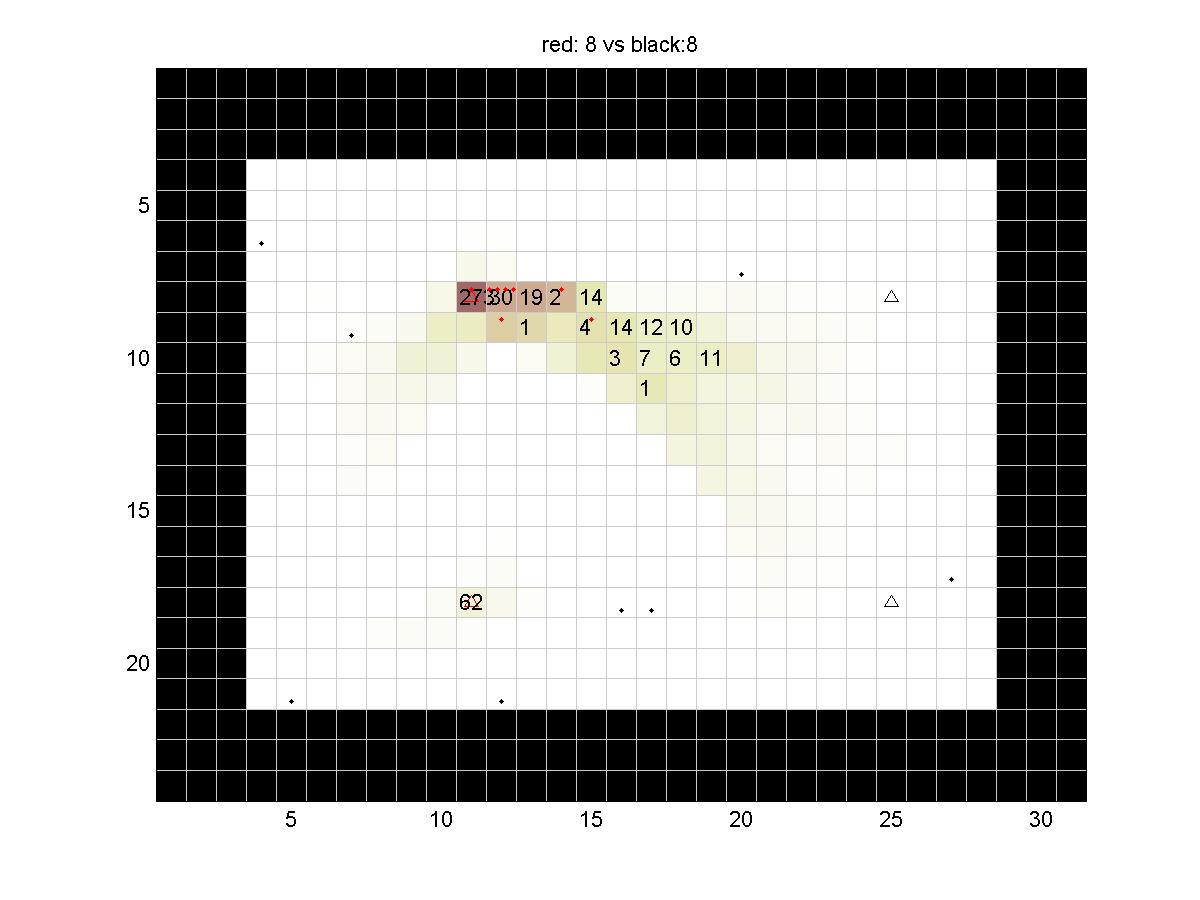
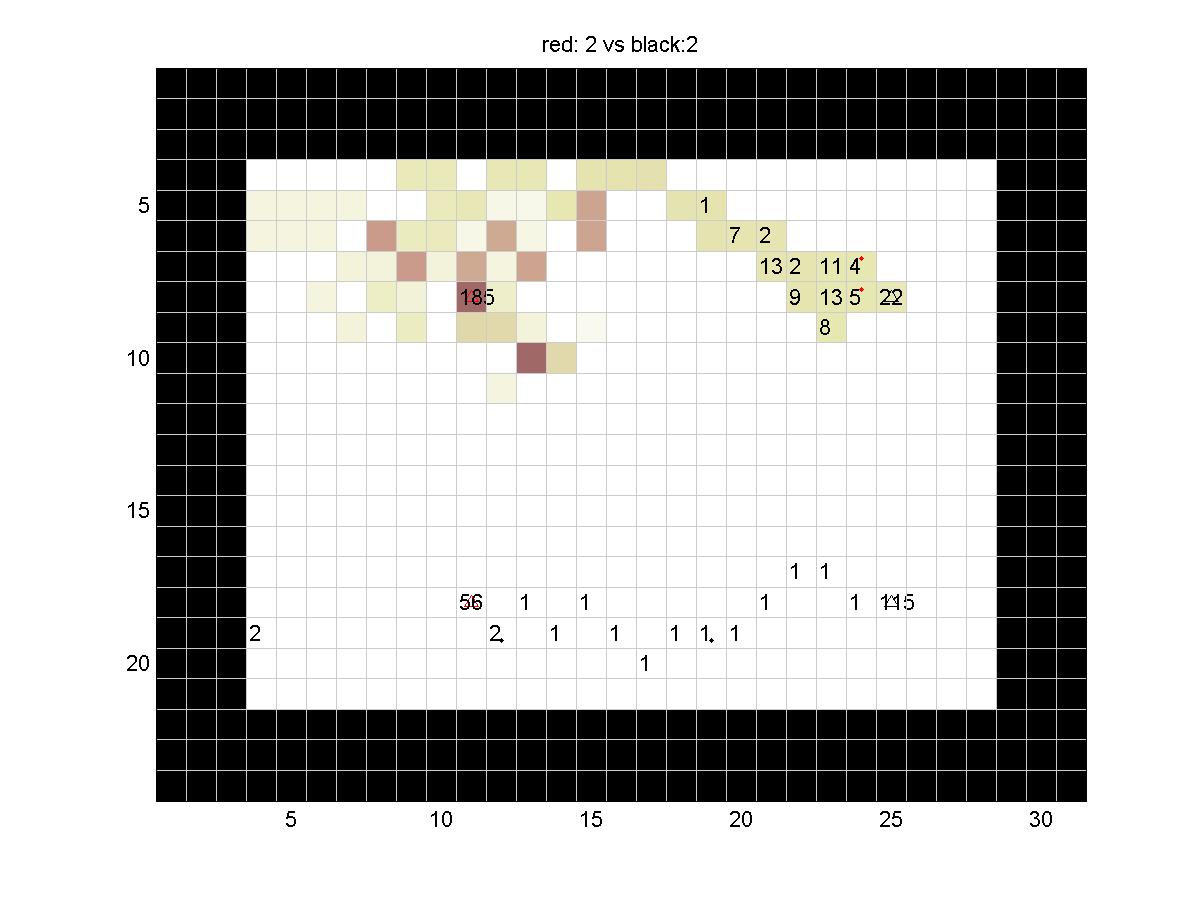
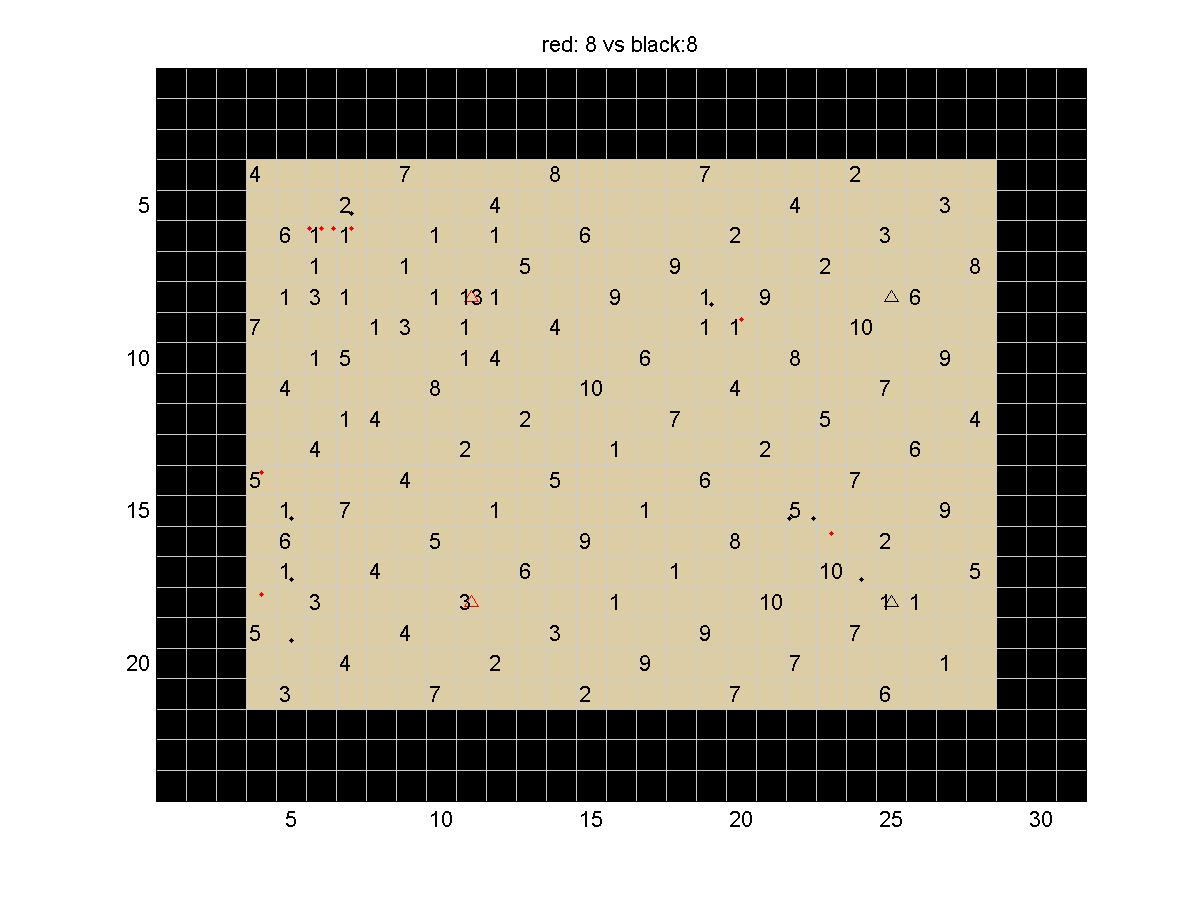
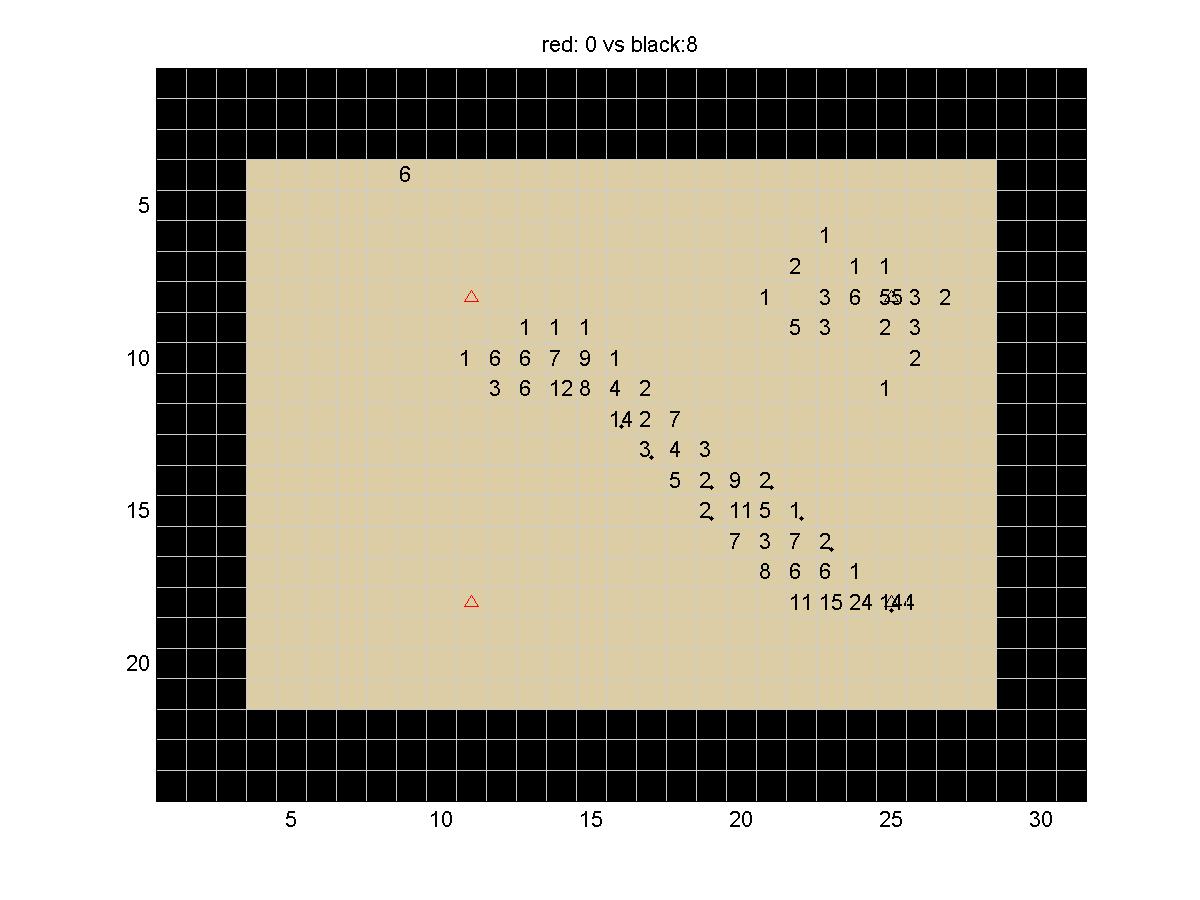
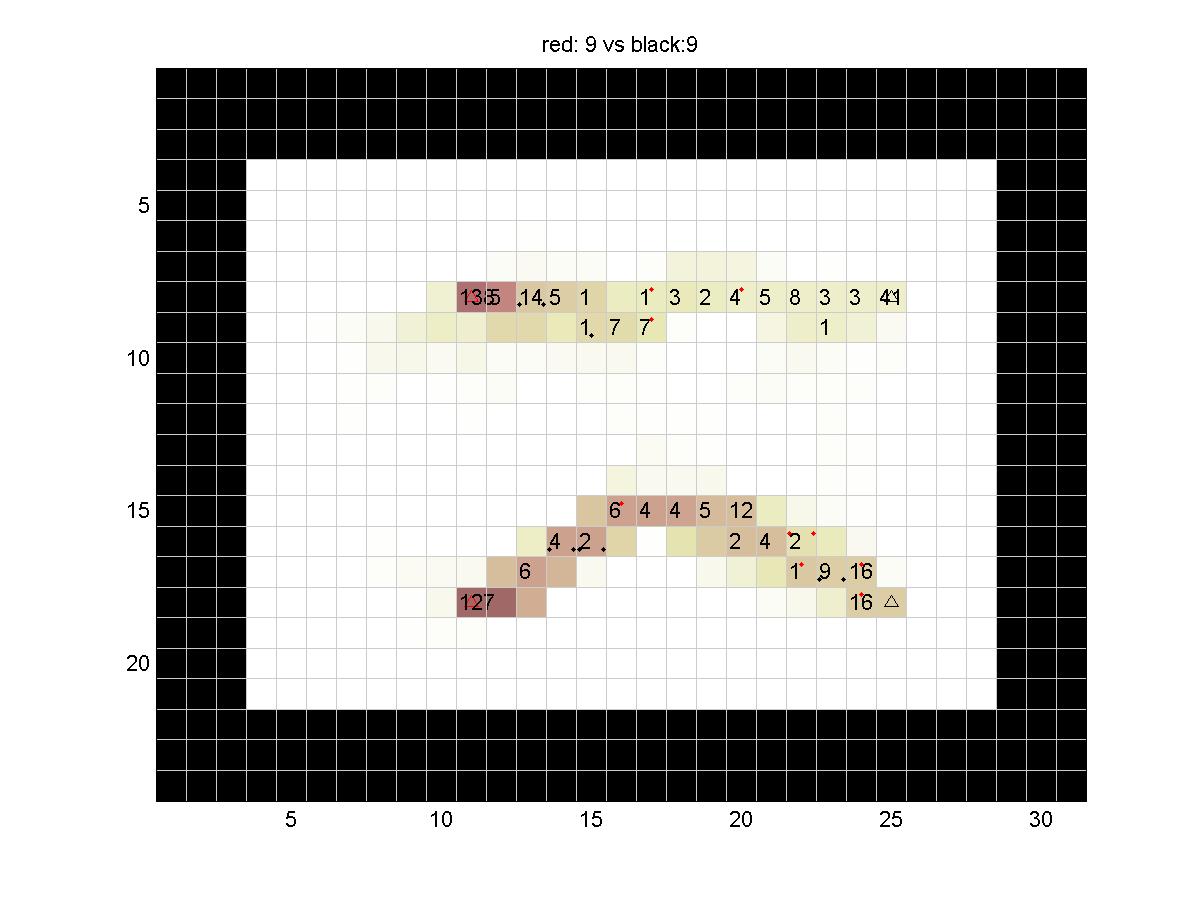
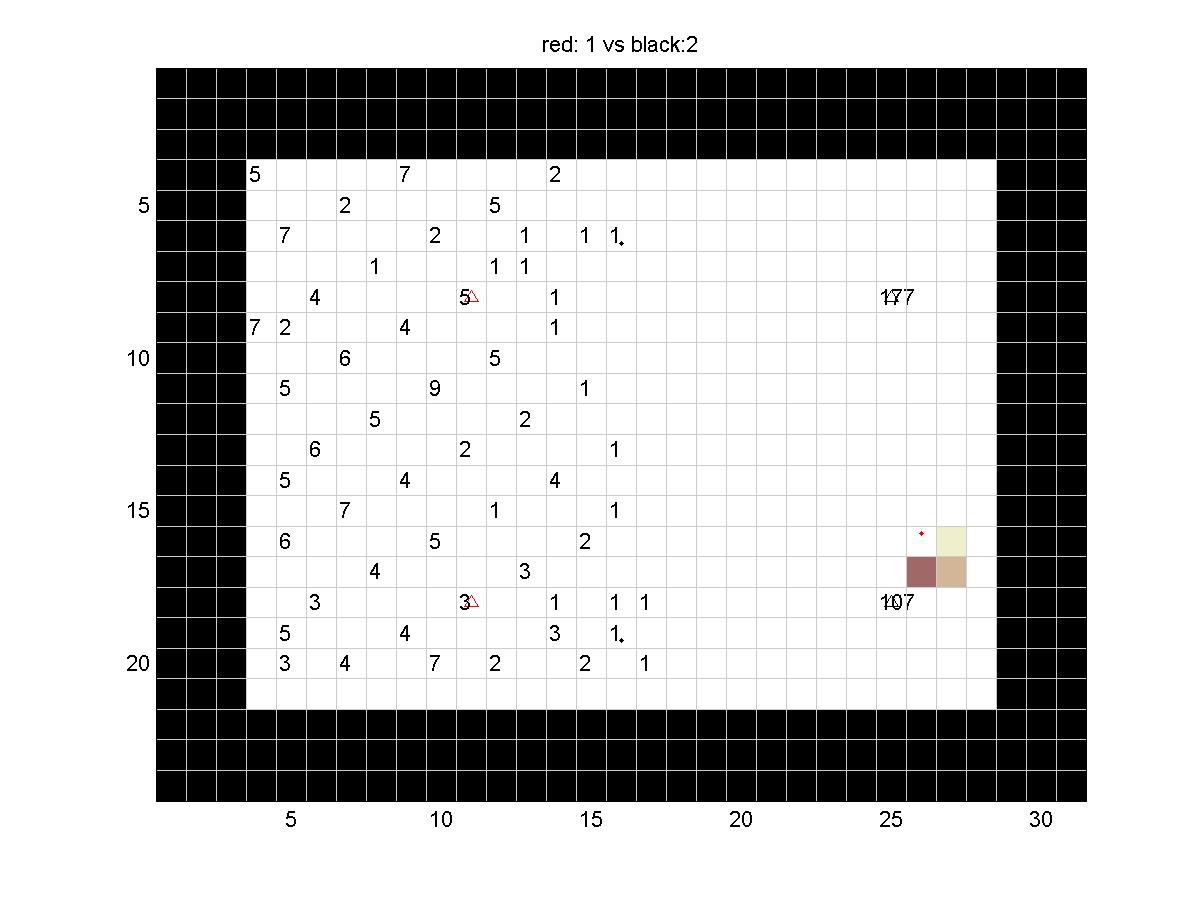
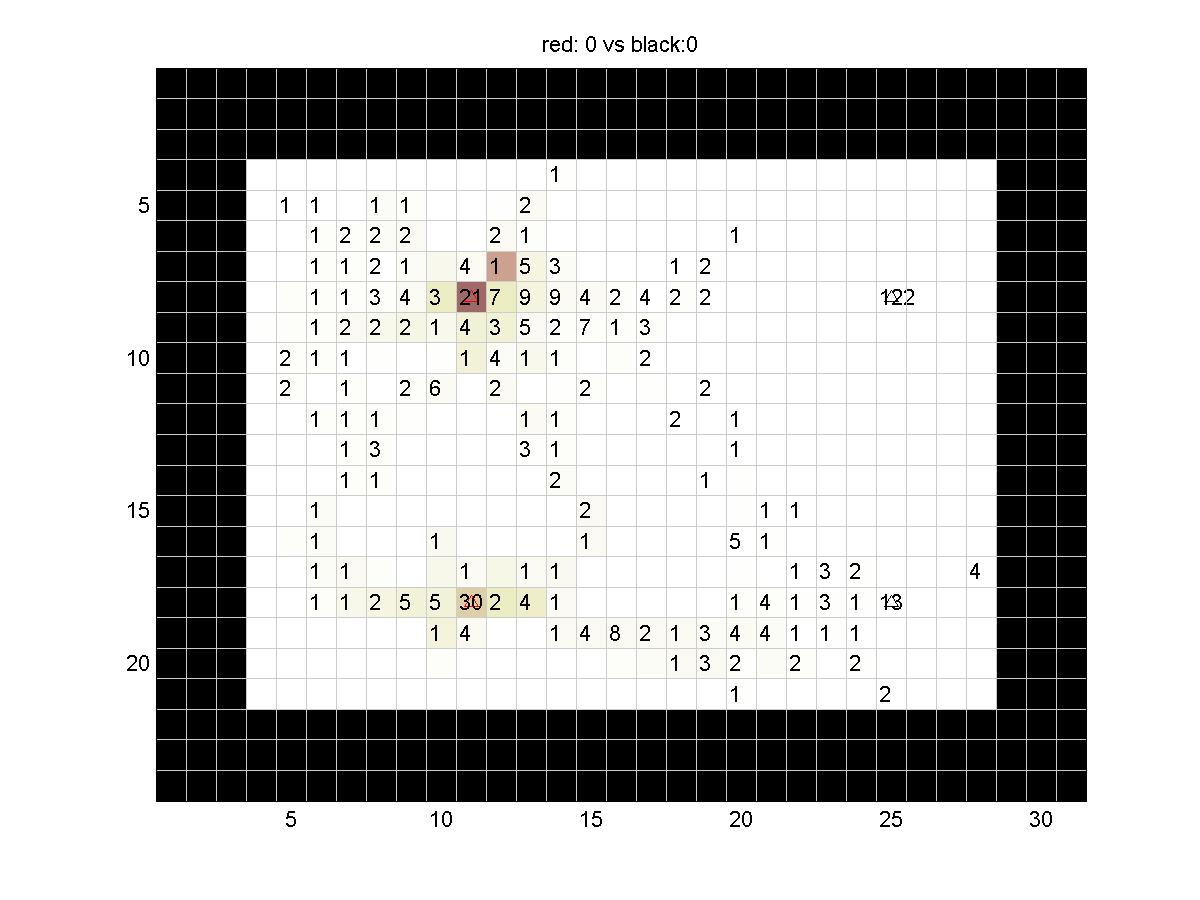
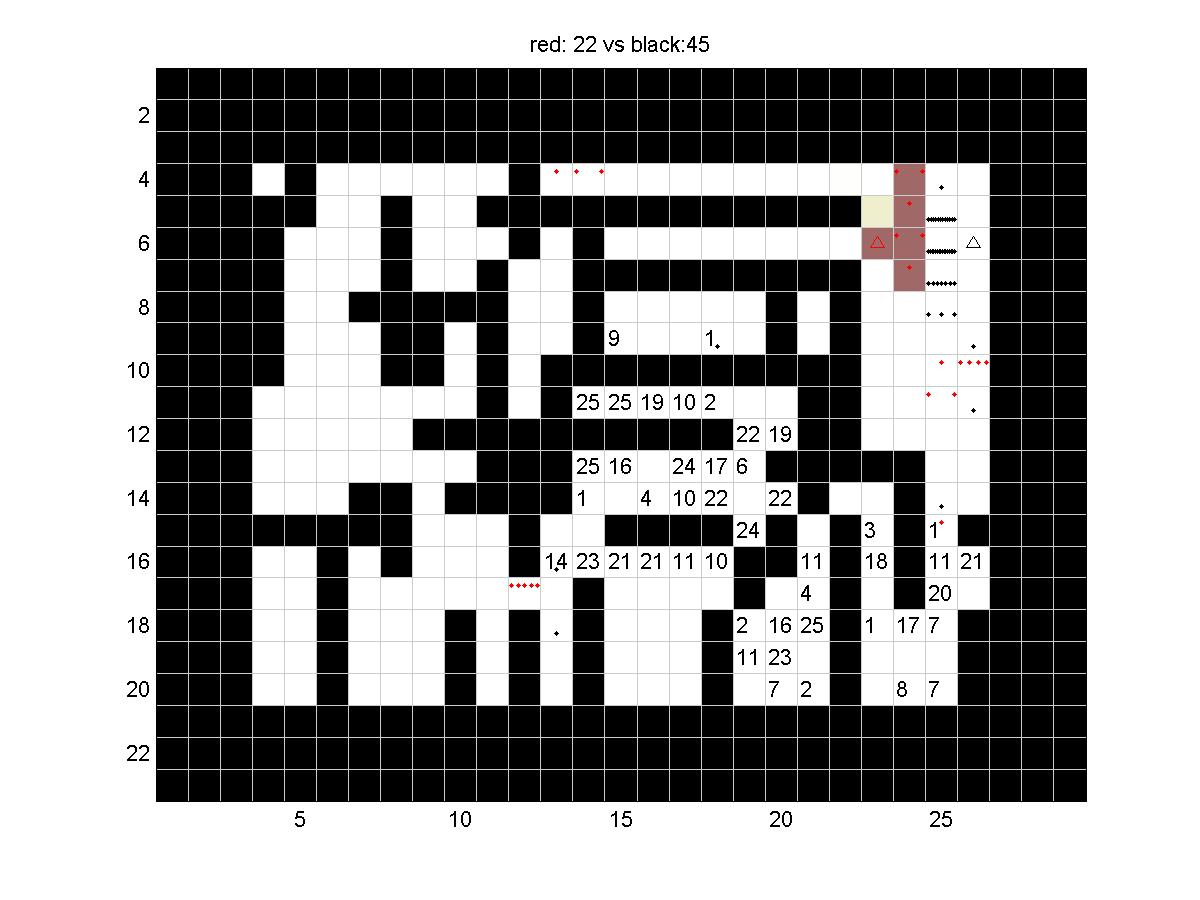
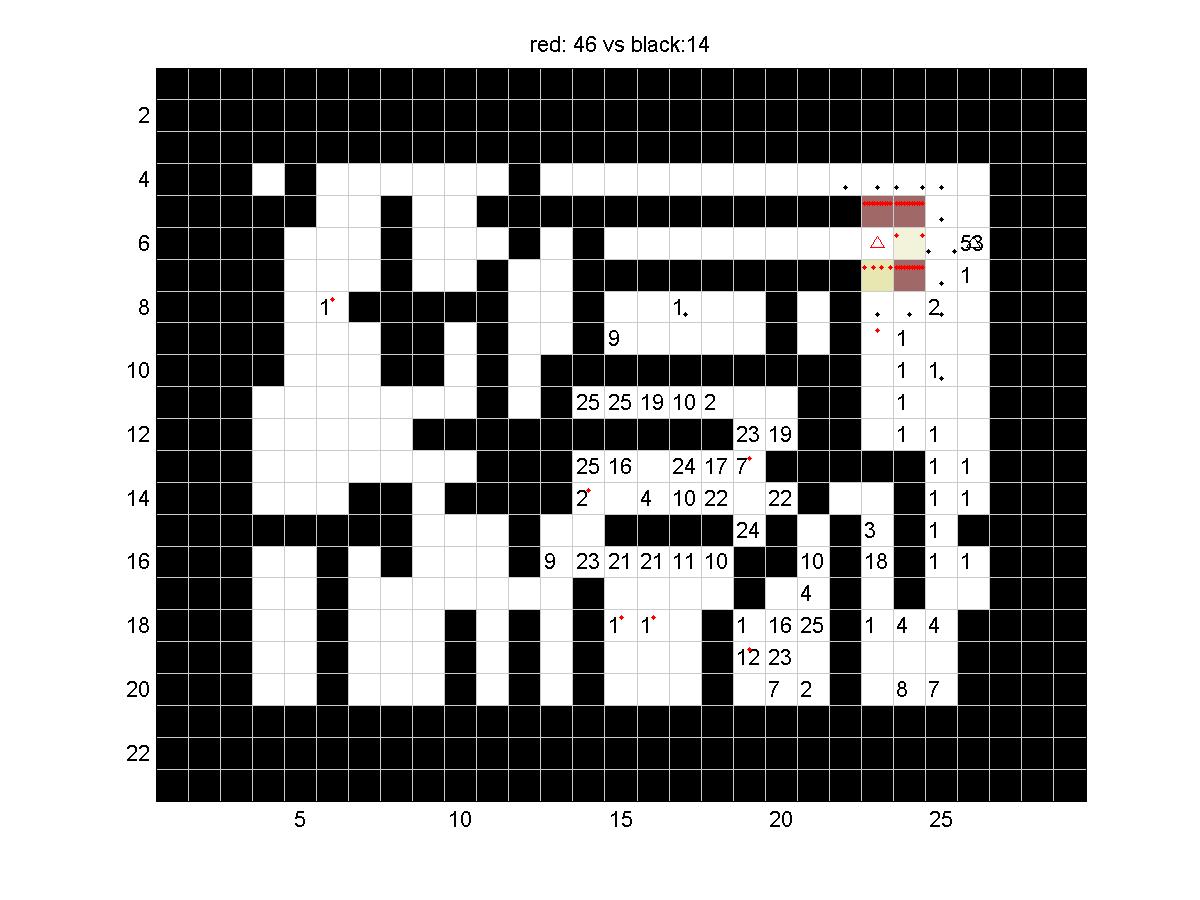
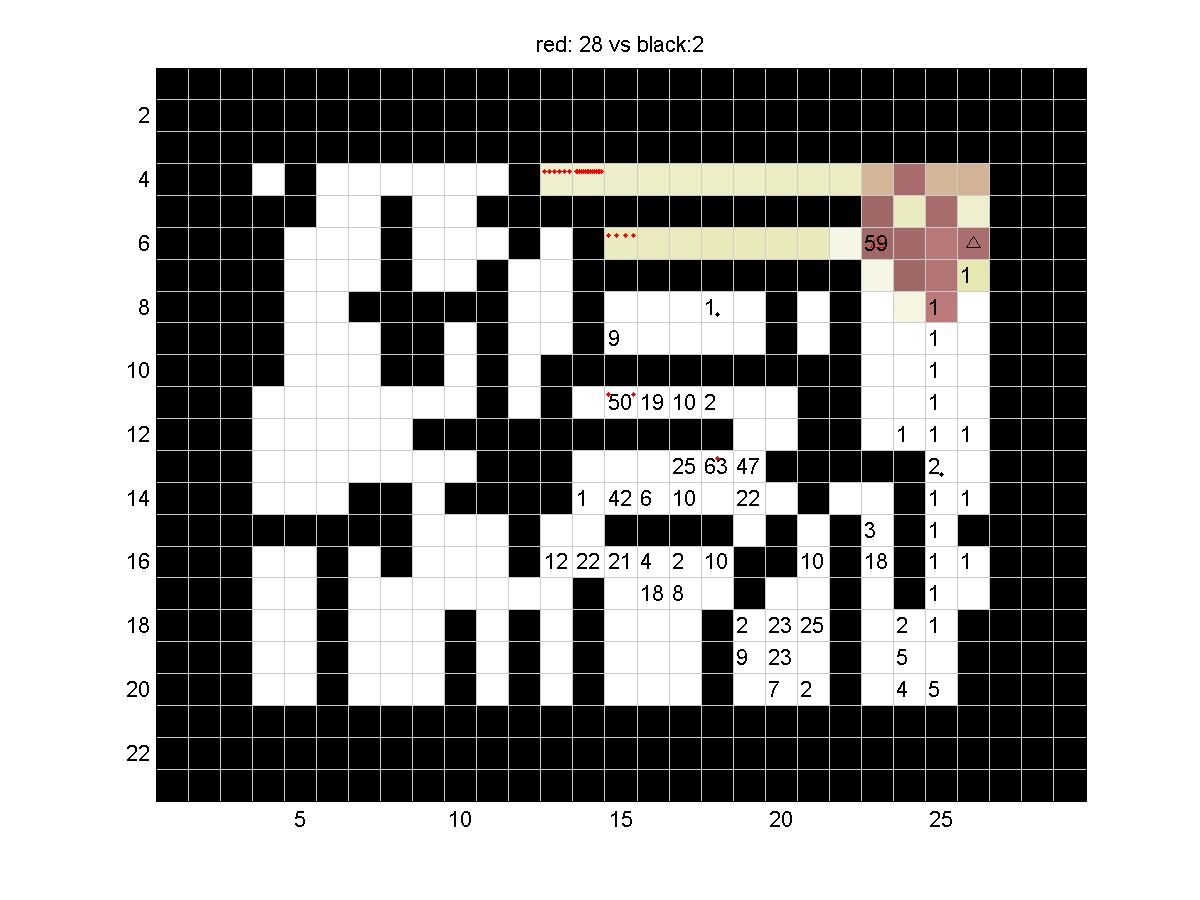
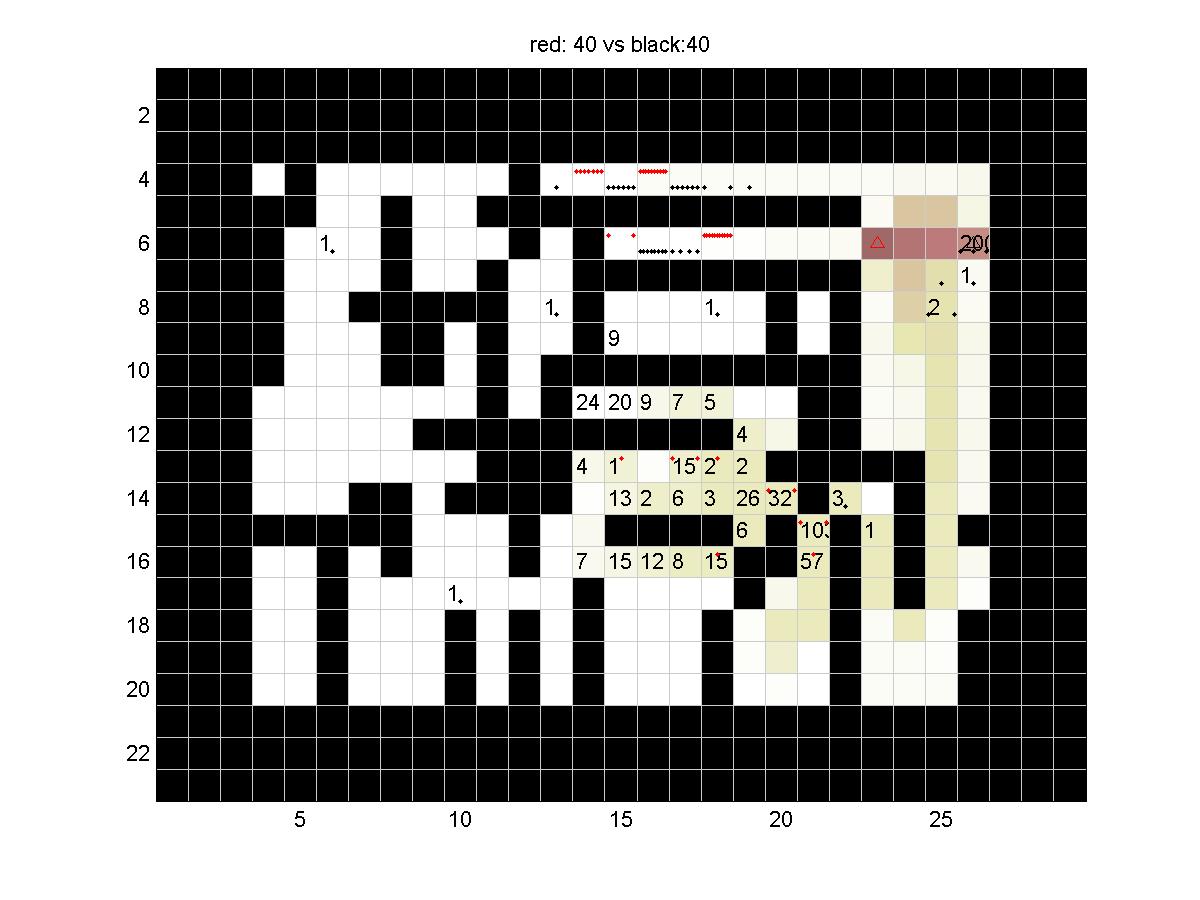
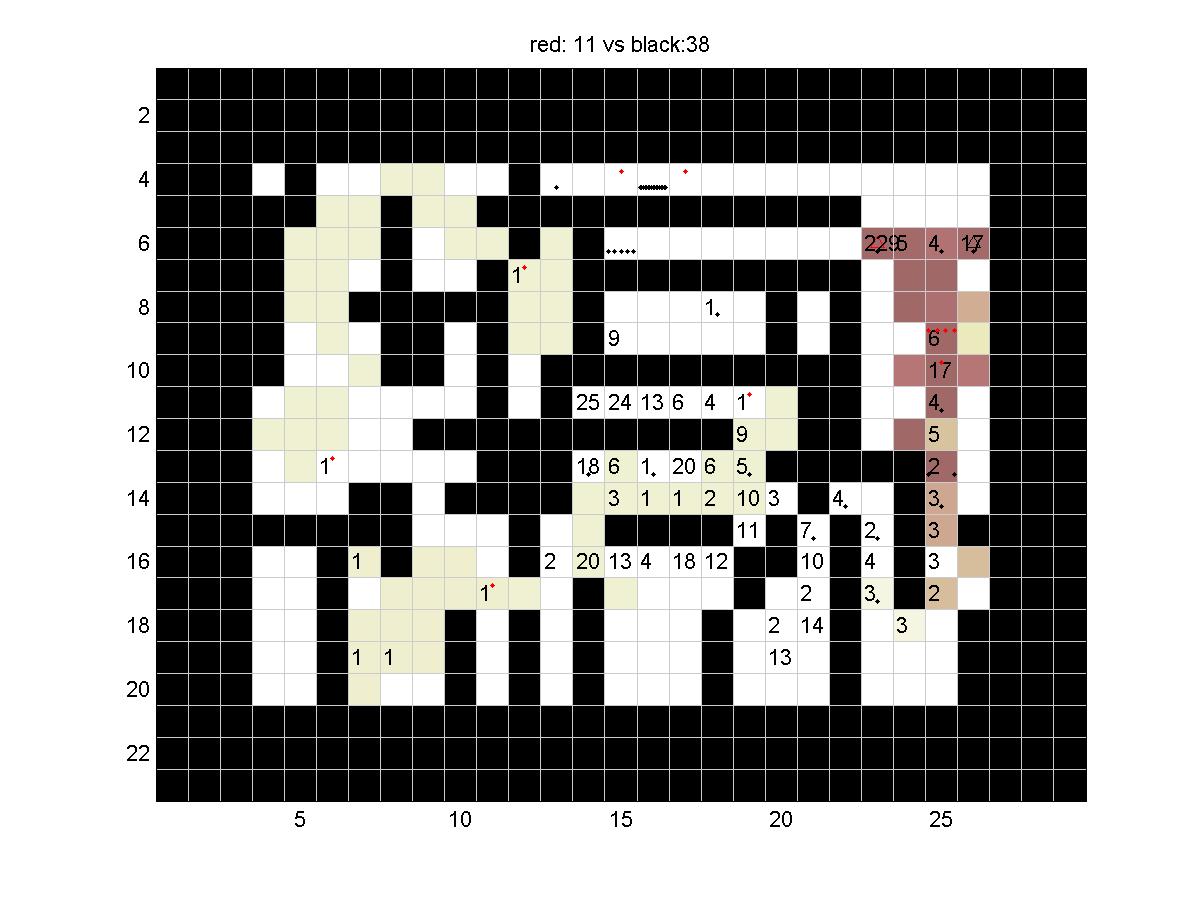
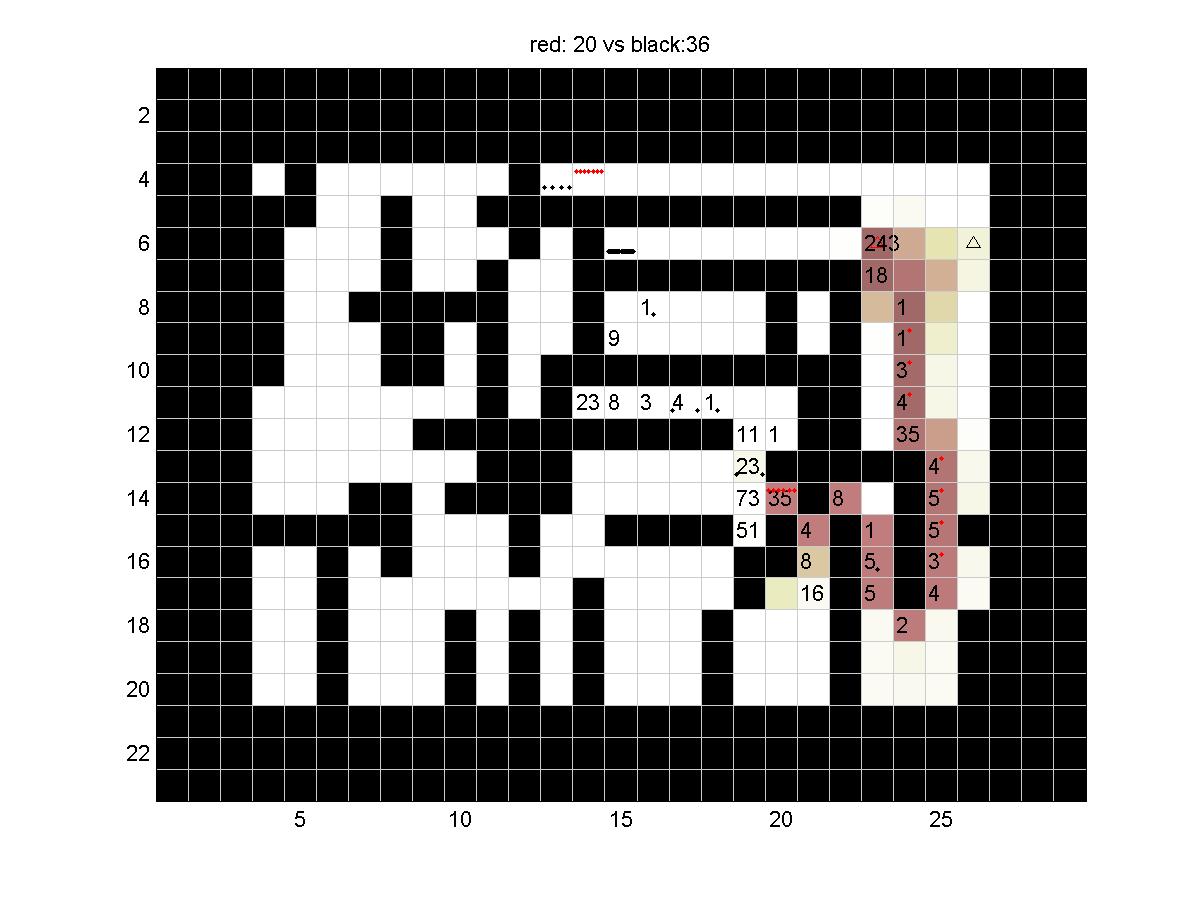
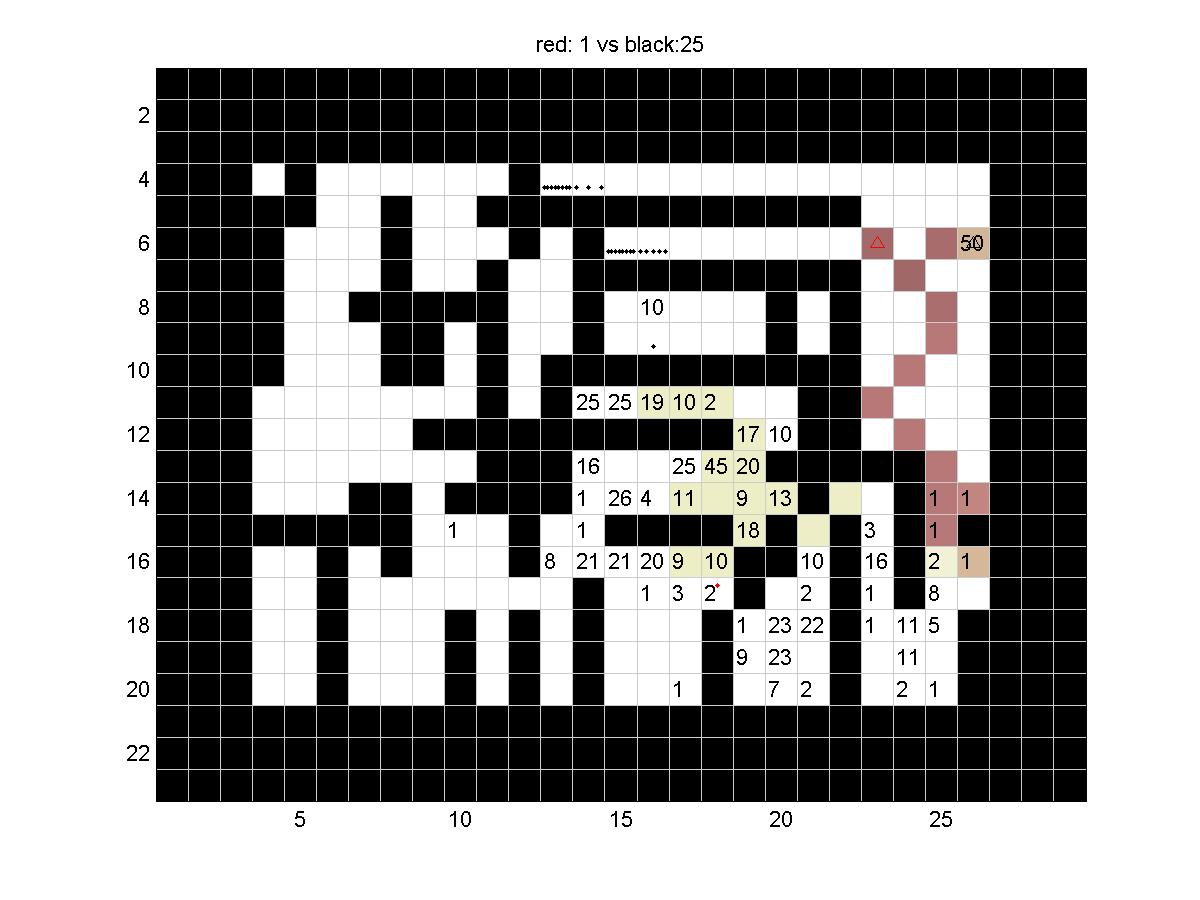
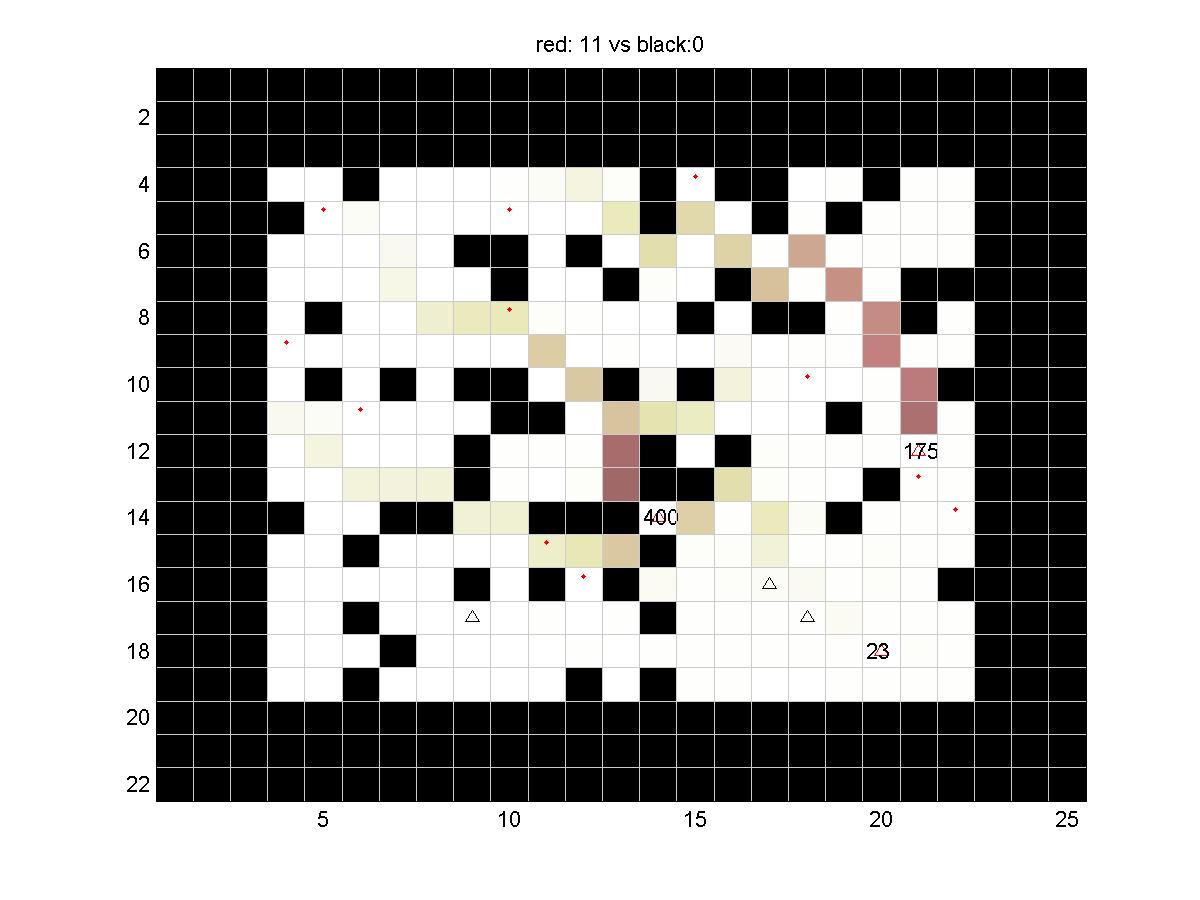
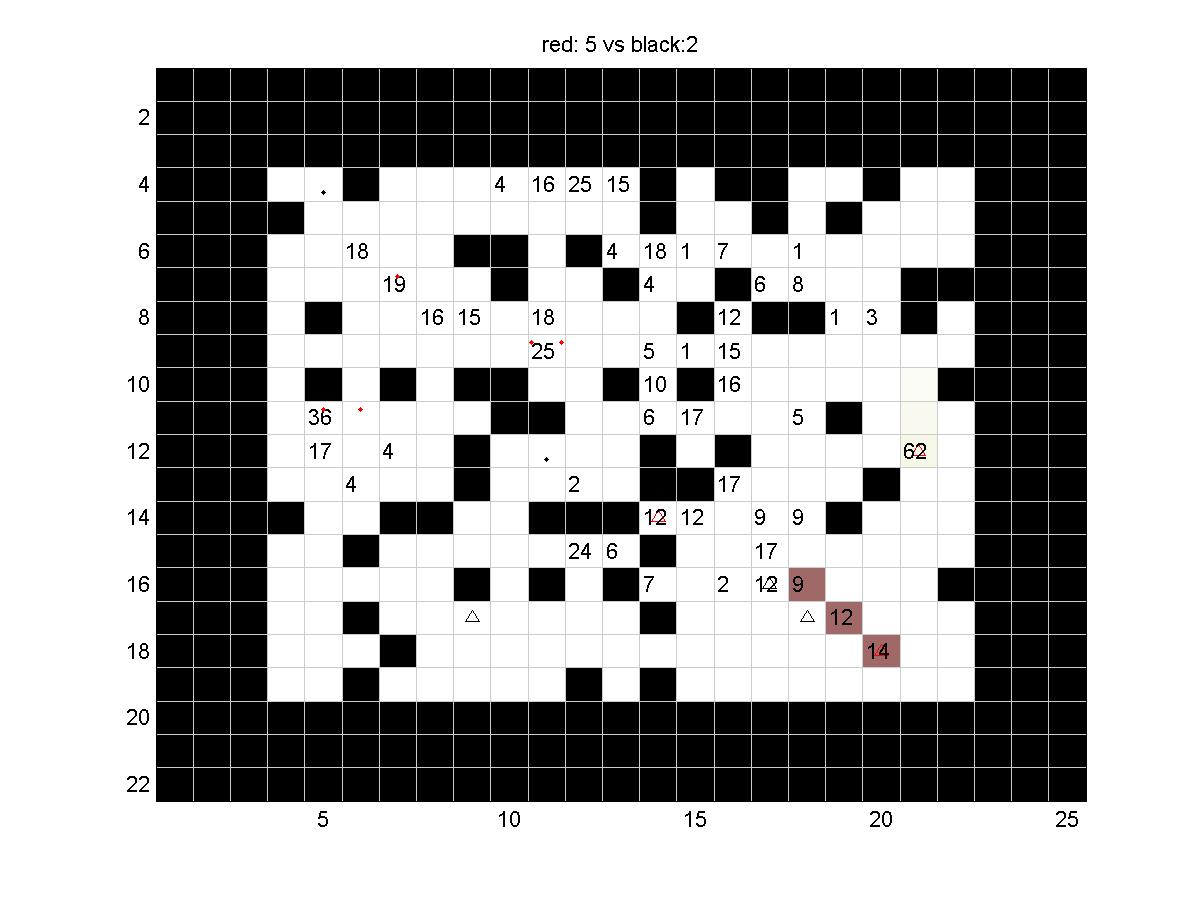
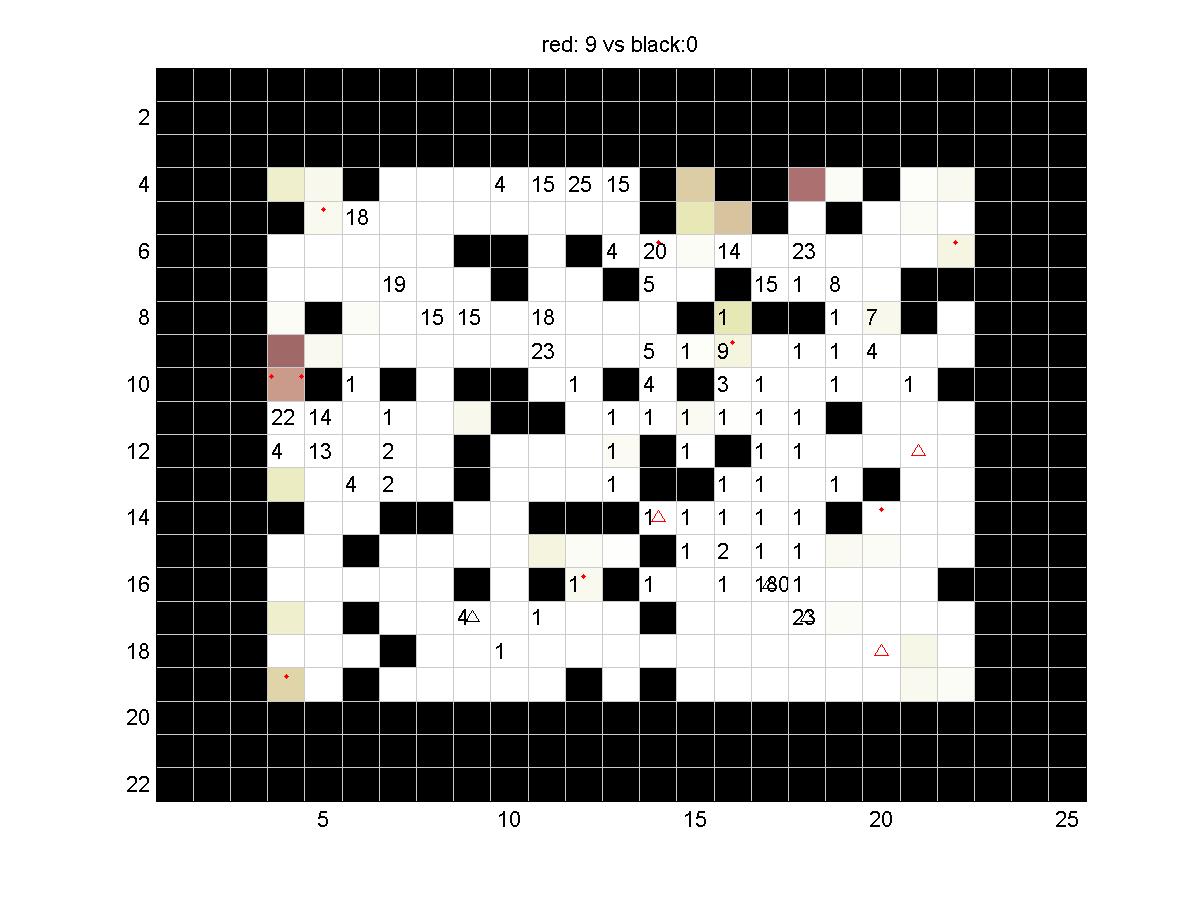
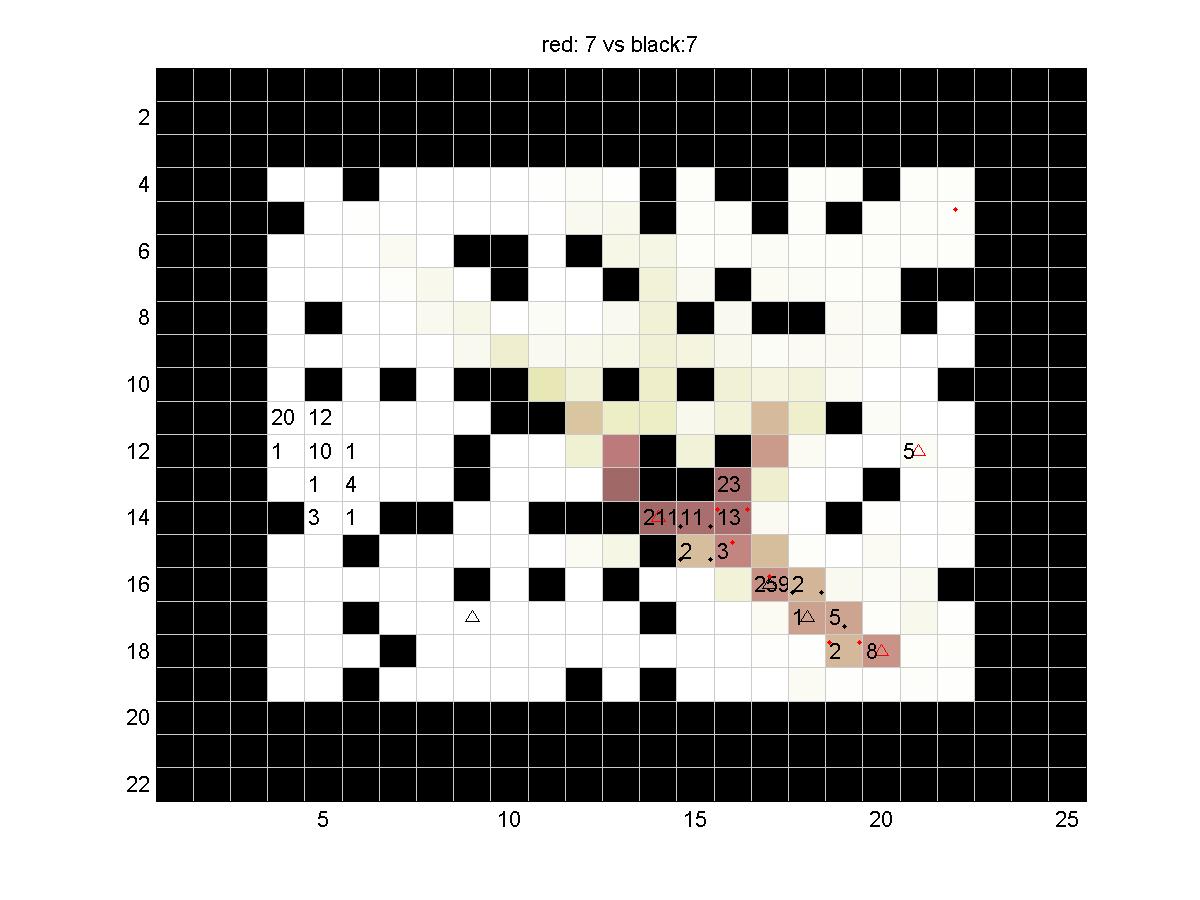
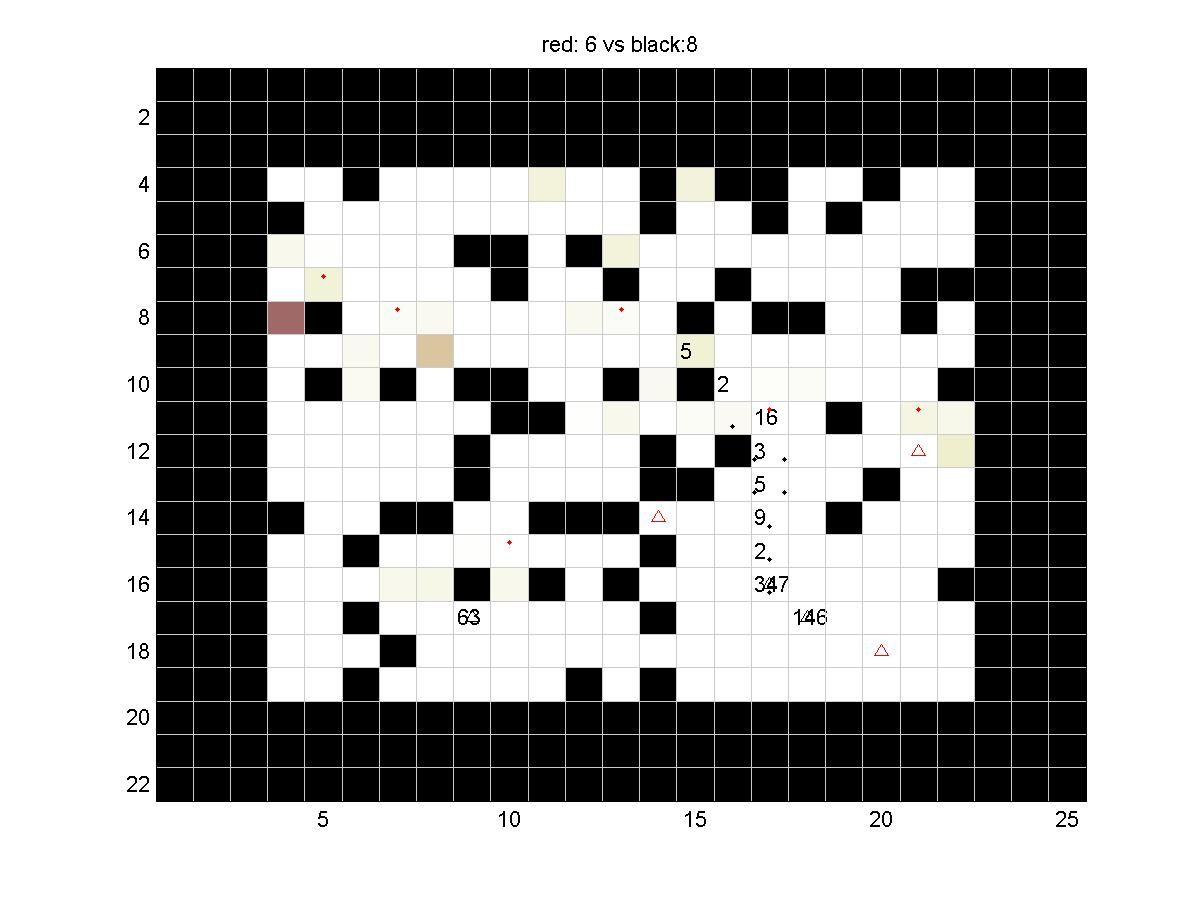
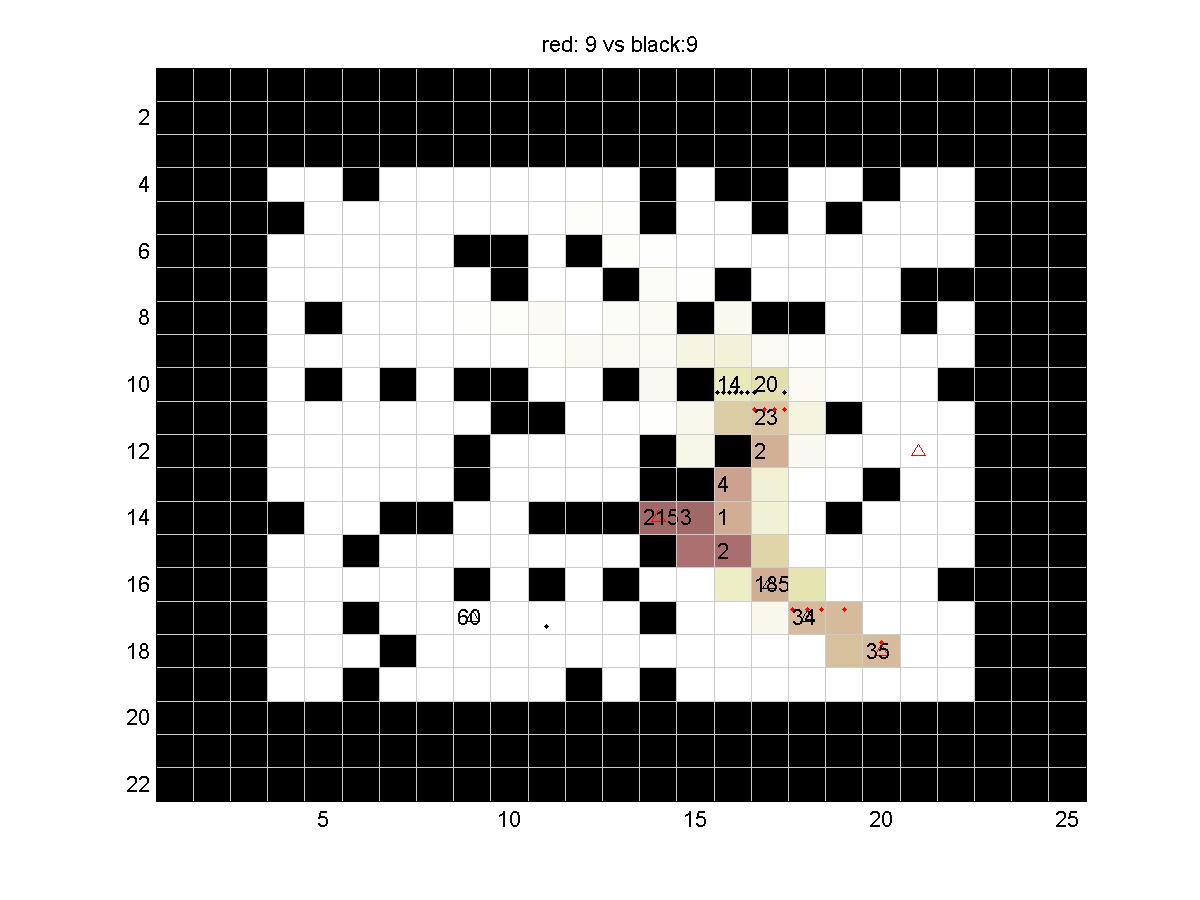
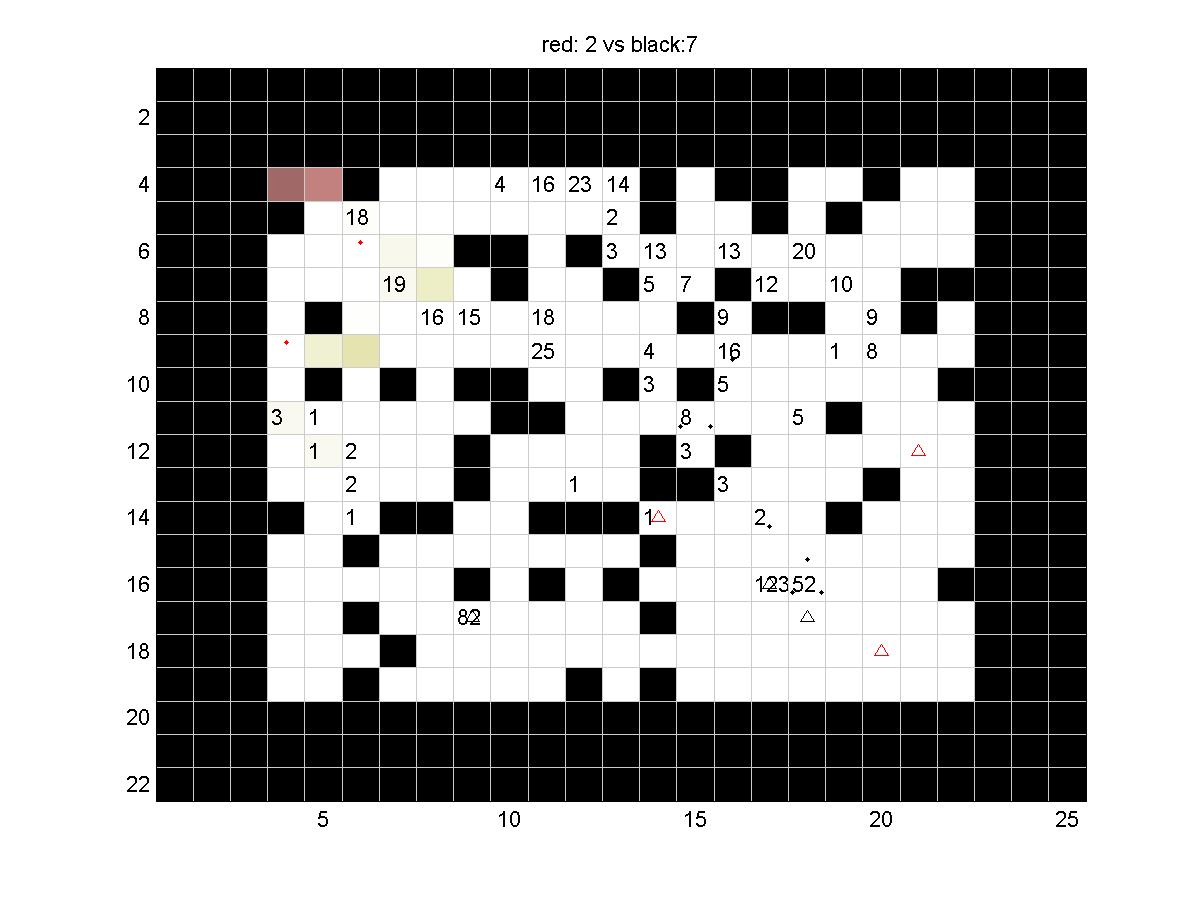
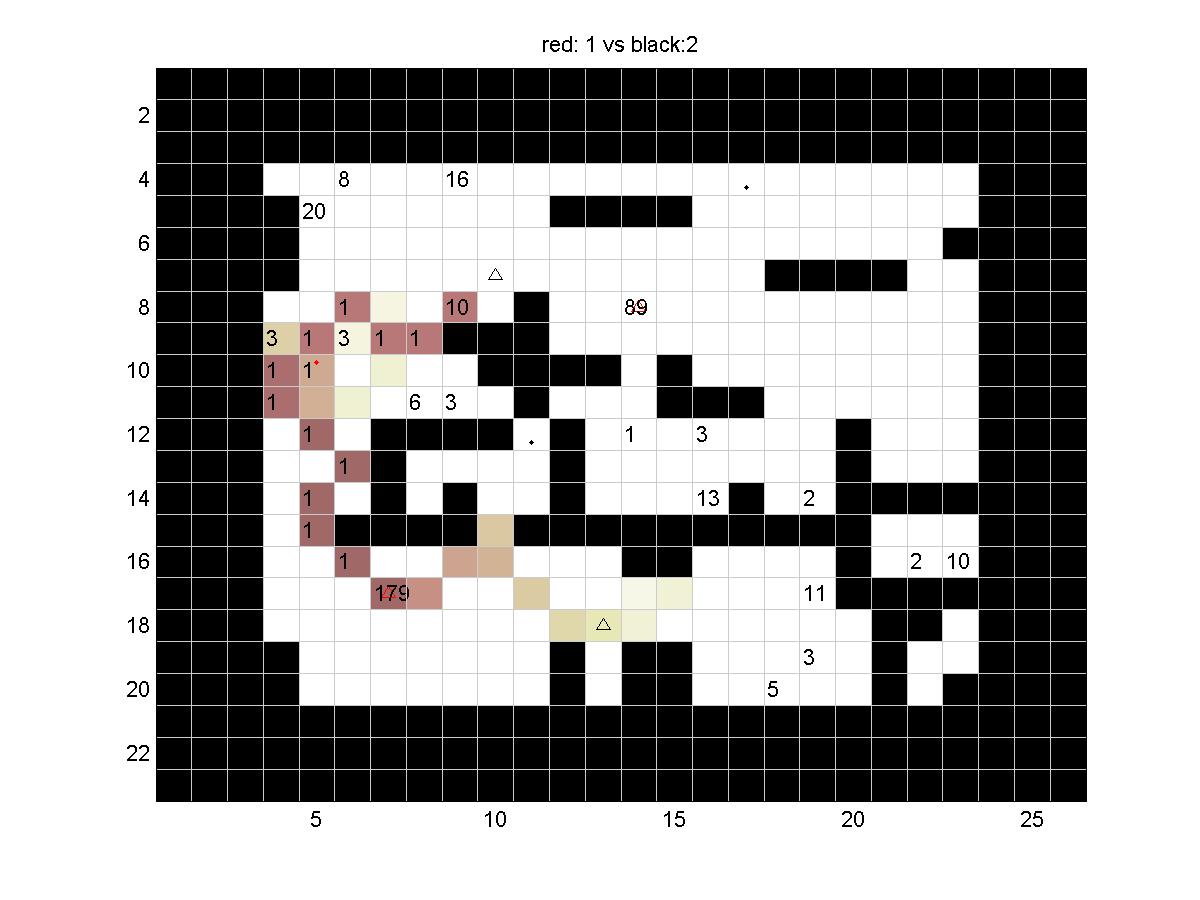
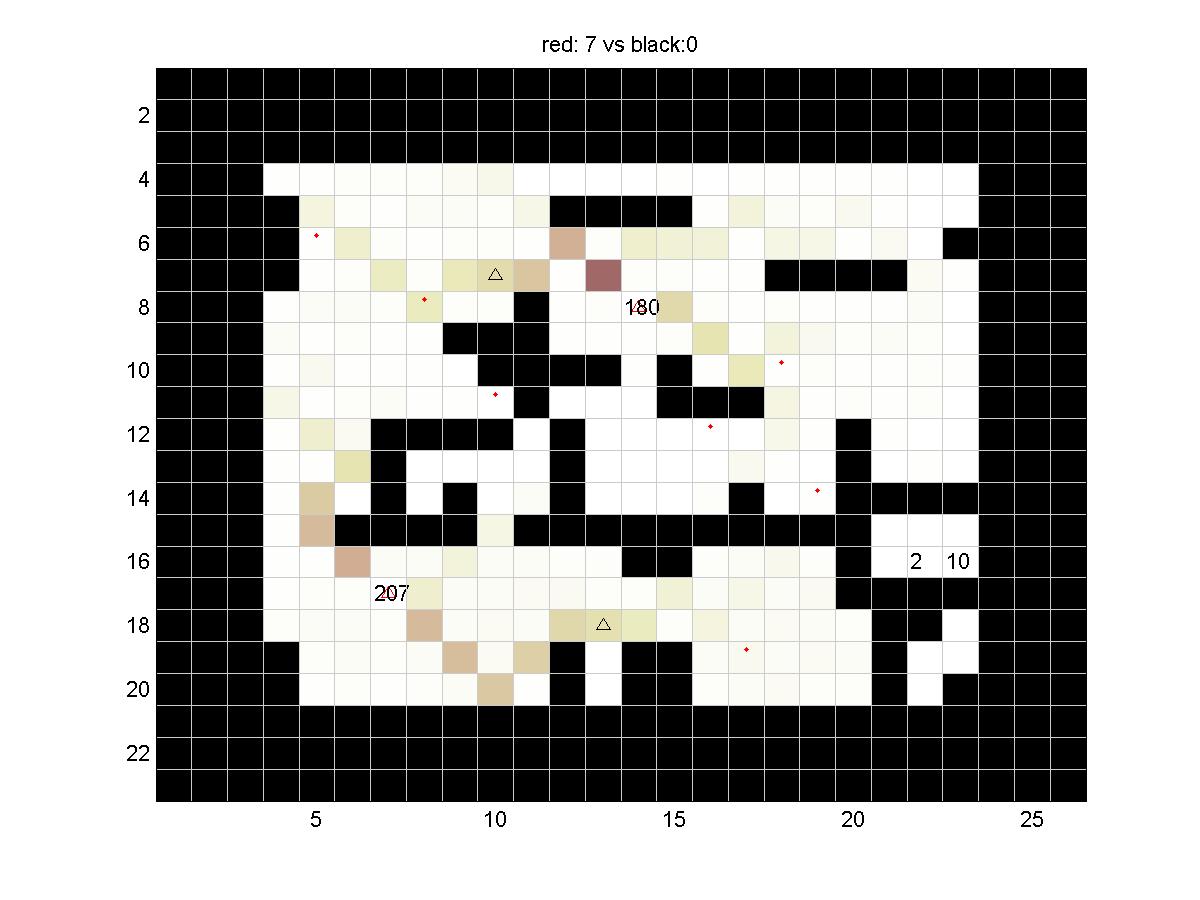
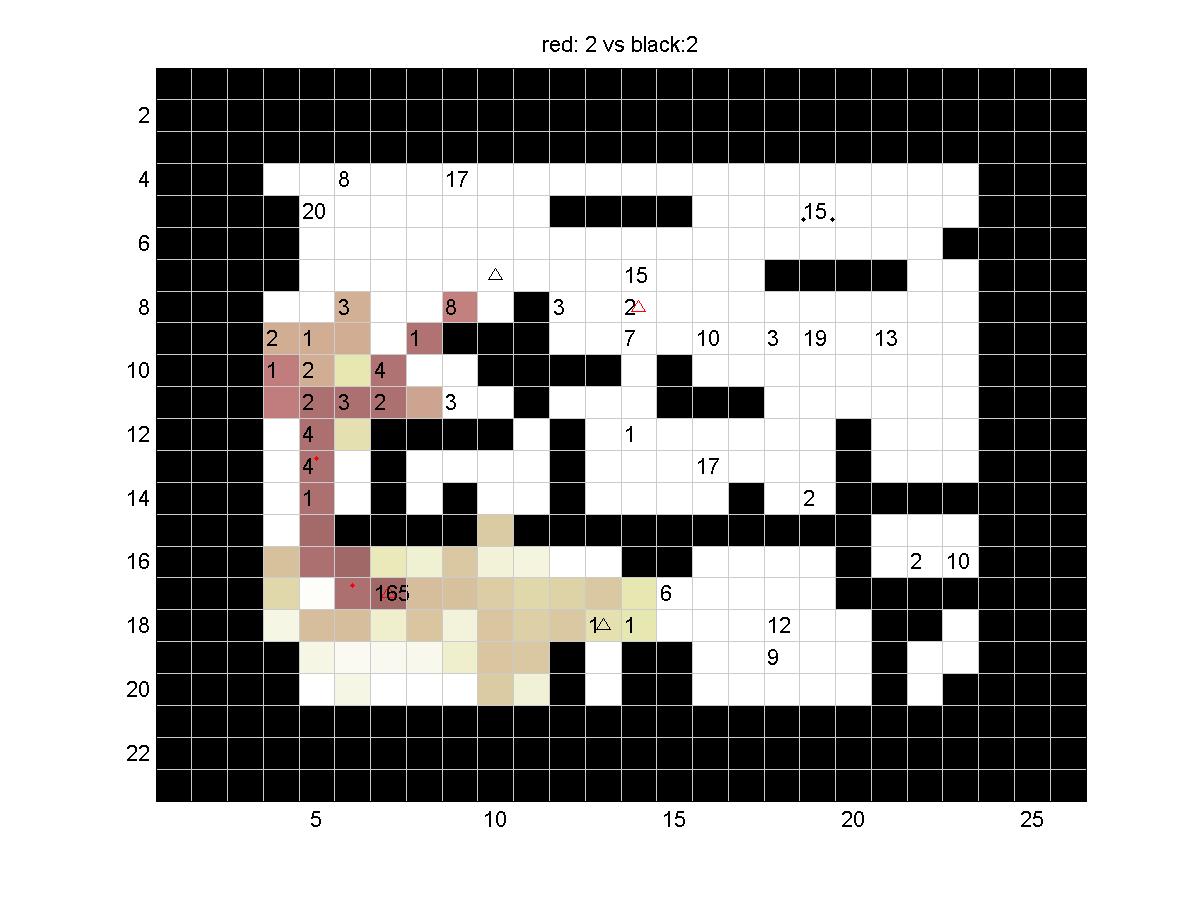
Board: 2
This board is good for showing the large sugar stack retrieving ability of the ants. There is a small battle possible for the central sugar. The red team has a problem that brining the sugar home requires that it first be brought farther away. This can lower your score if you do not get it all the way home.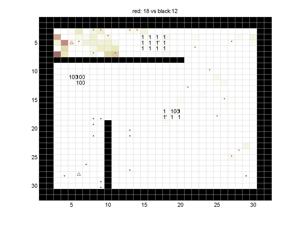
|
|---|
| Sample | Jan | Nathan | David | Markus | Nathan | Edin | Fabio |
|---|
| Sample | 0 | 46 | 5 | 43 | 38 | 12 | 54 | 32 |
| Jan | -137 | -73 | -11 | 39 | 10 | -67 | -50 | -42 |
| Nathan | -89 | -29 | 6 | 28 | 34 | -29 | -17 | -28 |
| David | -140 | -118 | -111 | -61 | -102 | -63 | -60 | -71 |
| Markus | -139 | -129 | -133 | -51 | -98 | -62 | -62 | -59 |
| Nathan | -139 | -118 | -124 | -68 | -63 | -47 | -47 | -58 |
| Edin | -137 | -104 | -119 | -65 | -64 | -62 | -65 | -47 |
| Fabio | -137 | -74 | -129 | -67 | -67 | -68 | -64 | -68 |
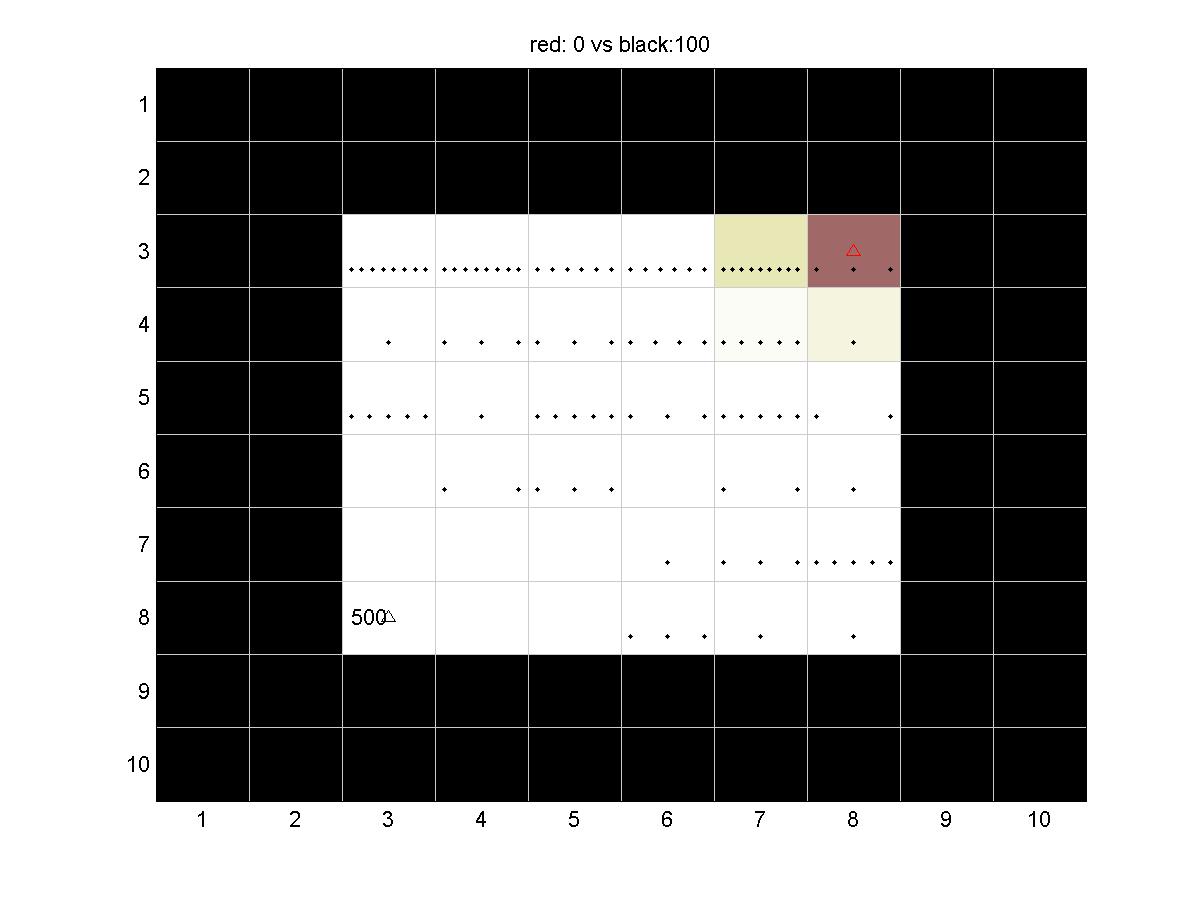
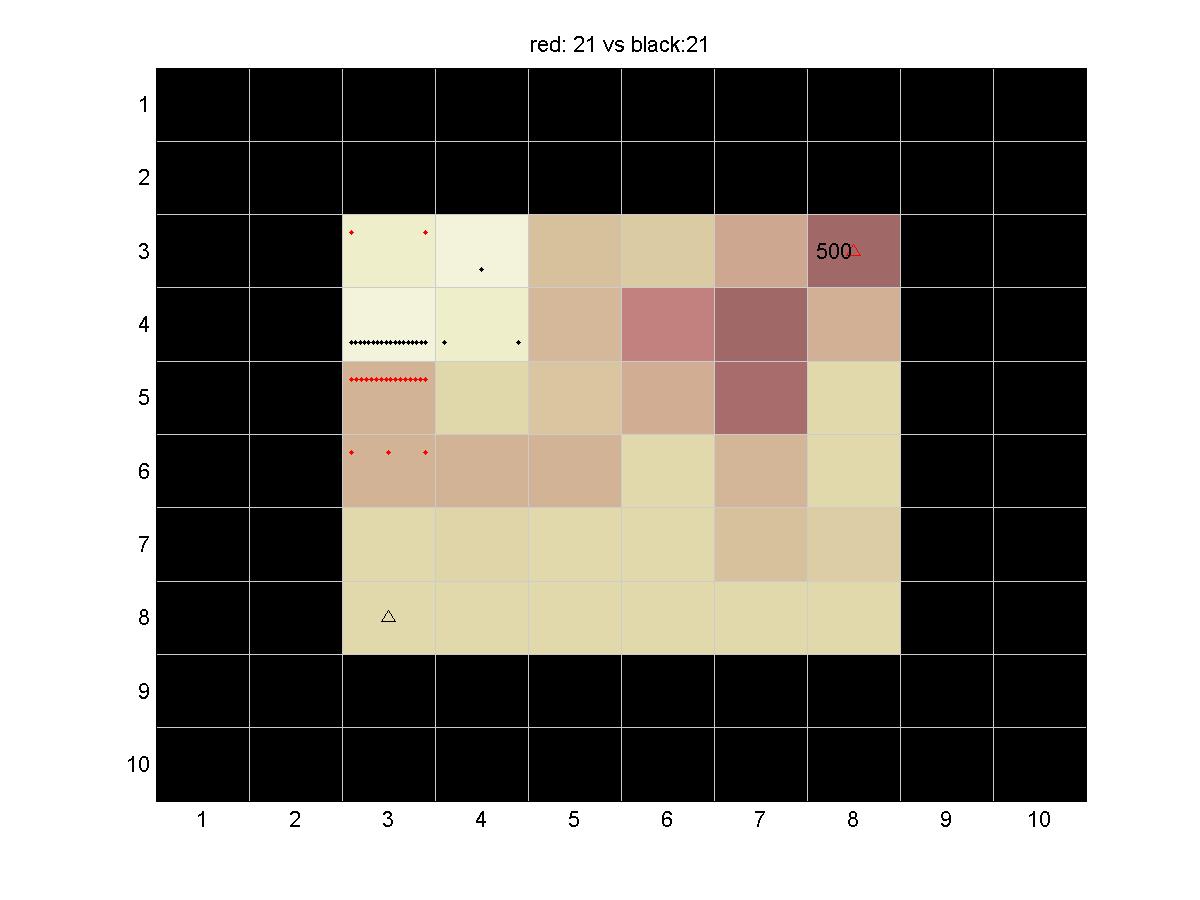
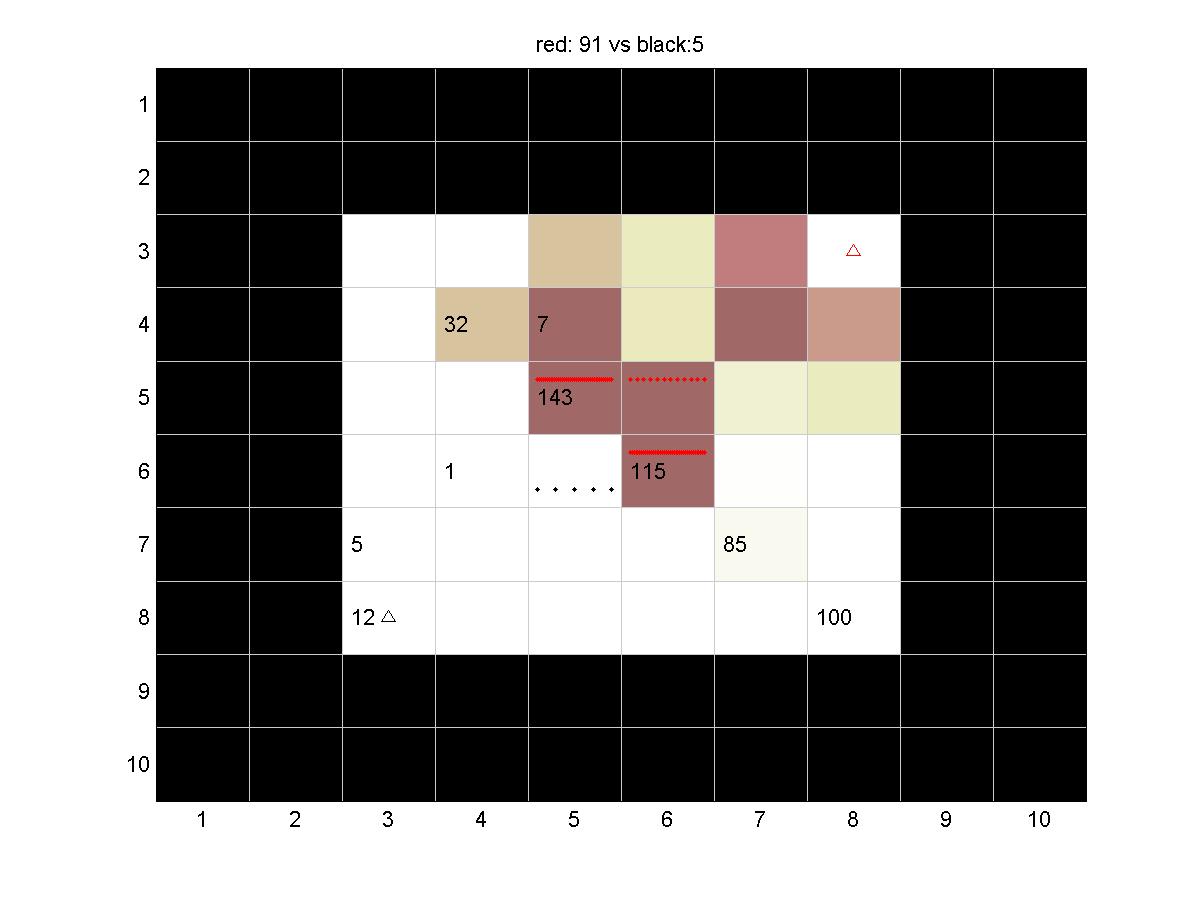
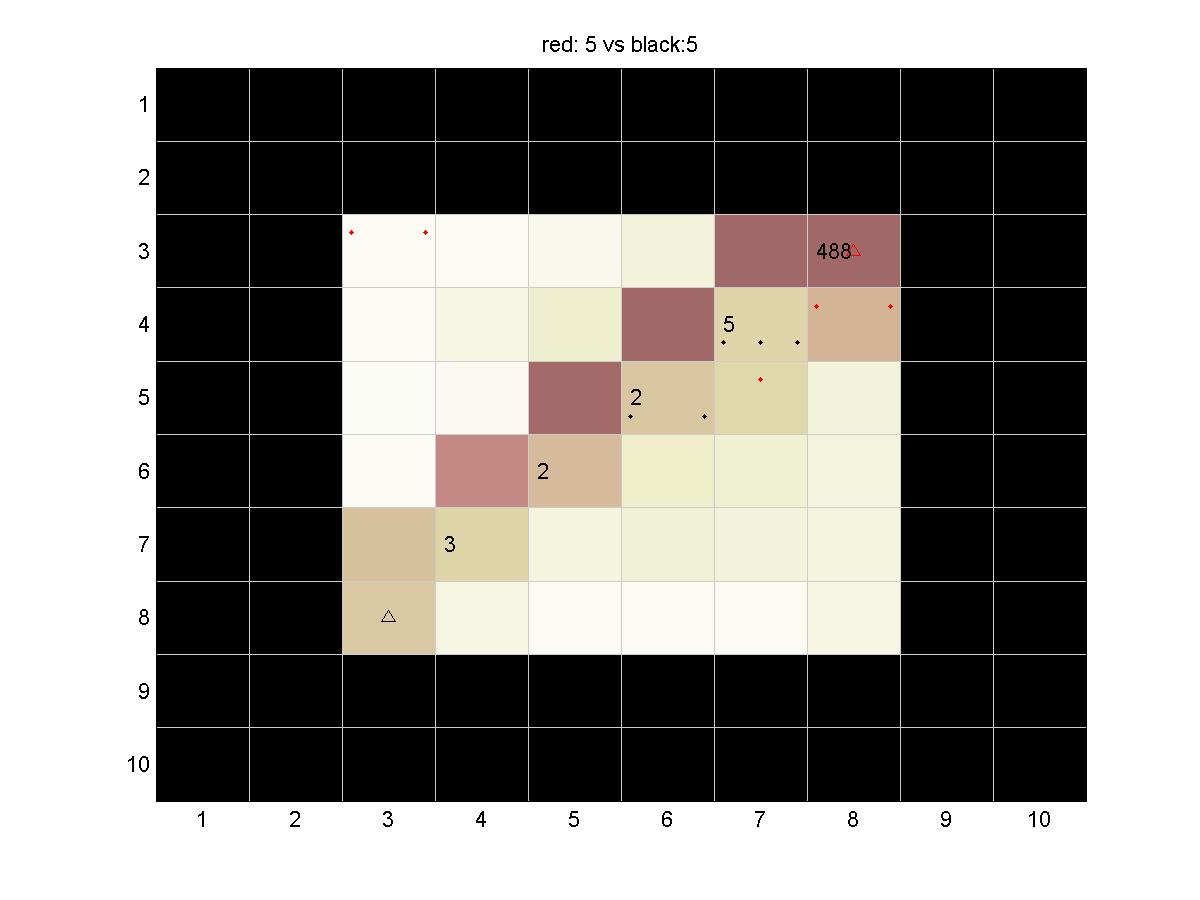
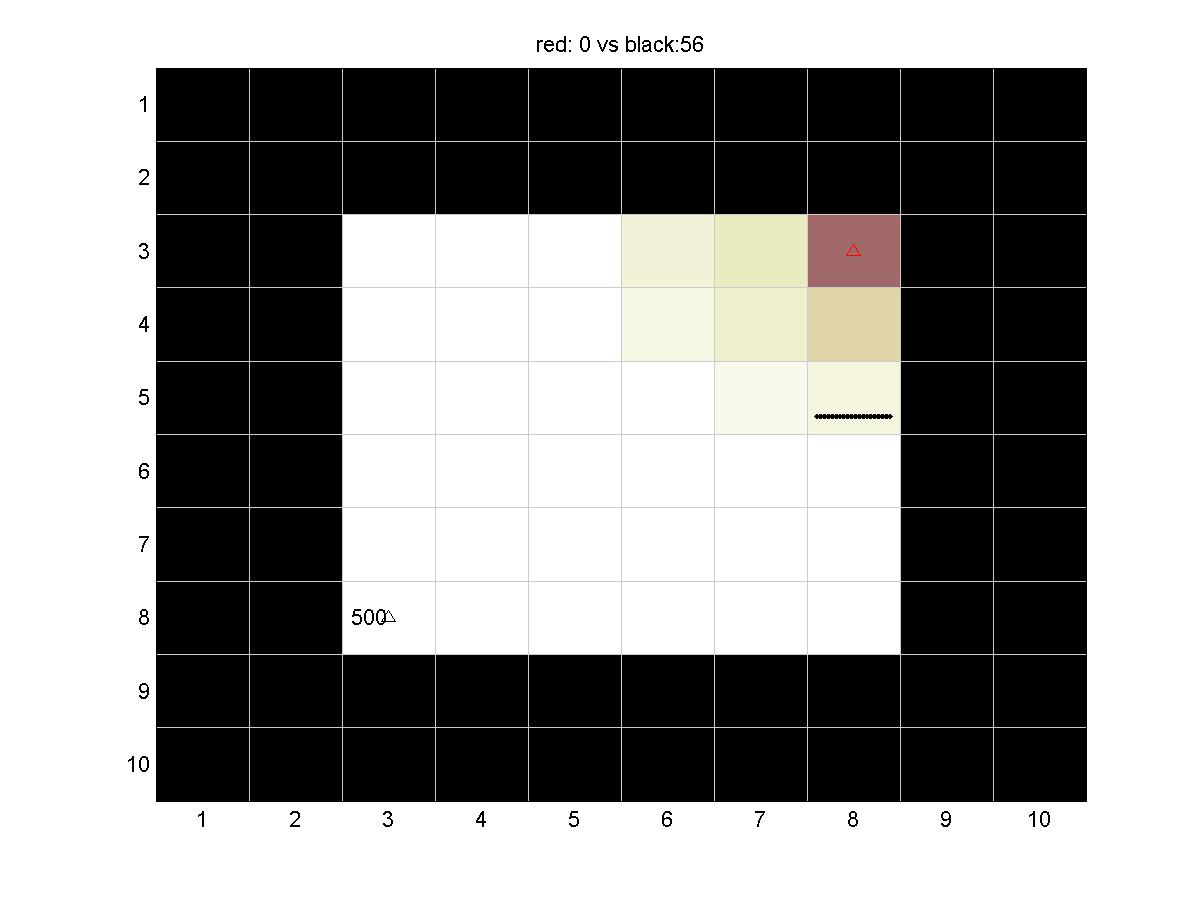
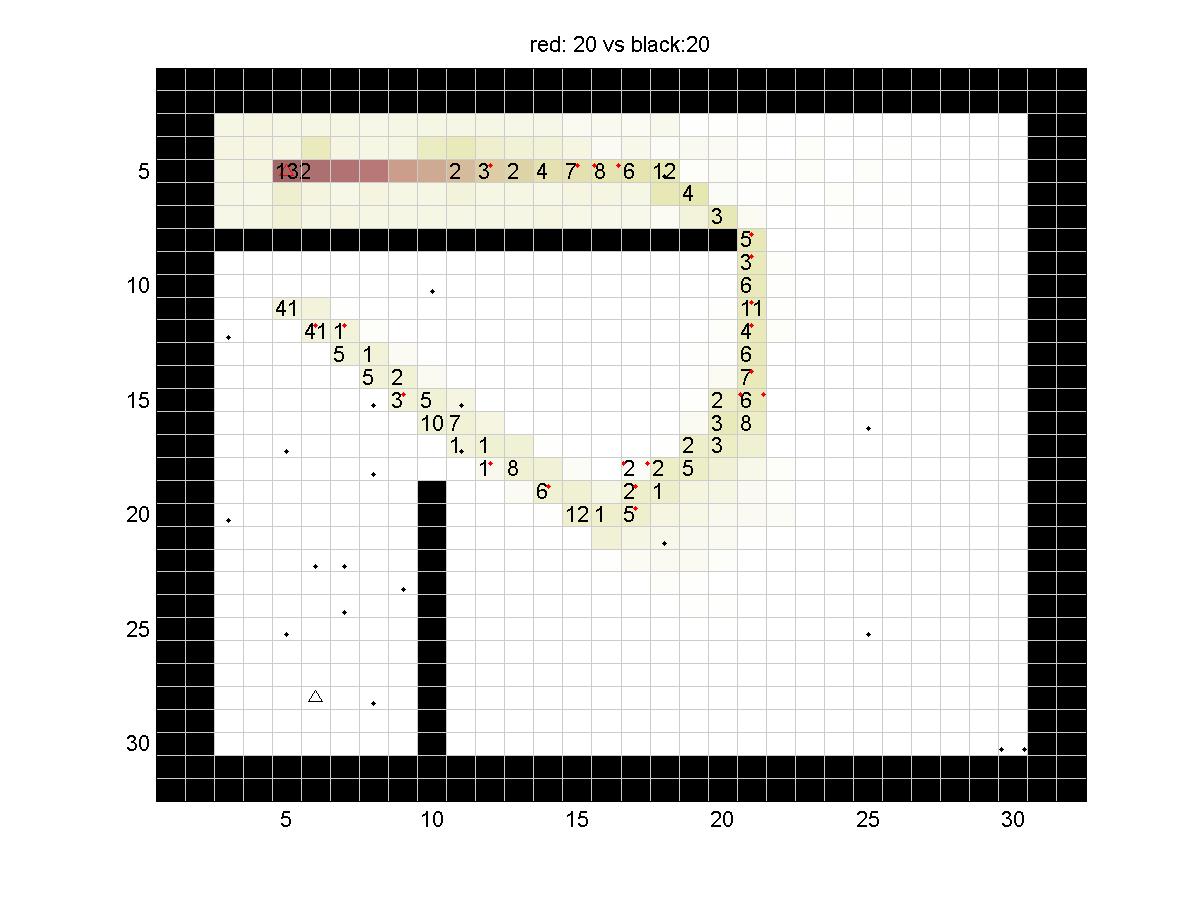
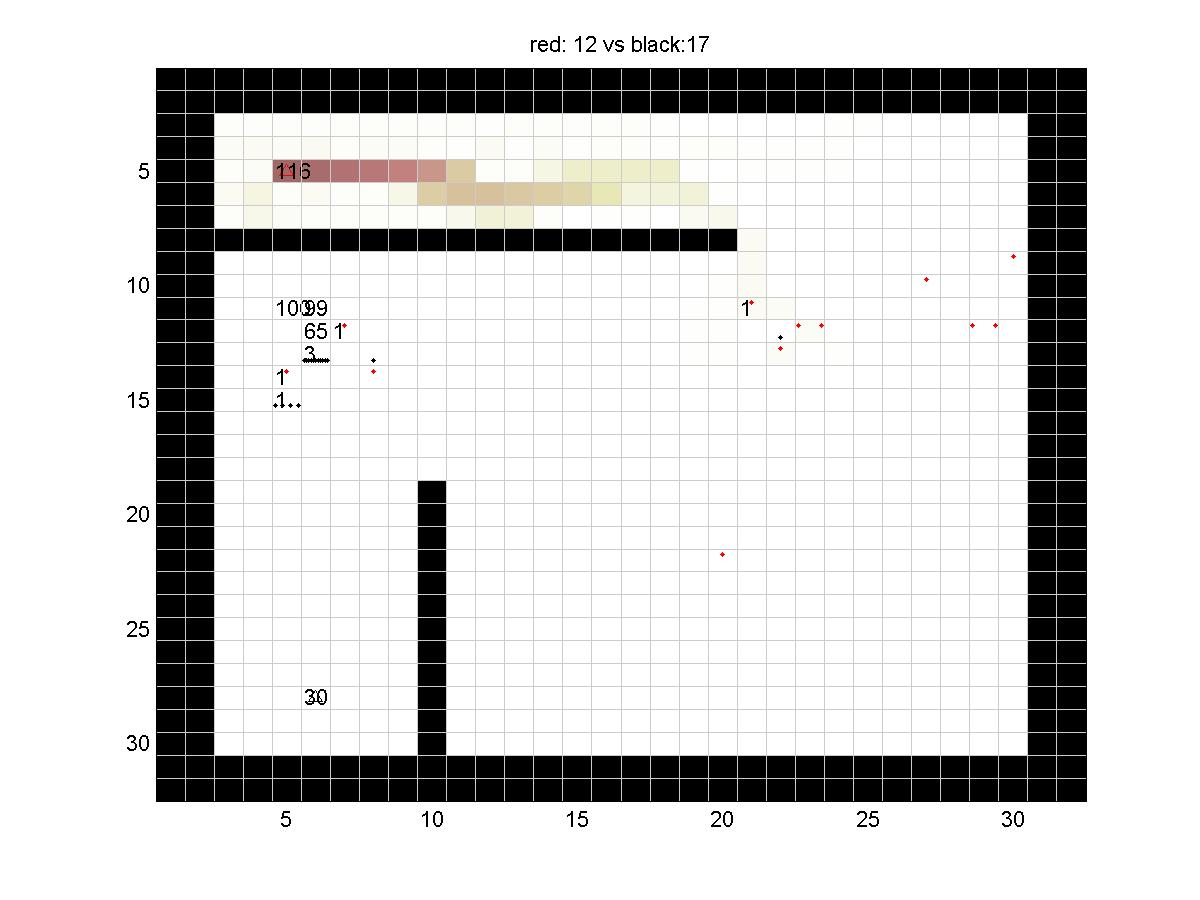
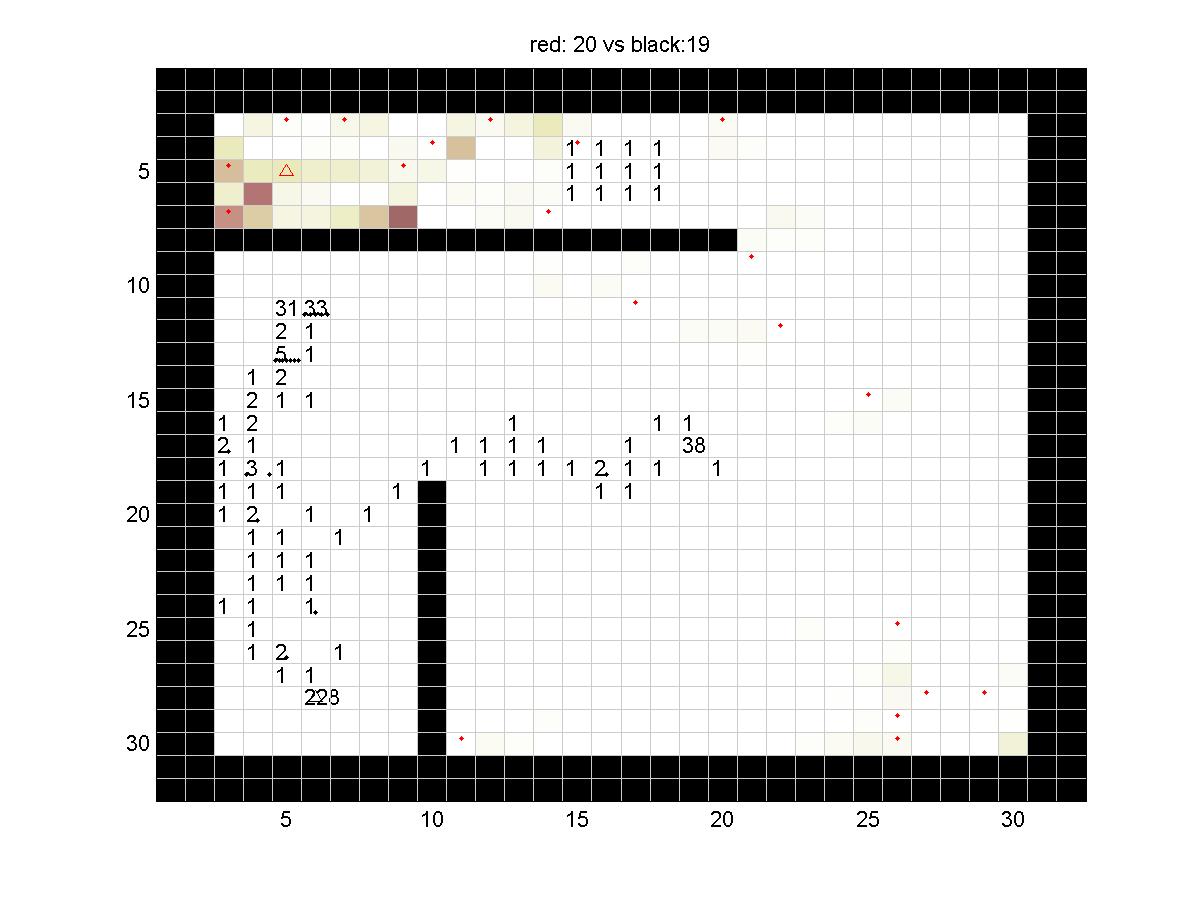
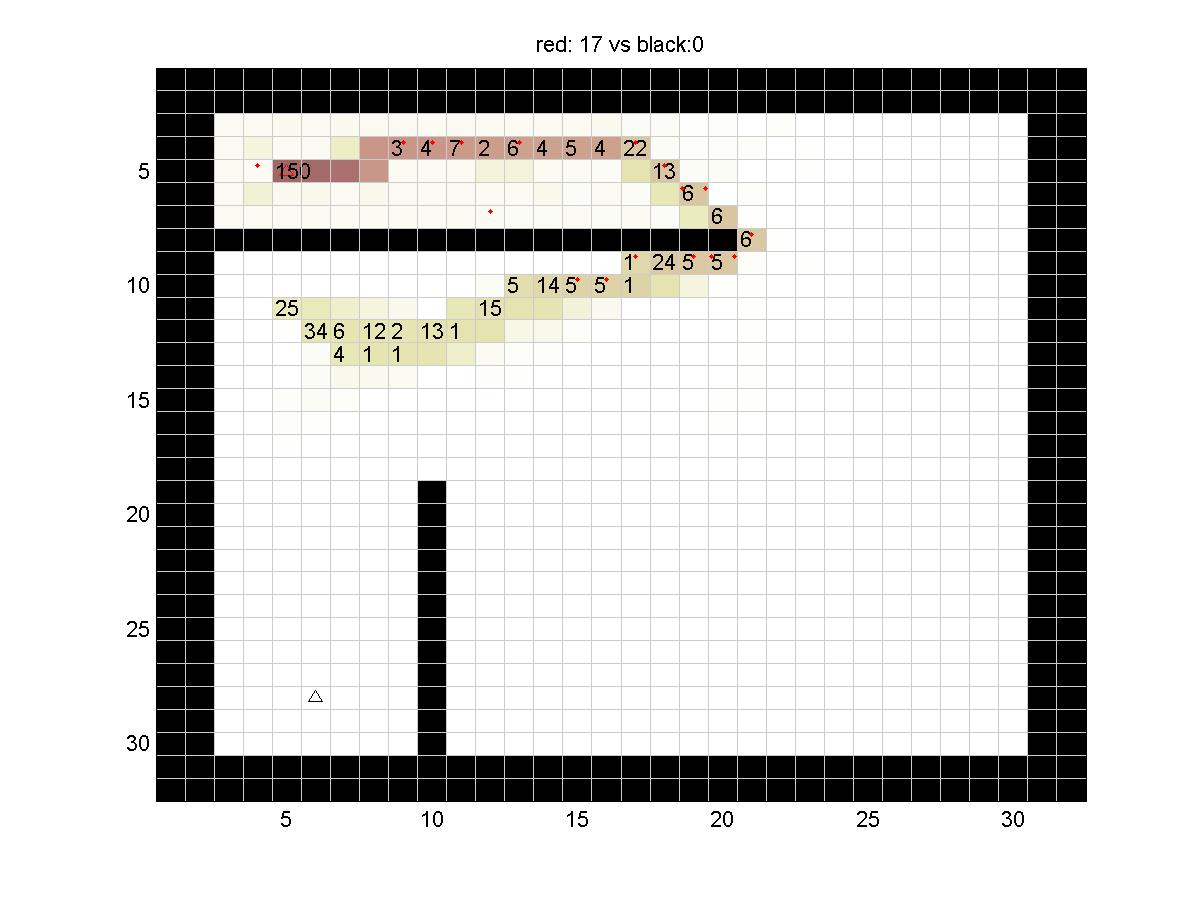
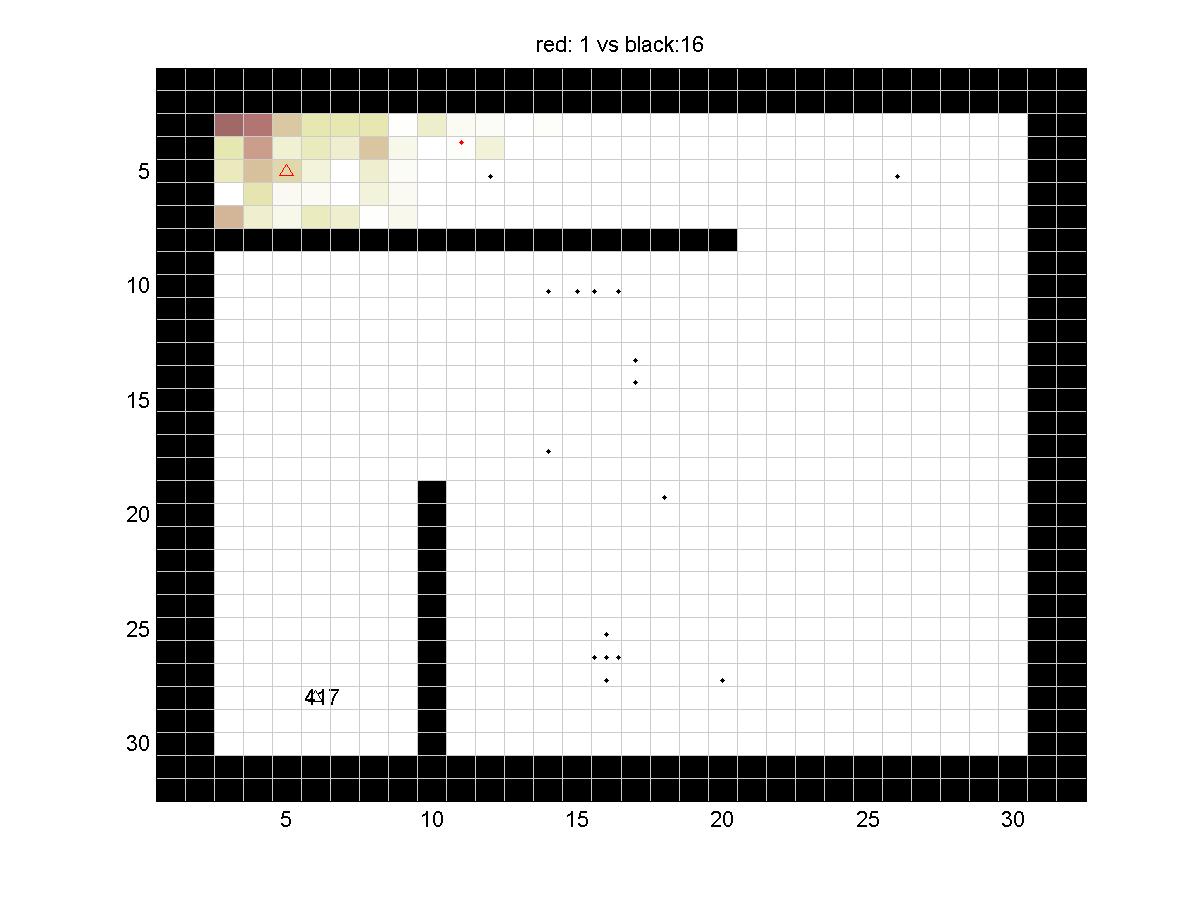
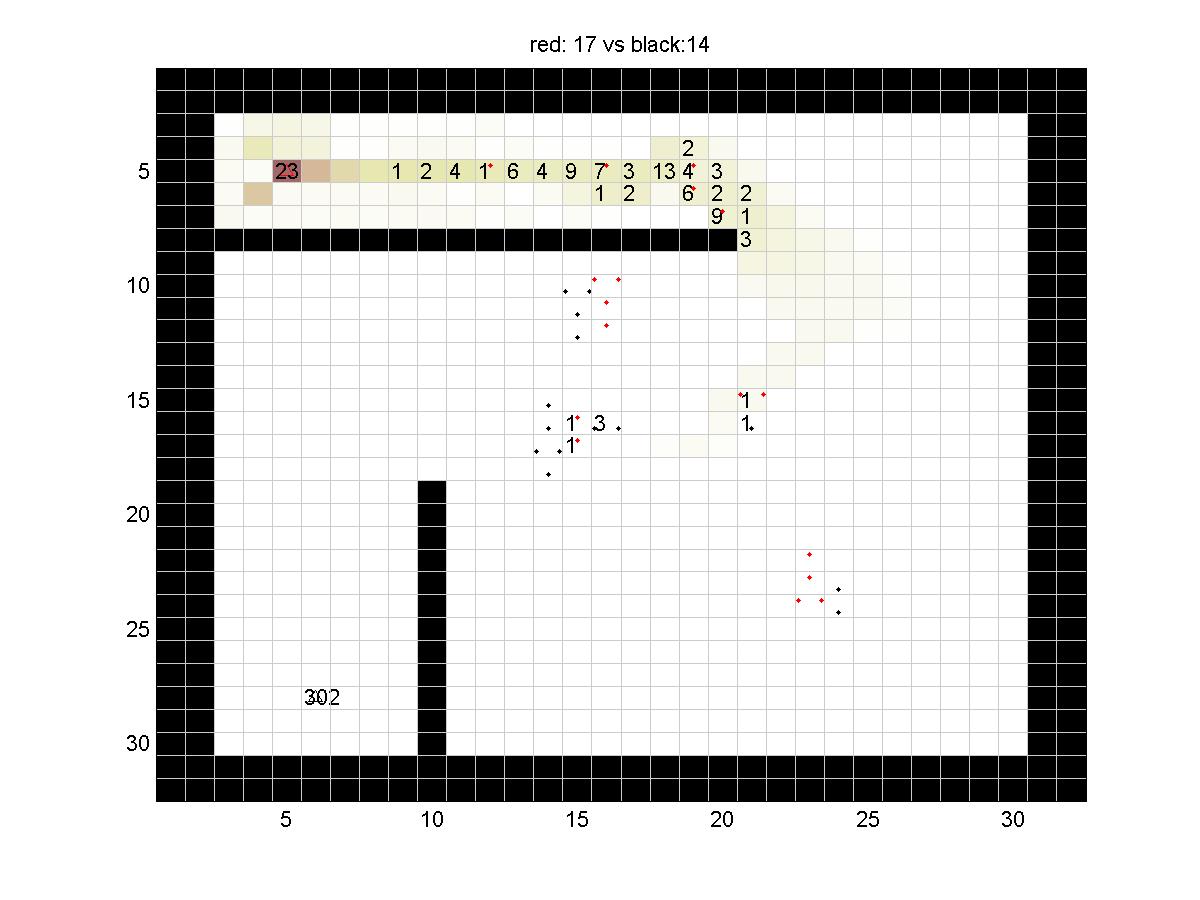
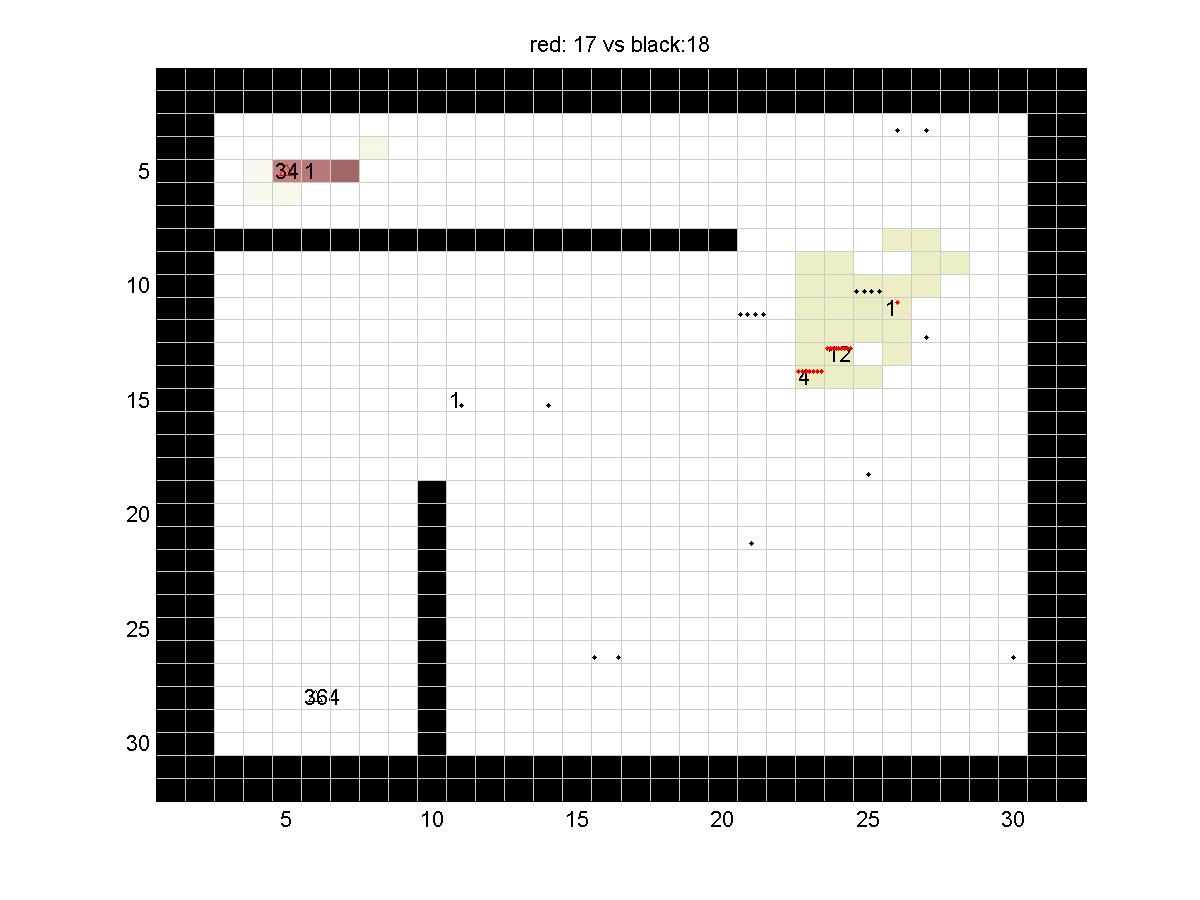
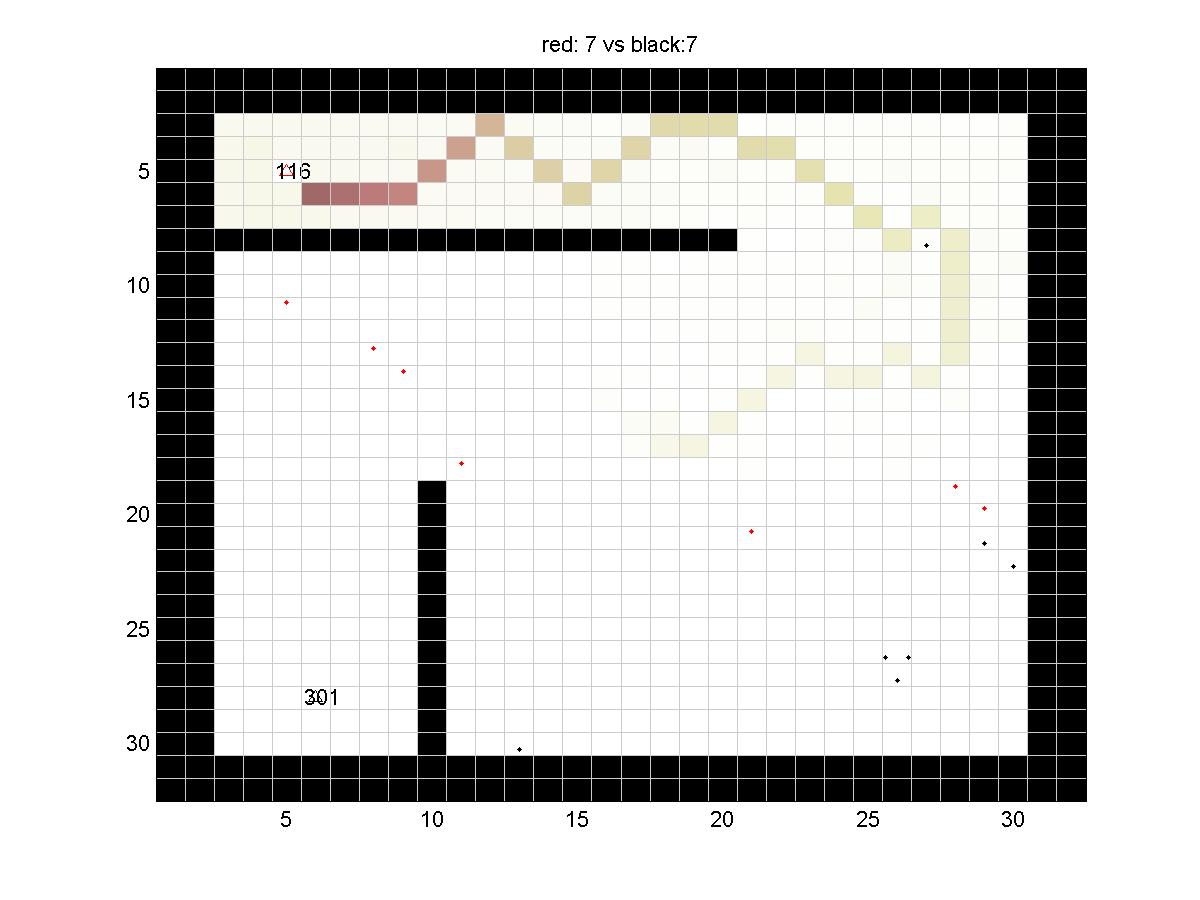
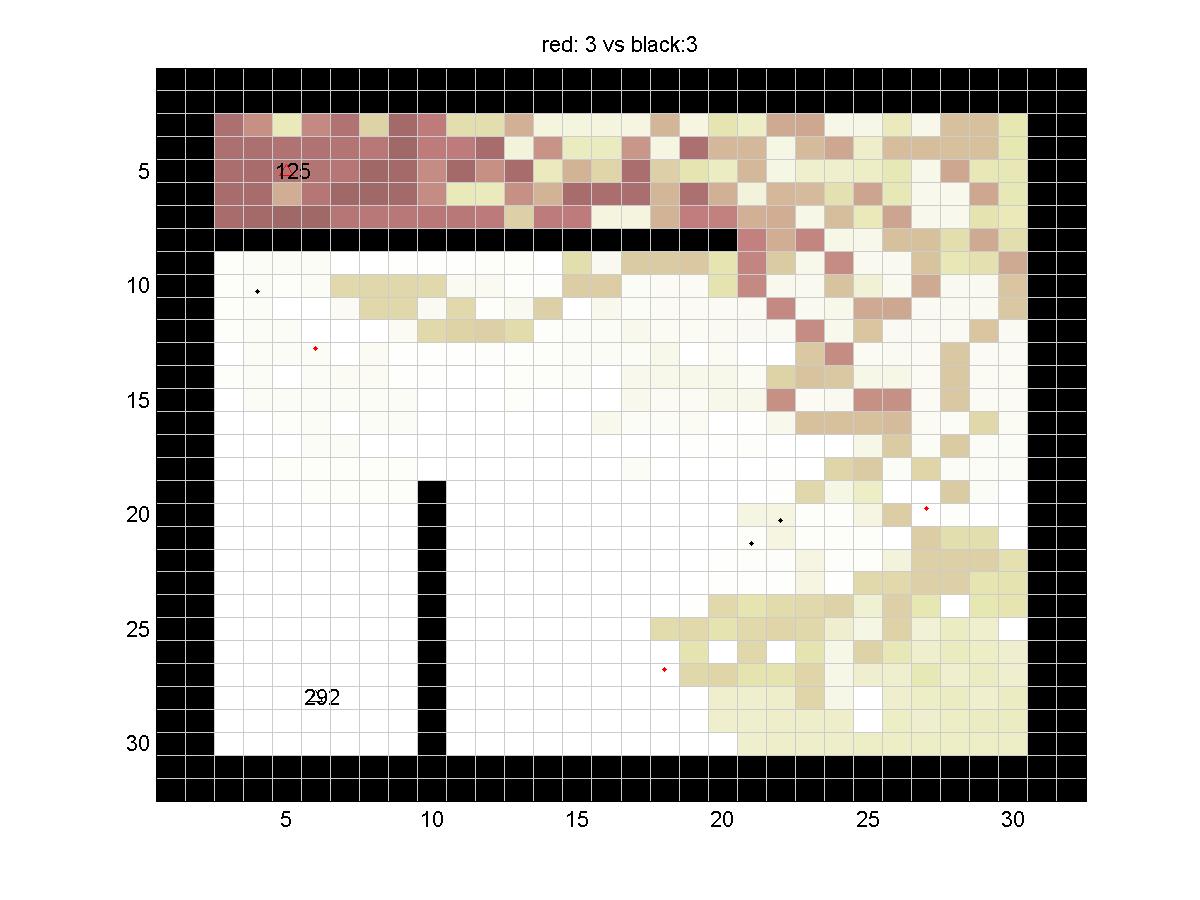
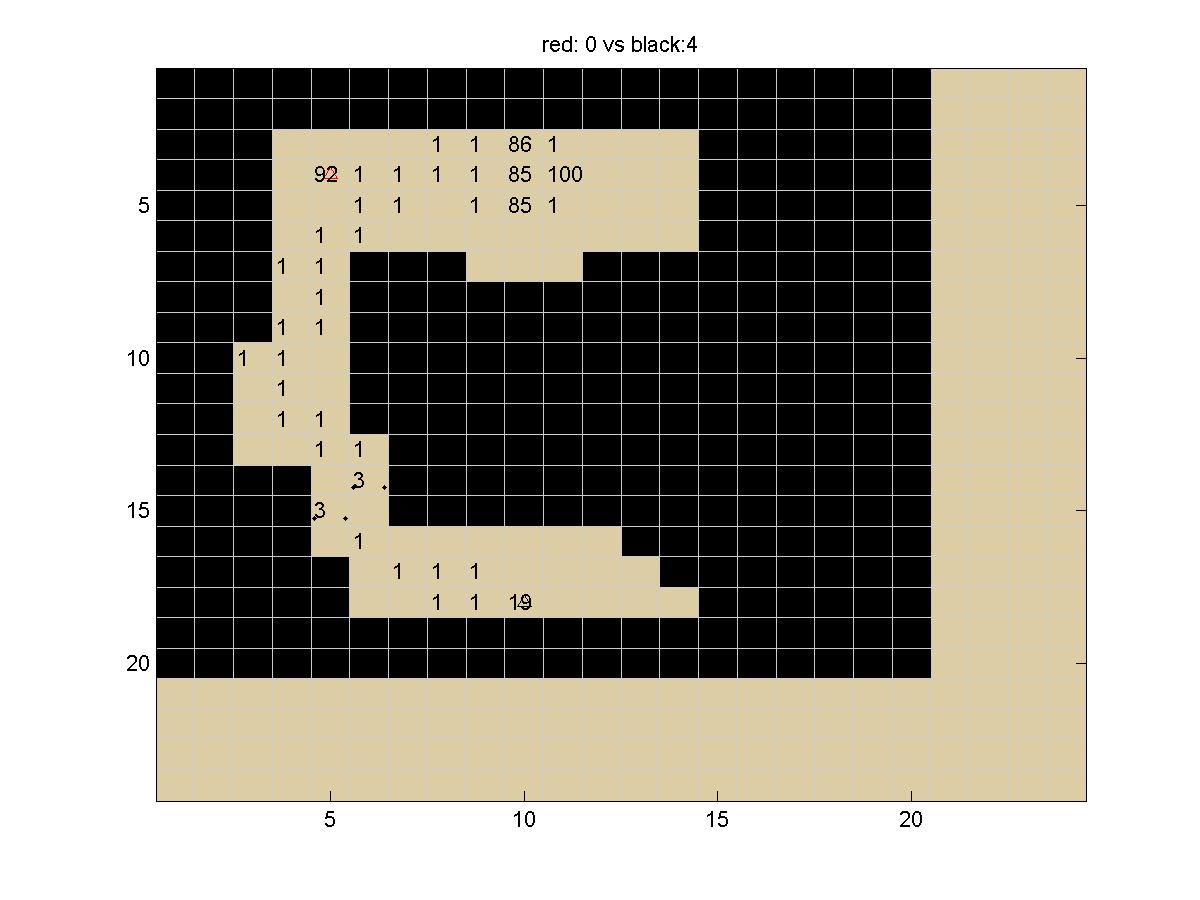
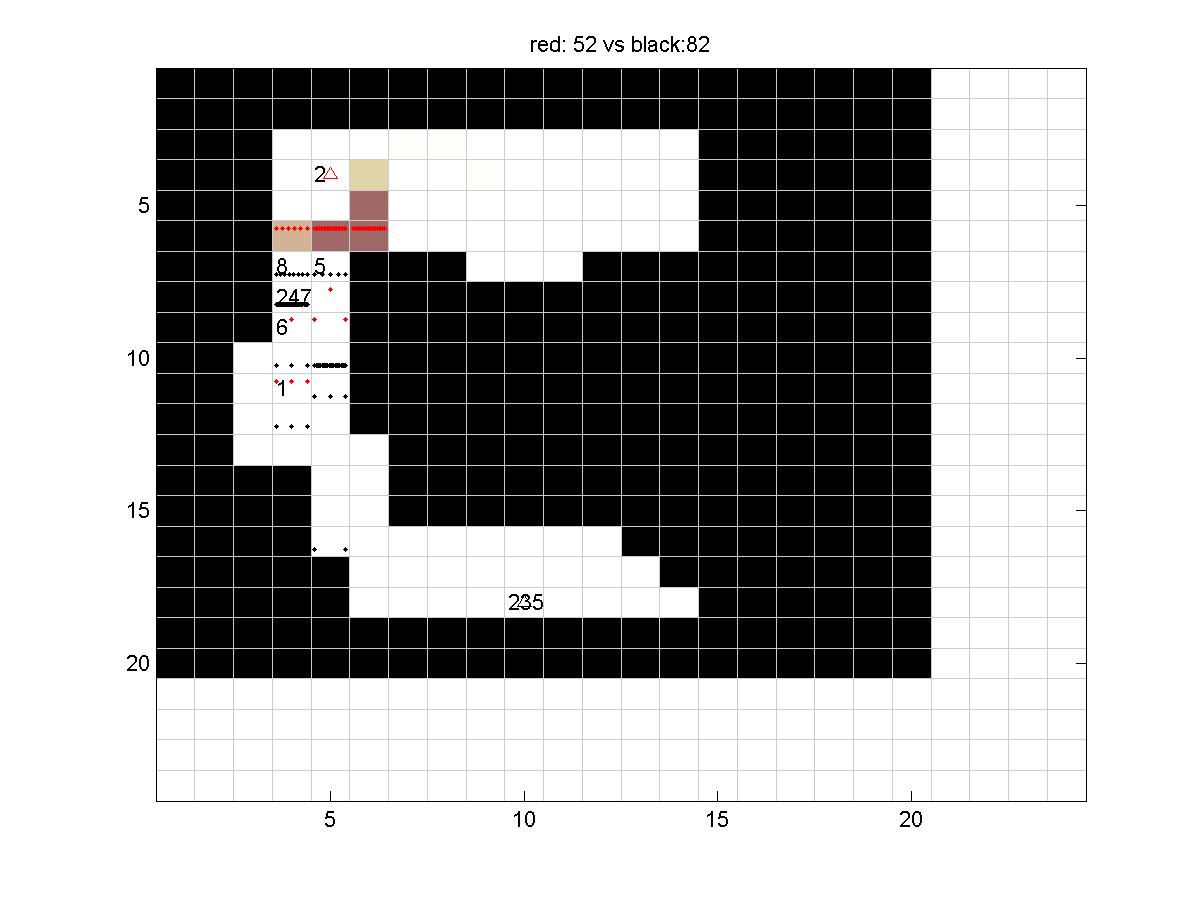
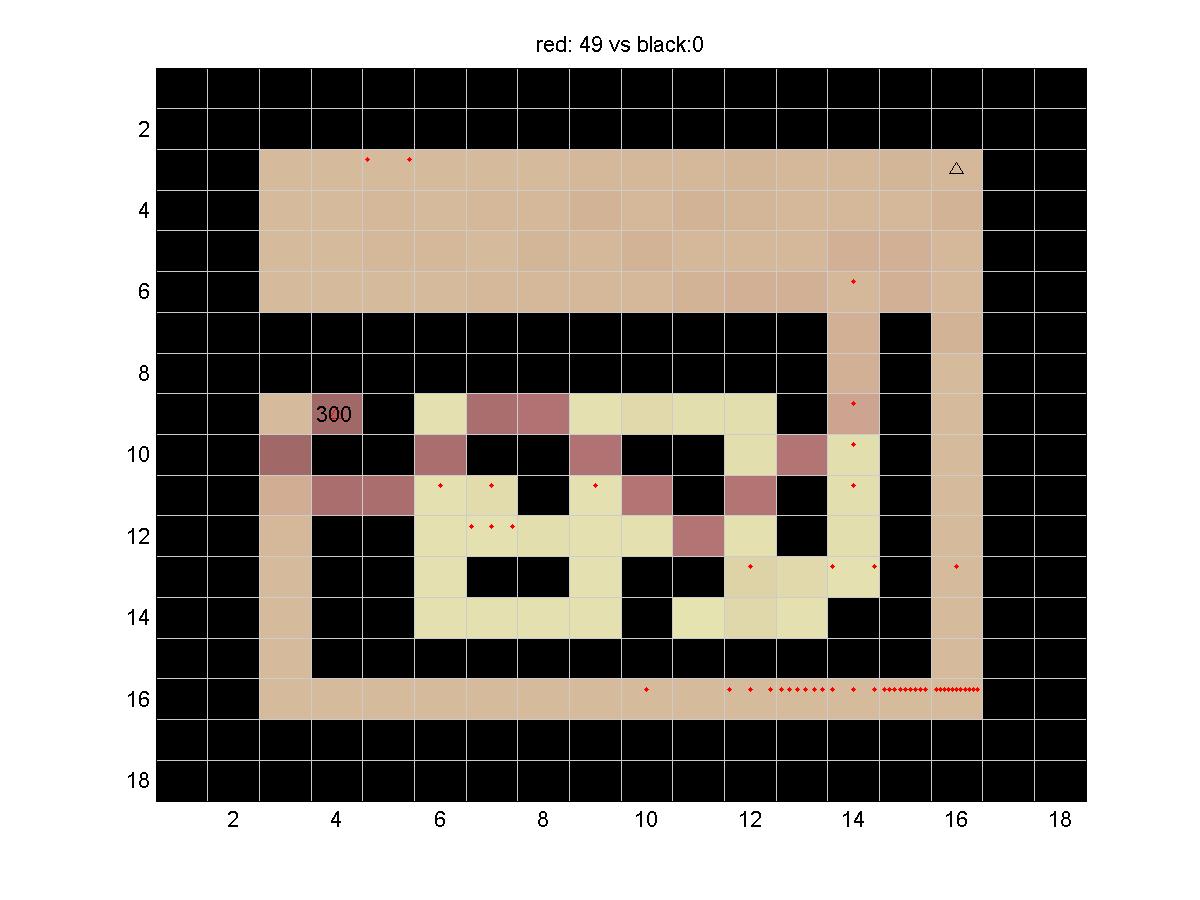
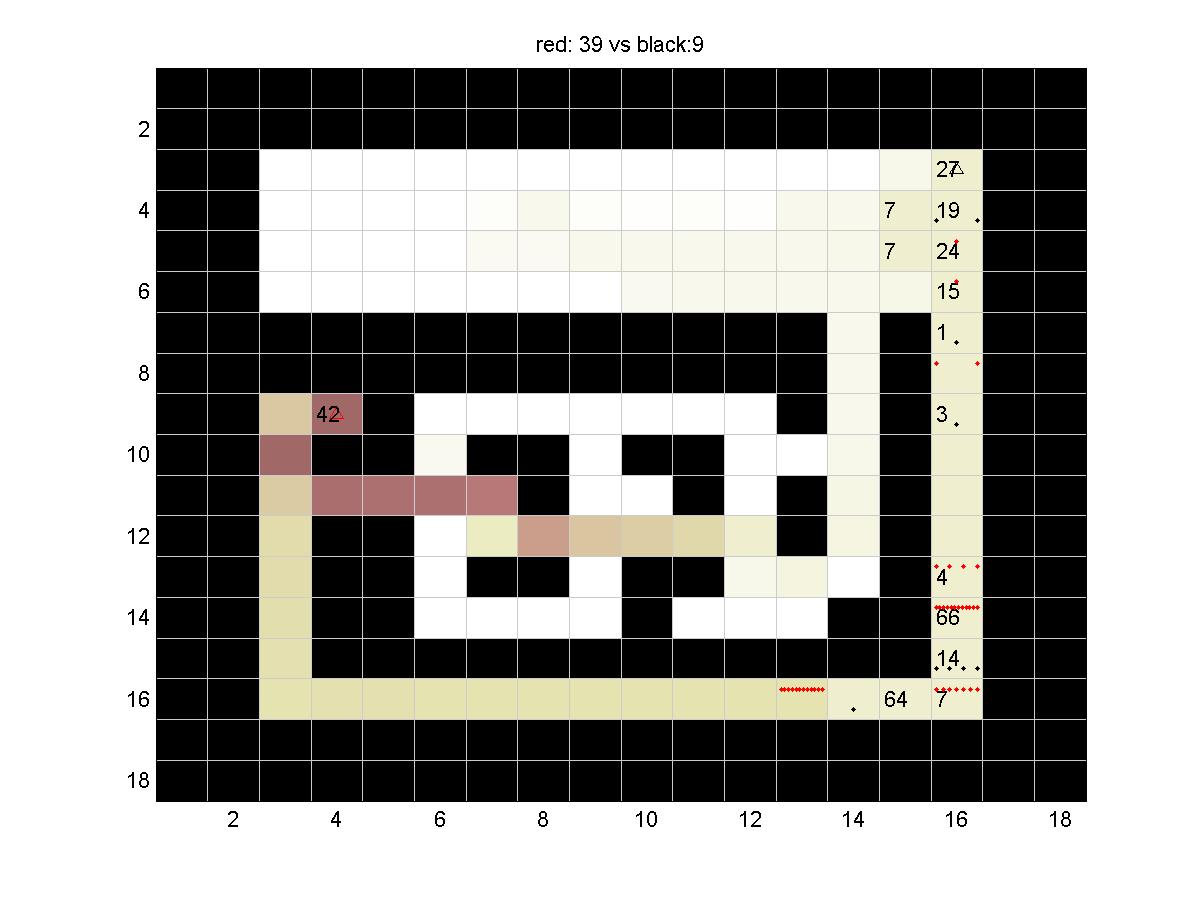
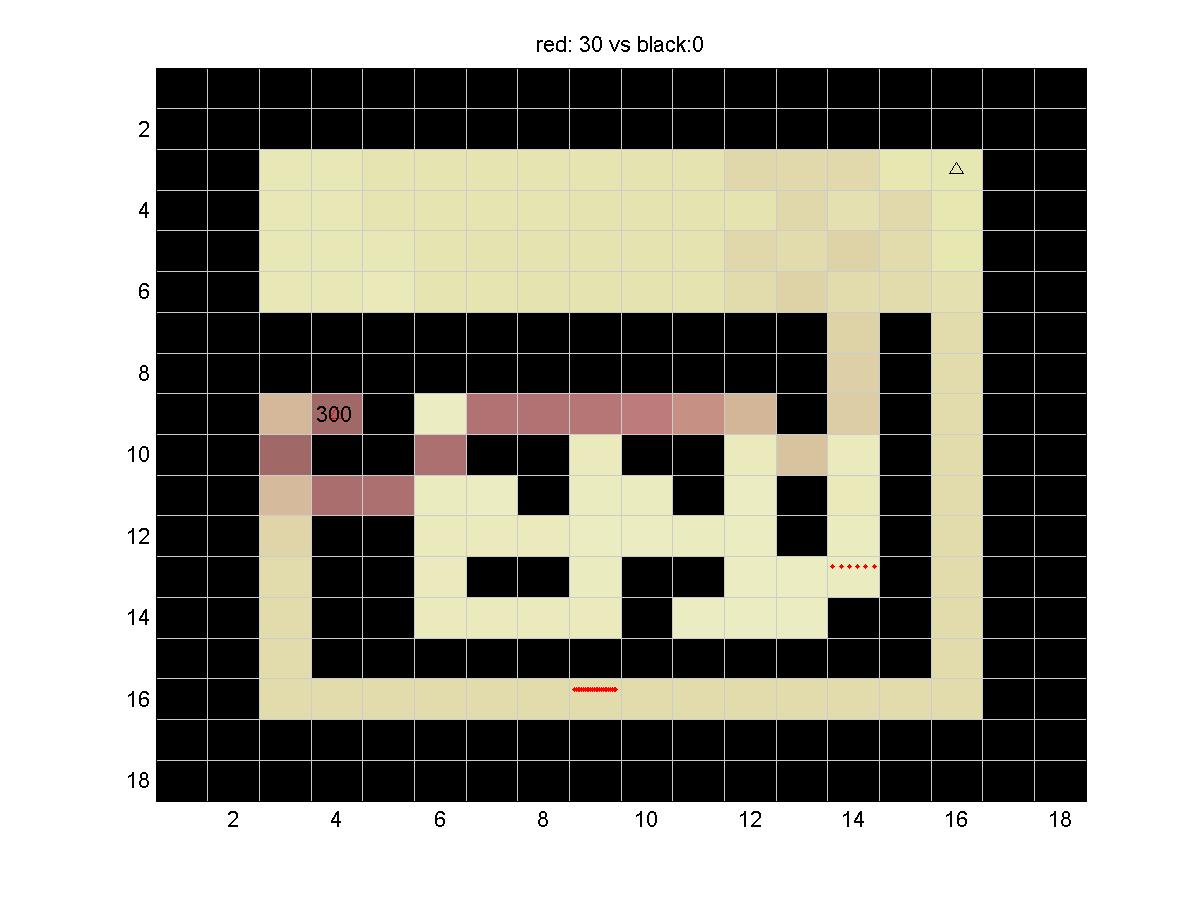
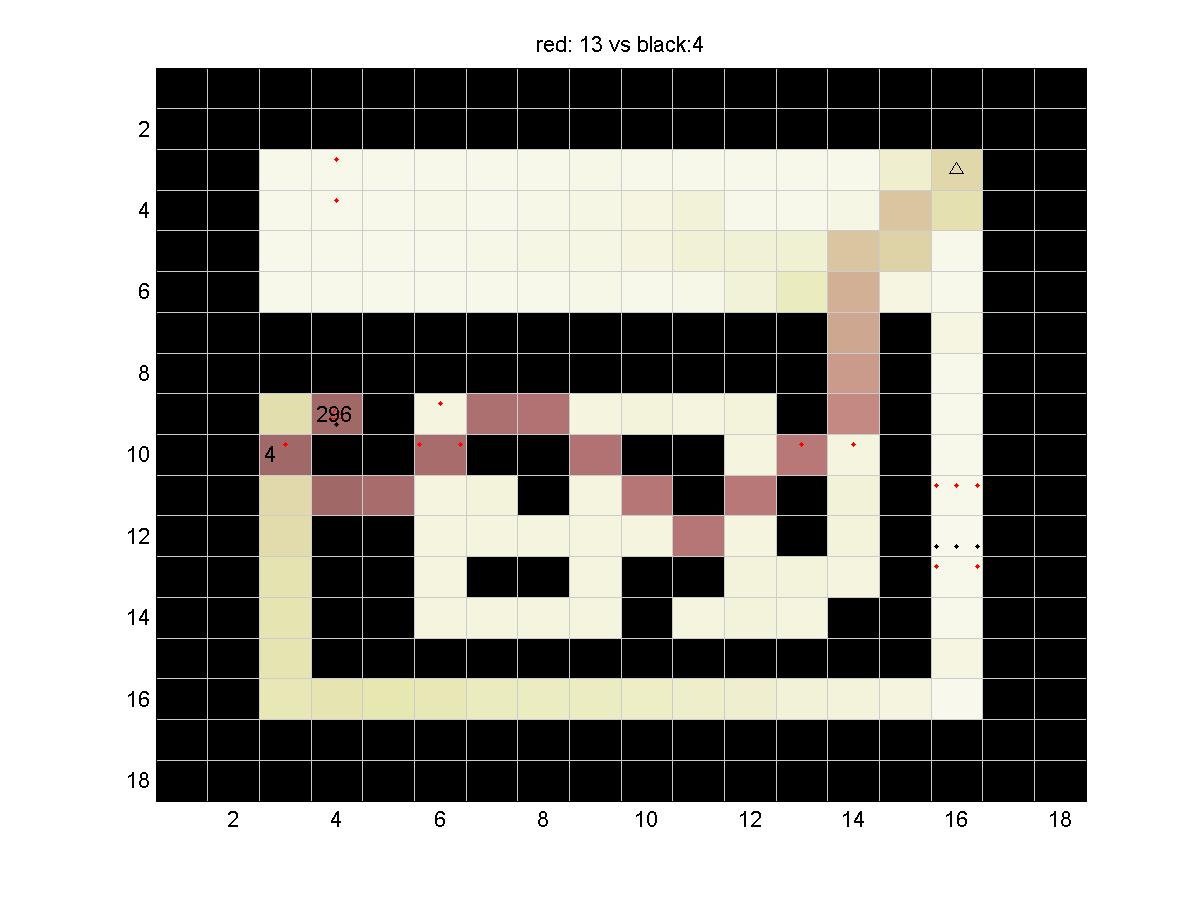
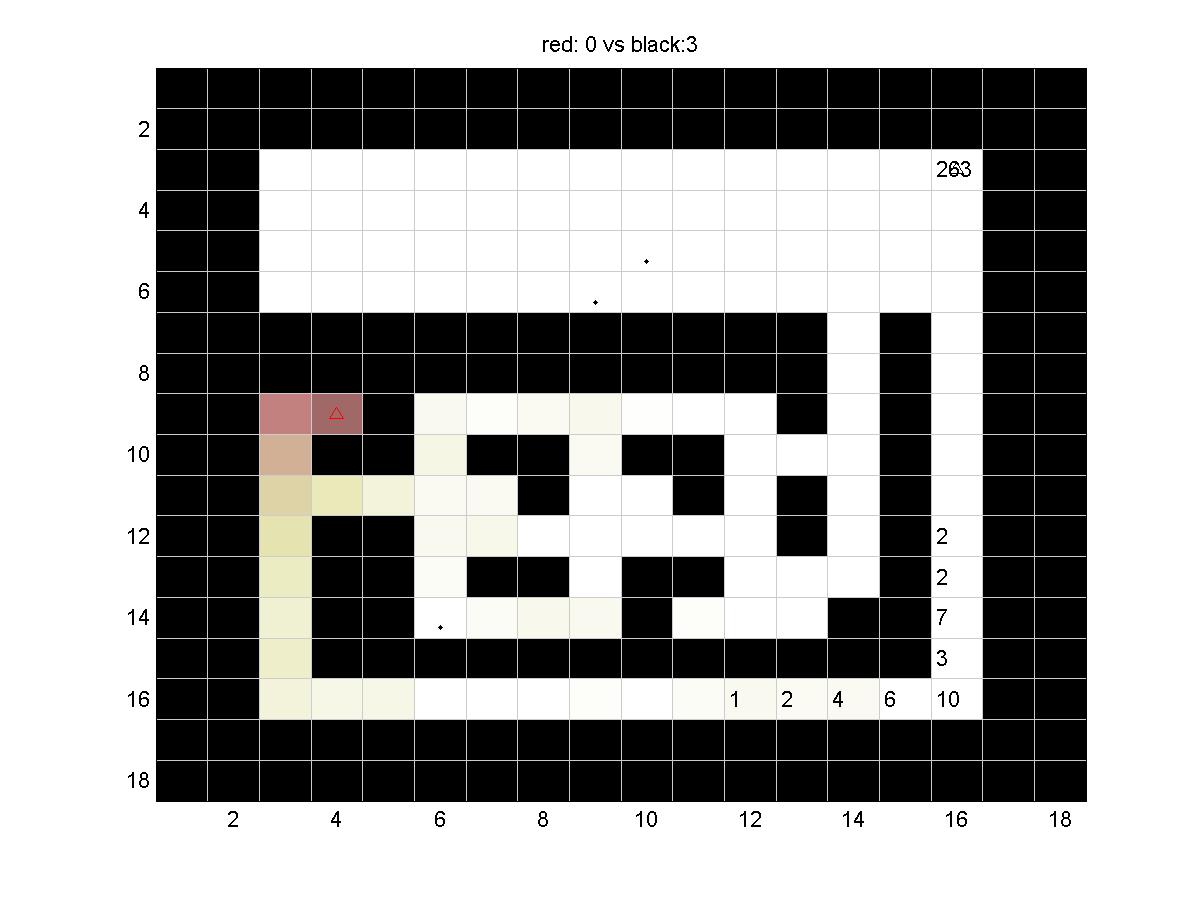
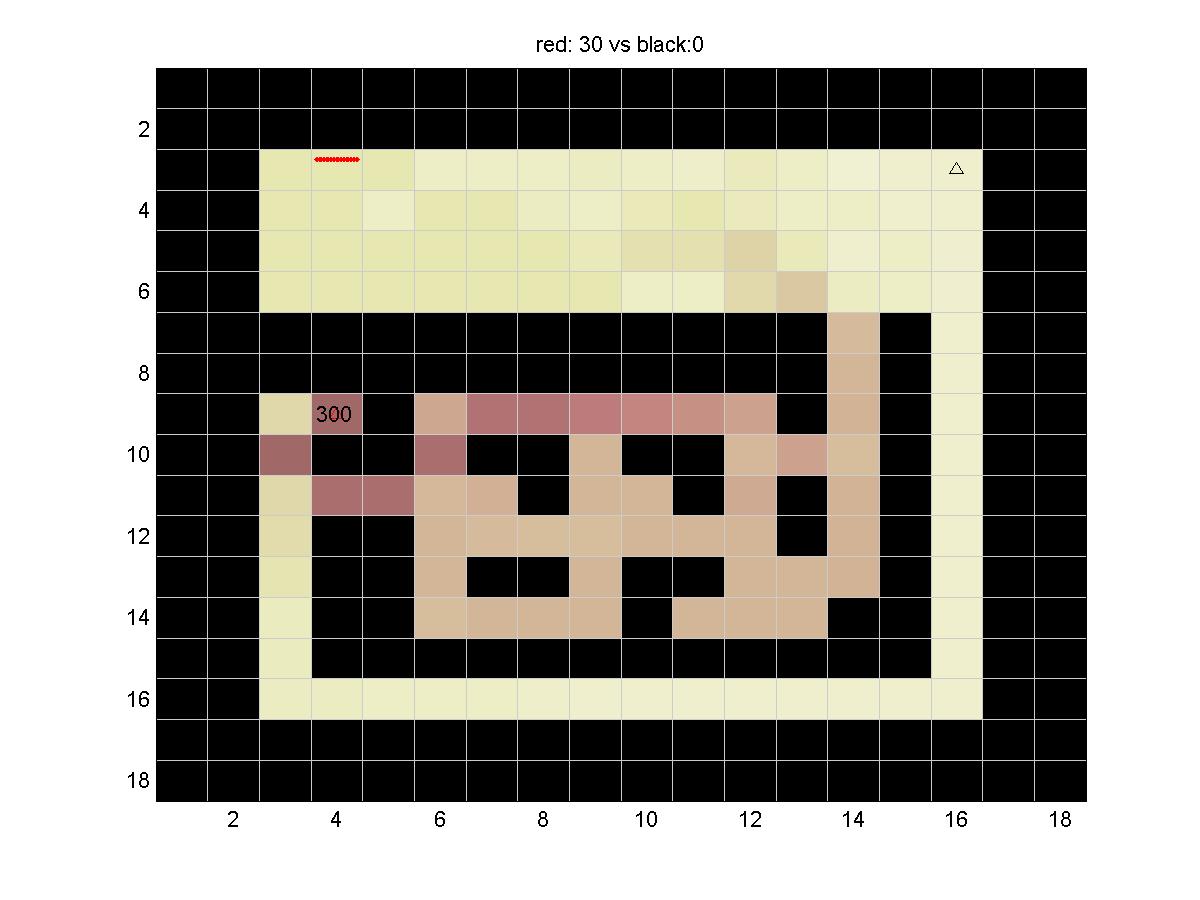
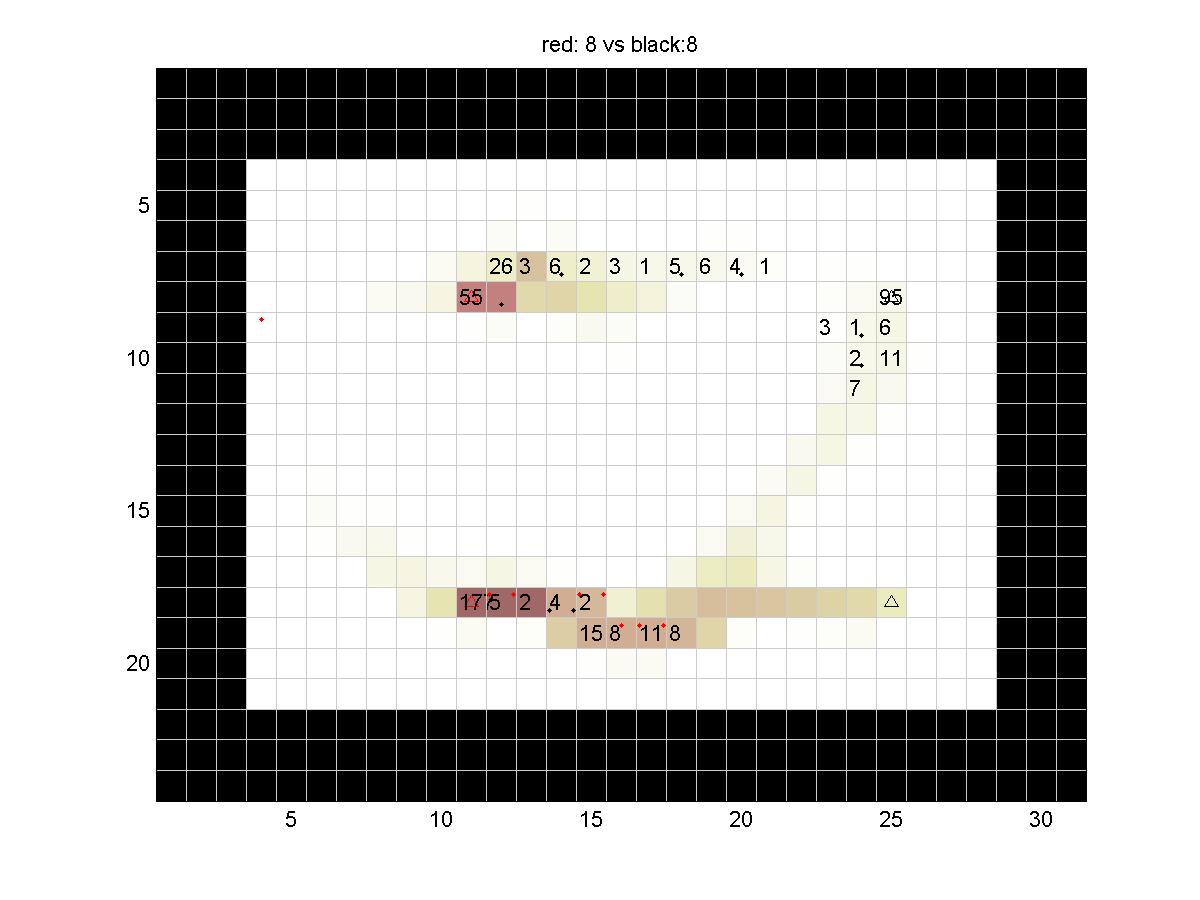
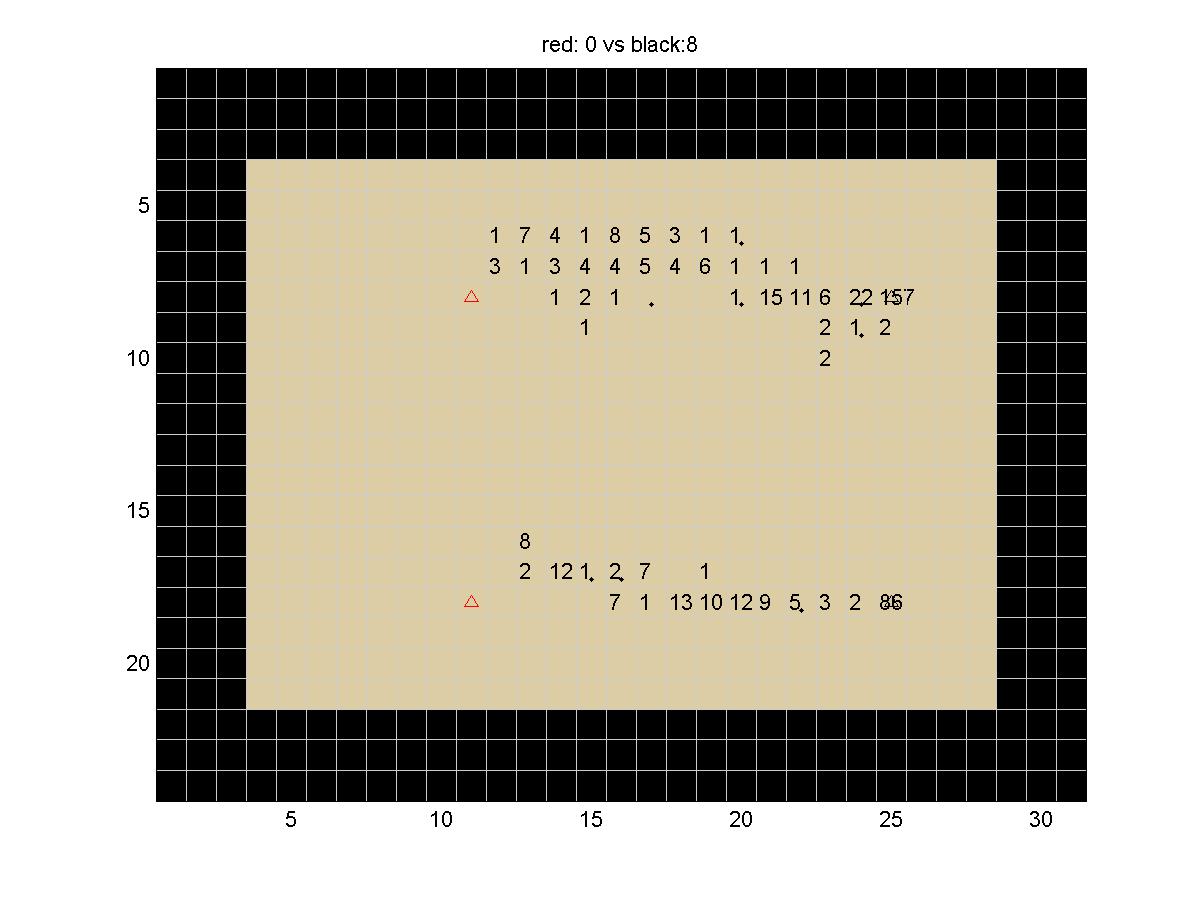
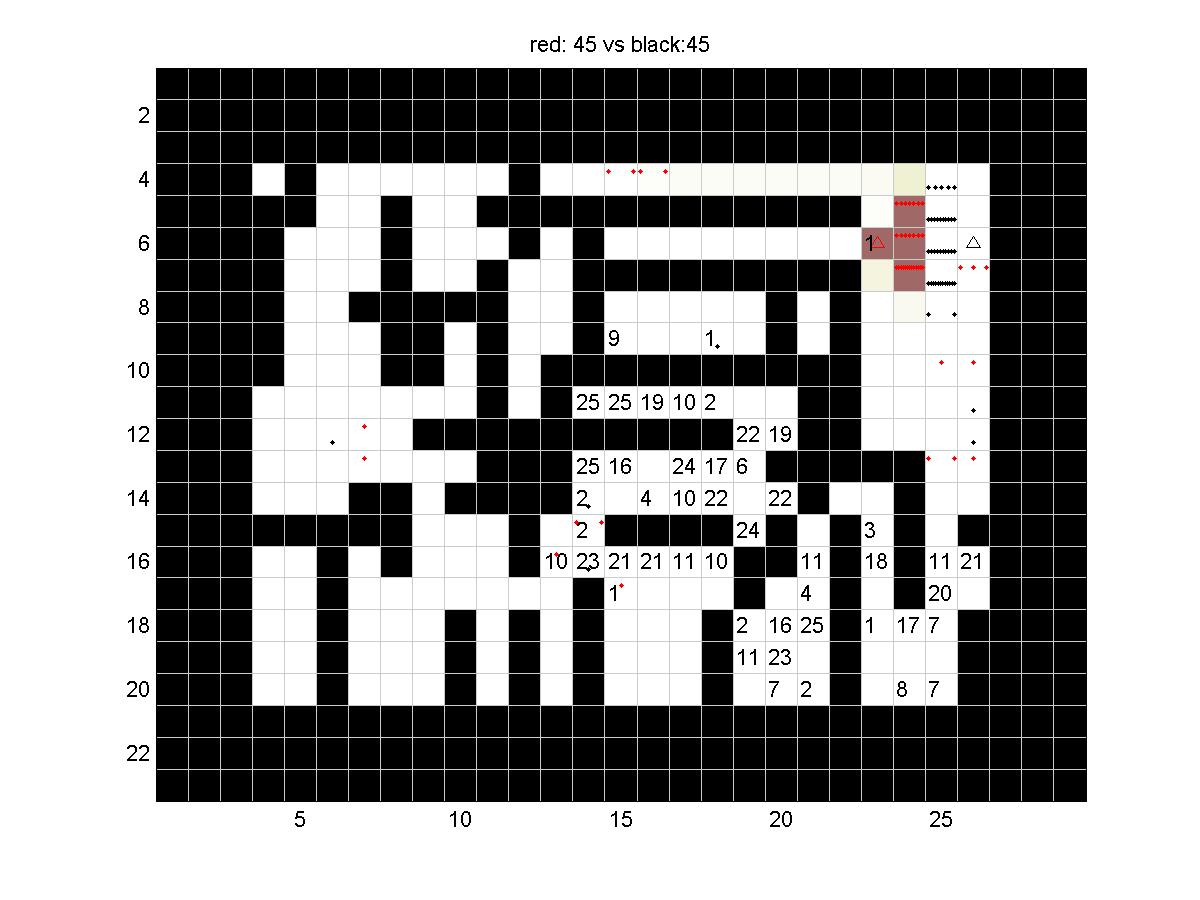
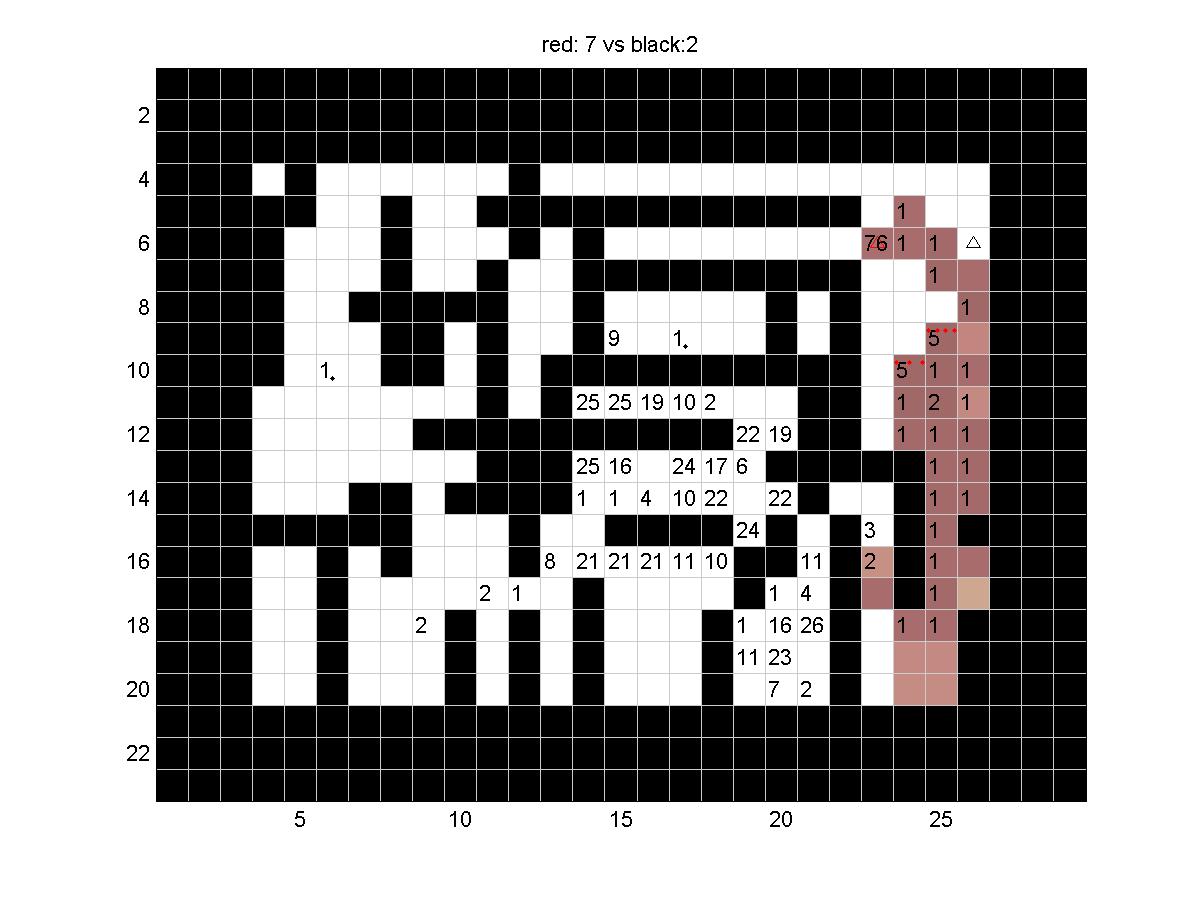
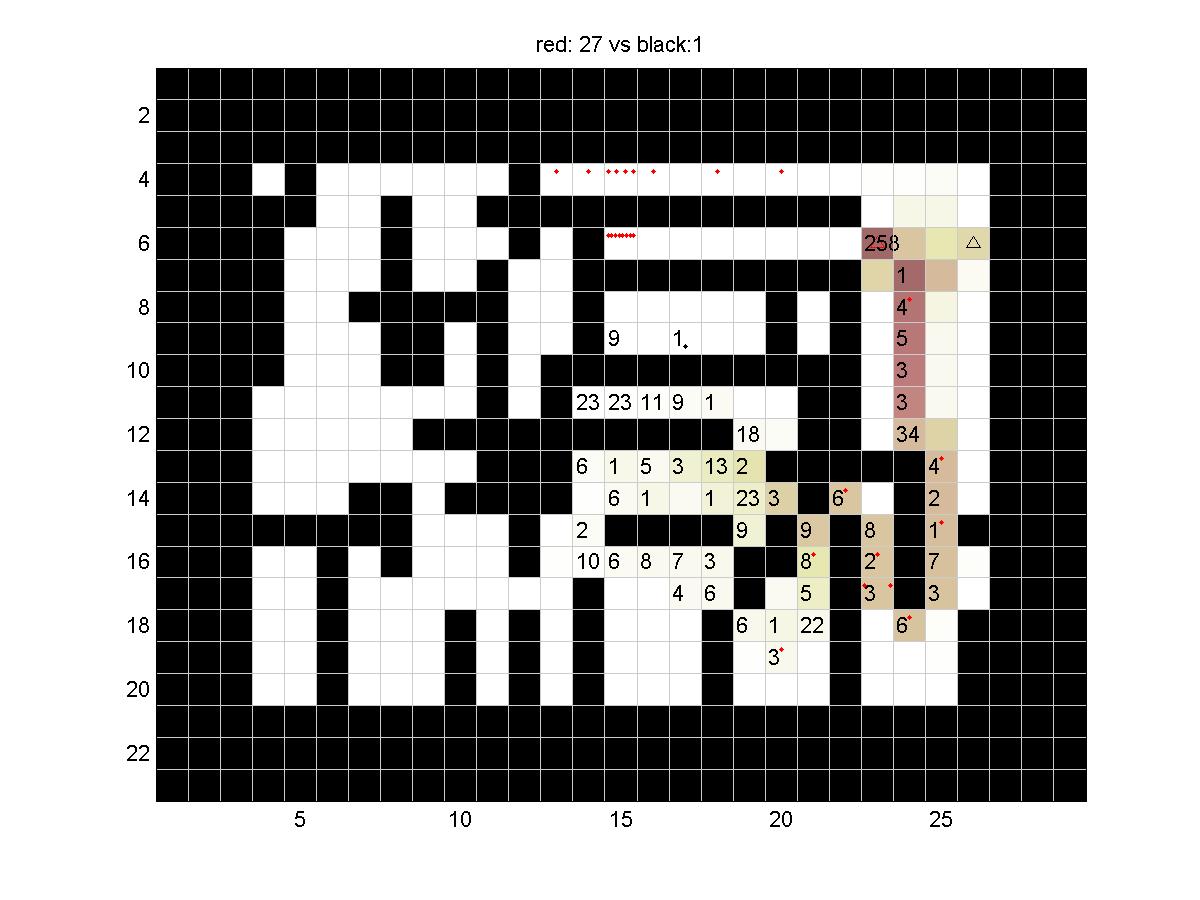
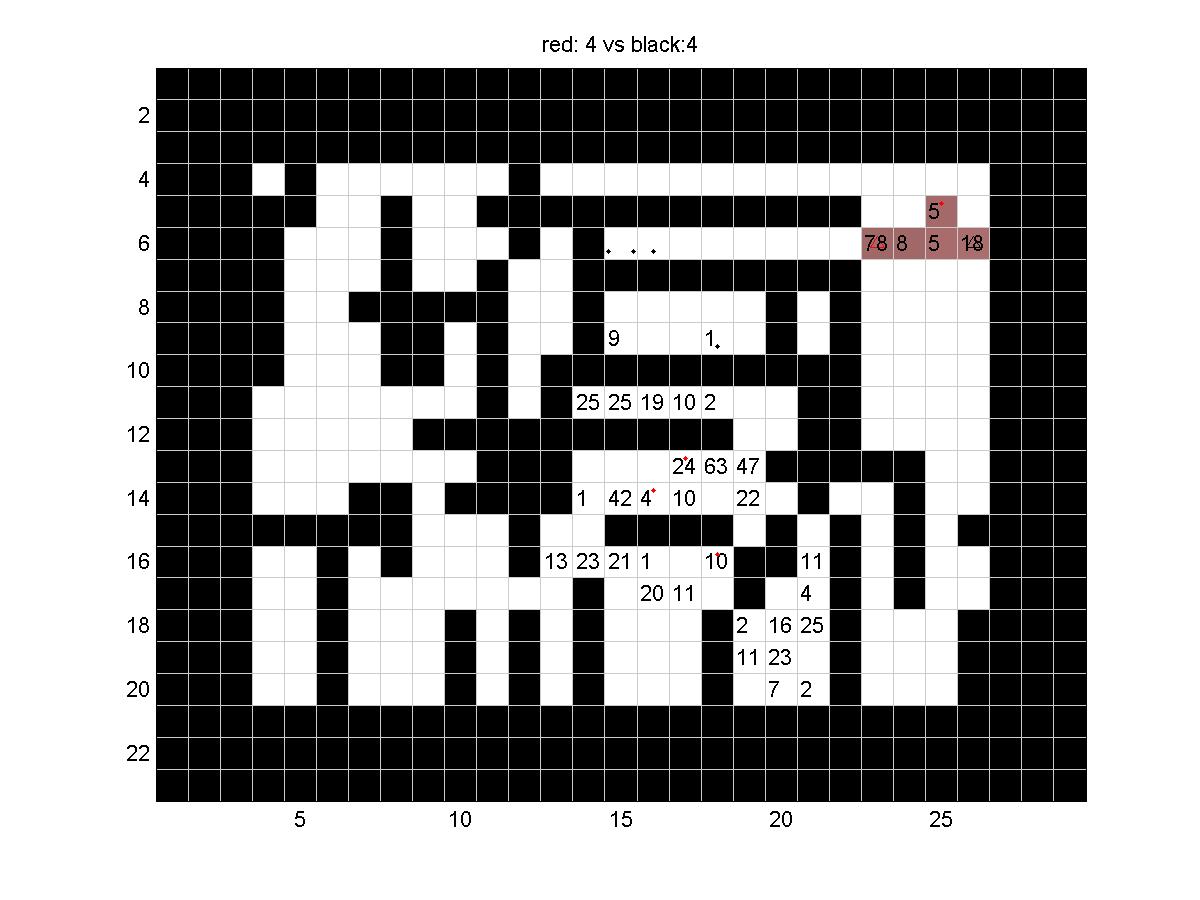
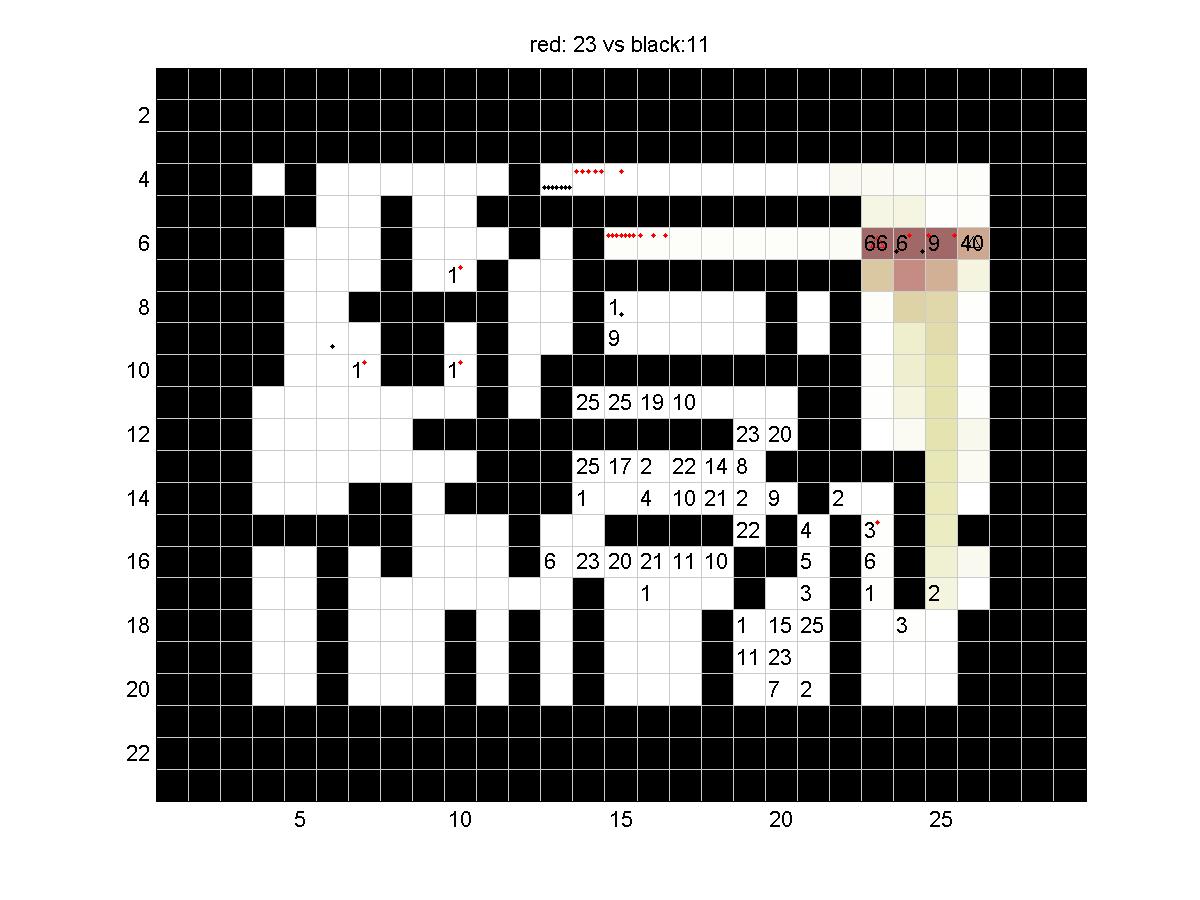
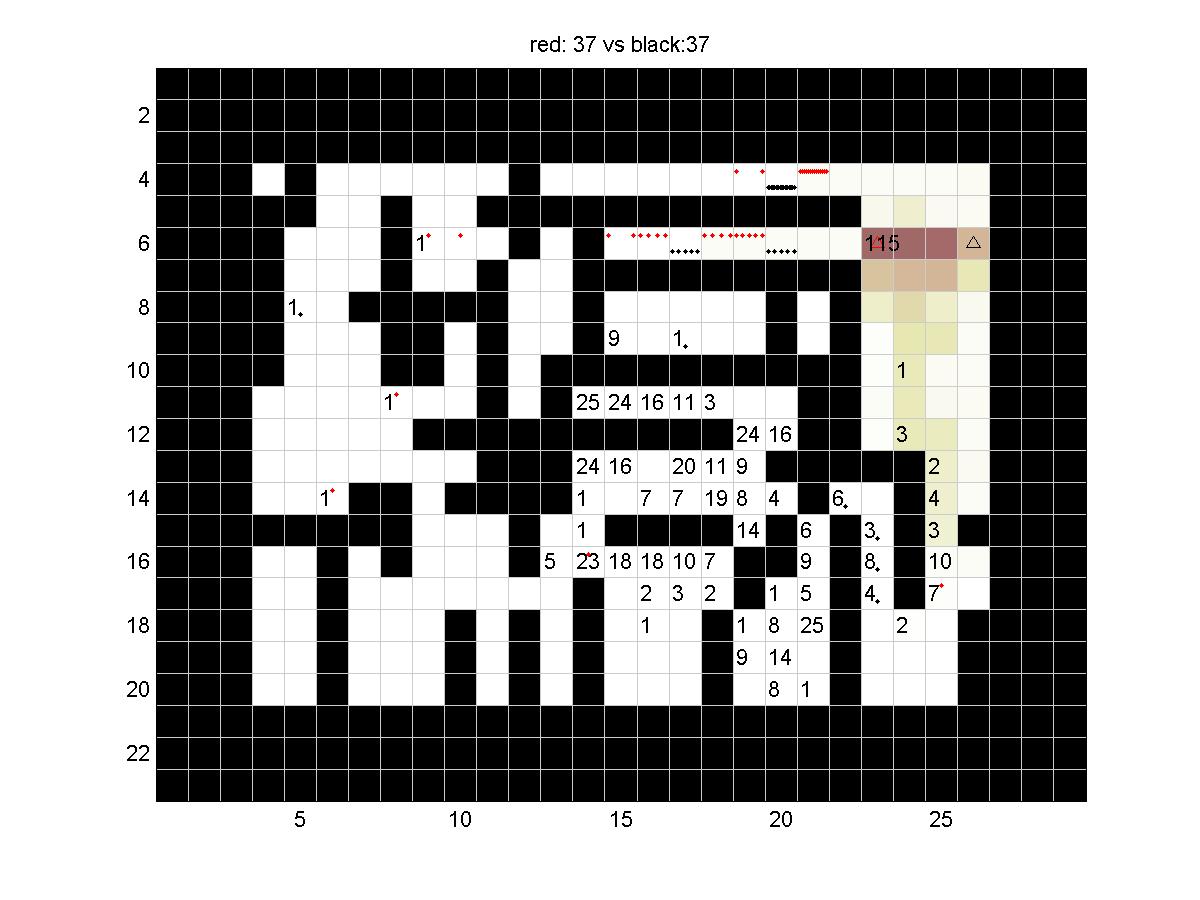
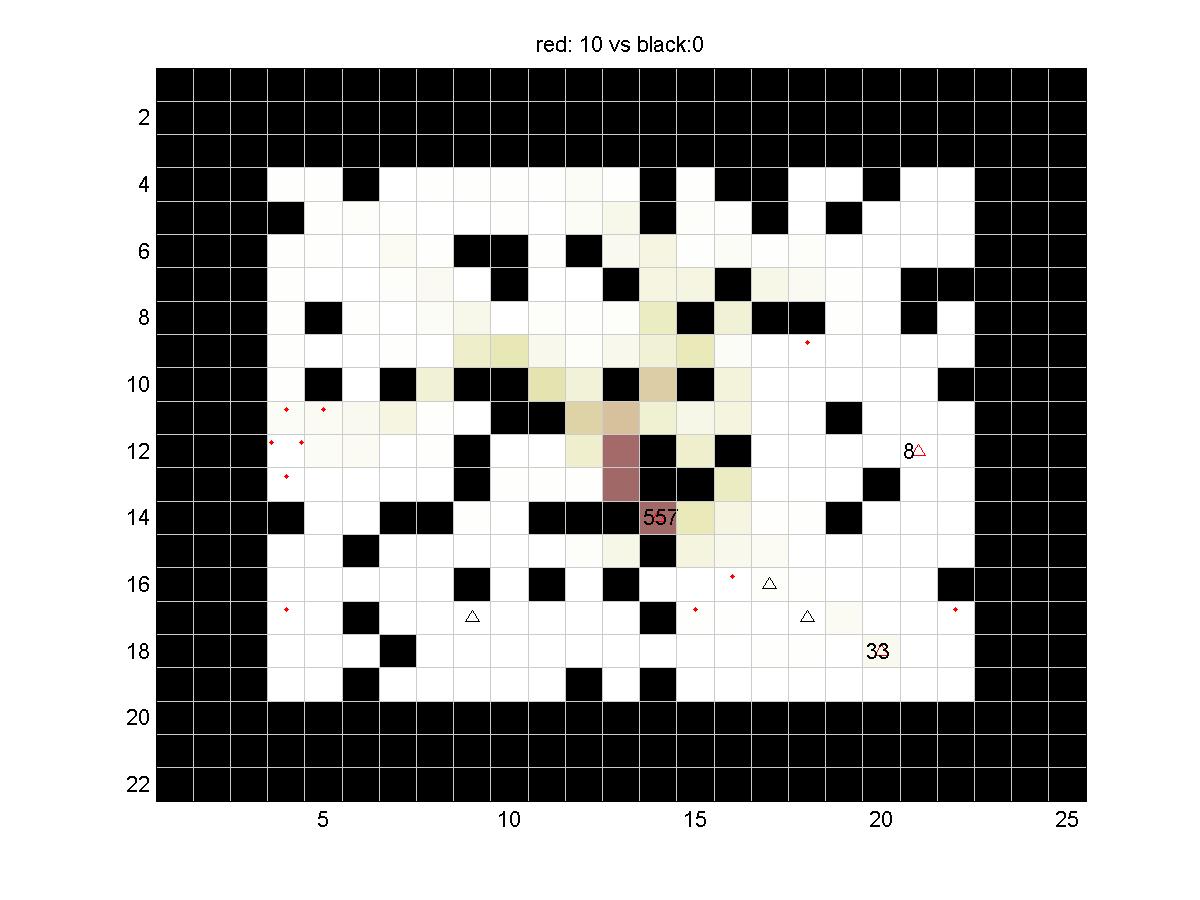
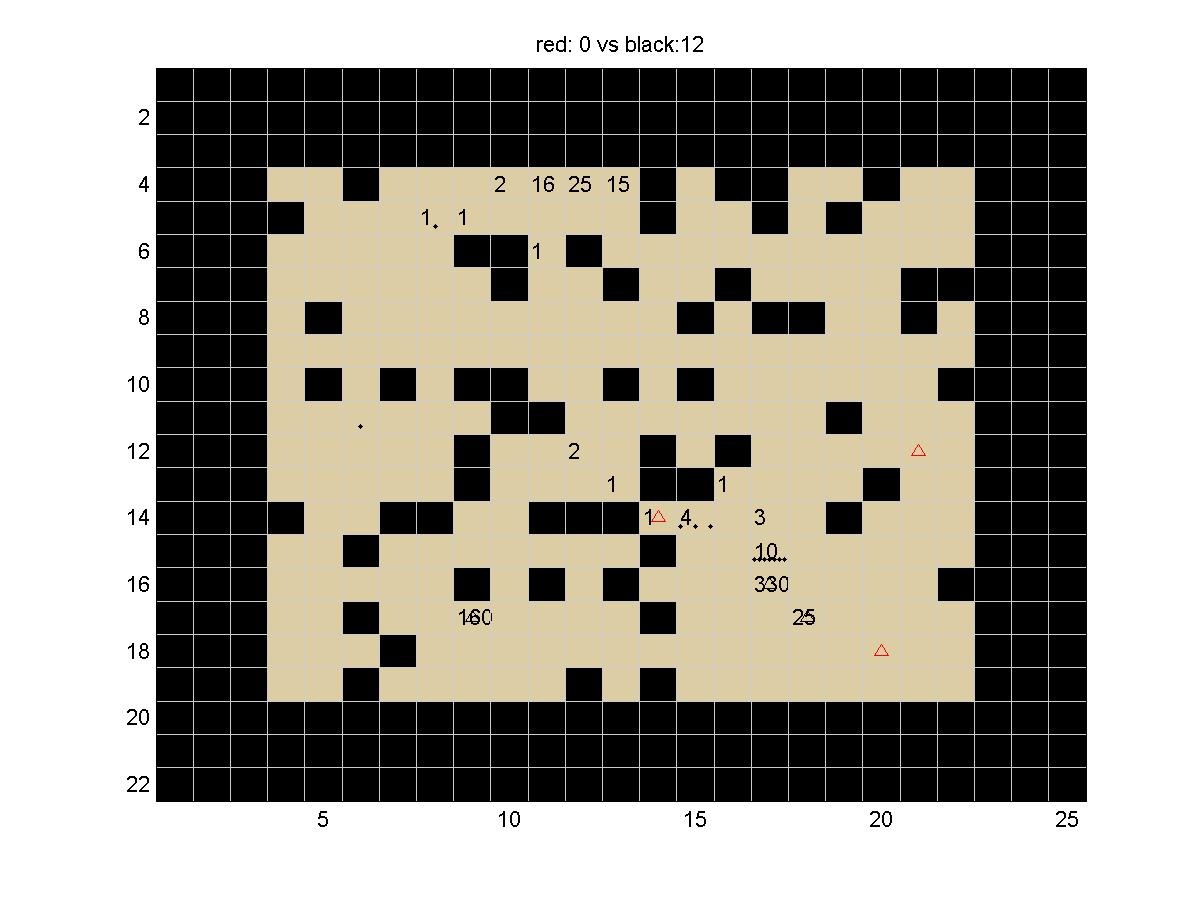
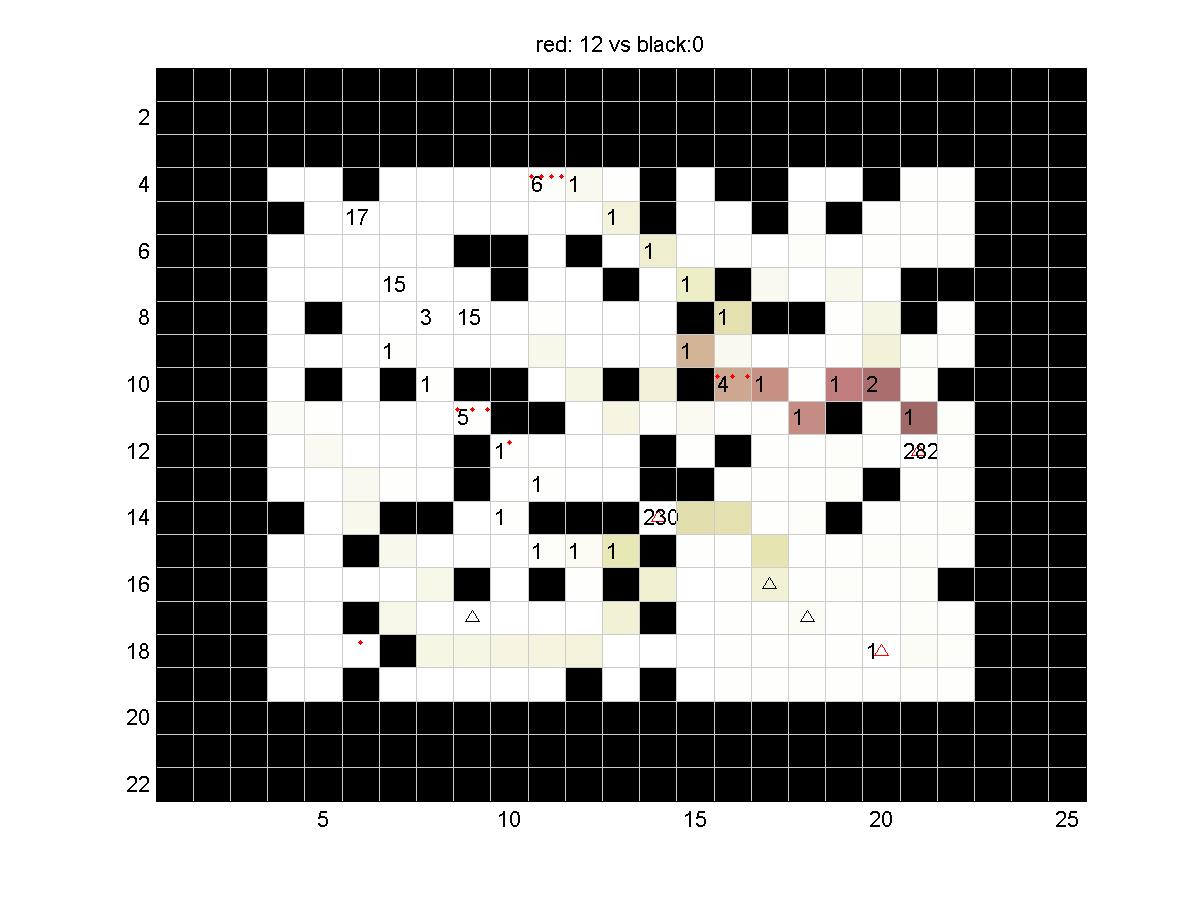
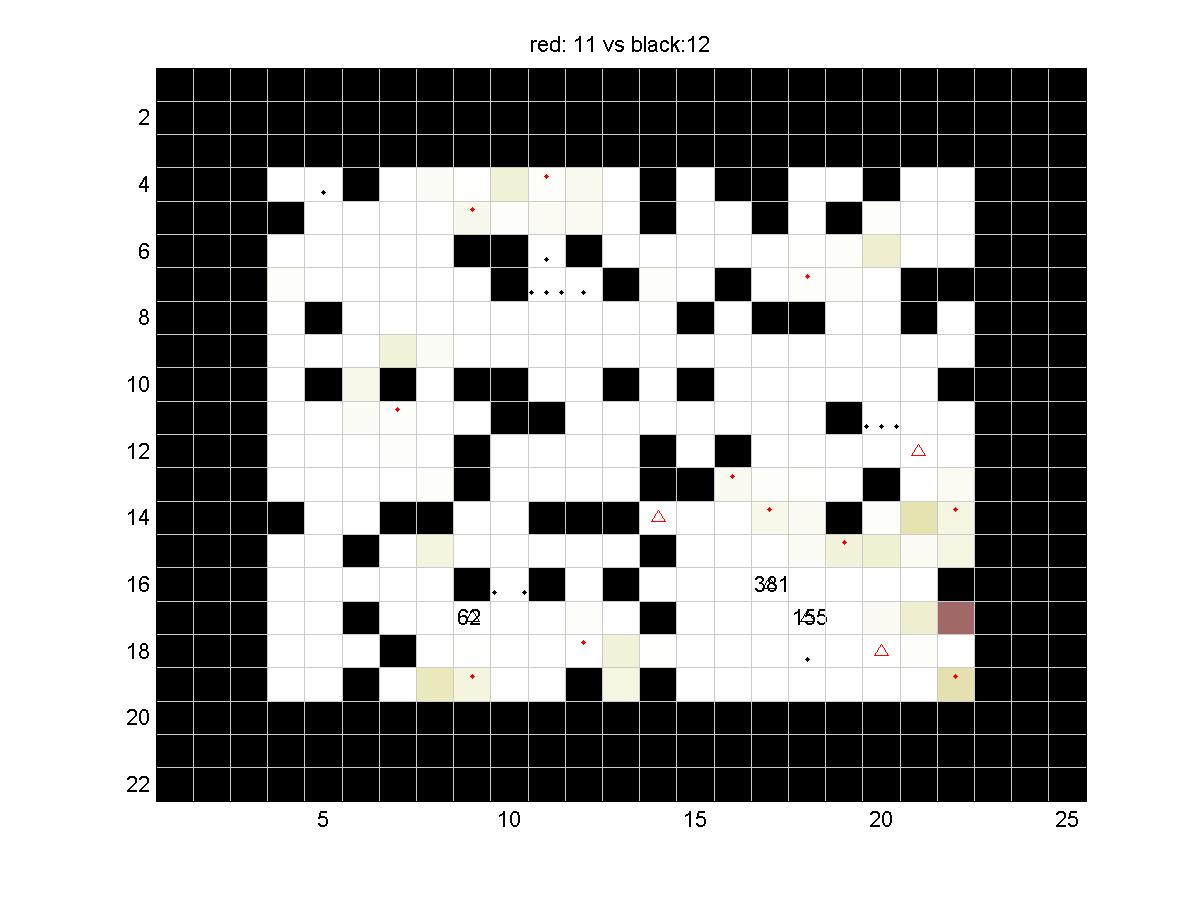
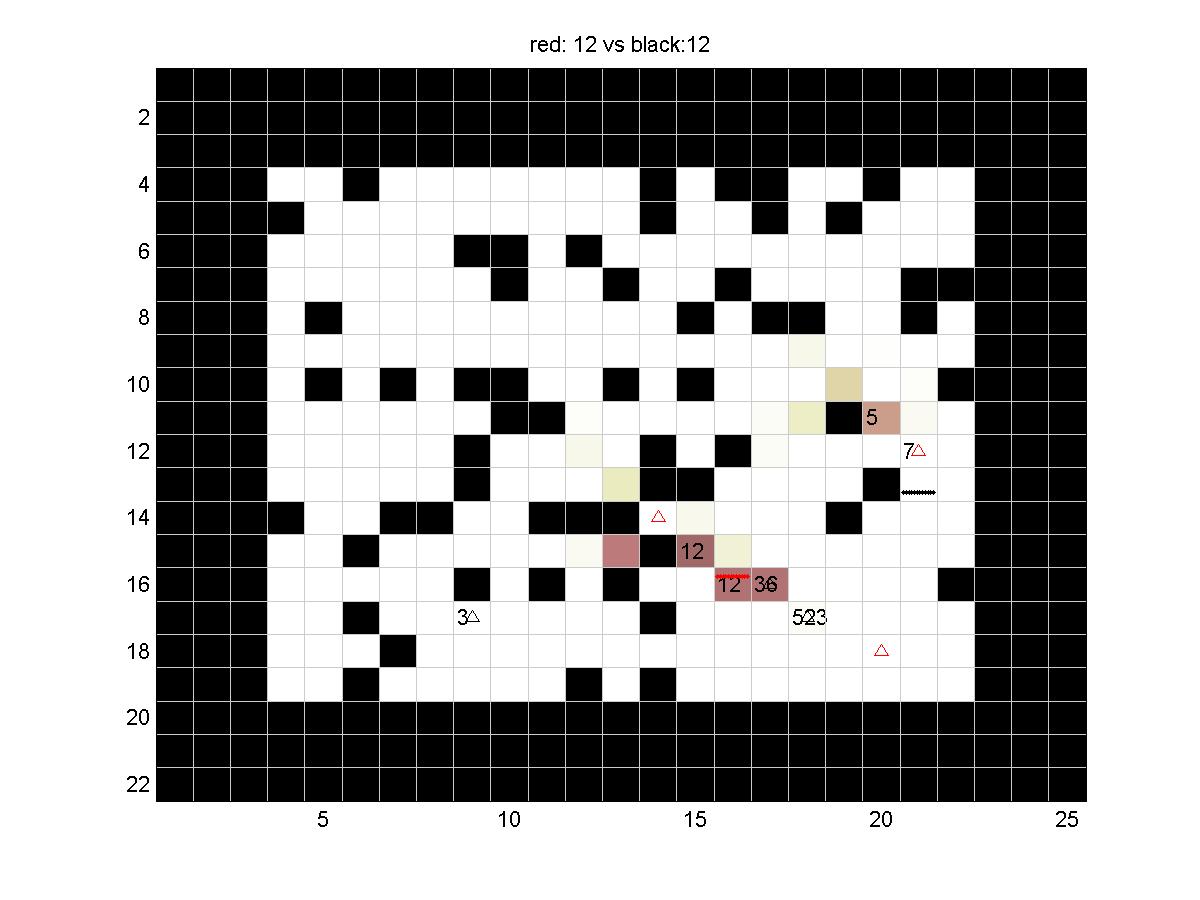
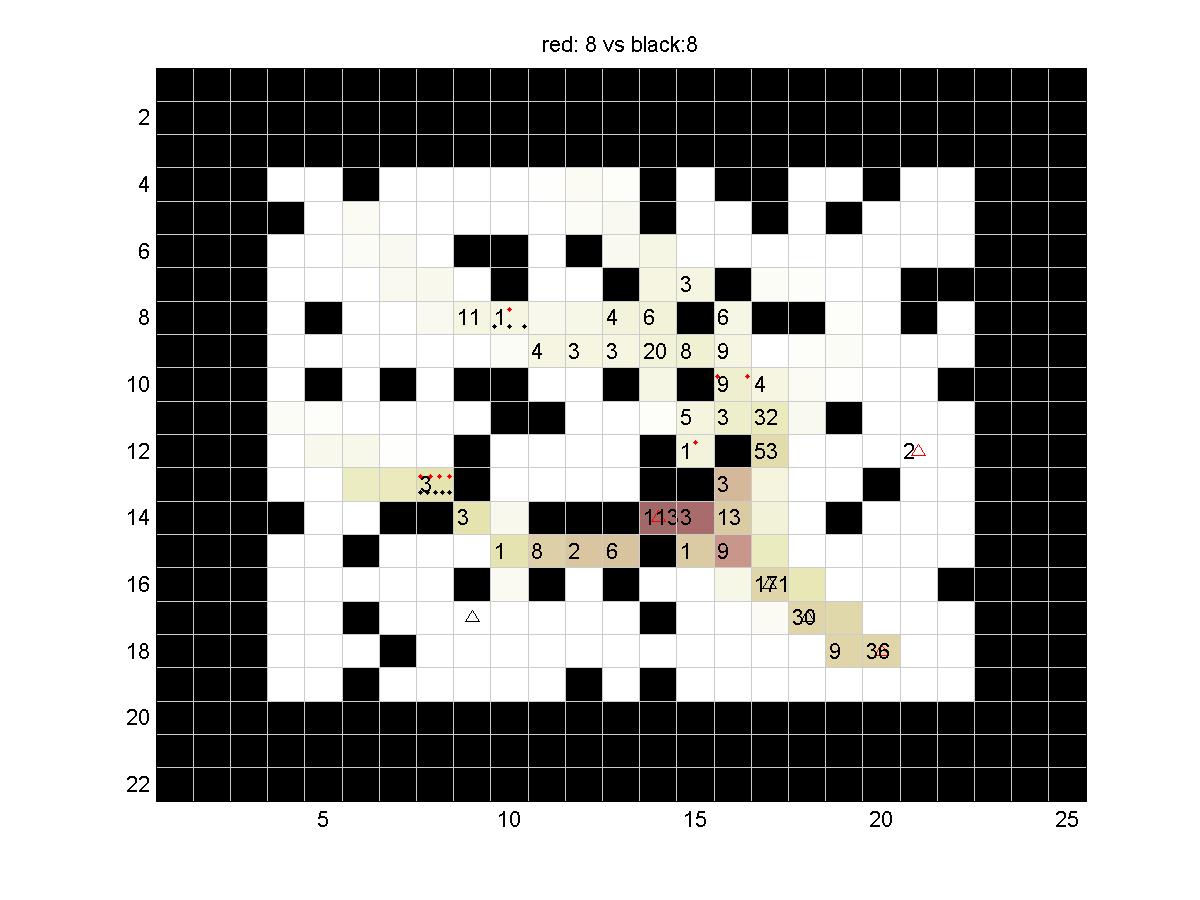
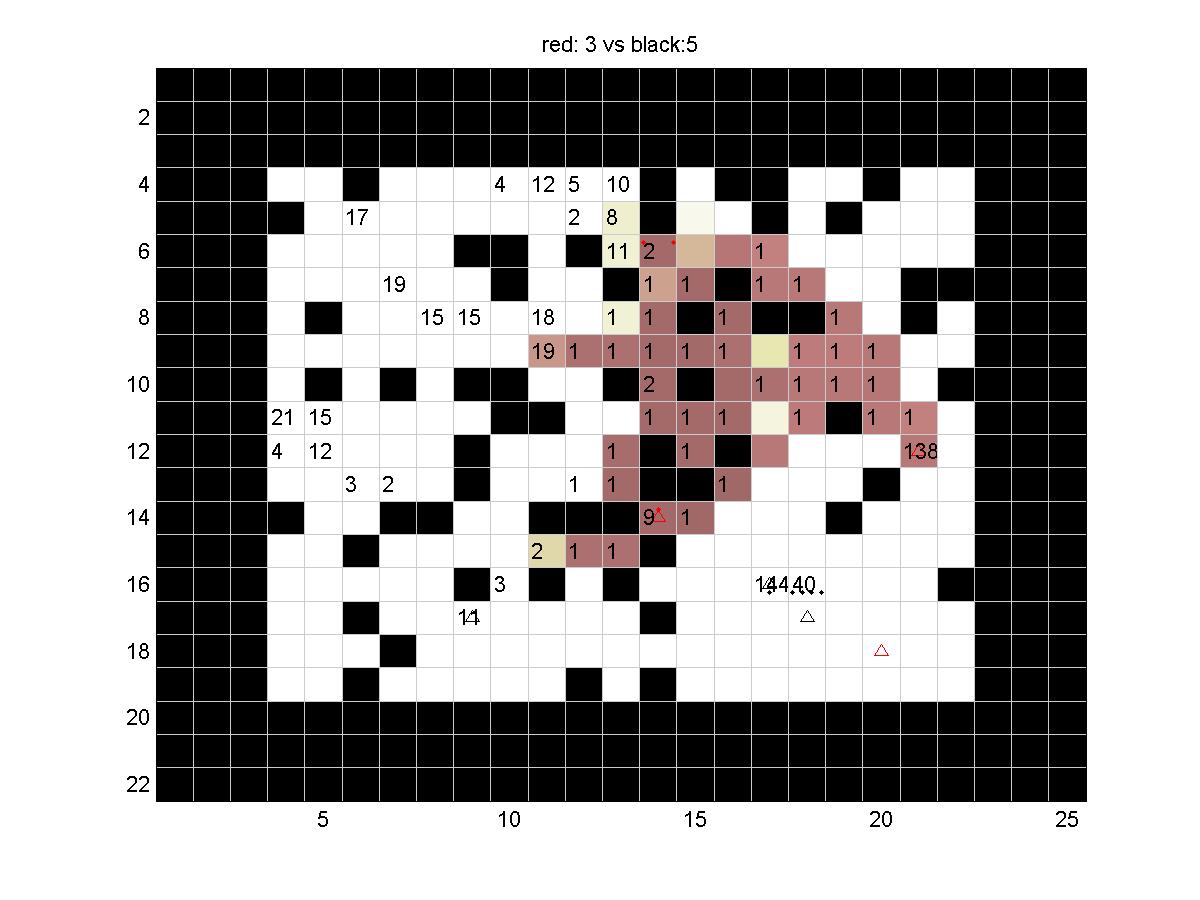
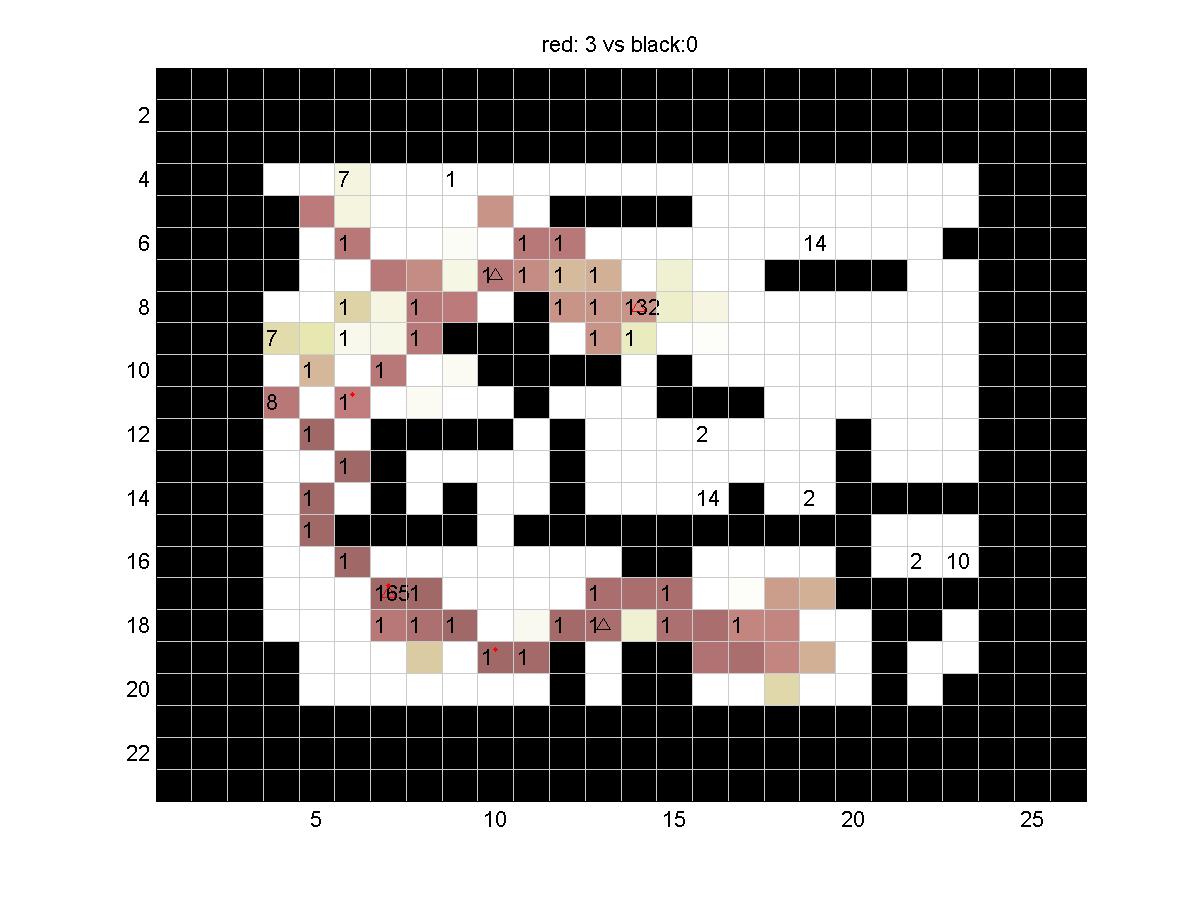
Board: 3
In this board, red team really just needs to defend the sugar. The gathering is and exploration is pretty simple. Many of the early road block type of strategies worked well here.
|
|---|
| Sample | Jan | Nathan | David | Markus | Nathan | Edin | Fabio |
|---|
| Sample | 0 | 100 | 100 | 100 | 100 | 100 | 100 | 100 |
| Jan | -195 | 100 | 100 | 100 | 100 | 100 | 99 | 100 |
| Nathan | -101 | 89 | 4 | 100 | 100 | 100 | 100 | 100 |
| David | -195 | 100 | 22 | -1 | 100 | 100 | 94 | 100 |
| Markus | -195 | 100 | -195 | -175 | 100 | -195 | 87 | -195 |
| Nathan | -195 | -81 | -195 | -195 | -4 | -195 | -138 | -182 |
| Edin | -195 | -193 | -195 | -195 | -135 | -195 | -147 | -195 |
| Fabio | -195 | -186 | -195 | -195 | -195 | -195 | -195 | -195 |
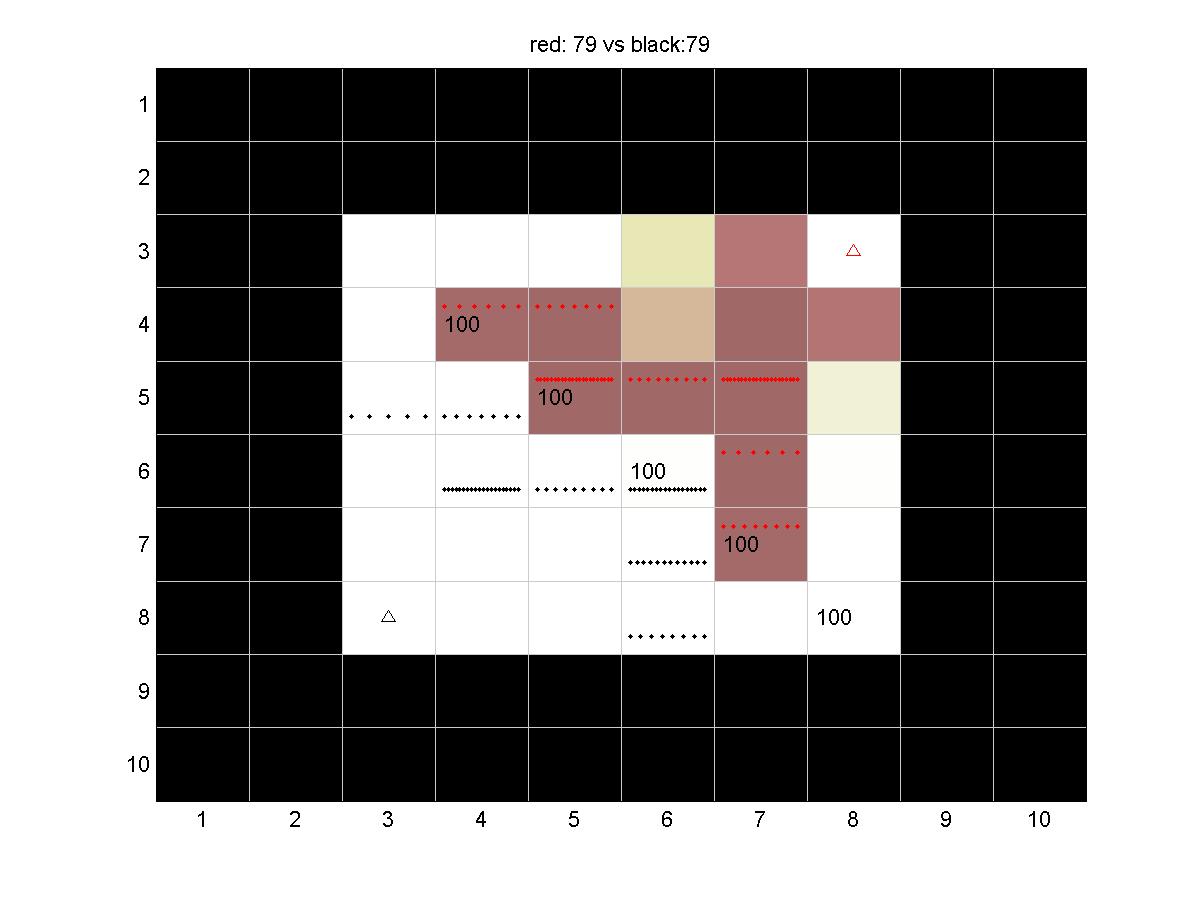
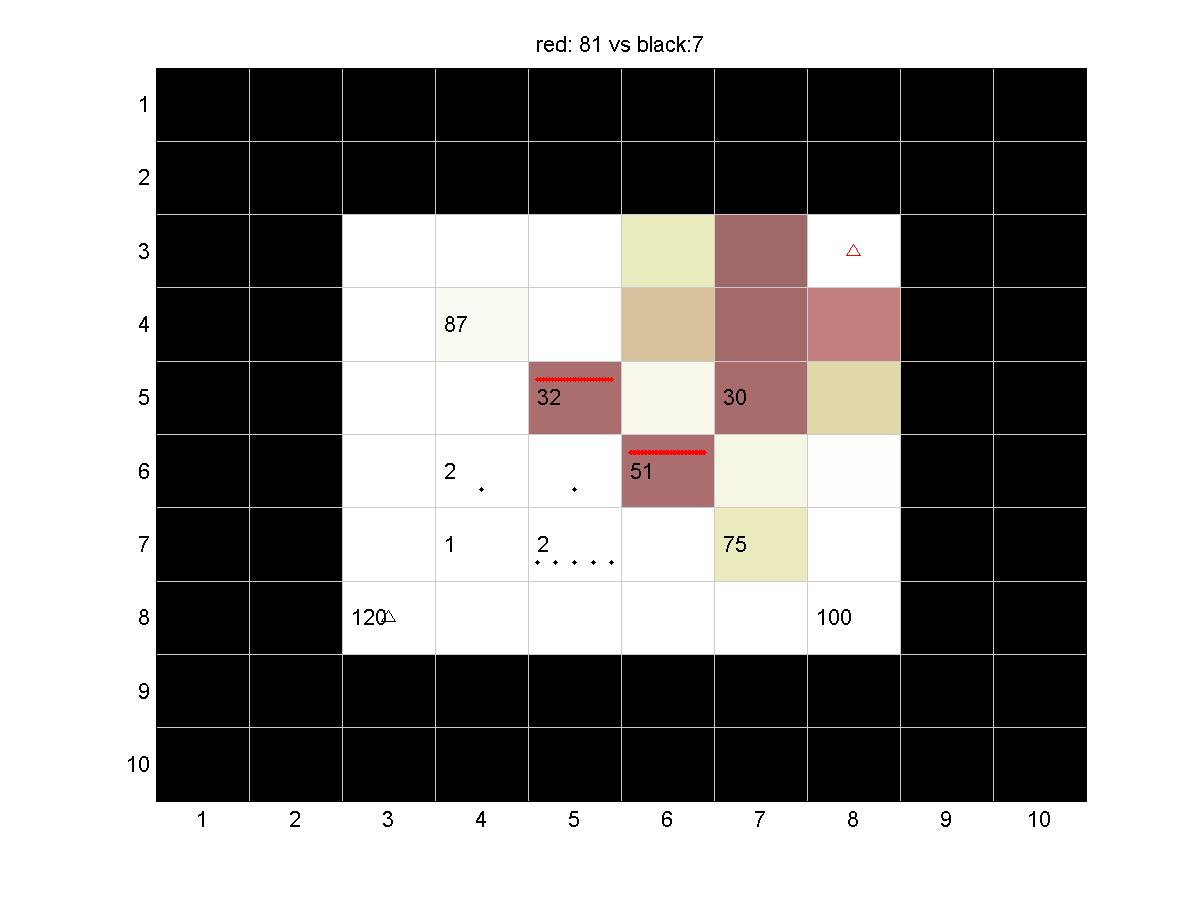
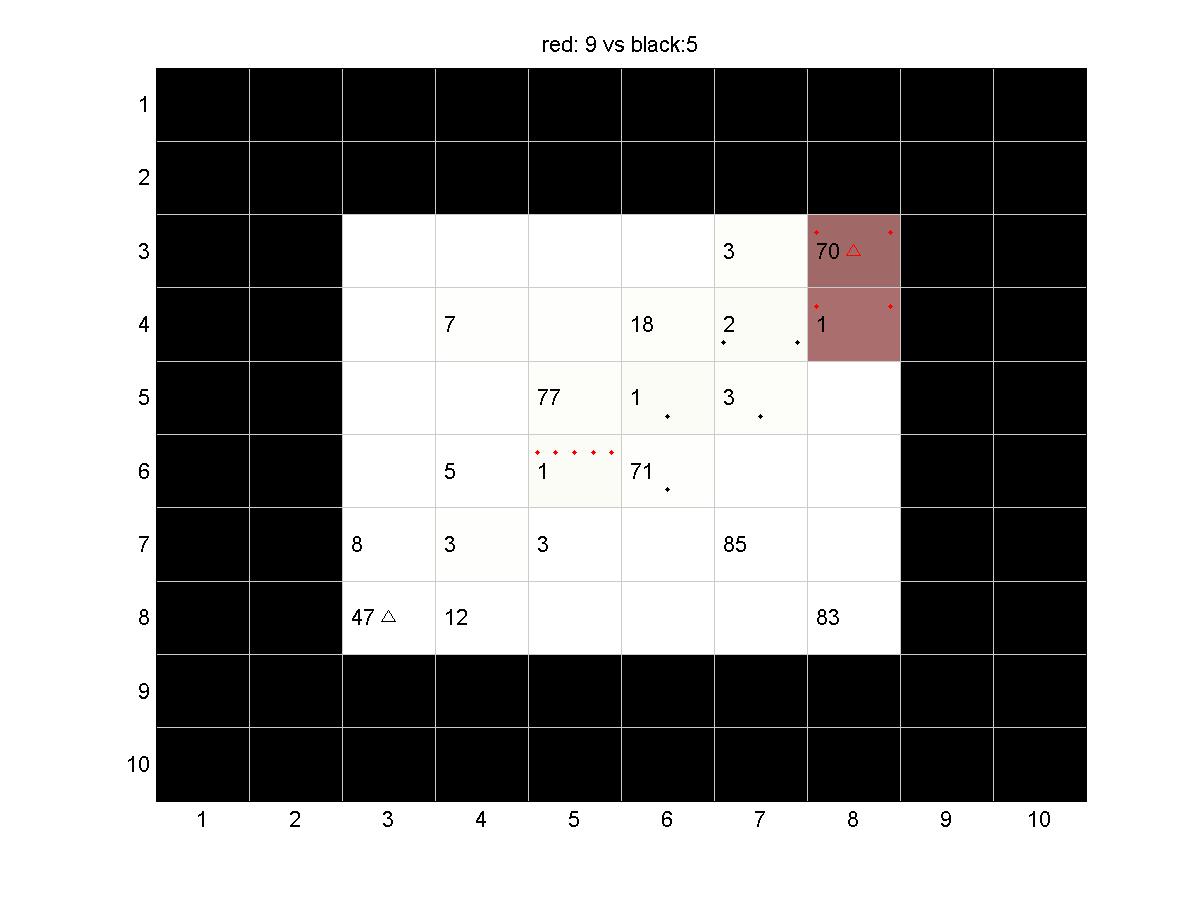
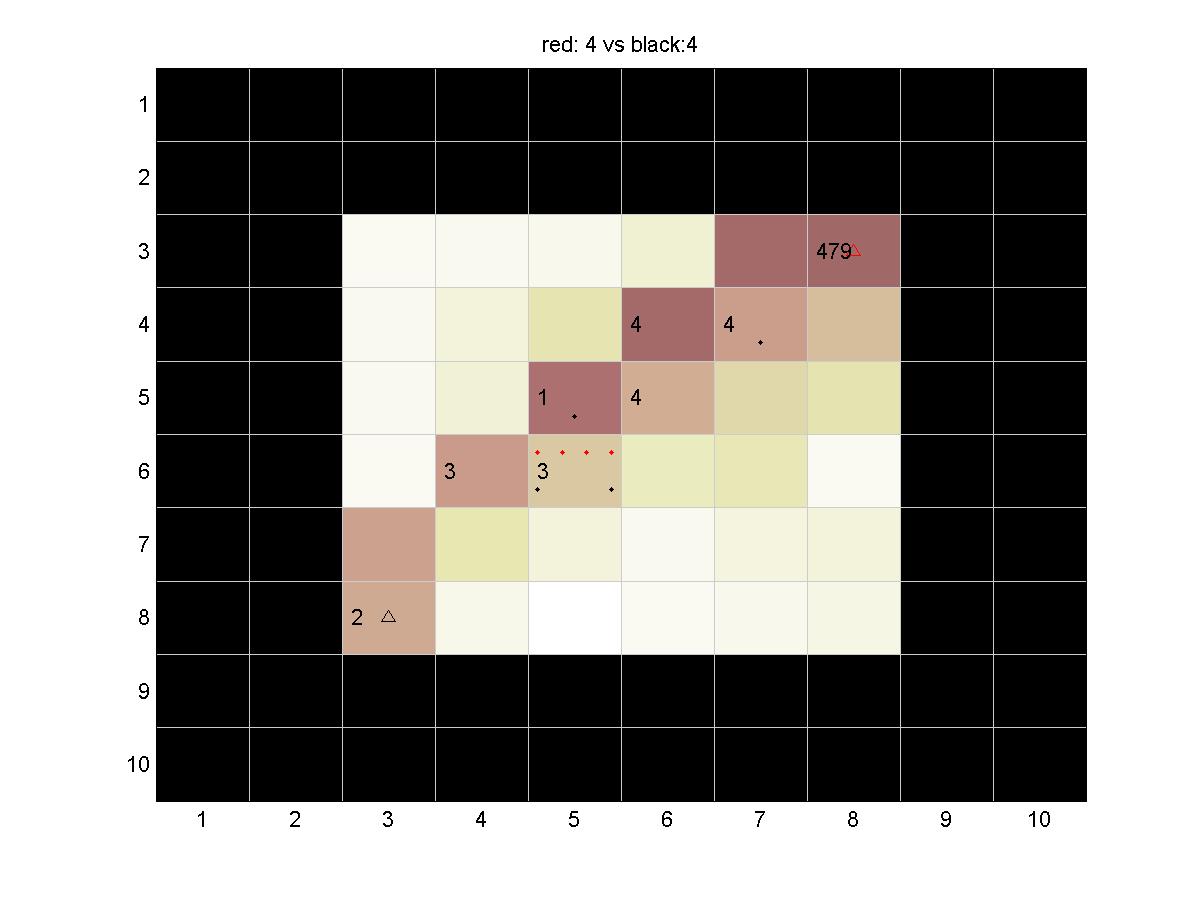
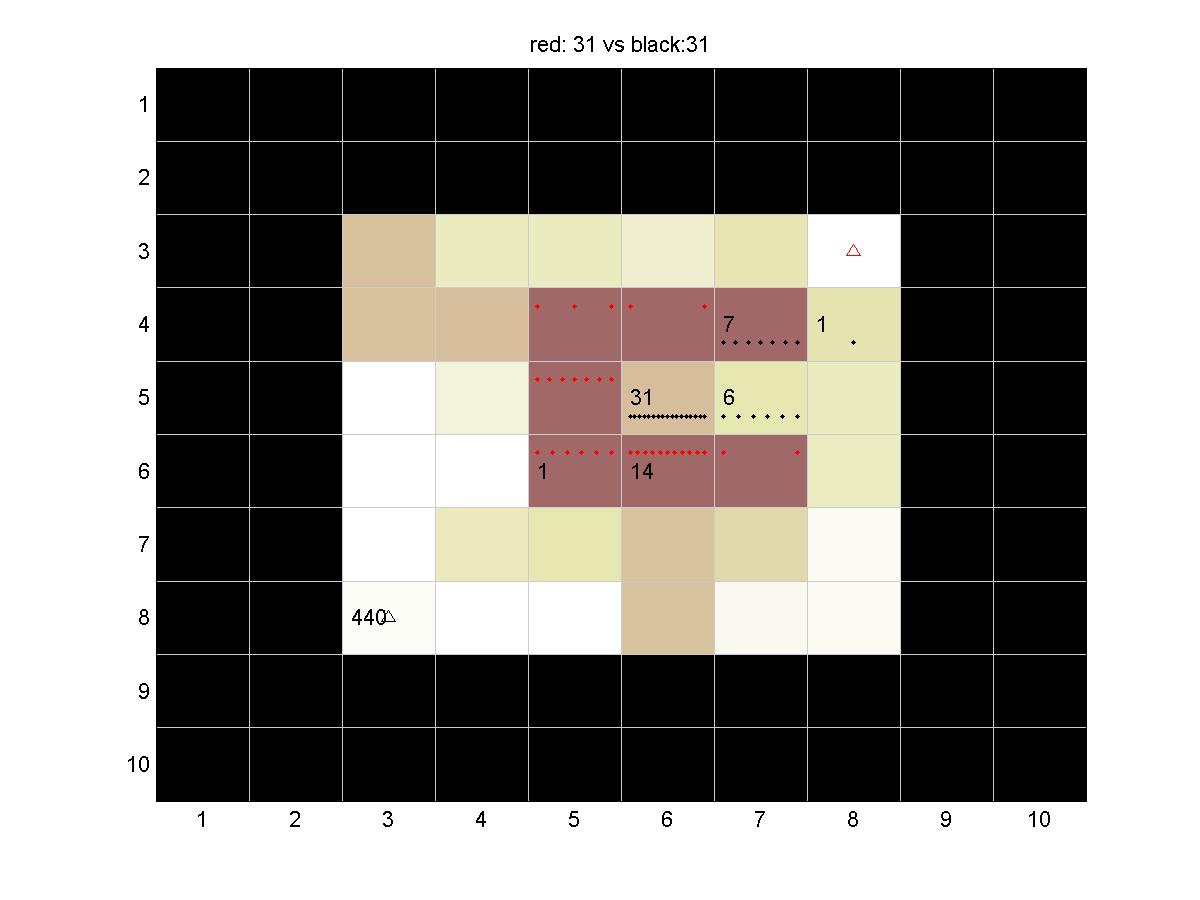
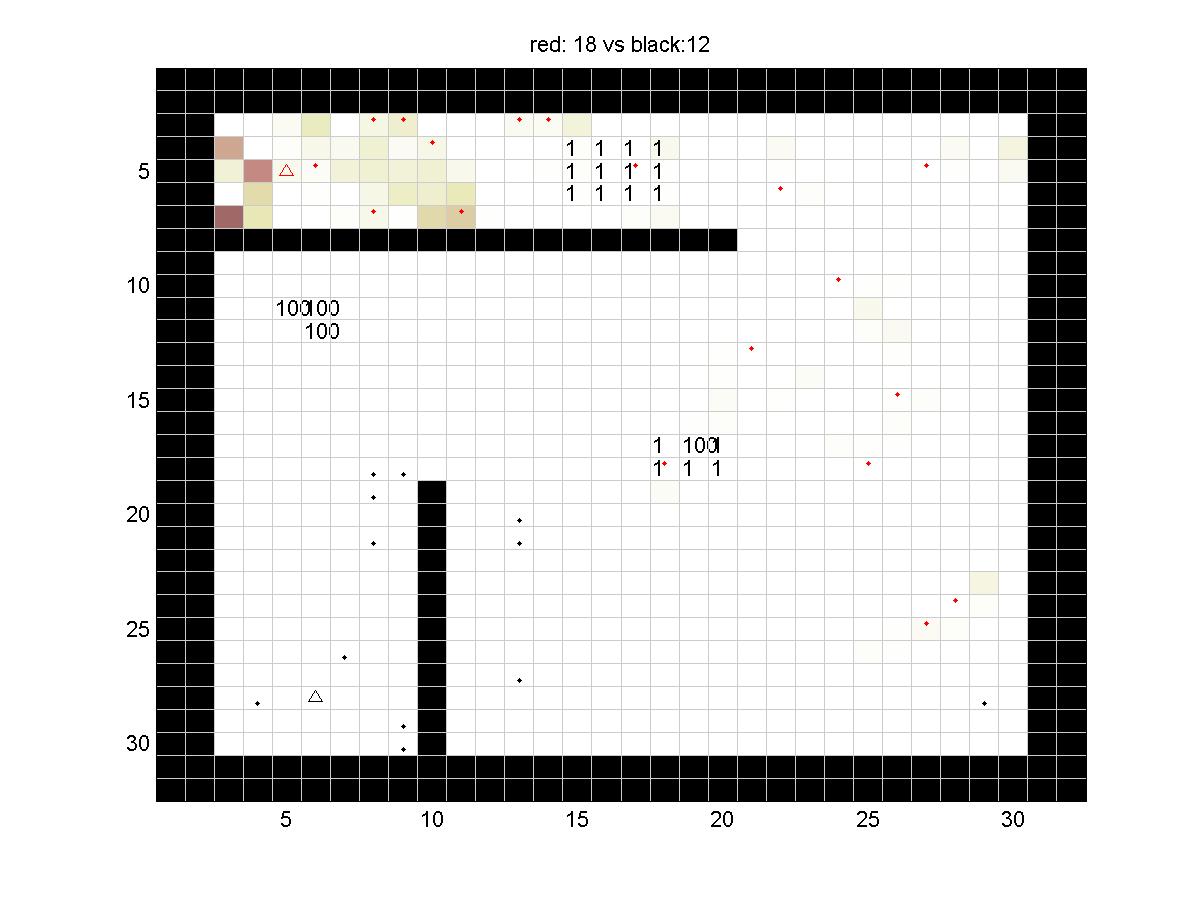
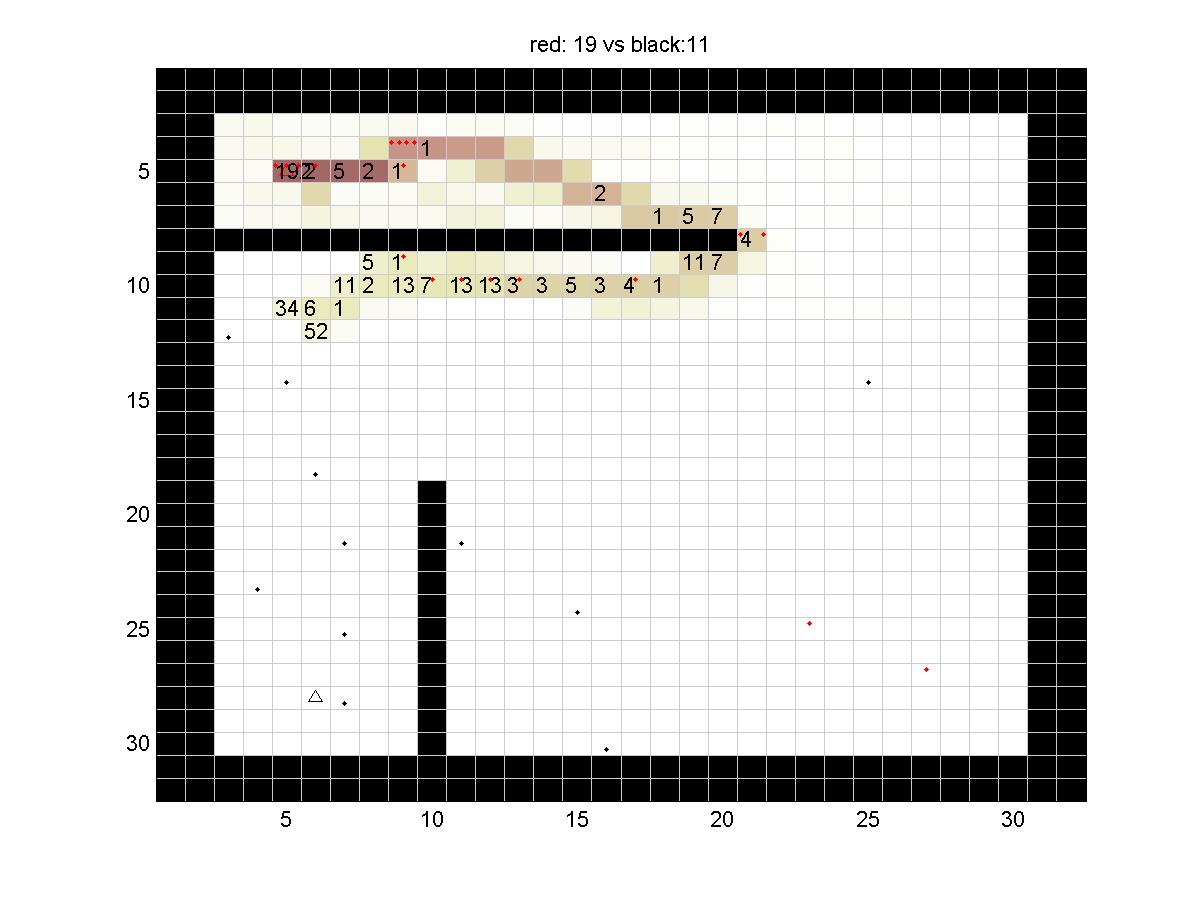
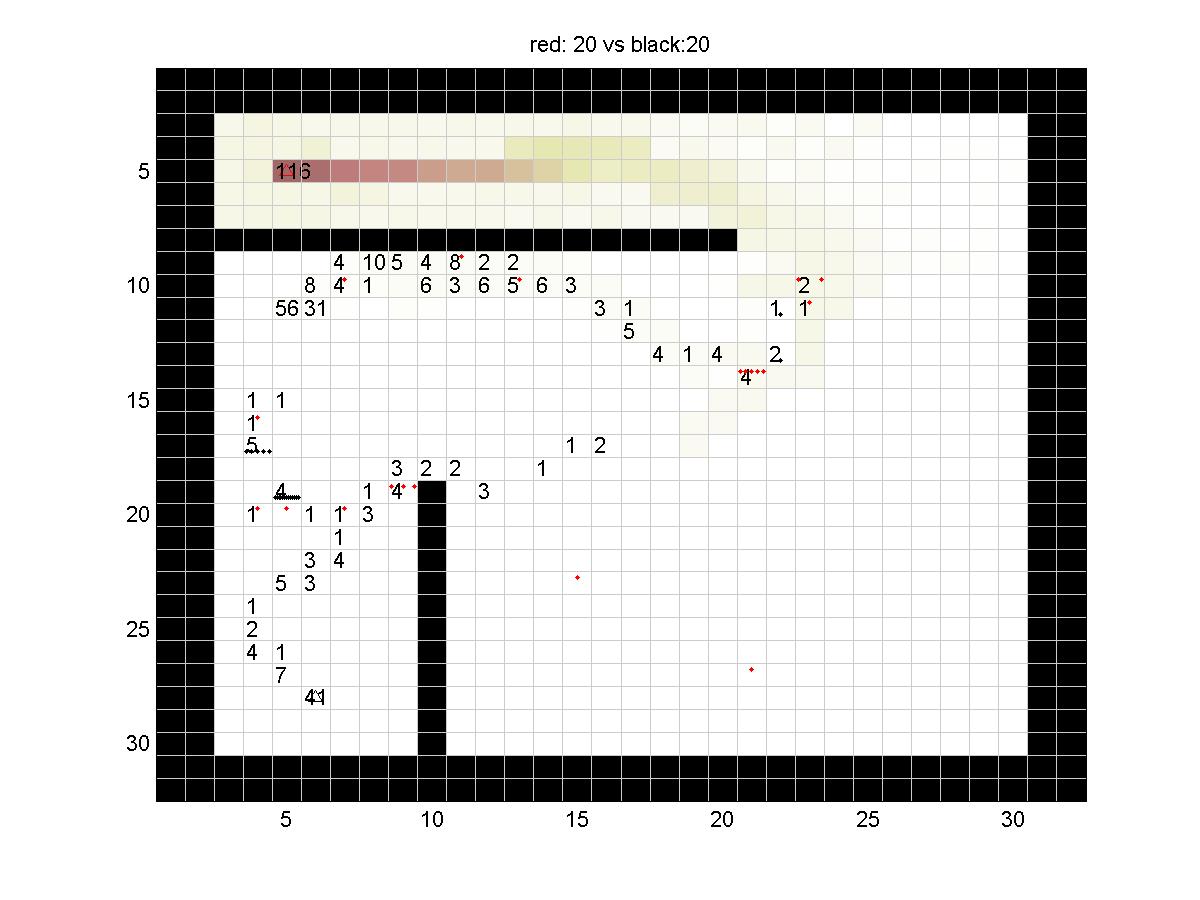
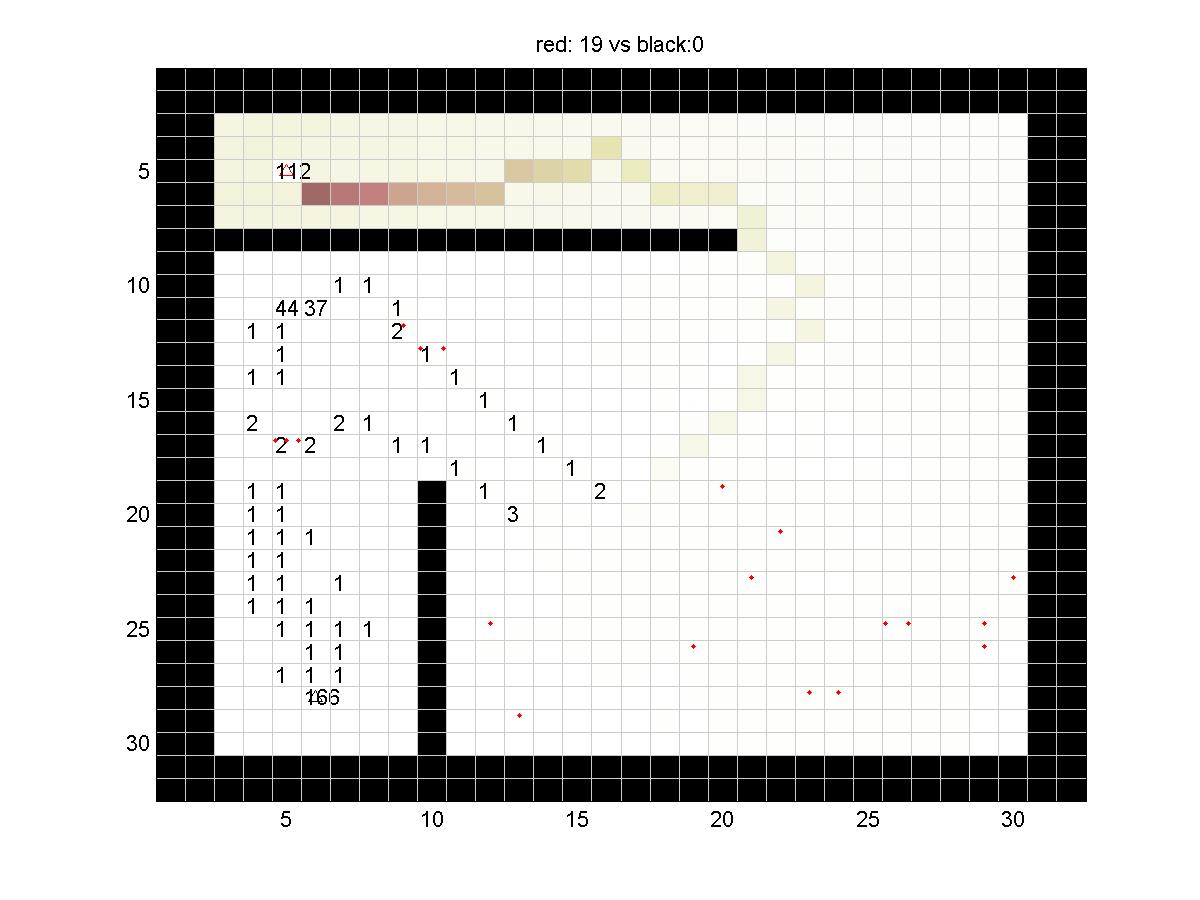
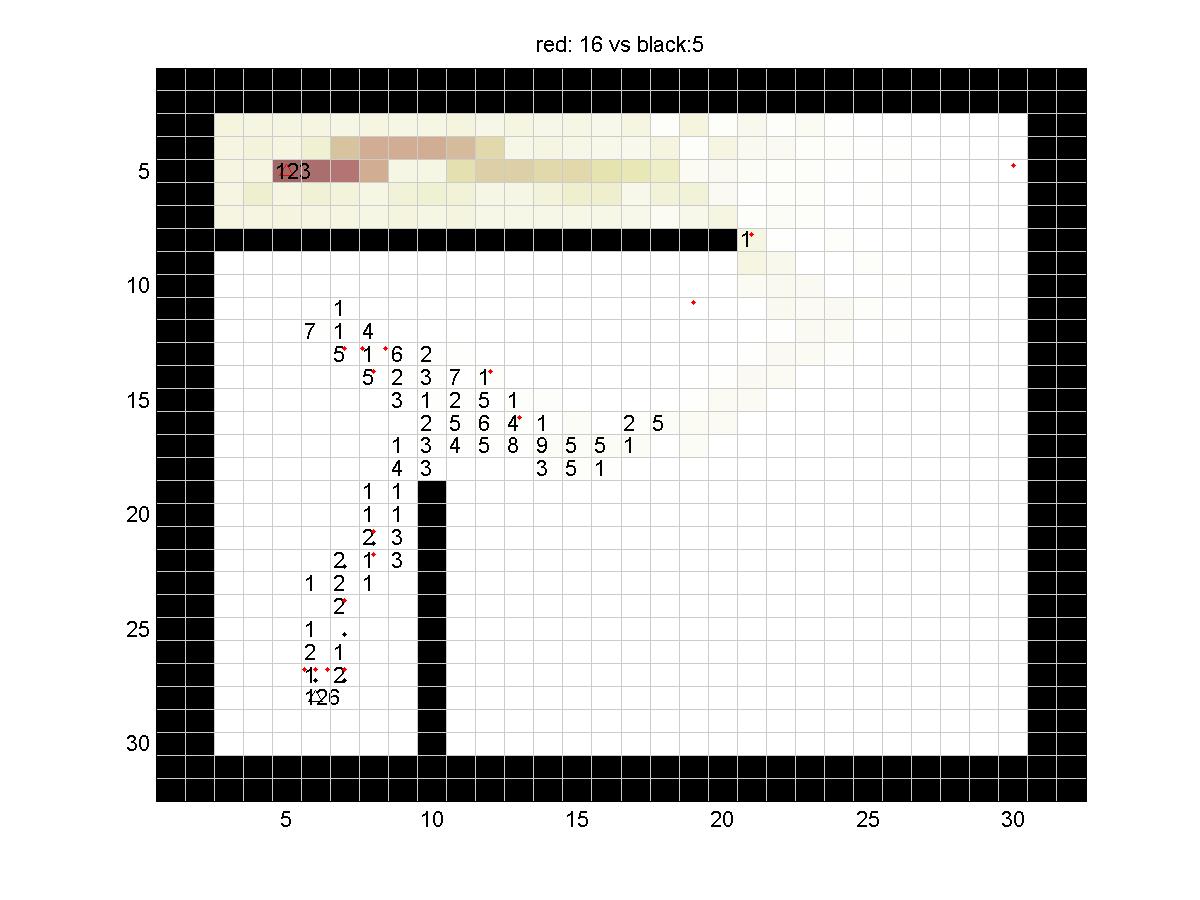
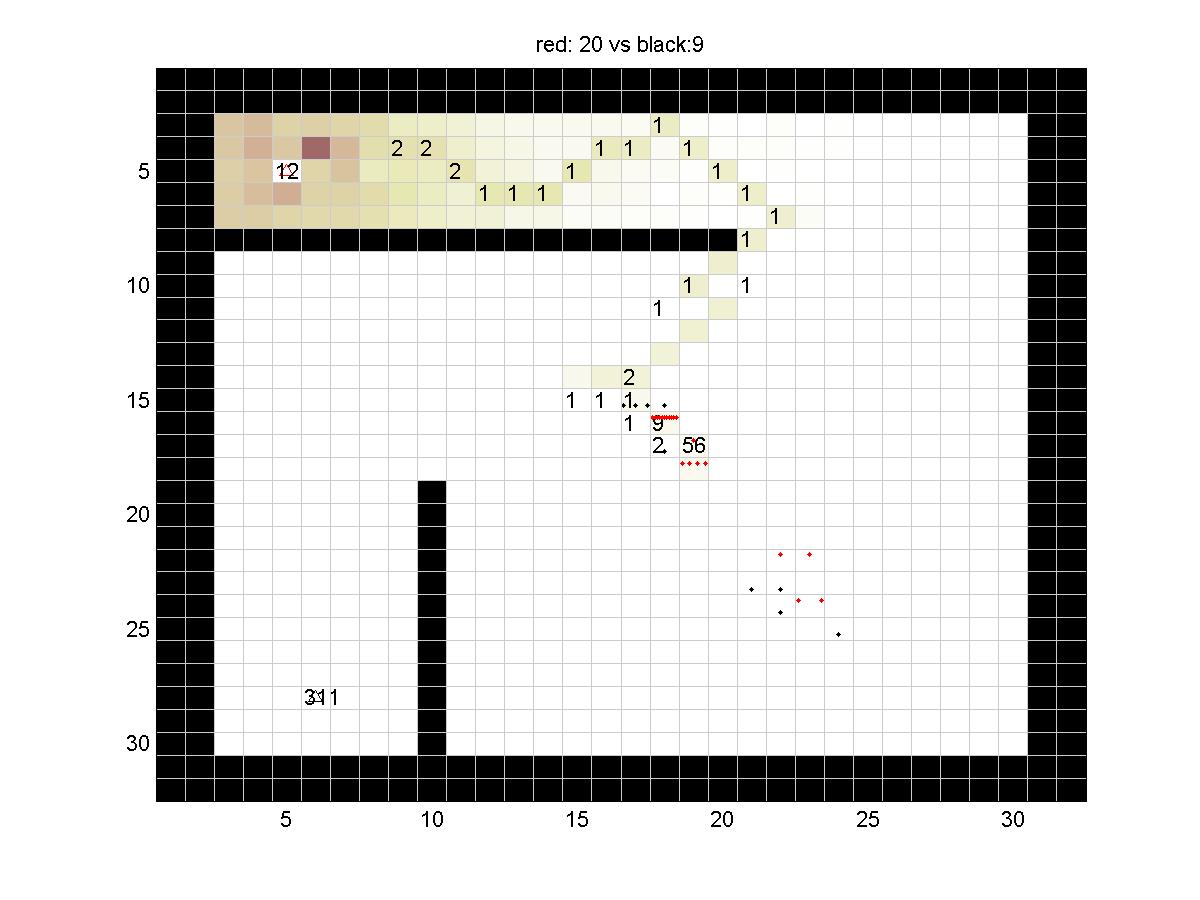
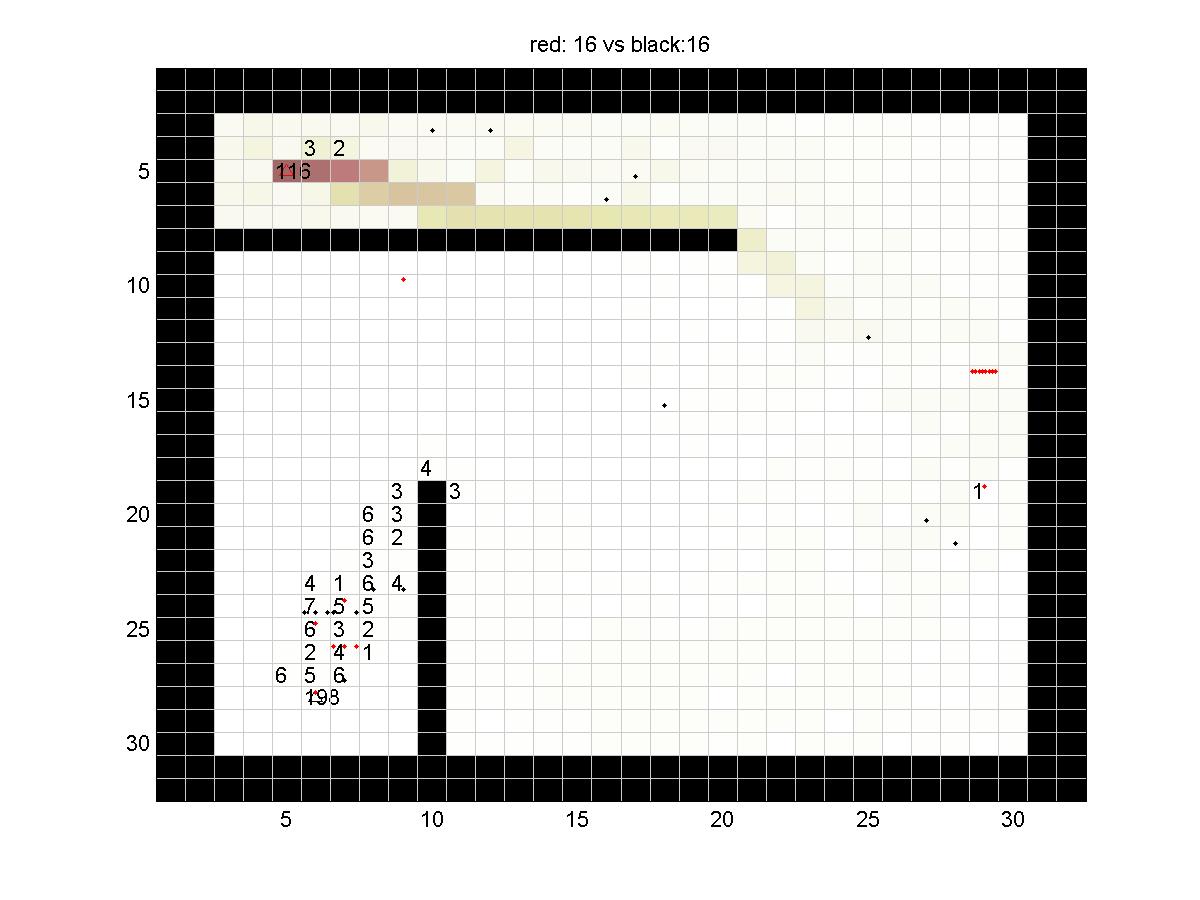
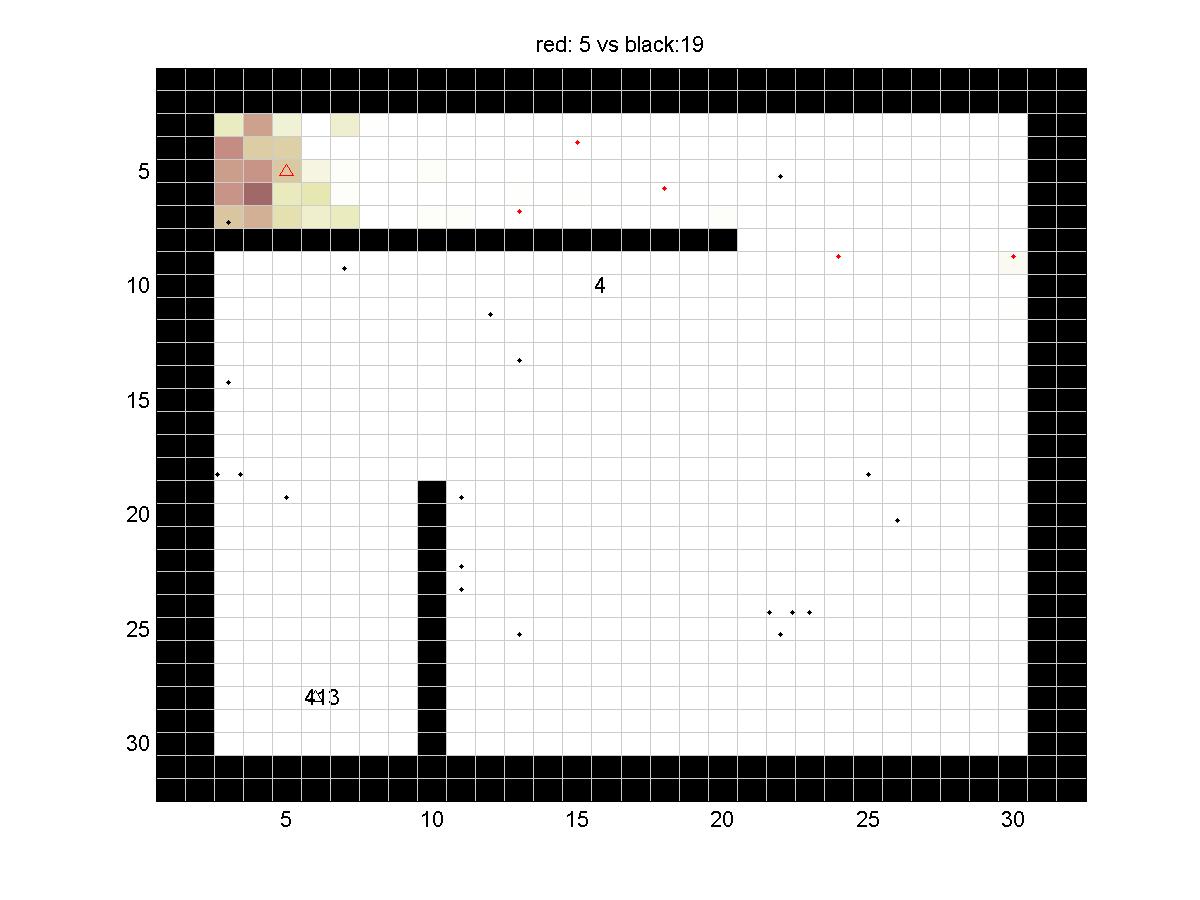
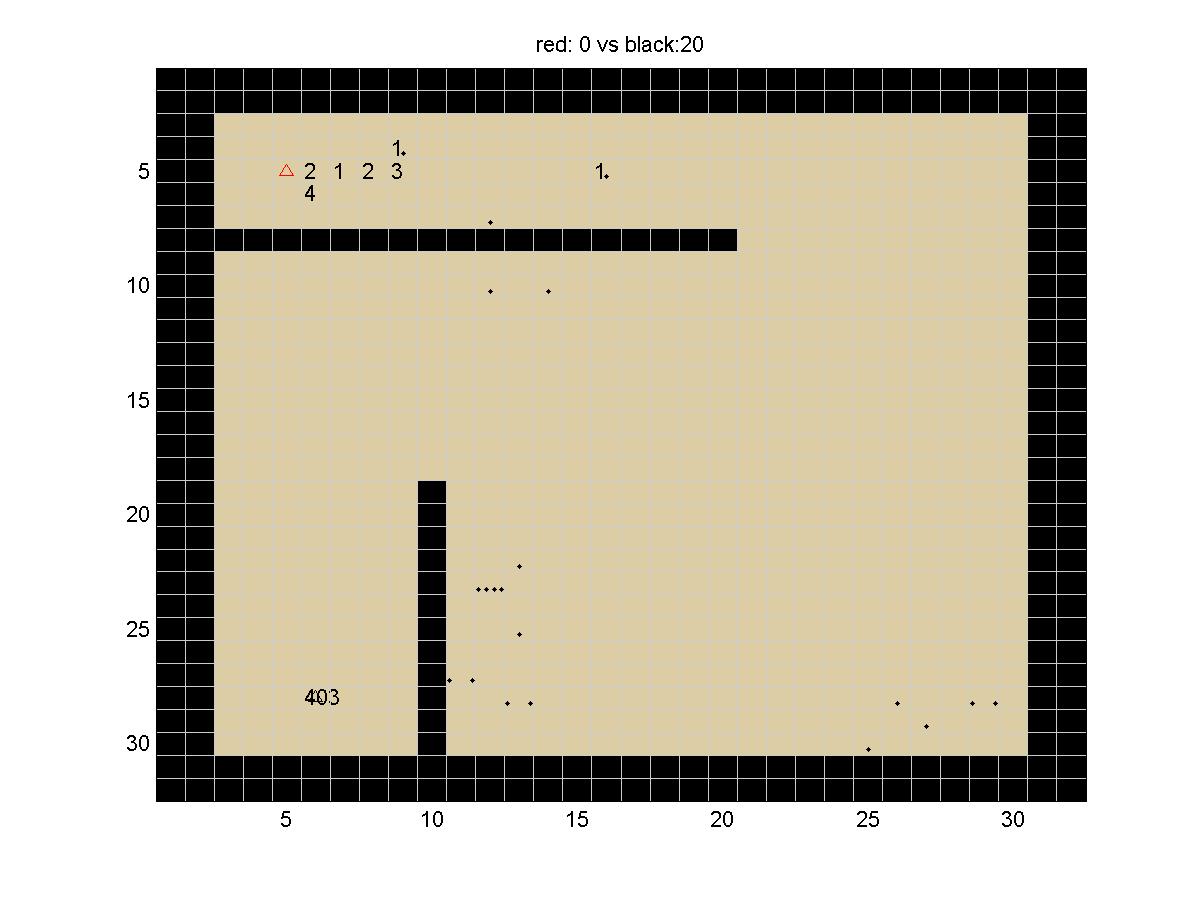
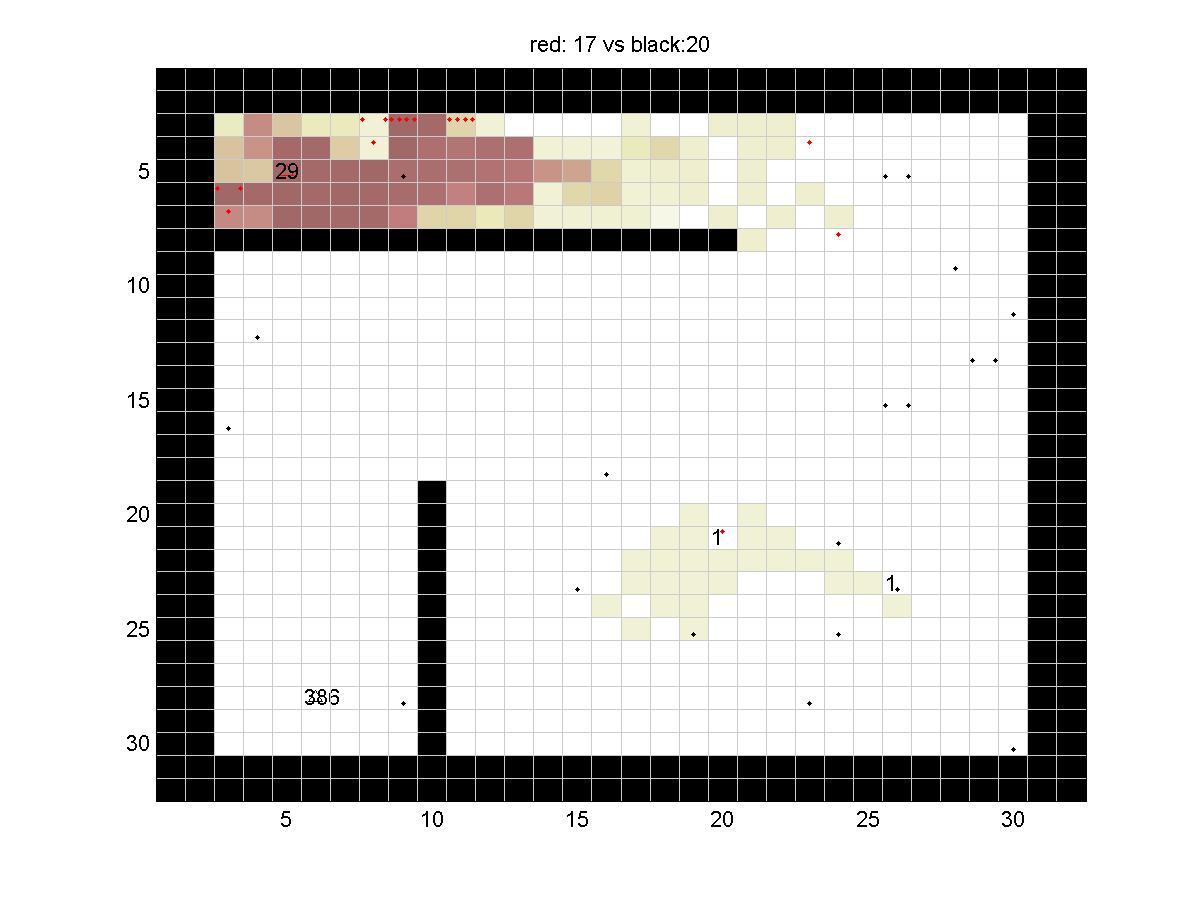
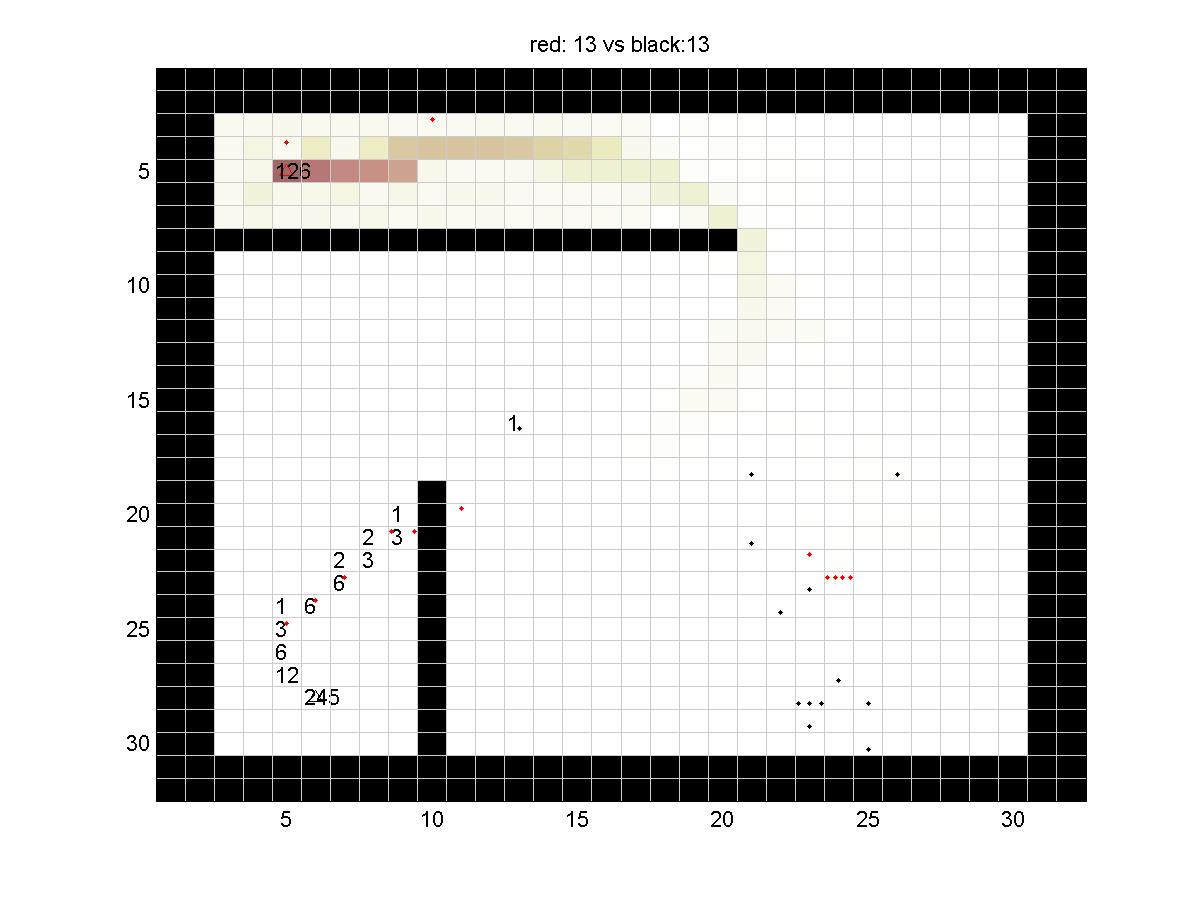
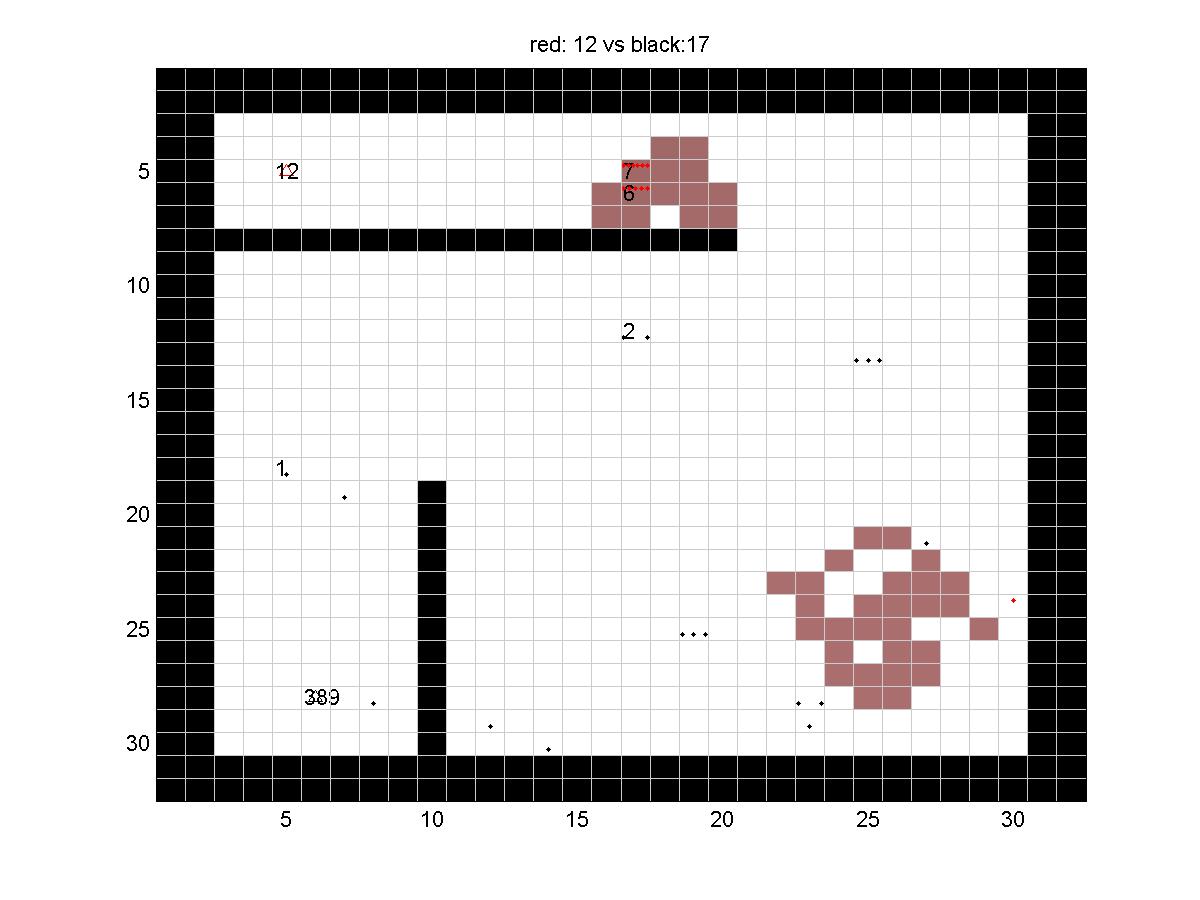
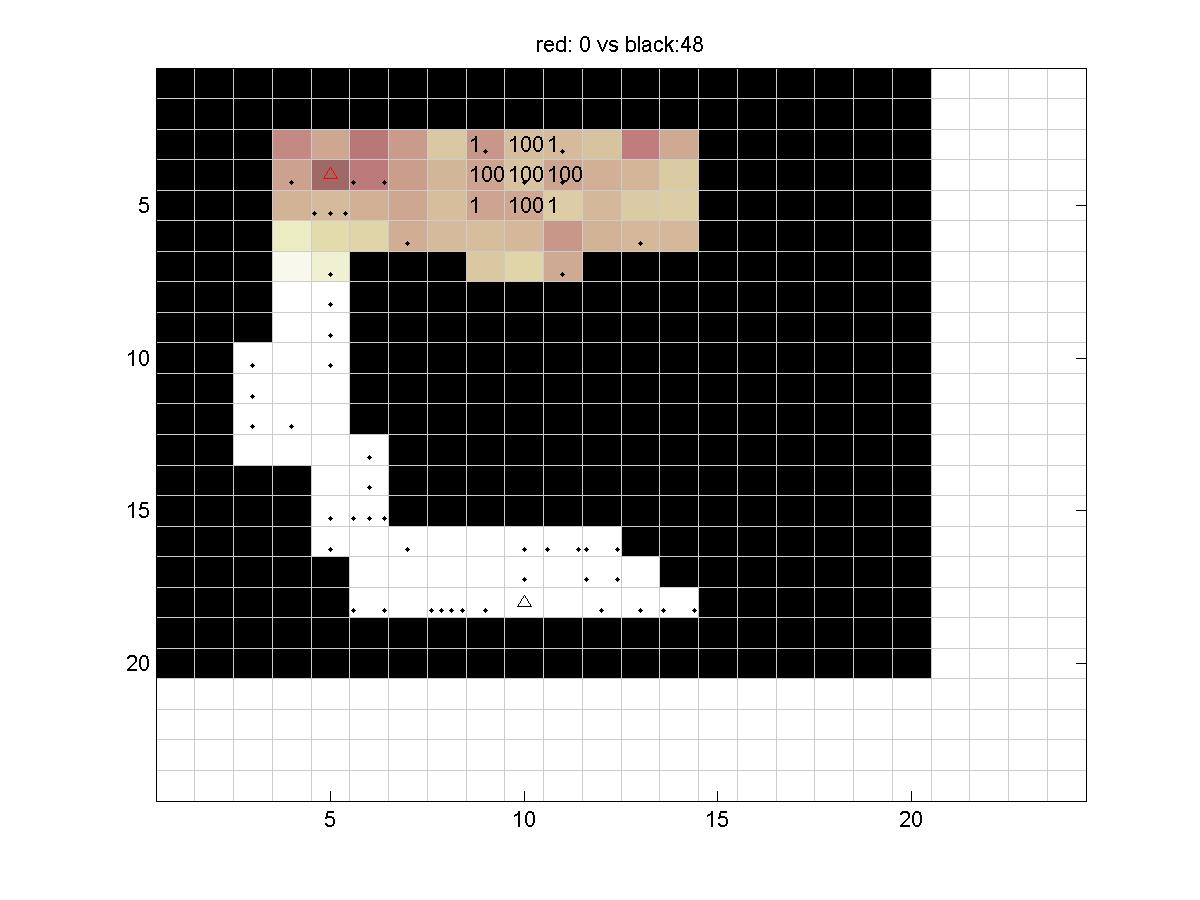
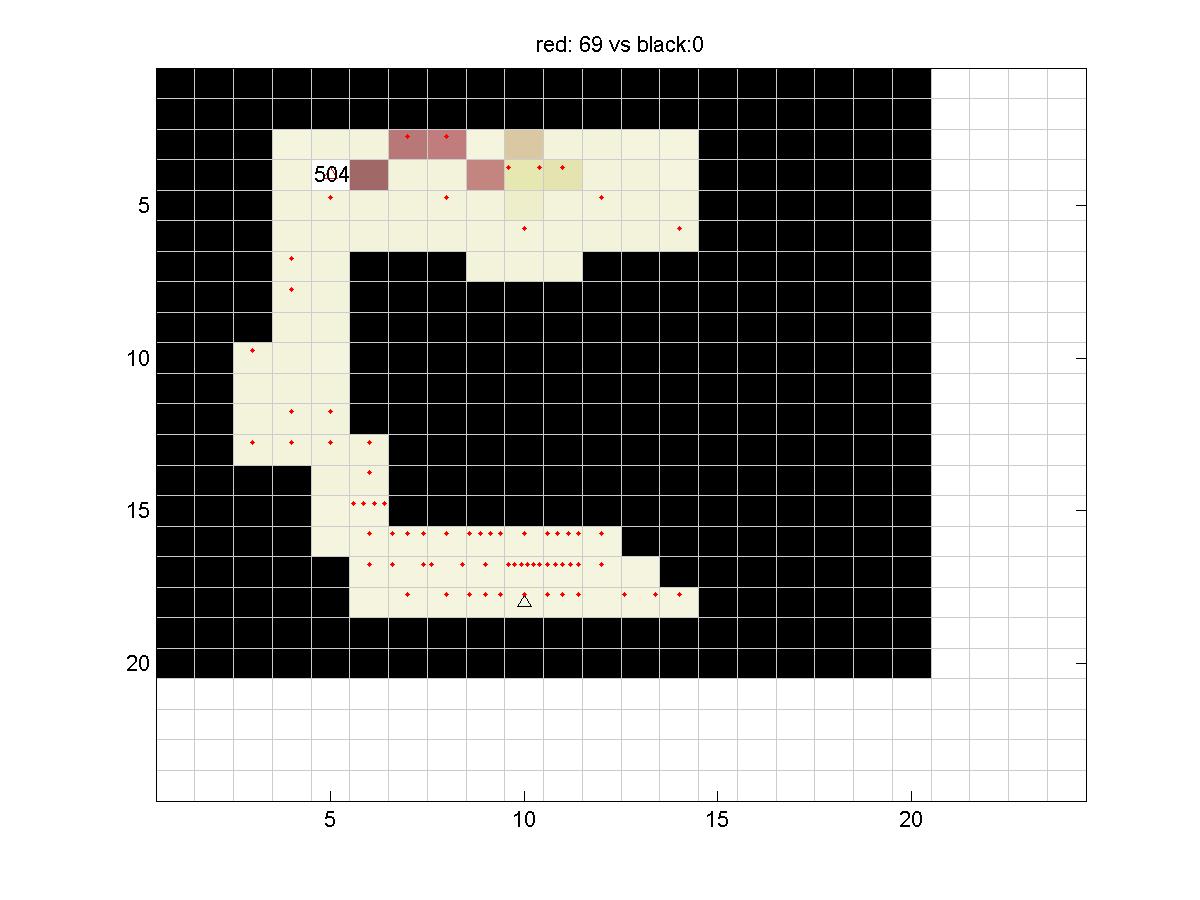
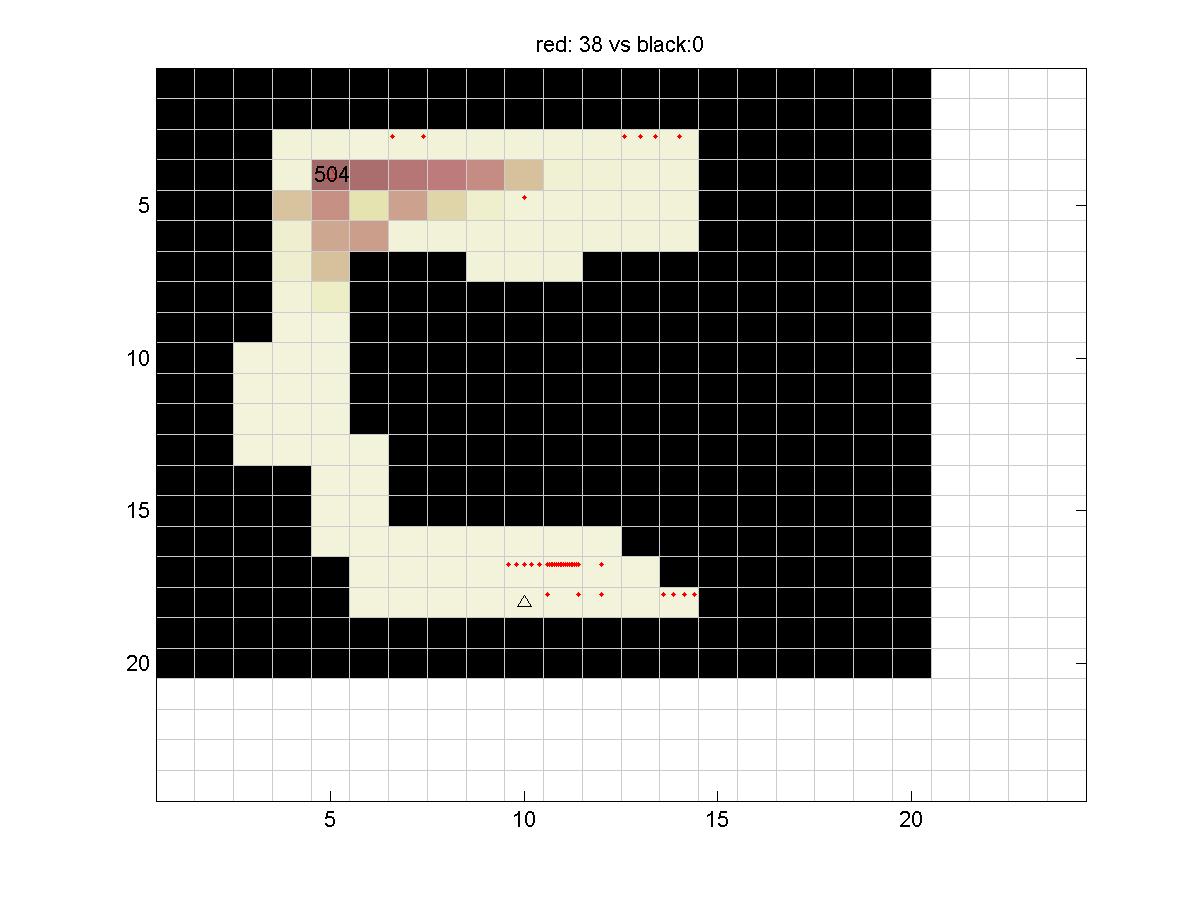
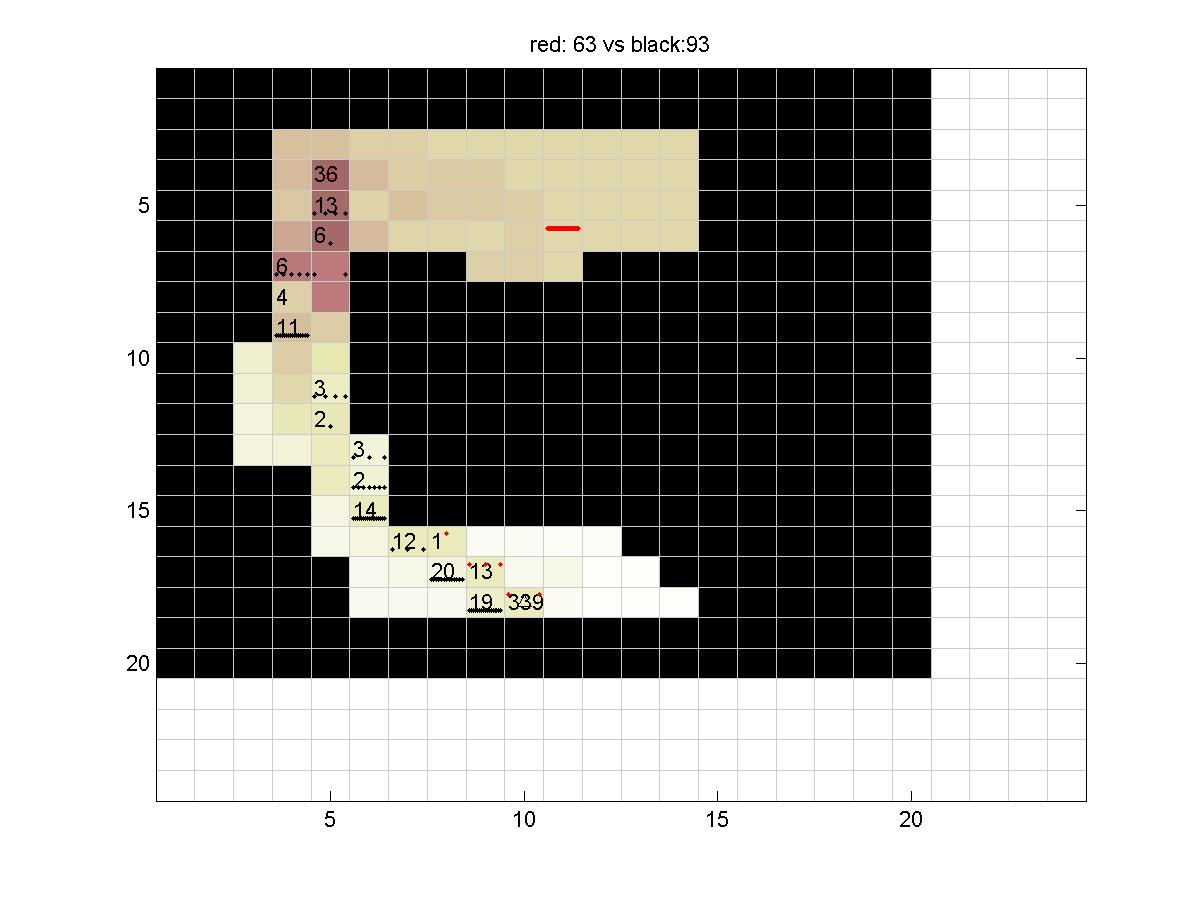
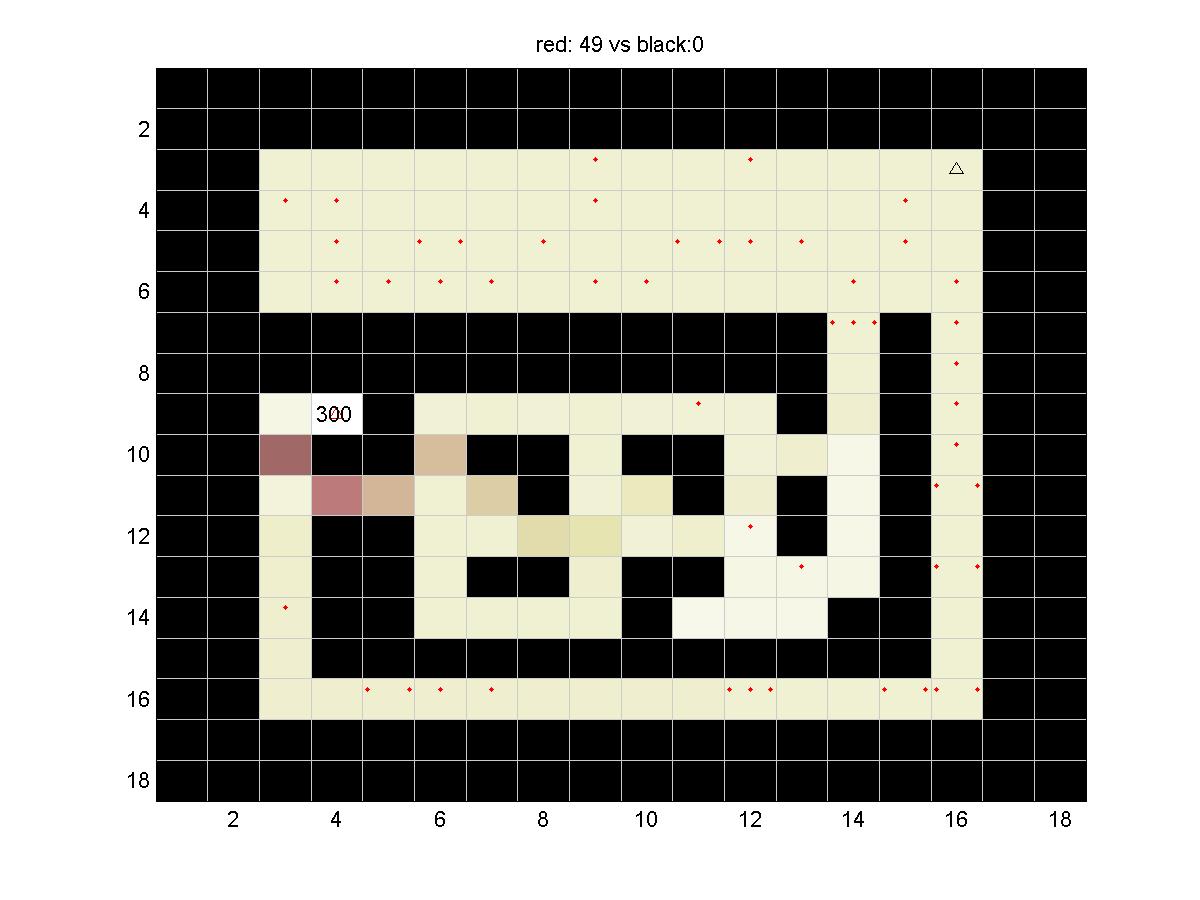
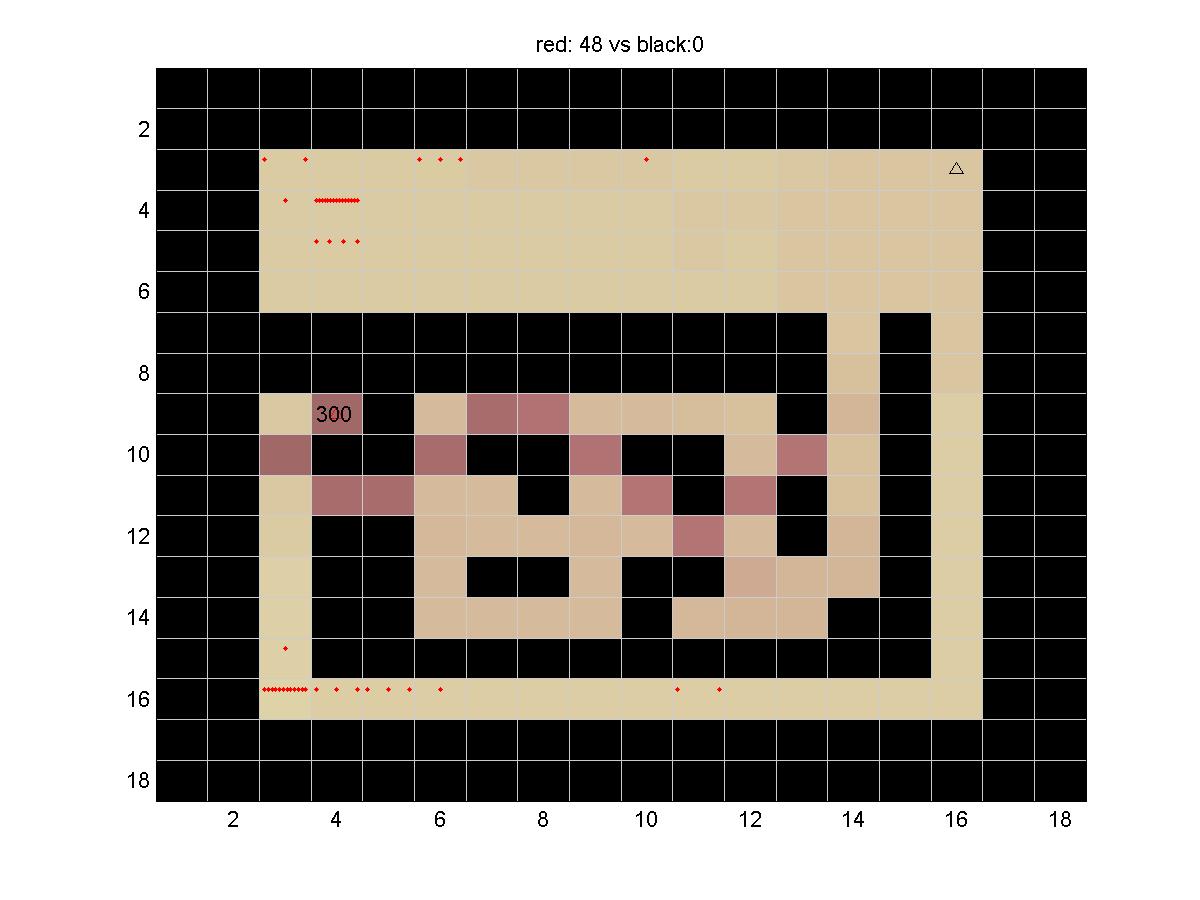
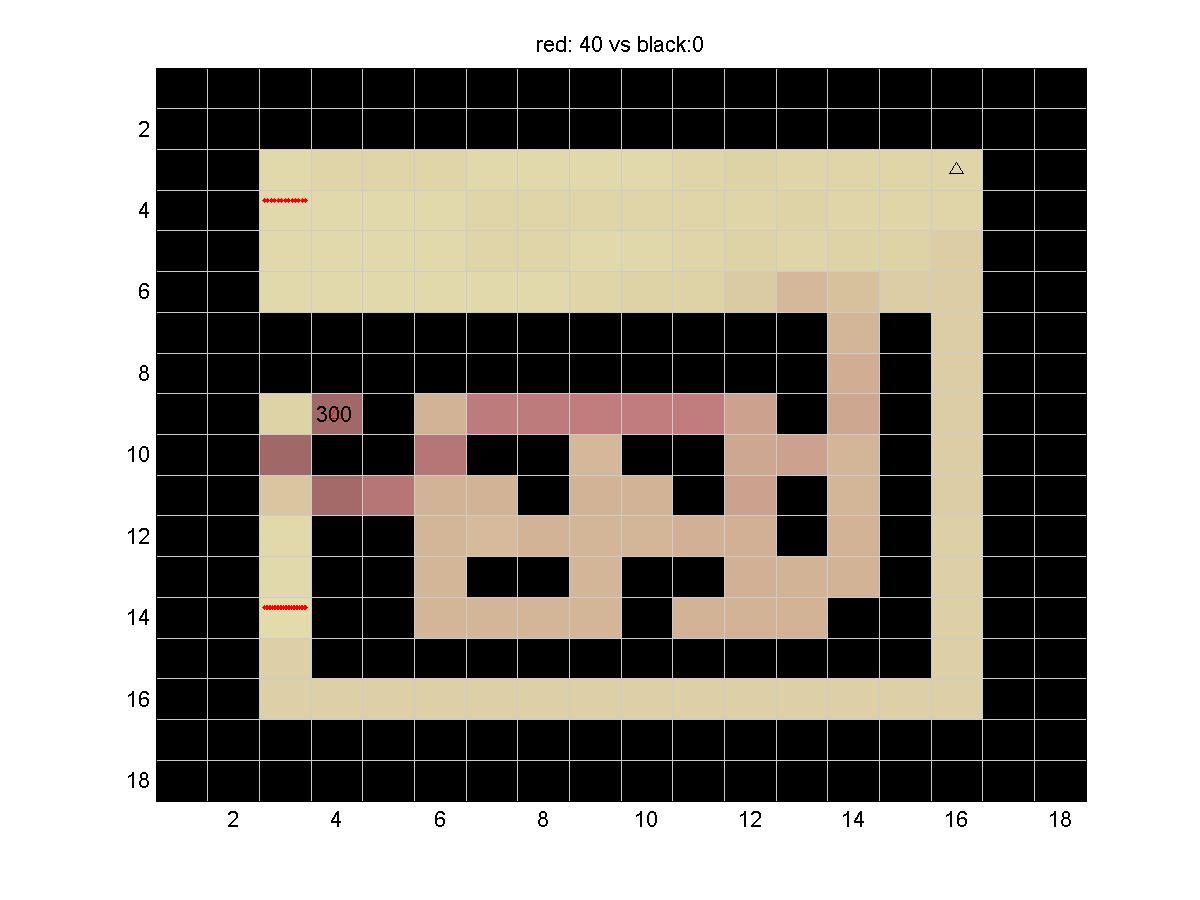
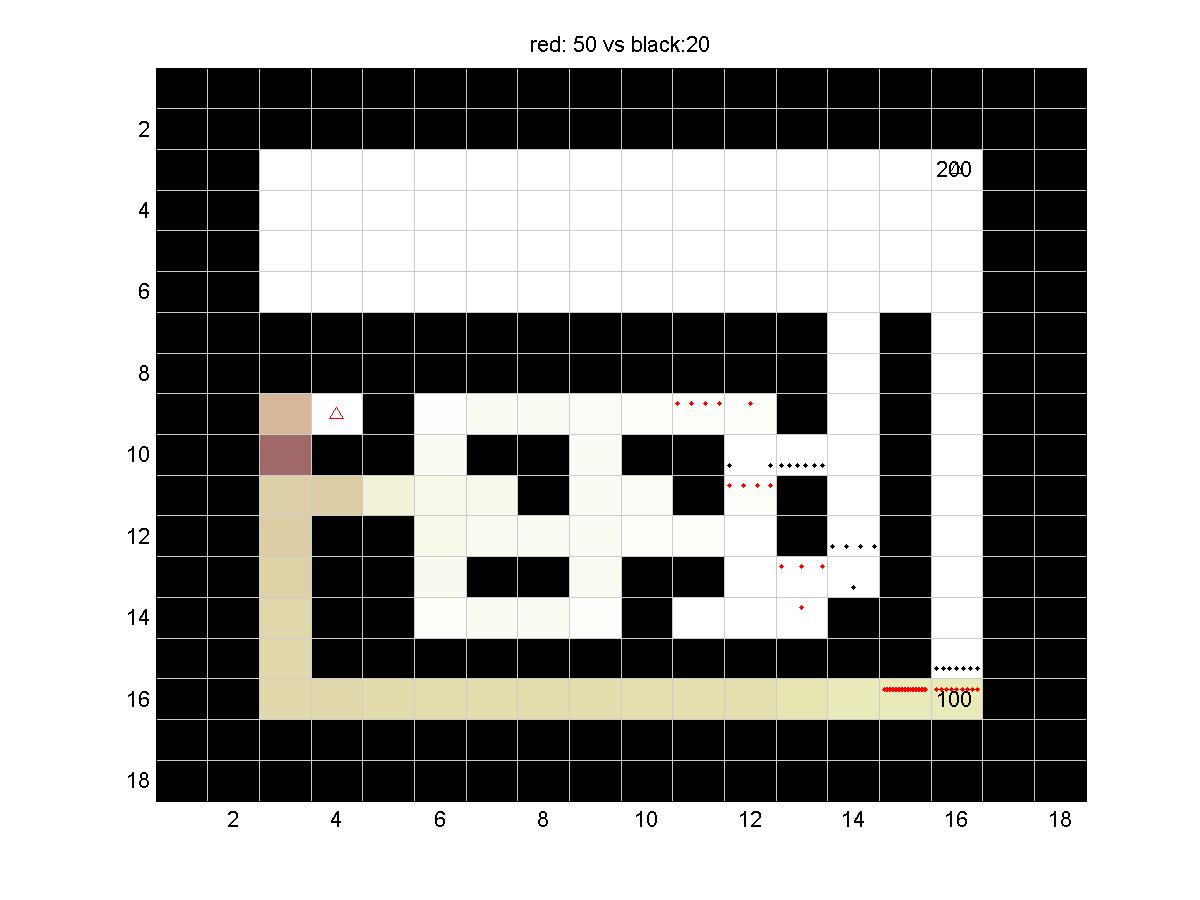
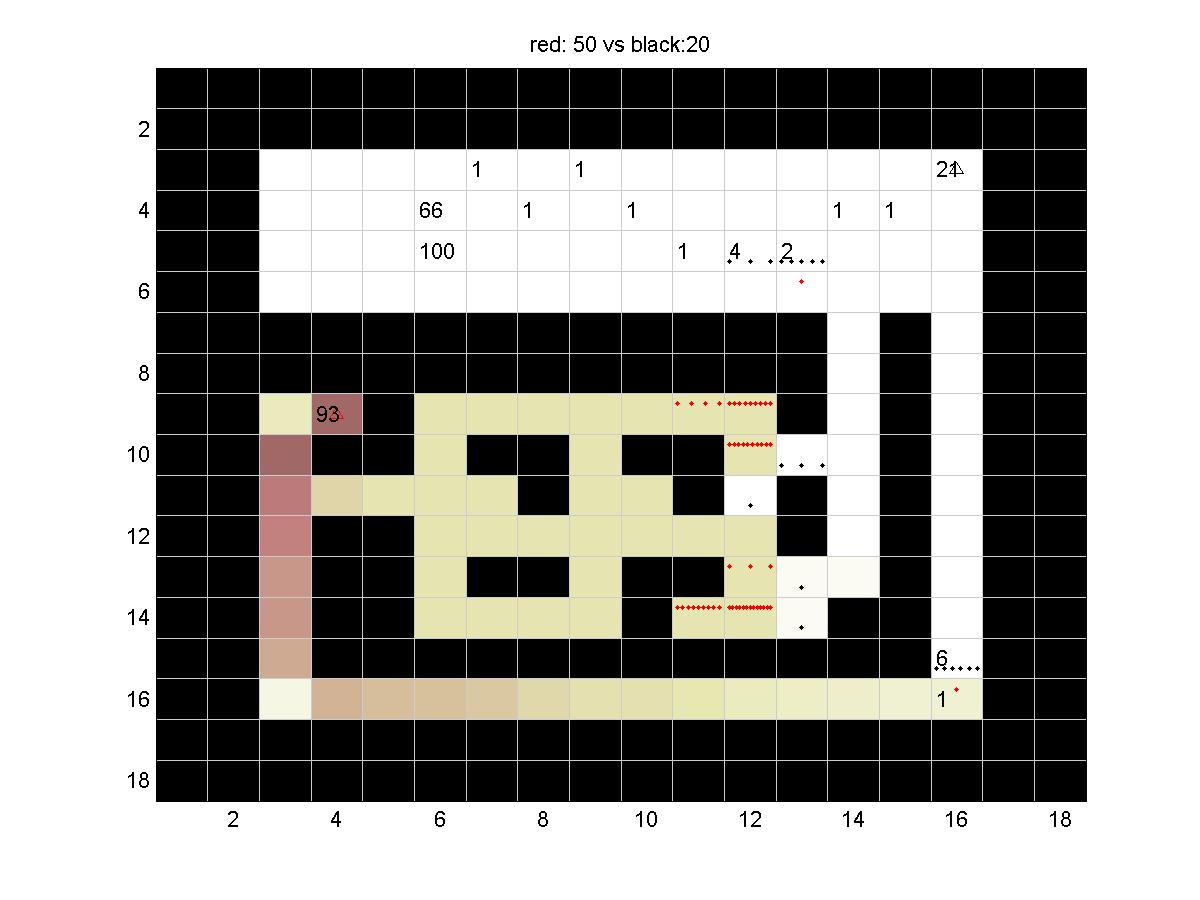
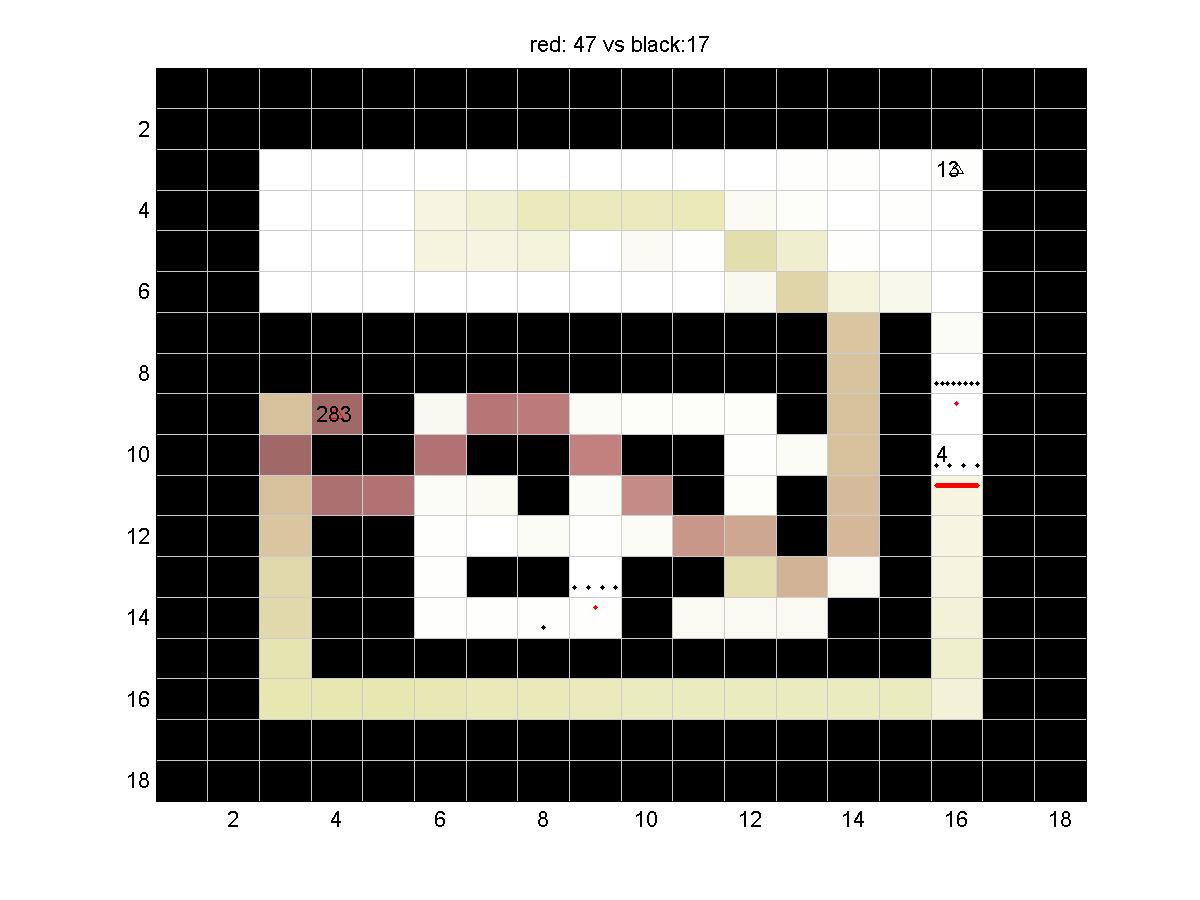
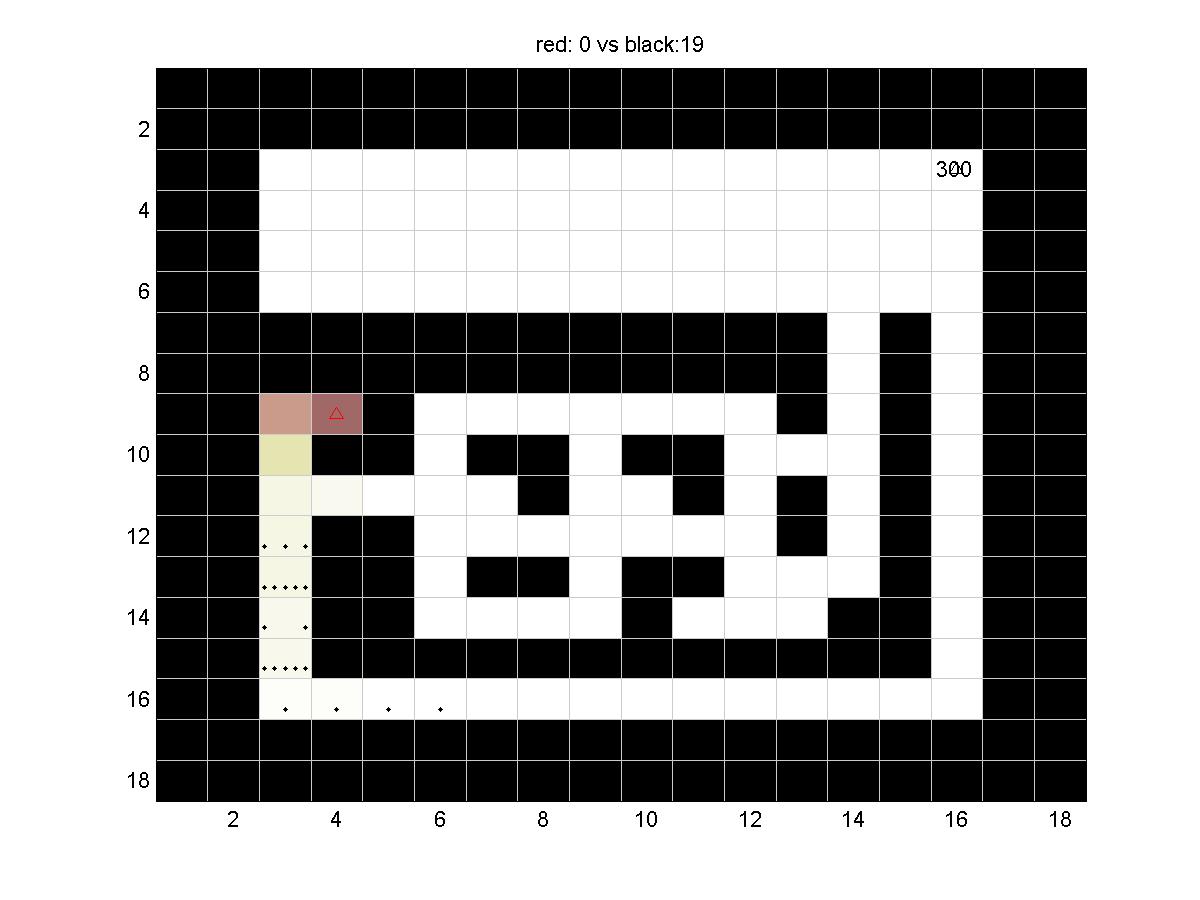
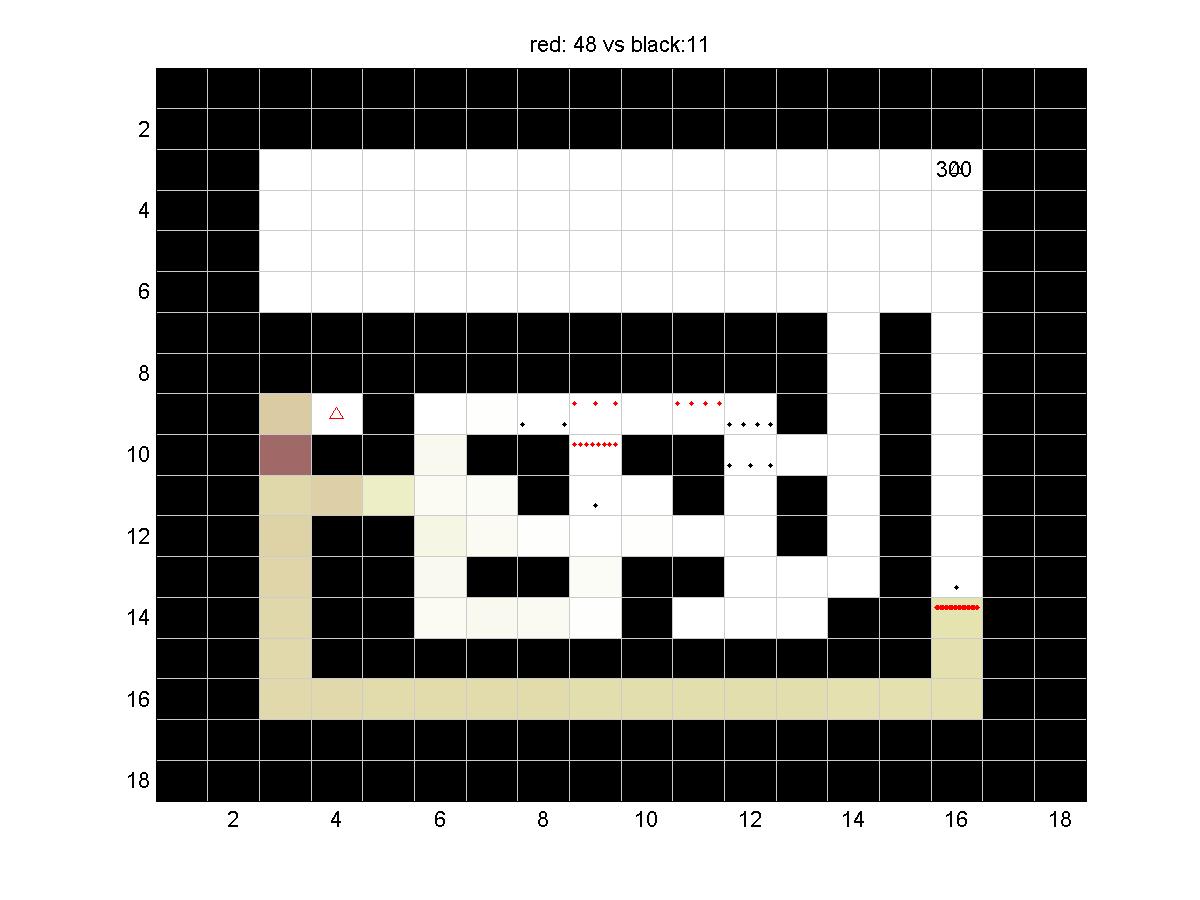
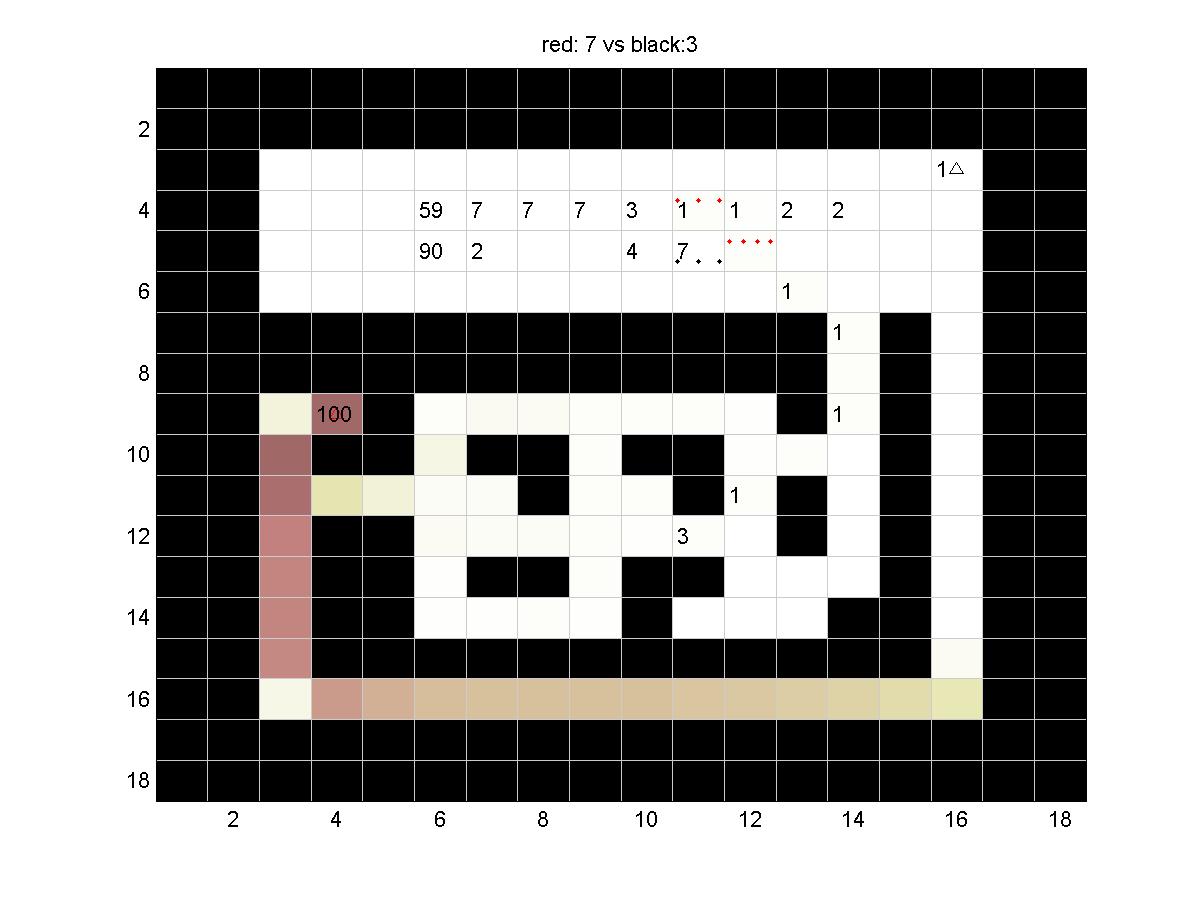
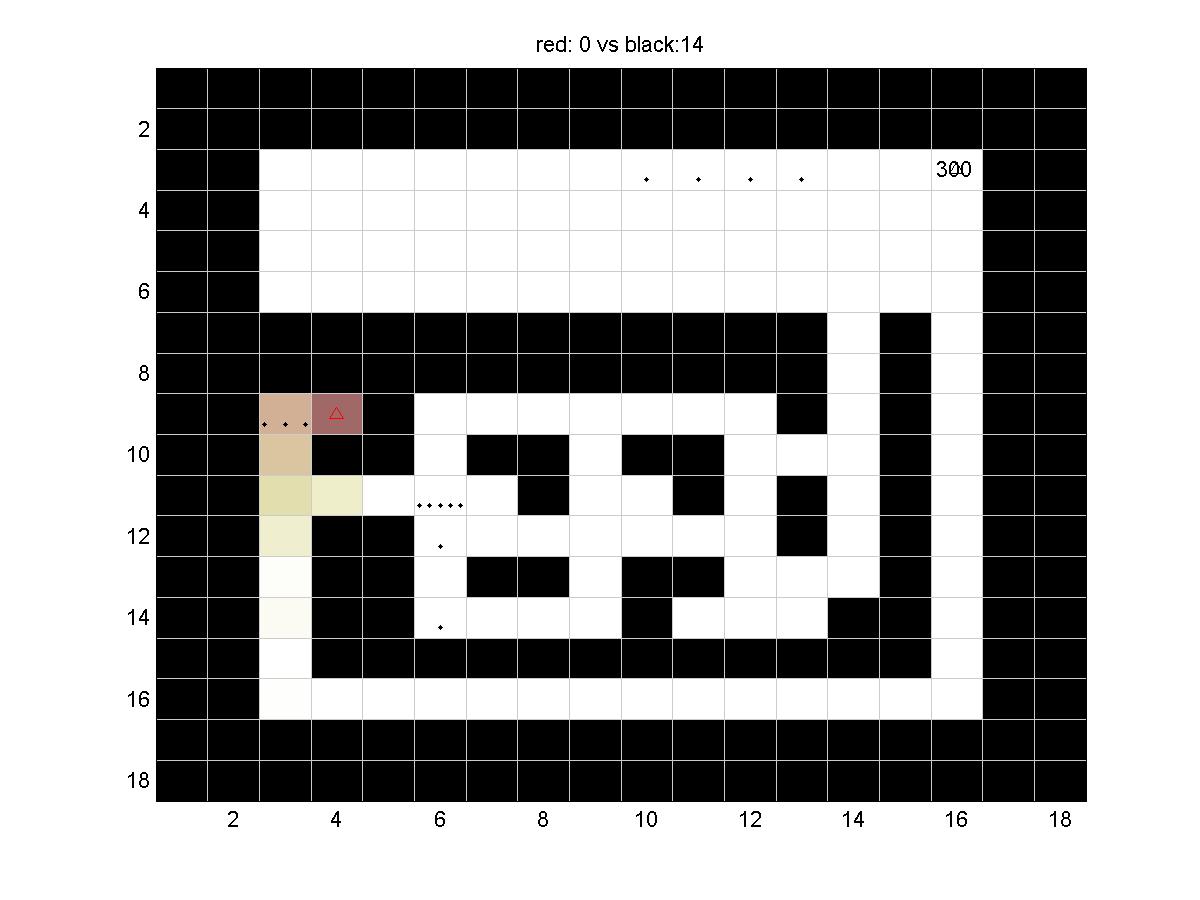
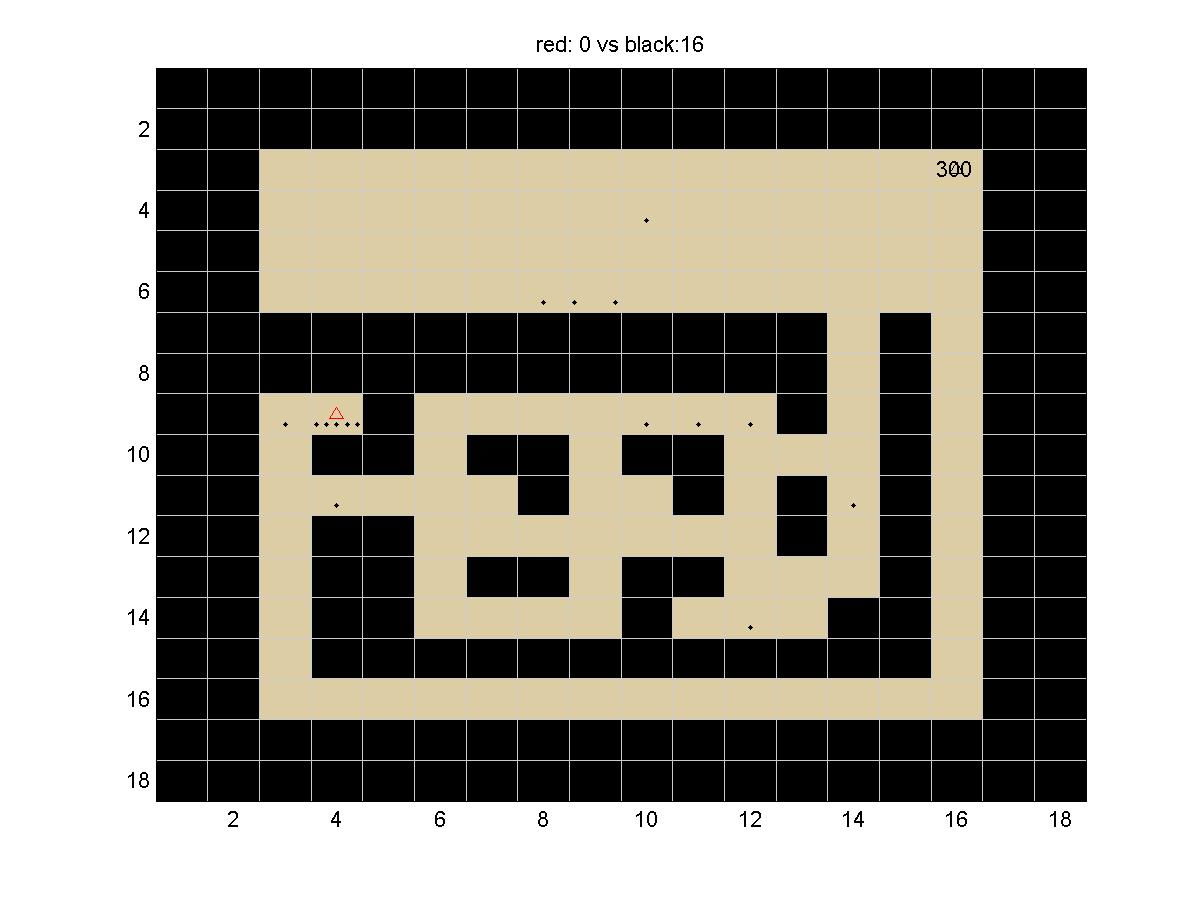
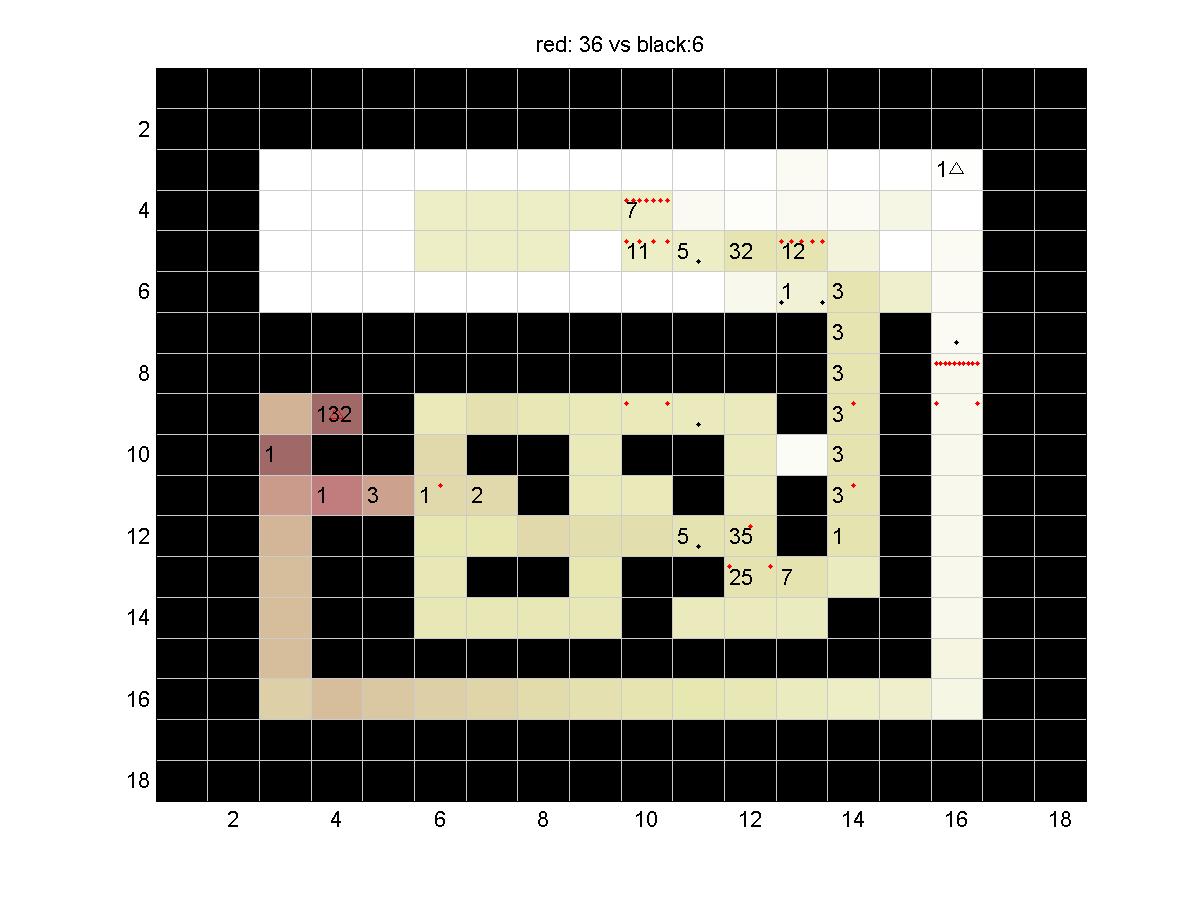
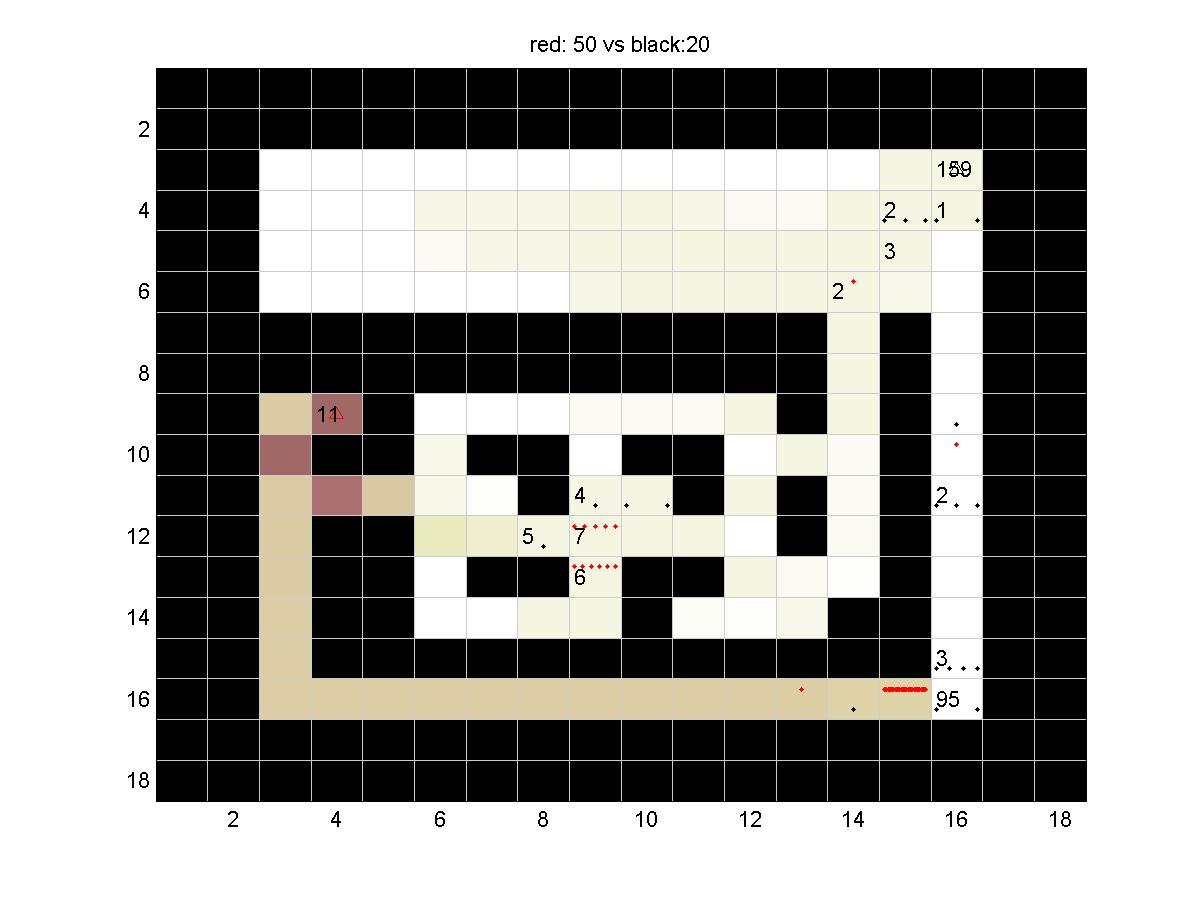
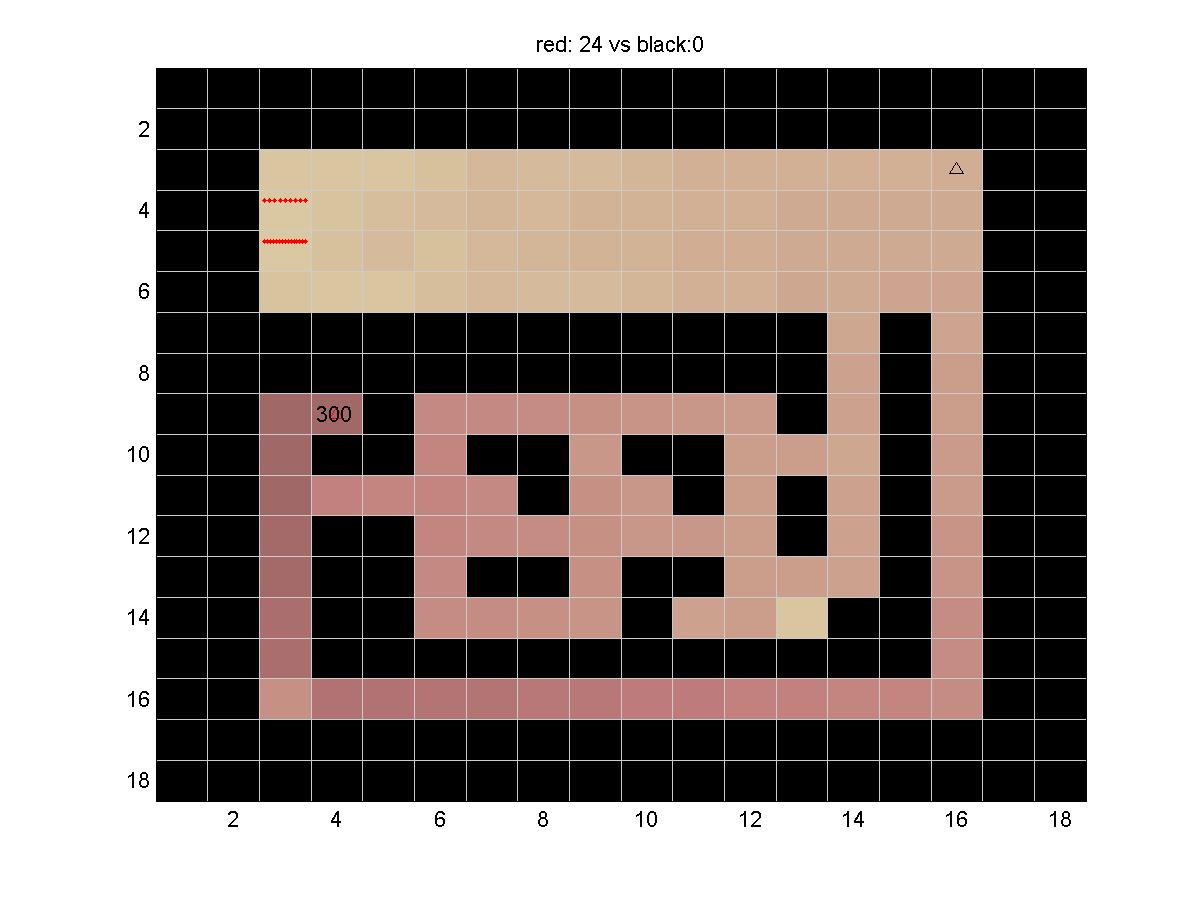
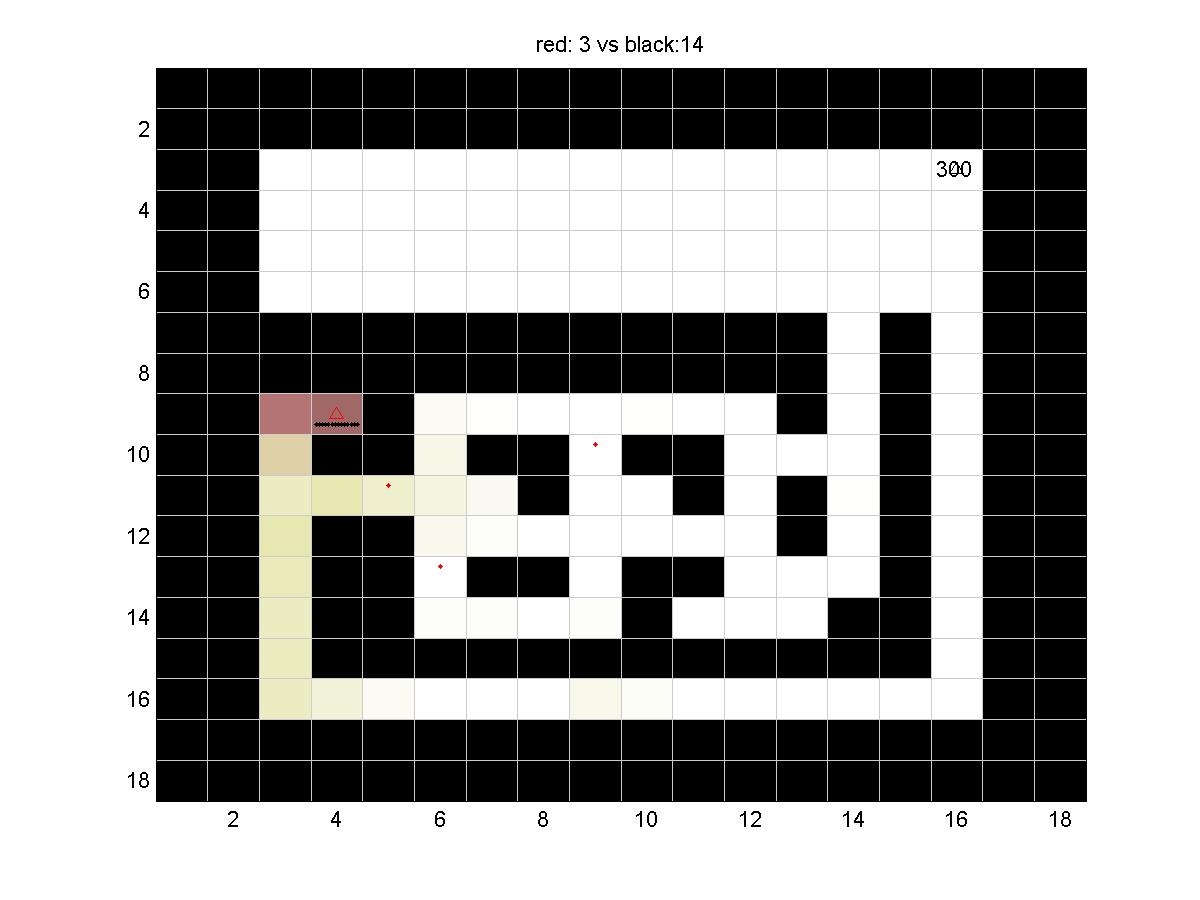
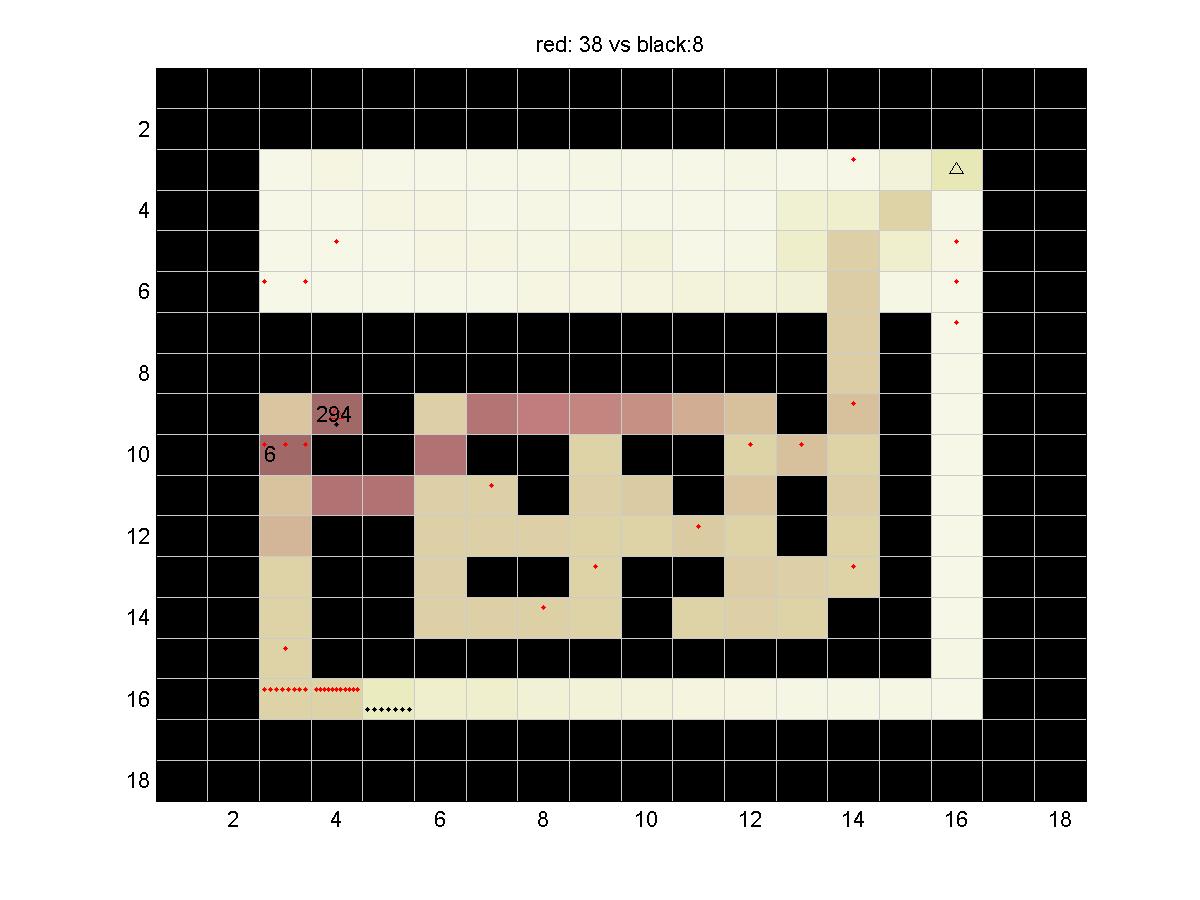
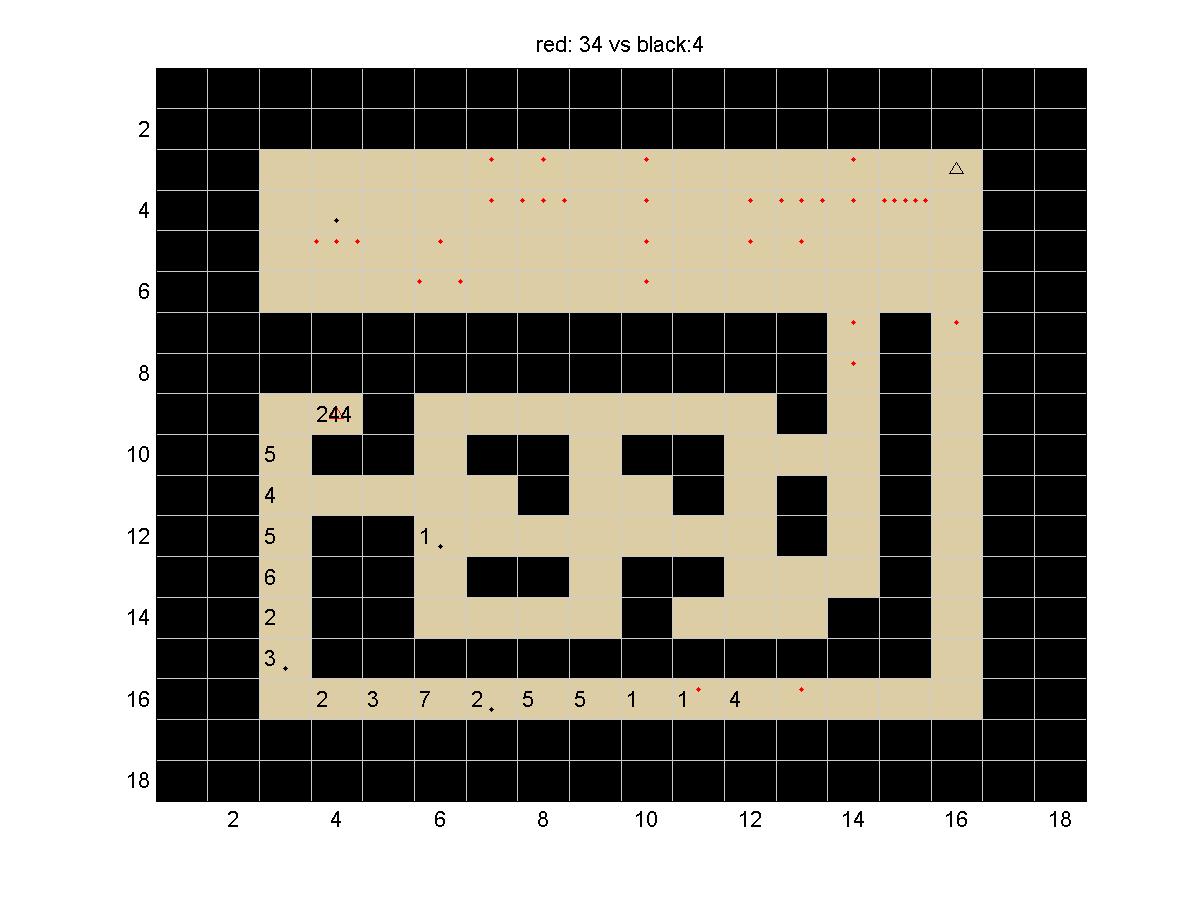
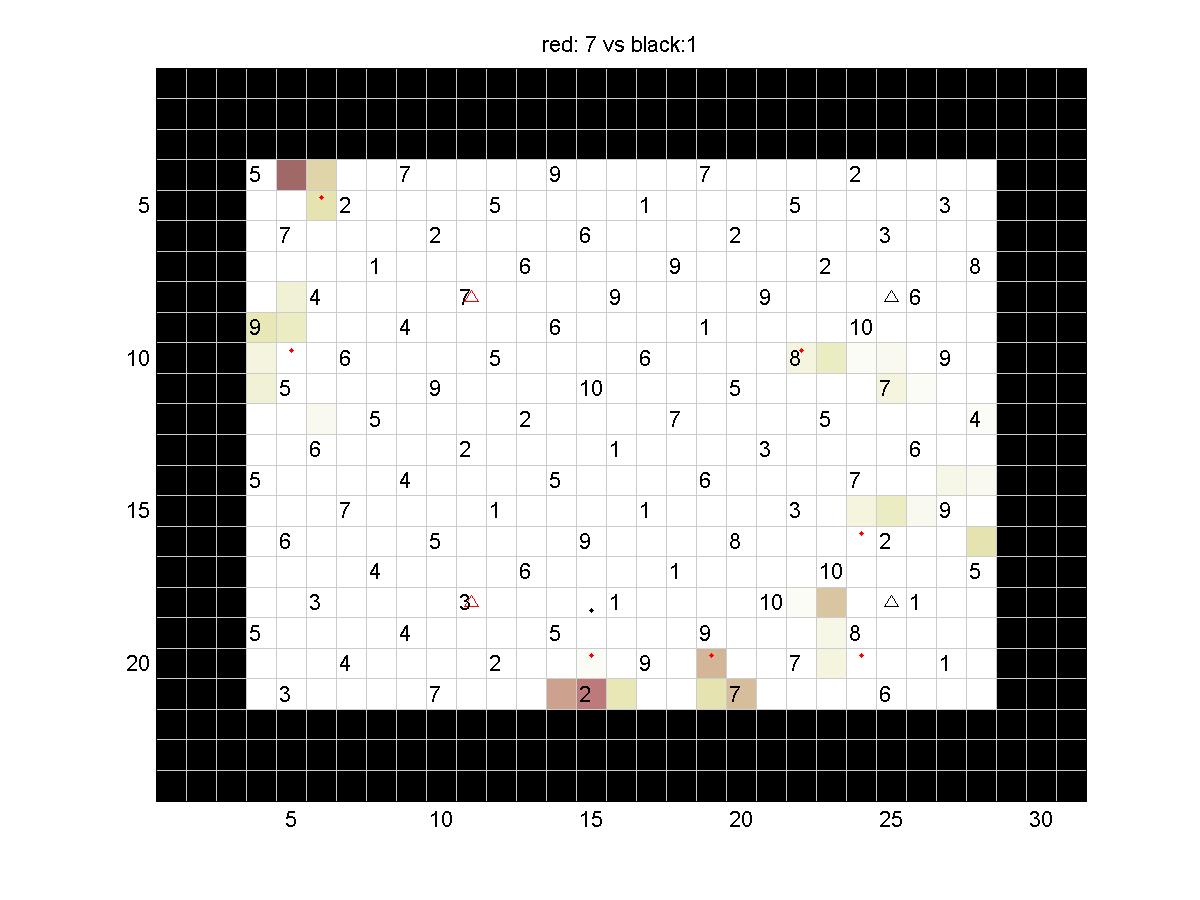
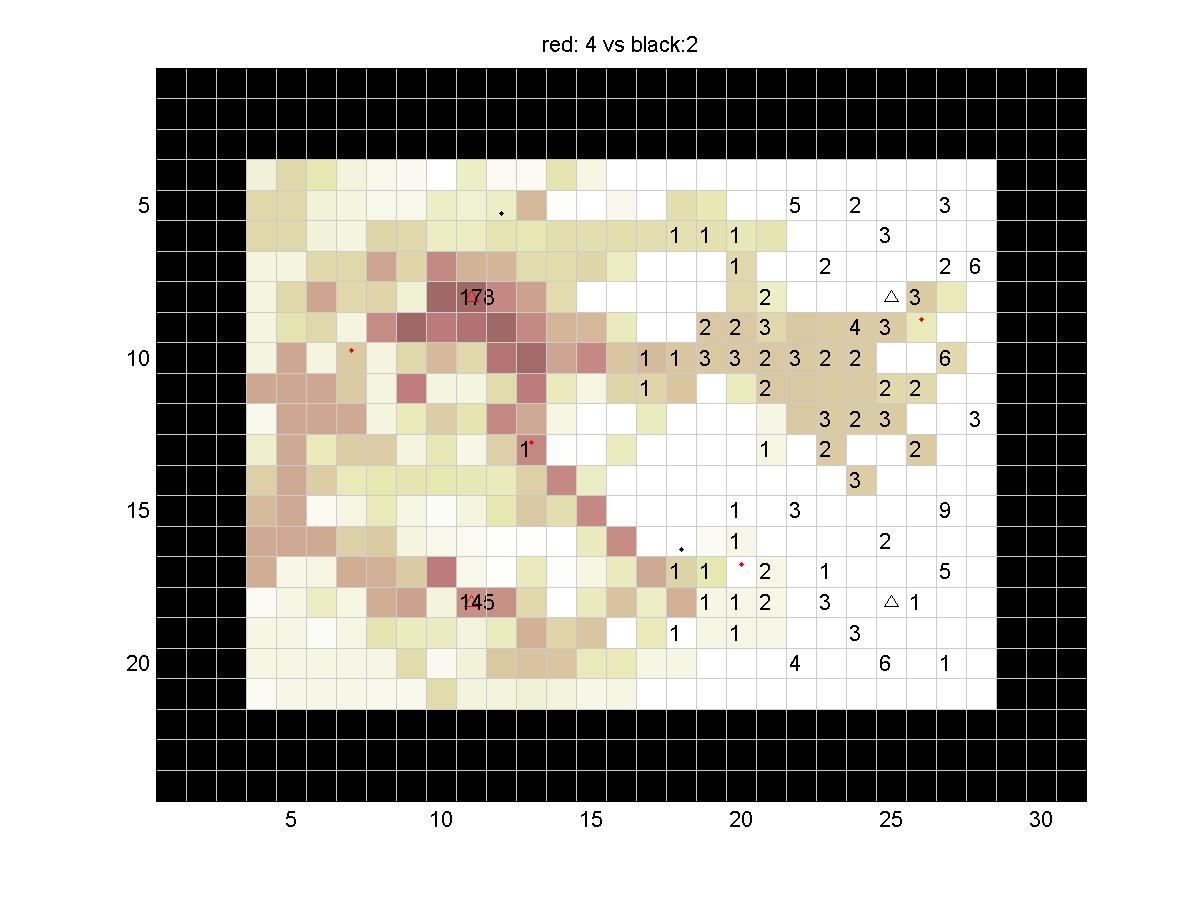
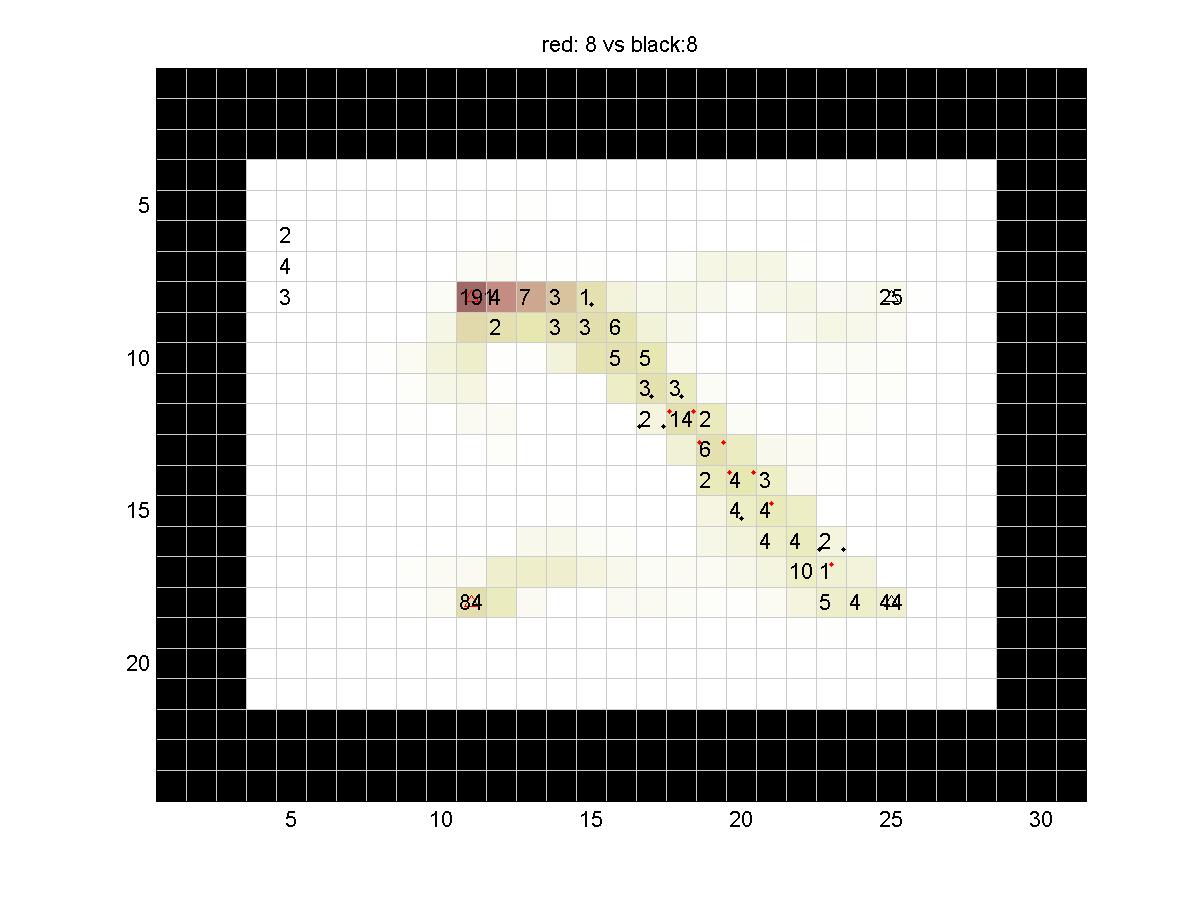
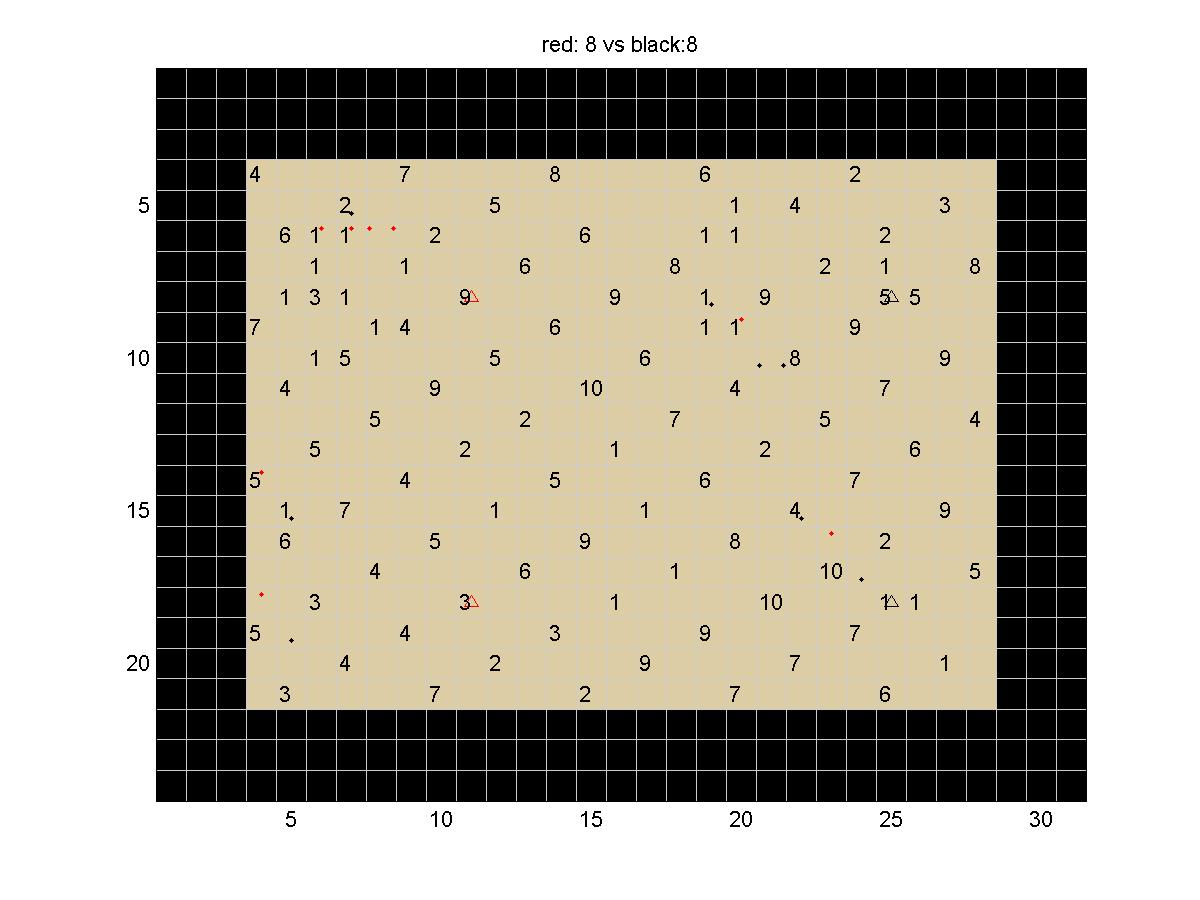
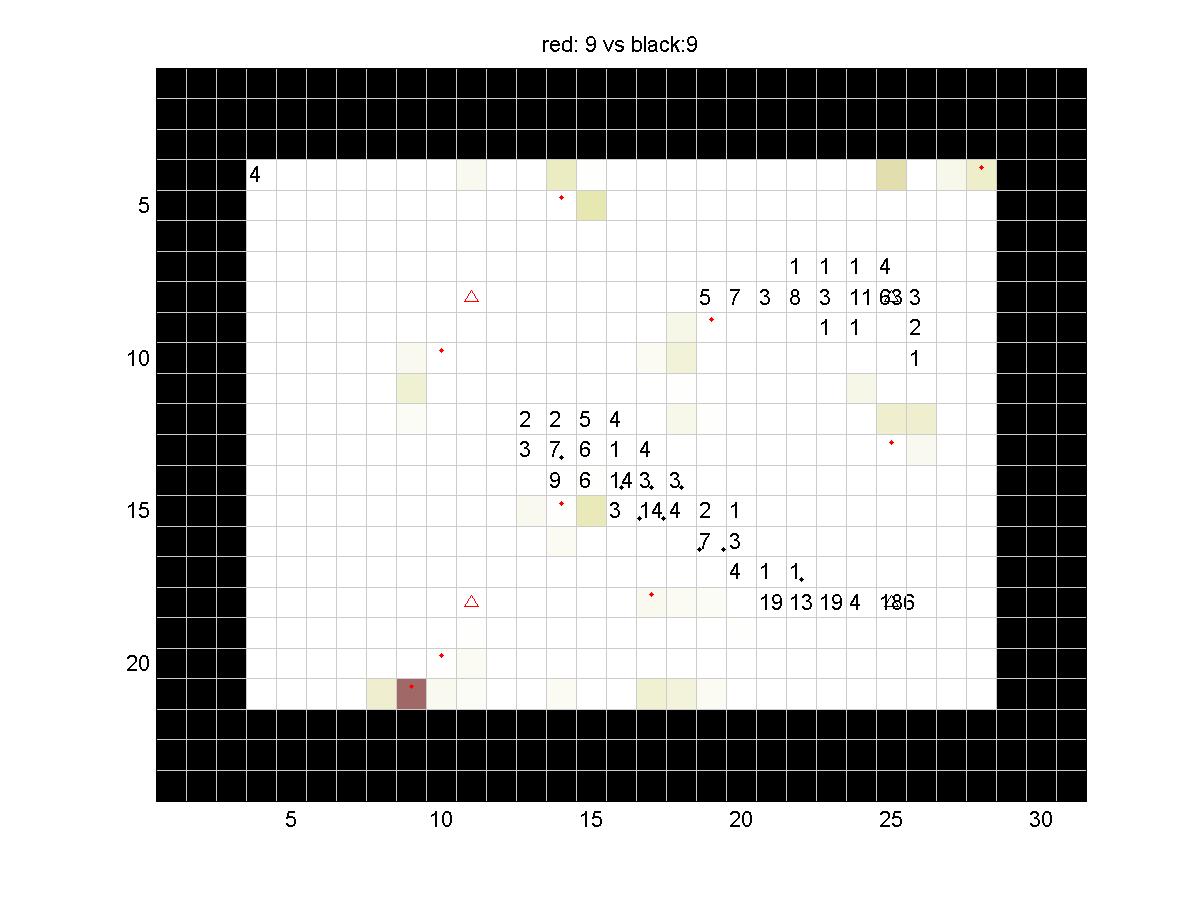
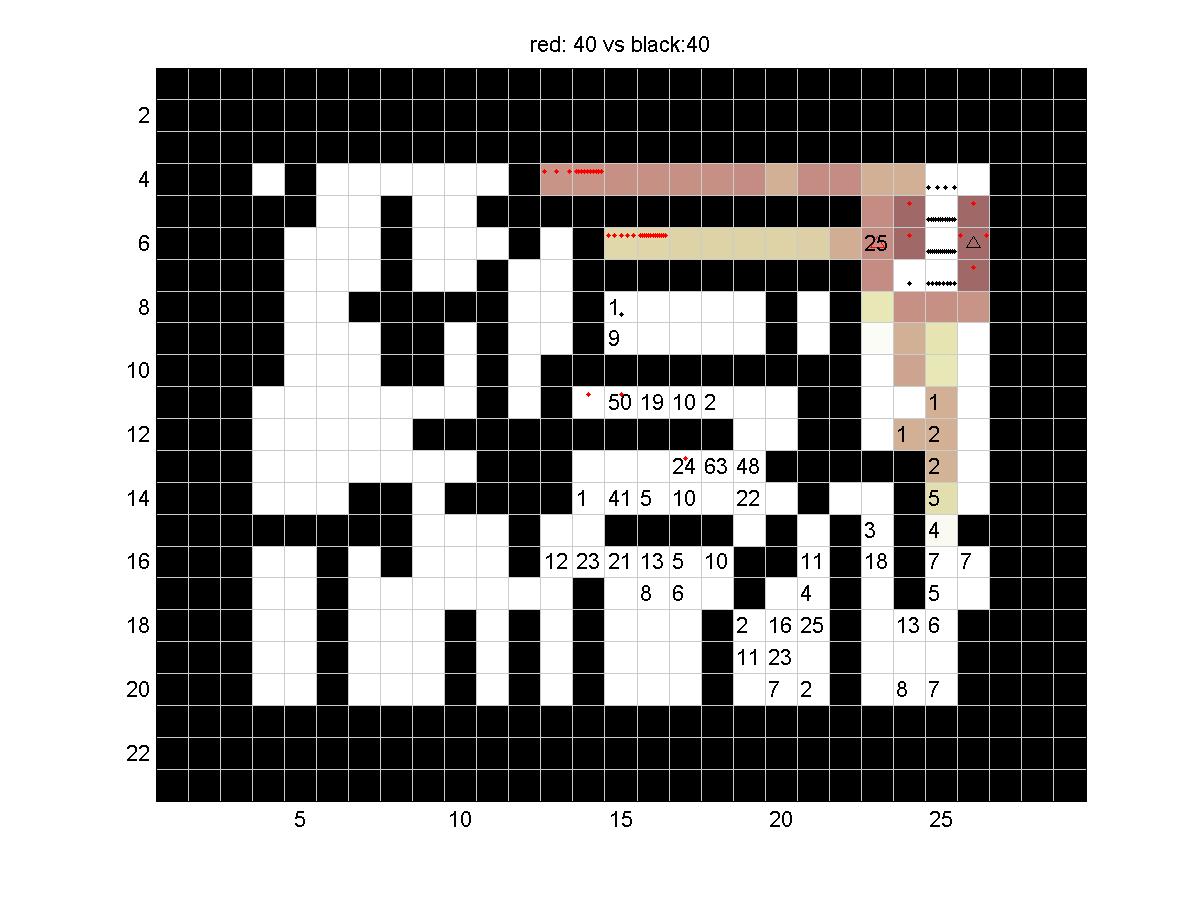
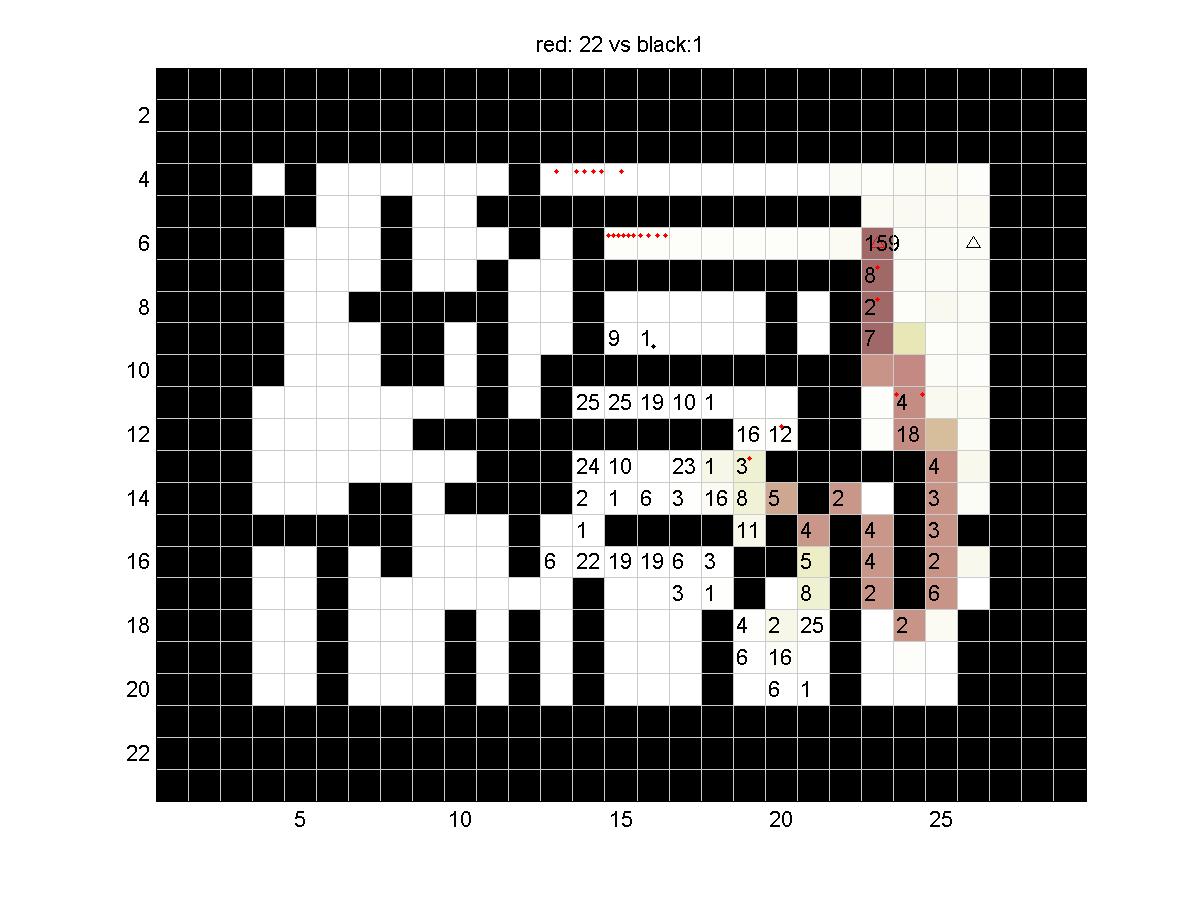
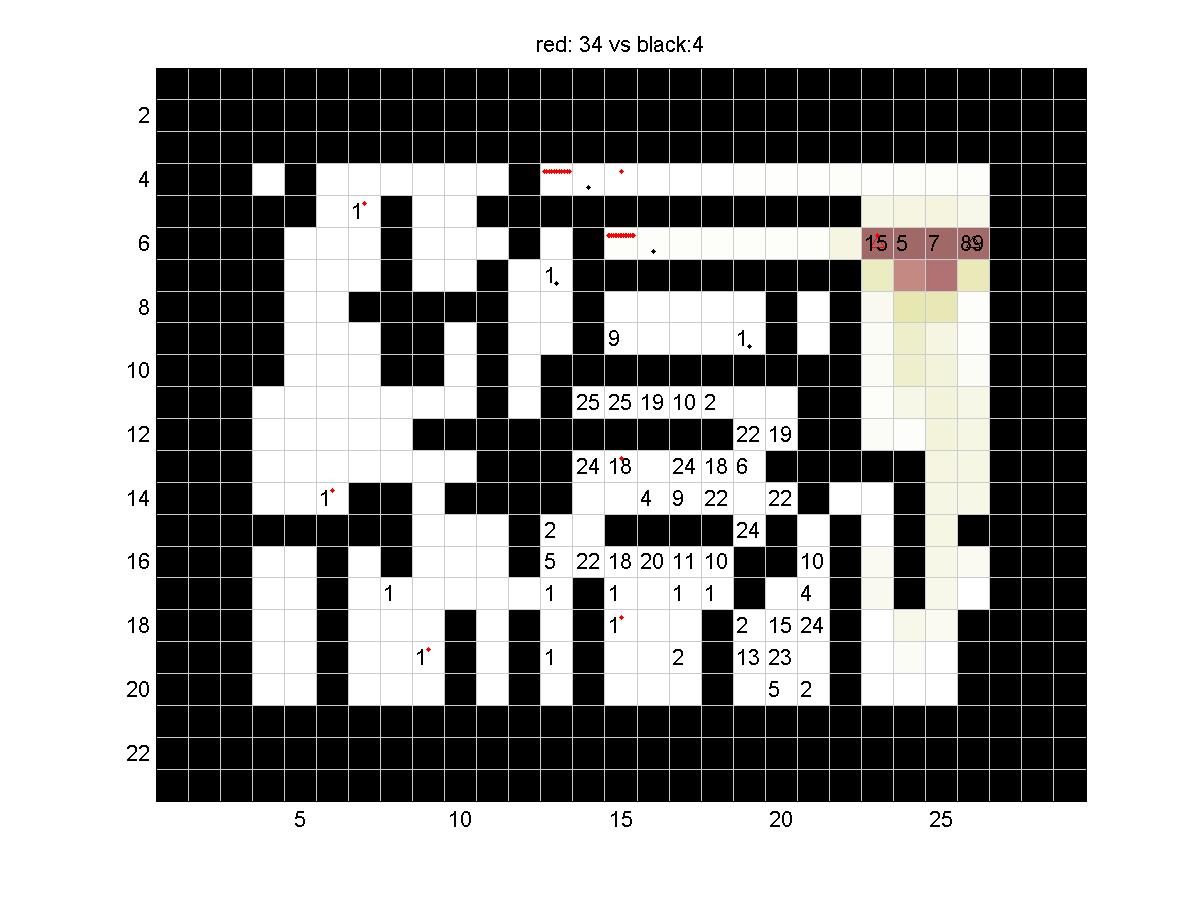
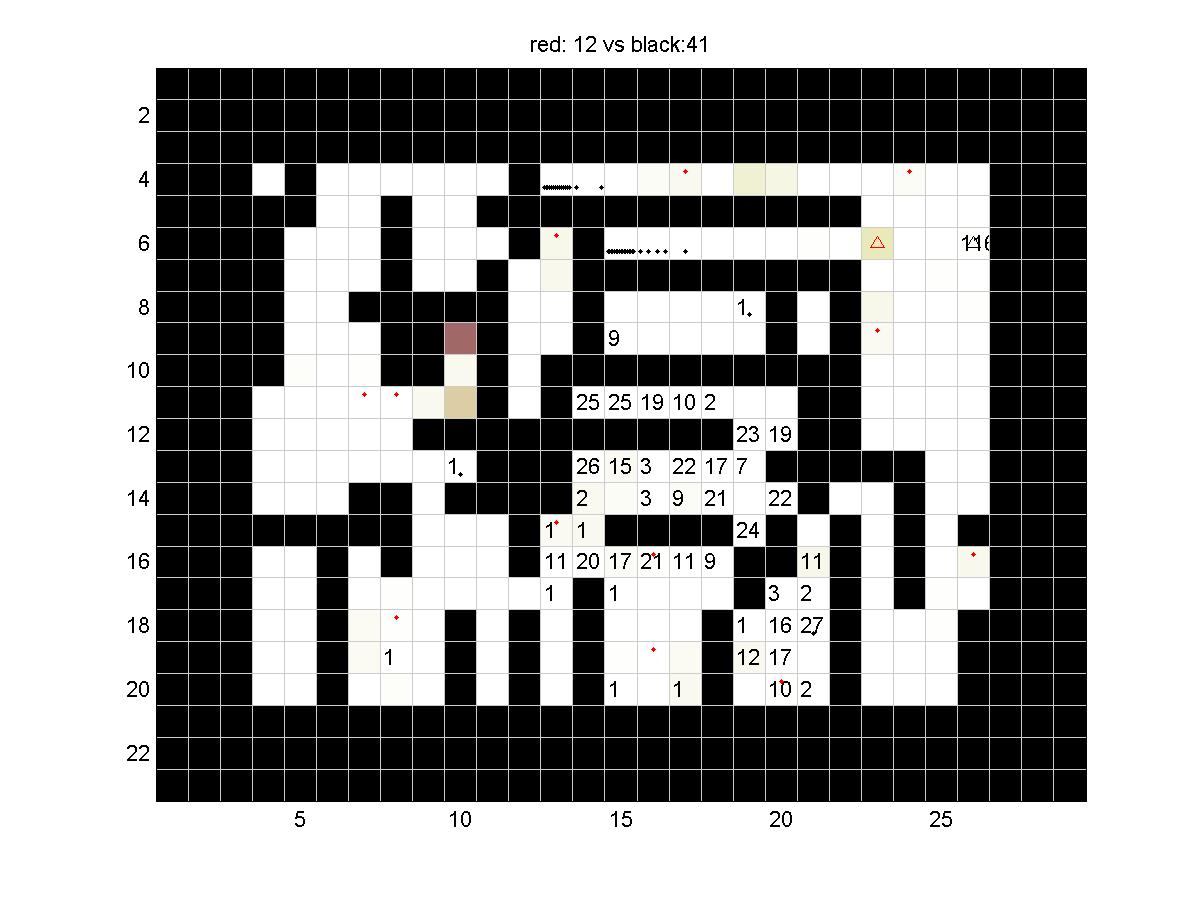
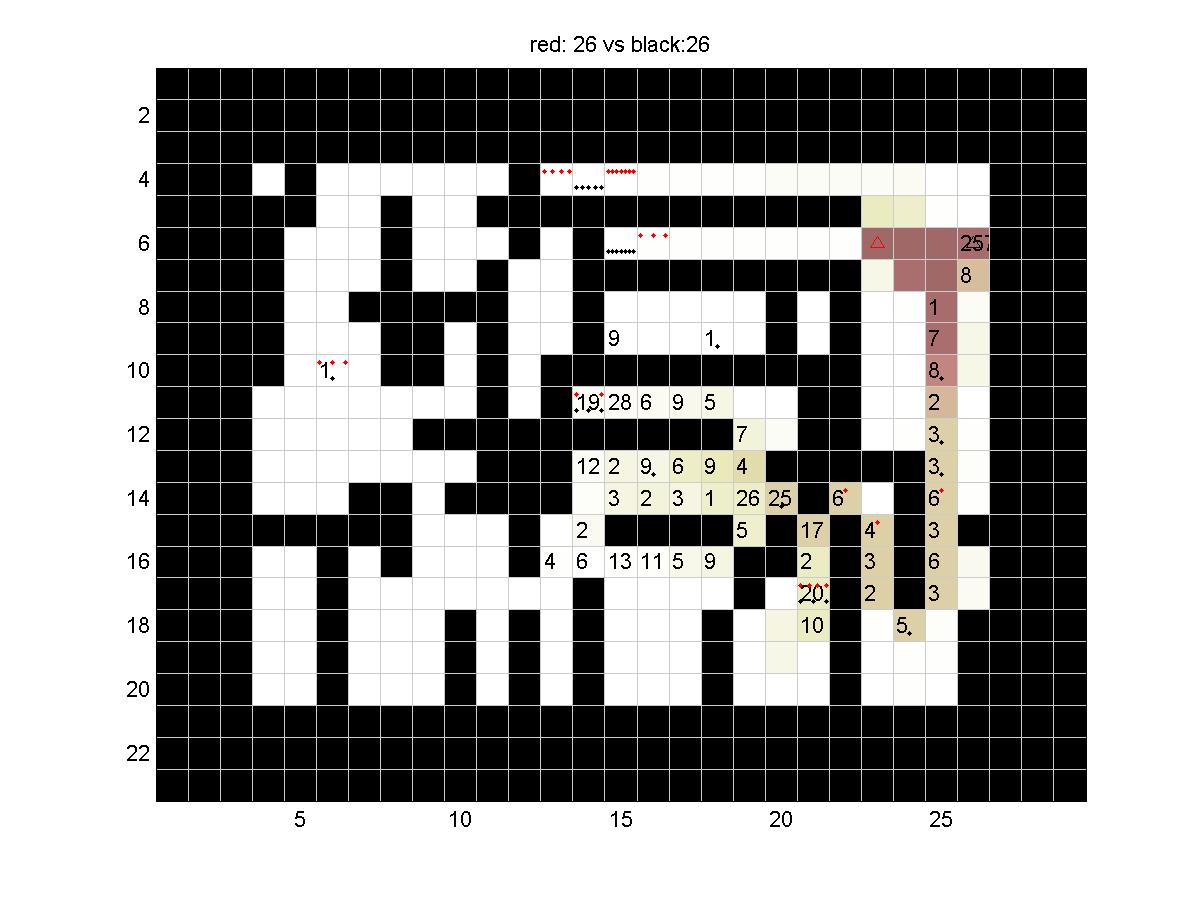
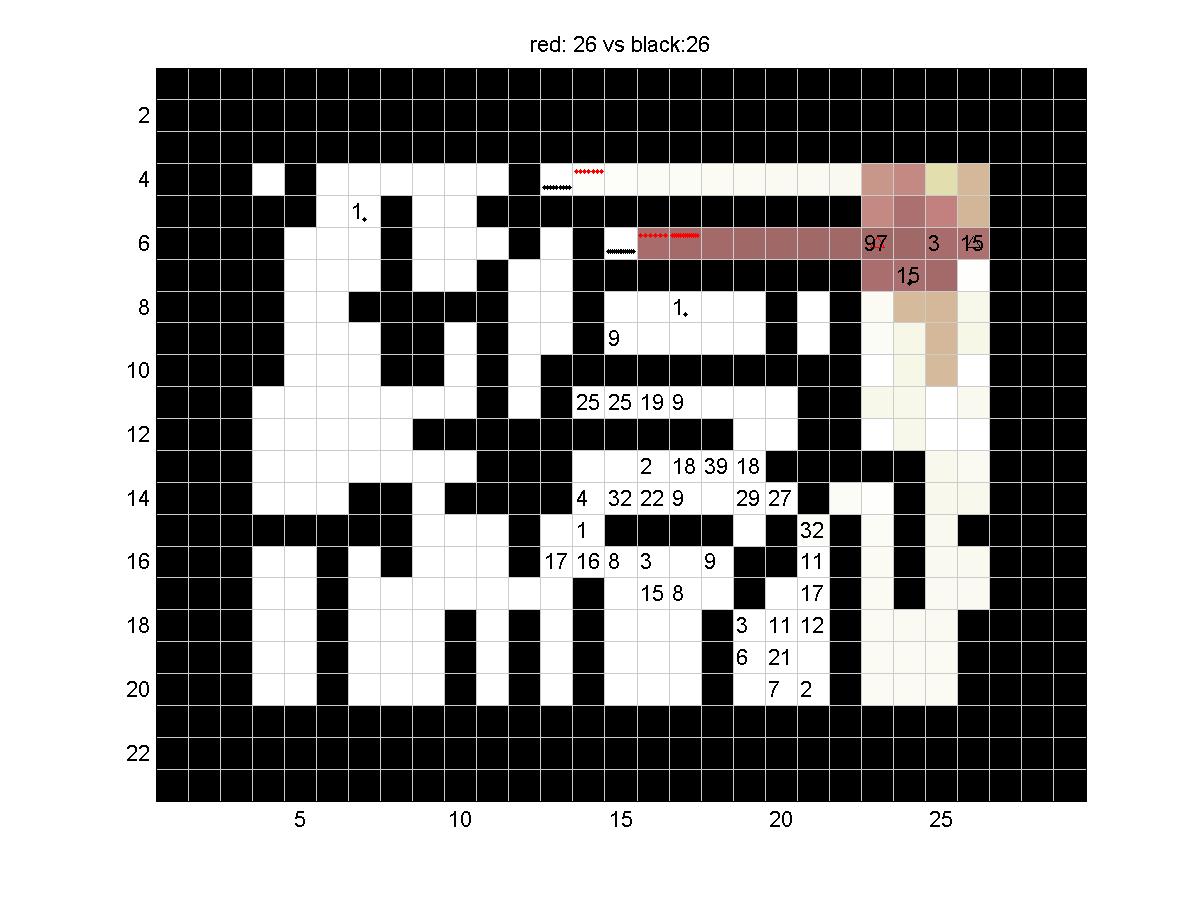
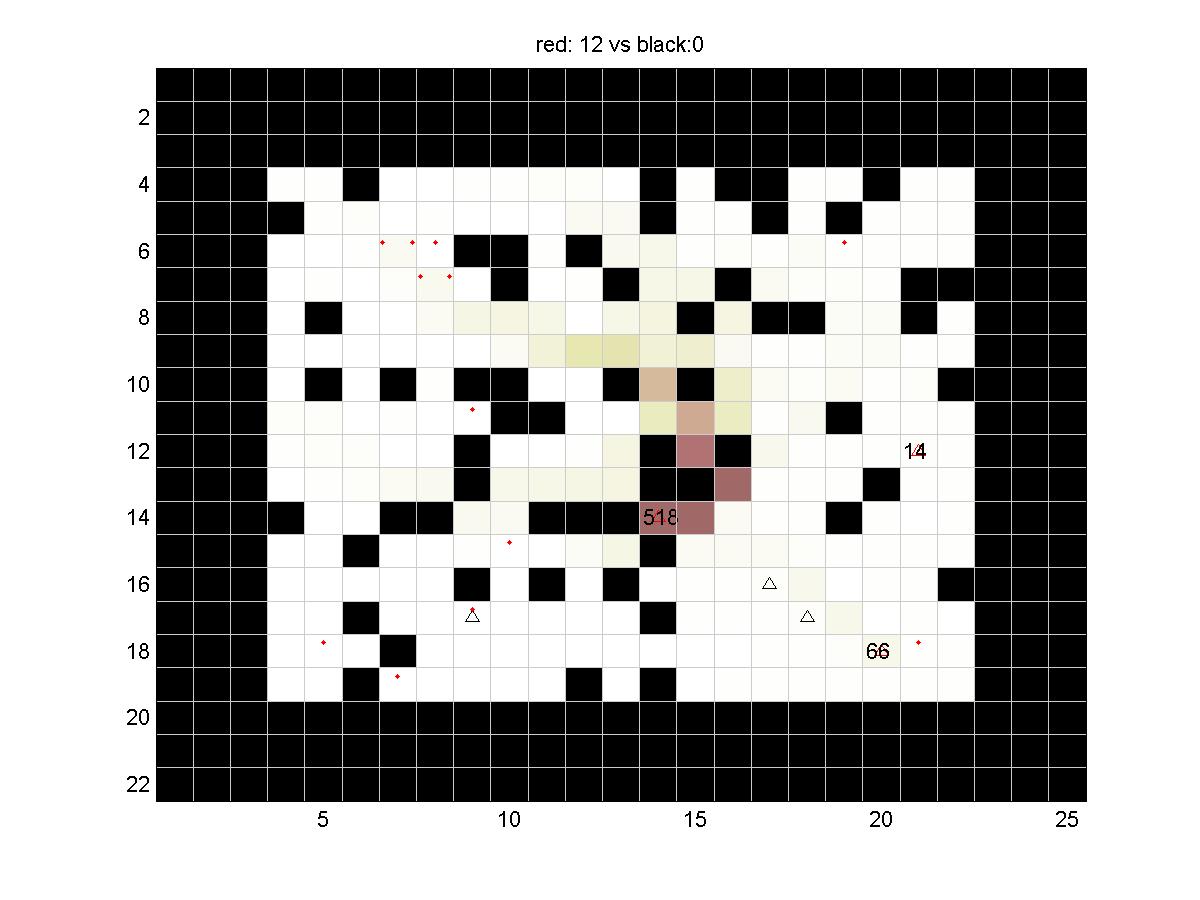
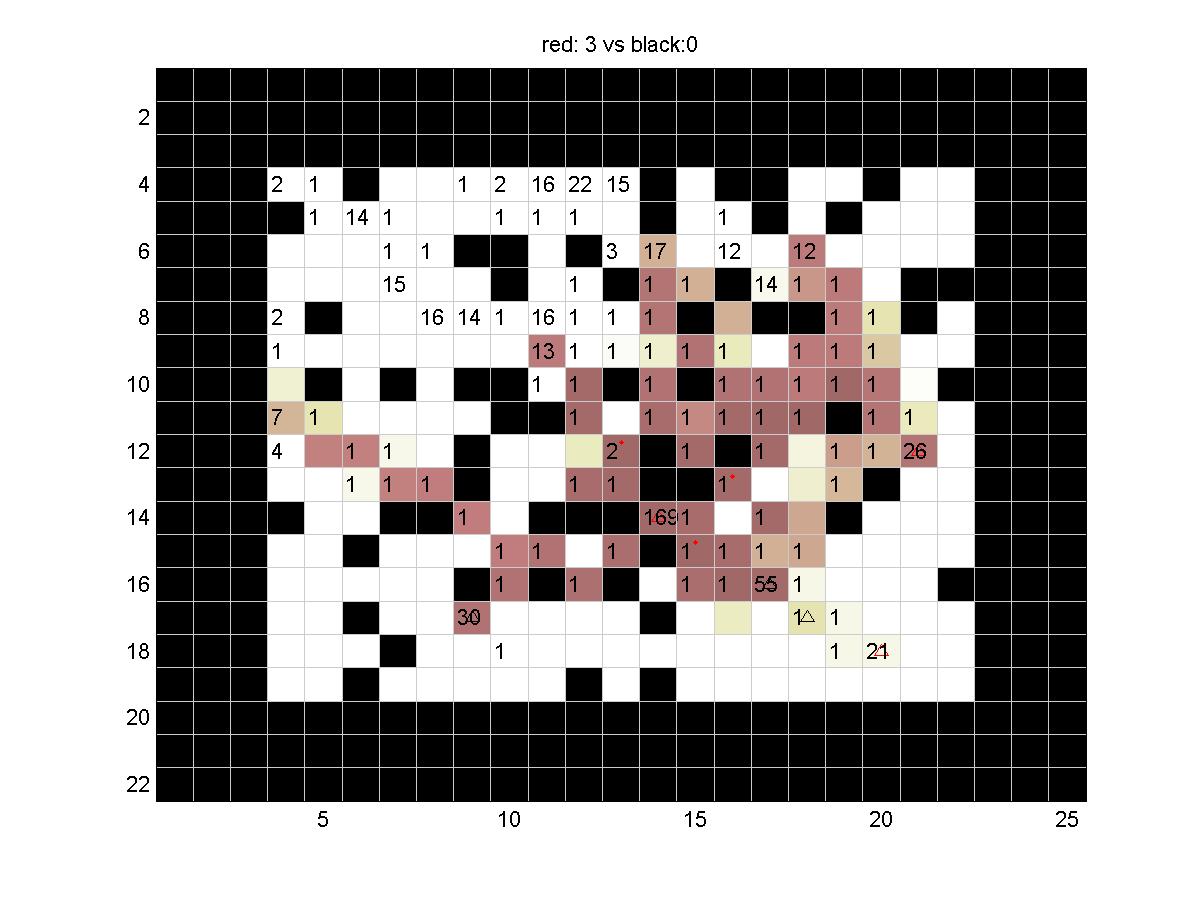
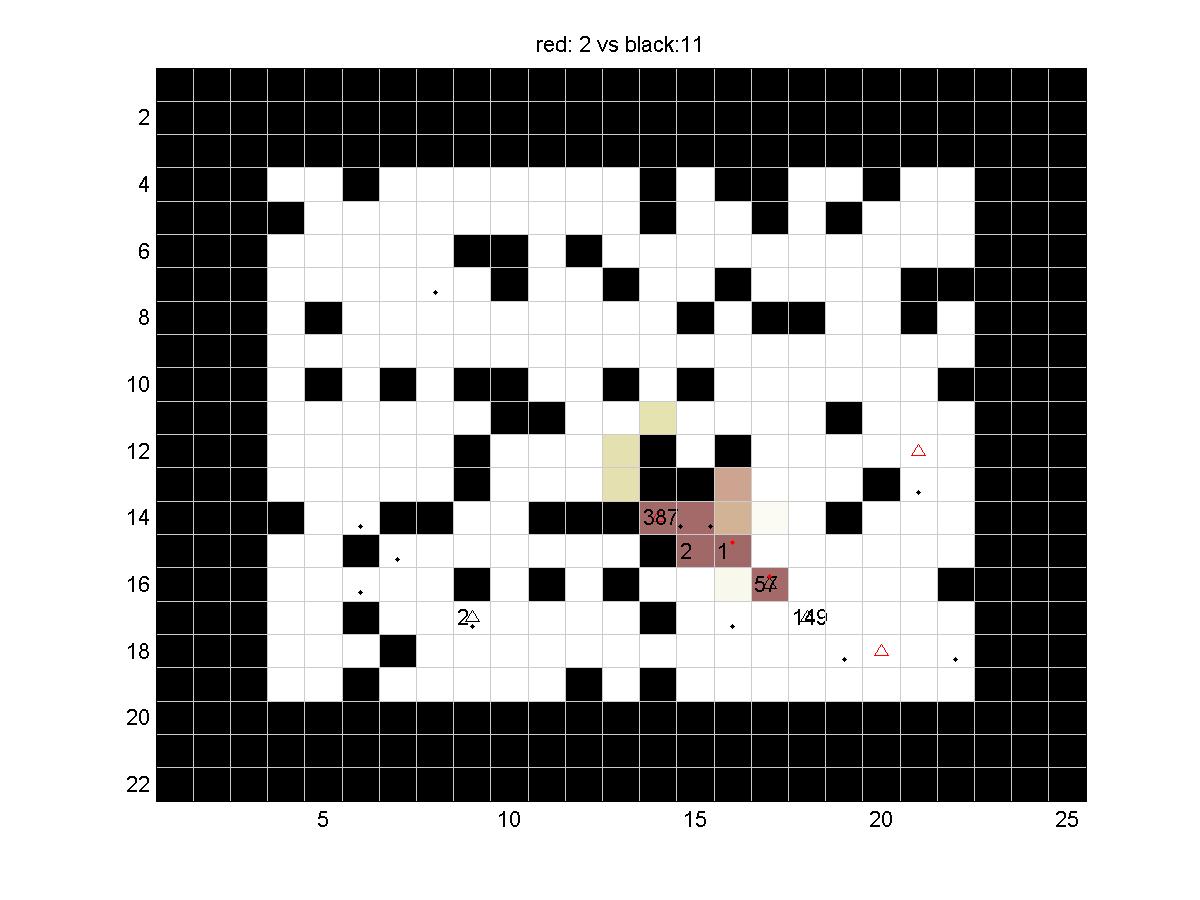
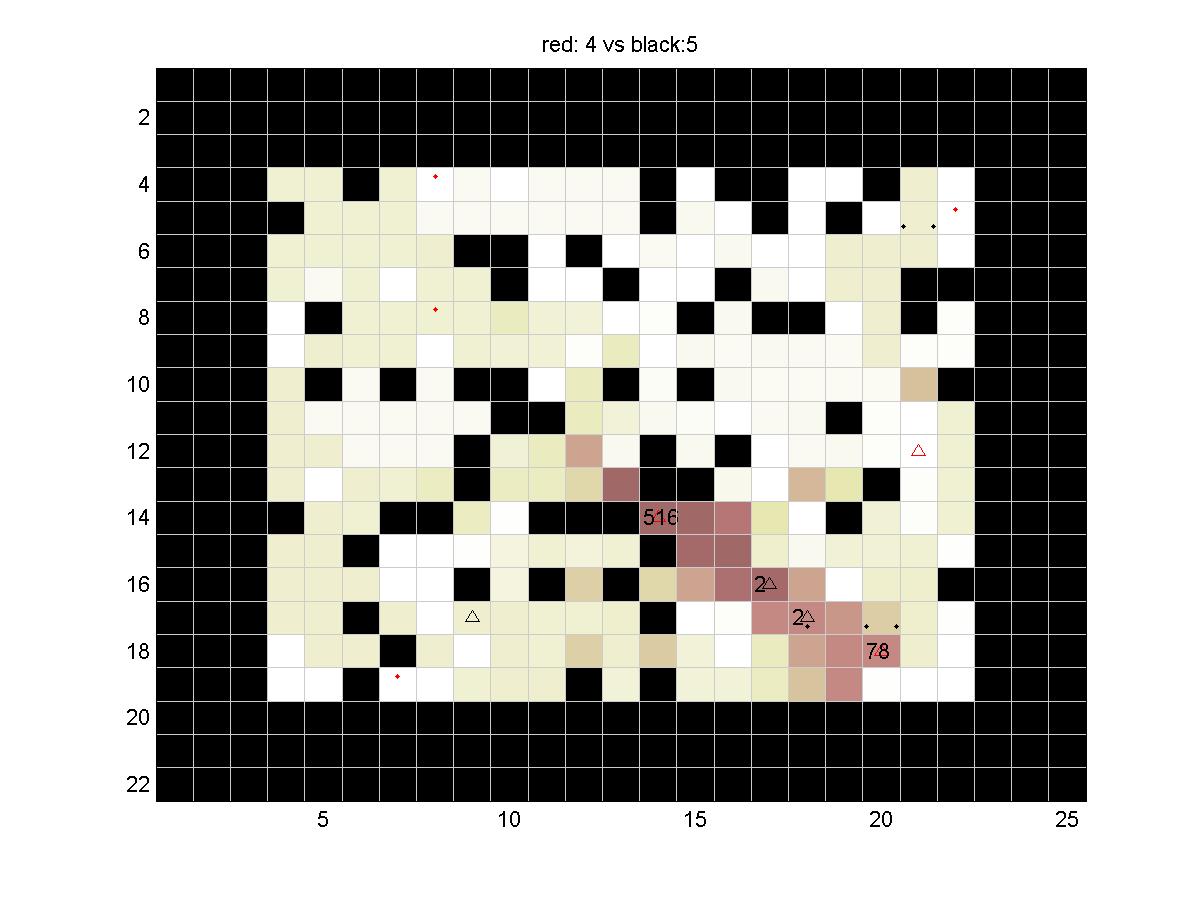
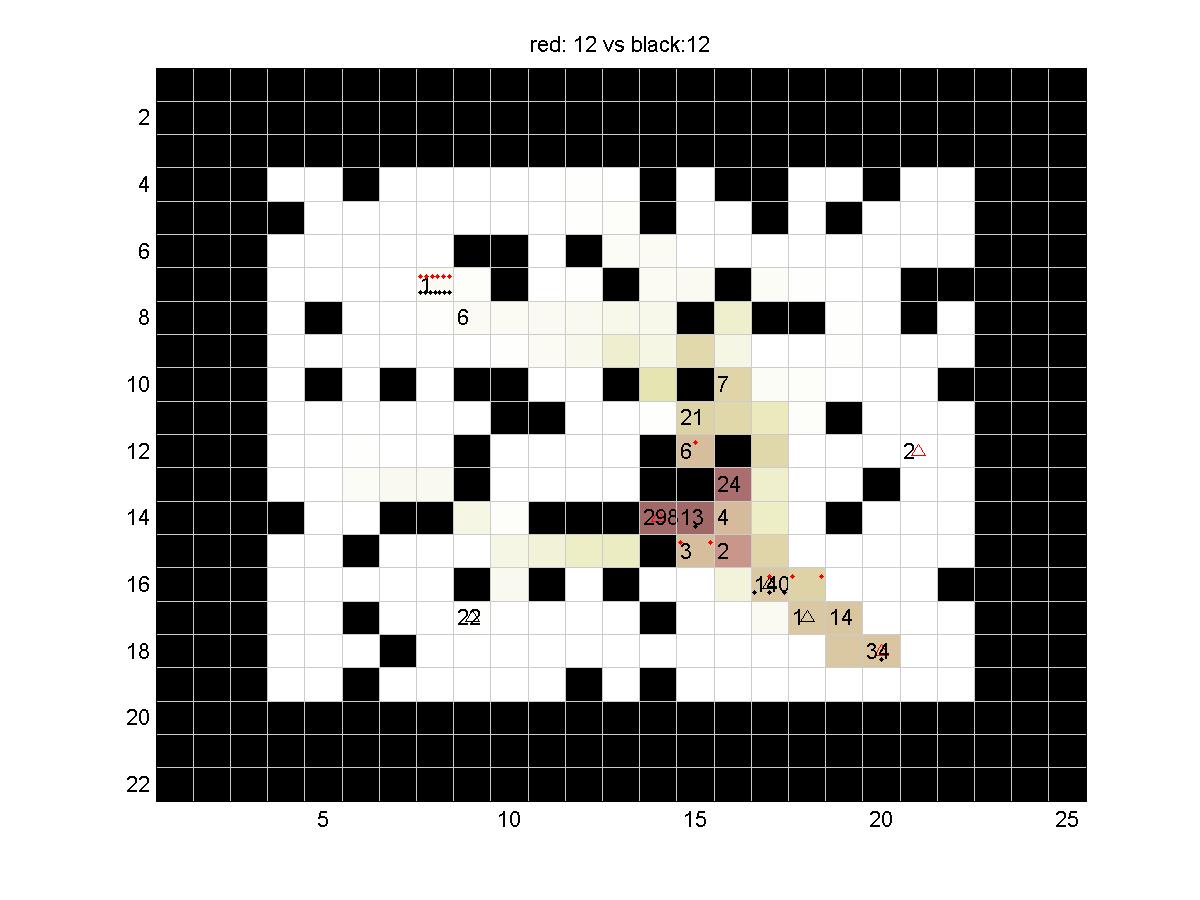
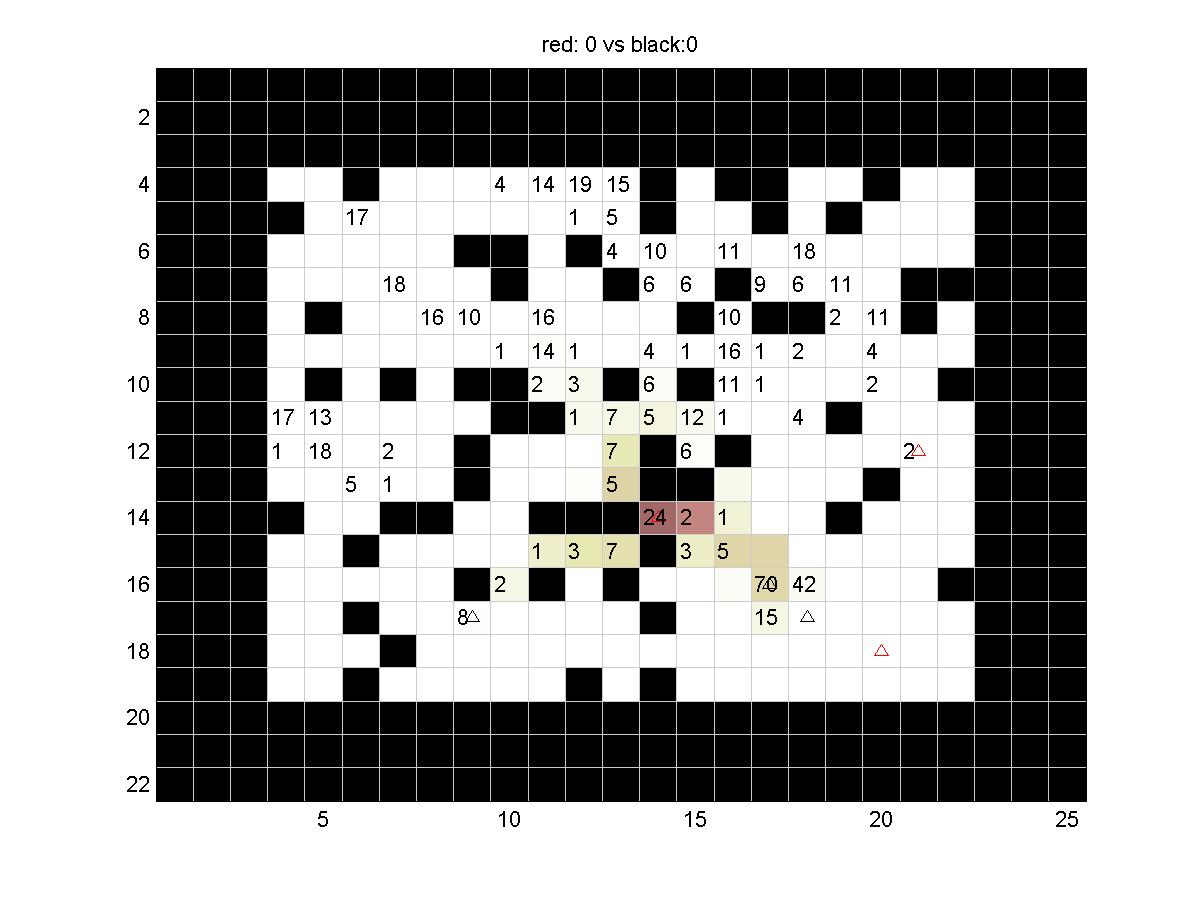
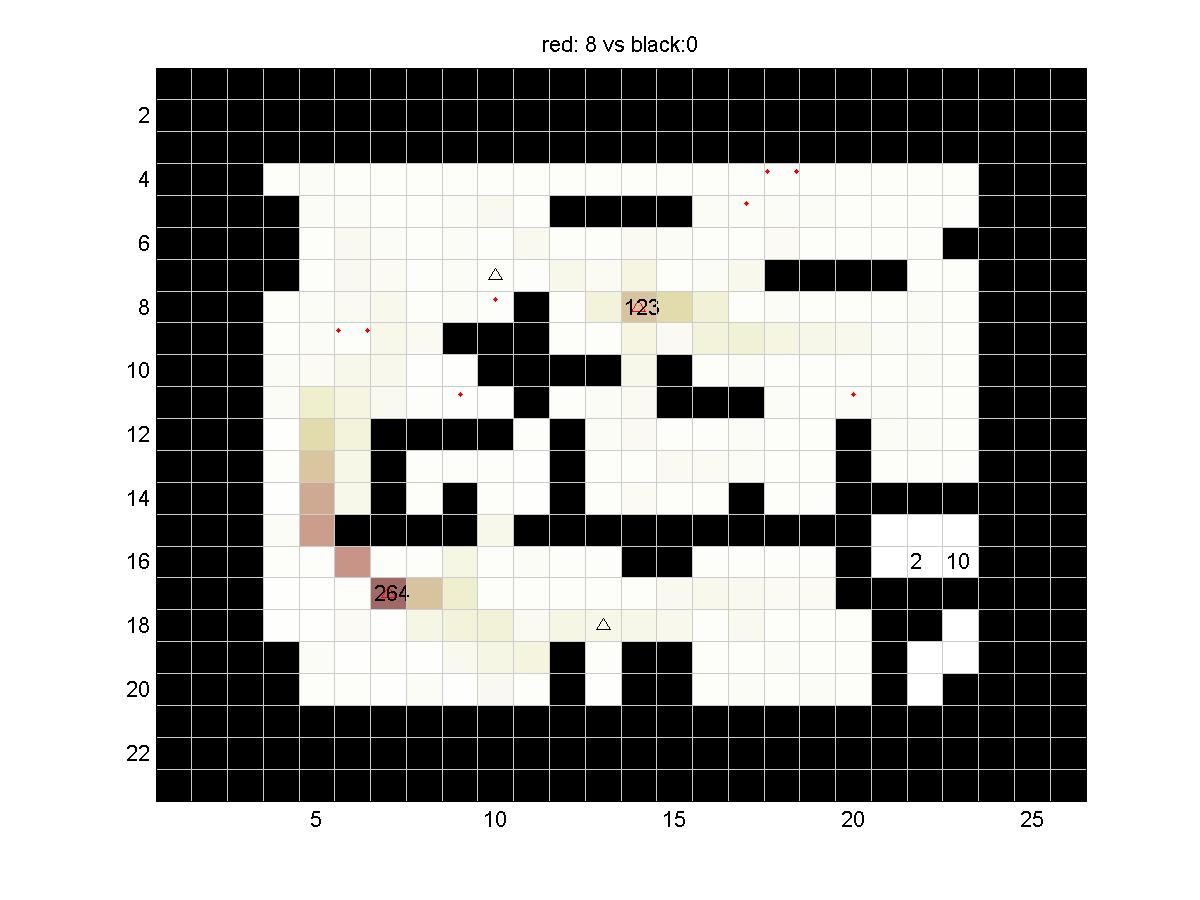
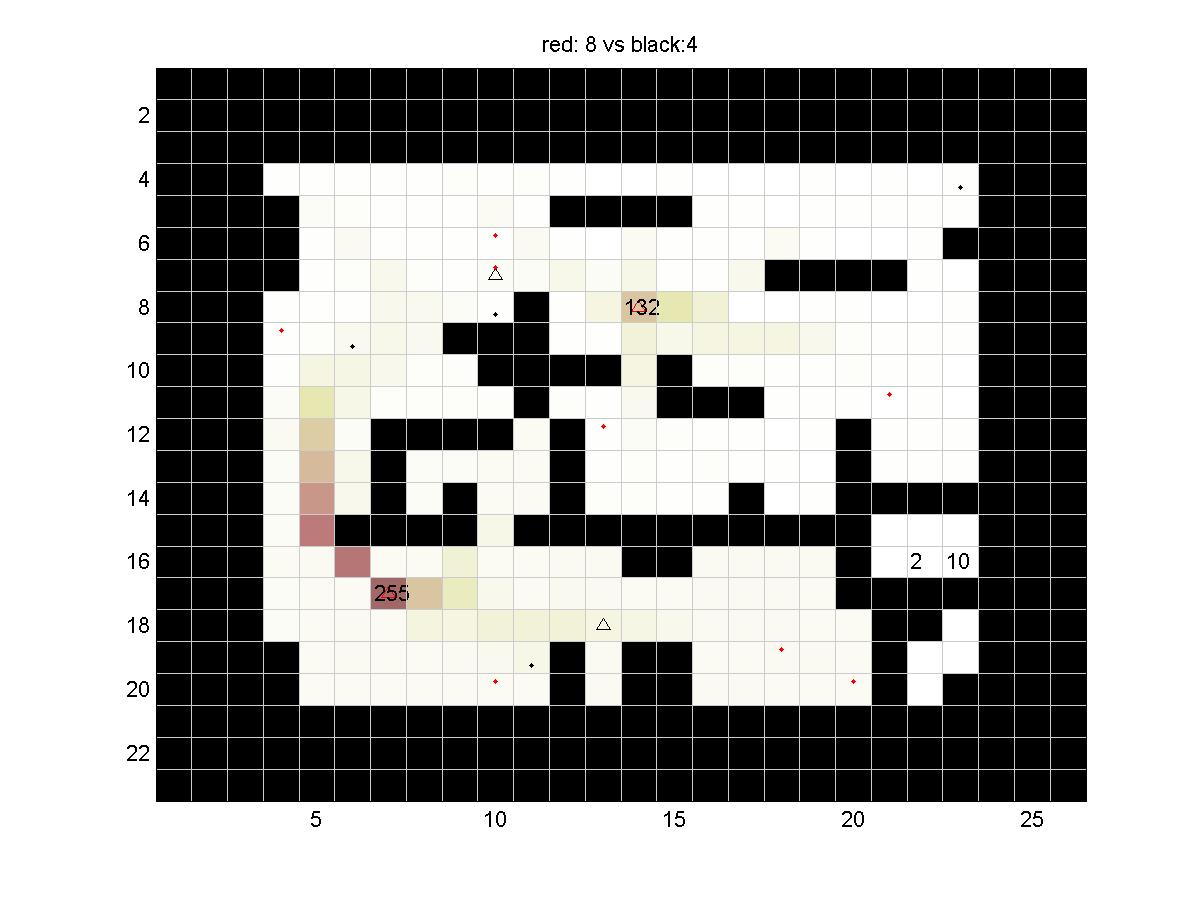
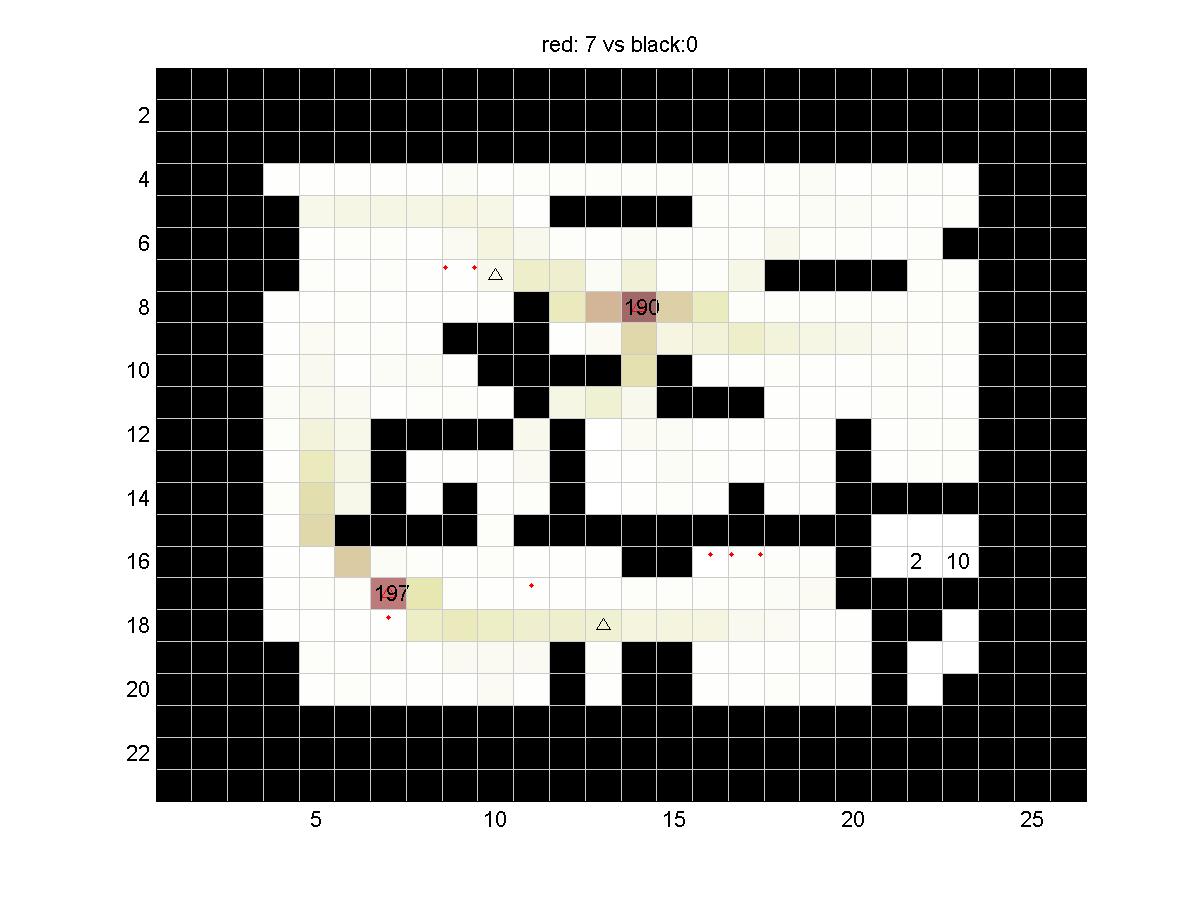
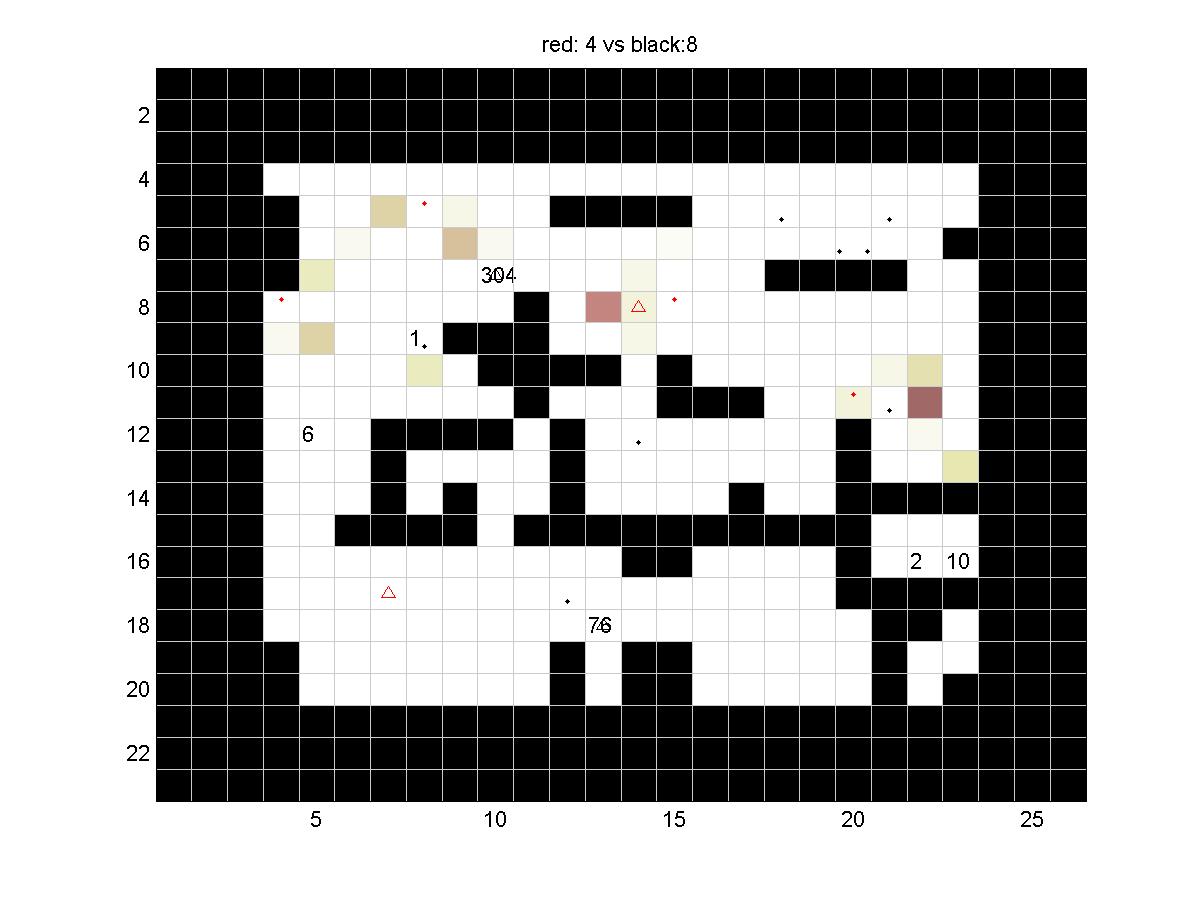
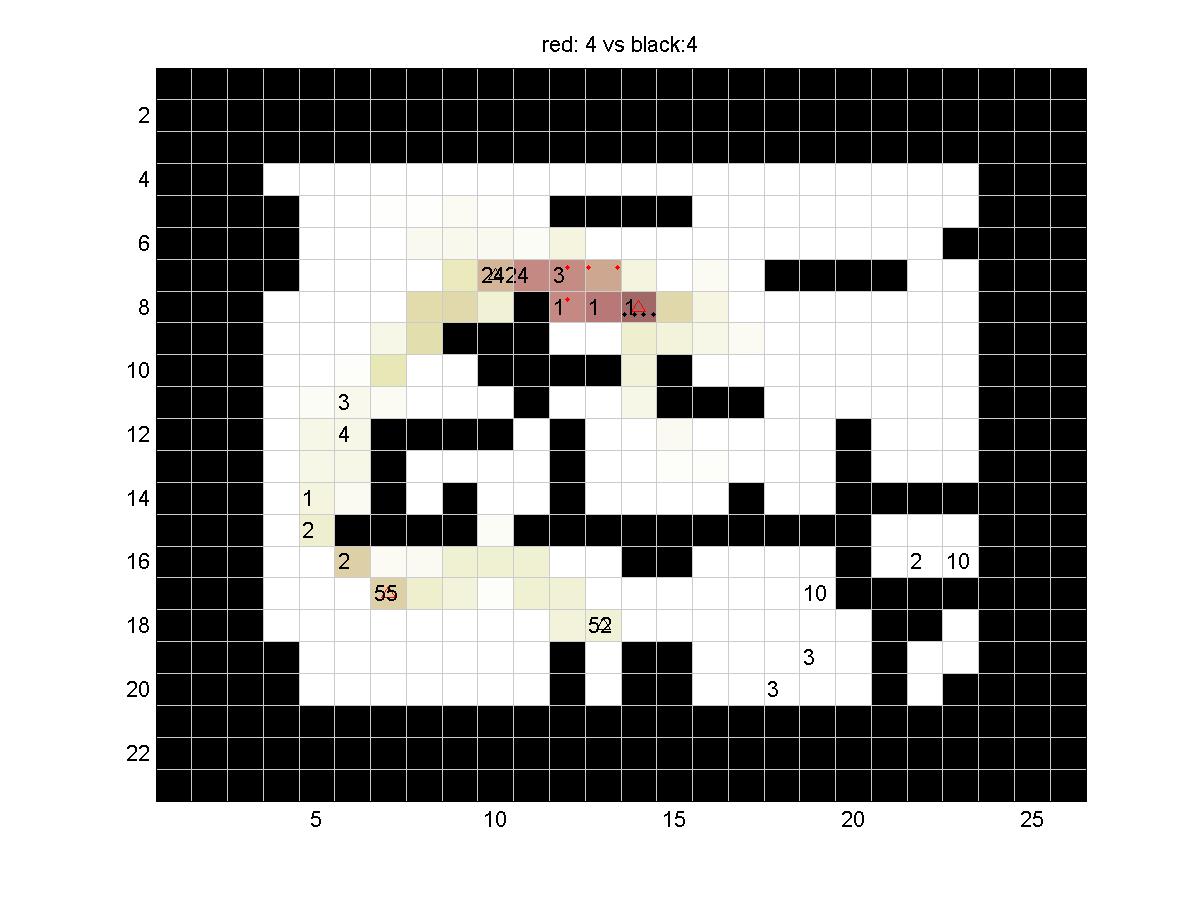
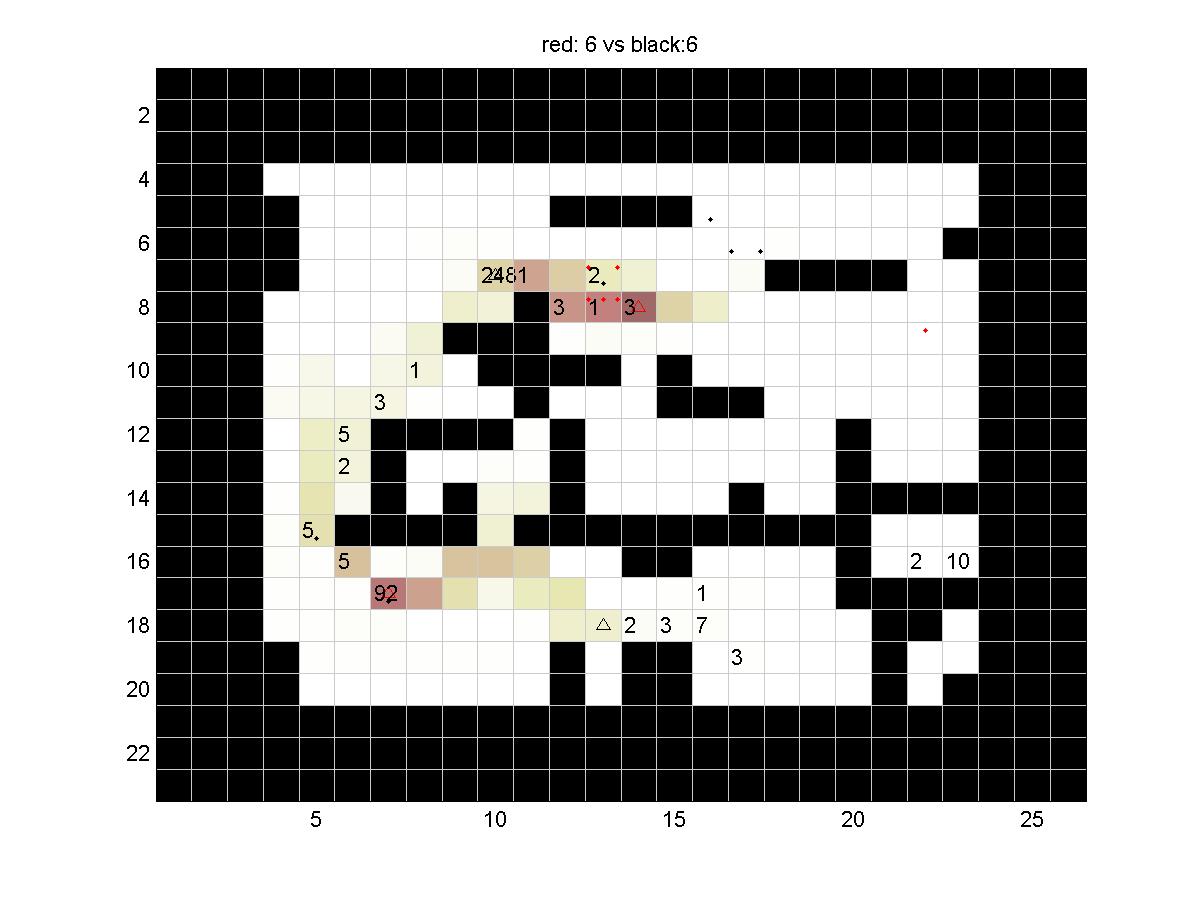
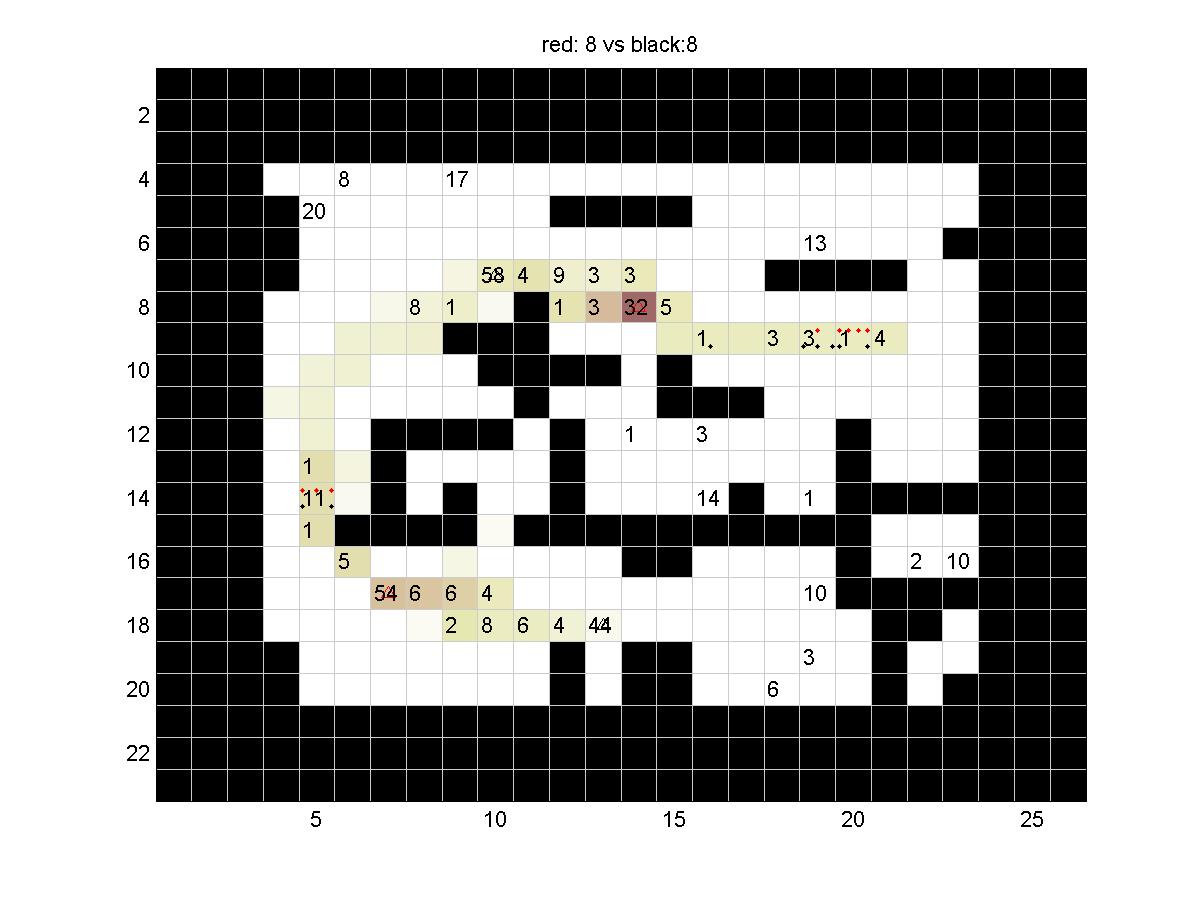
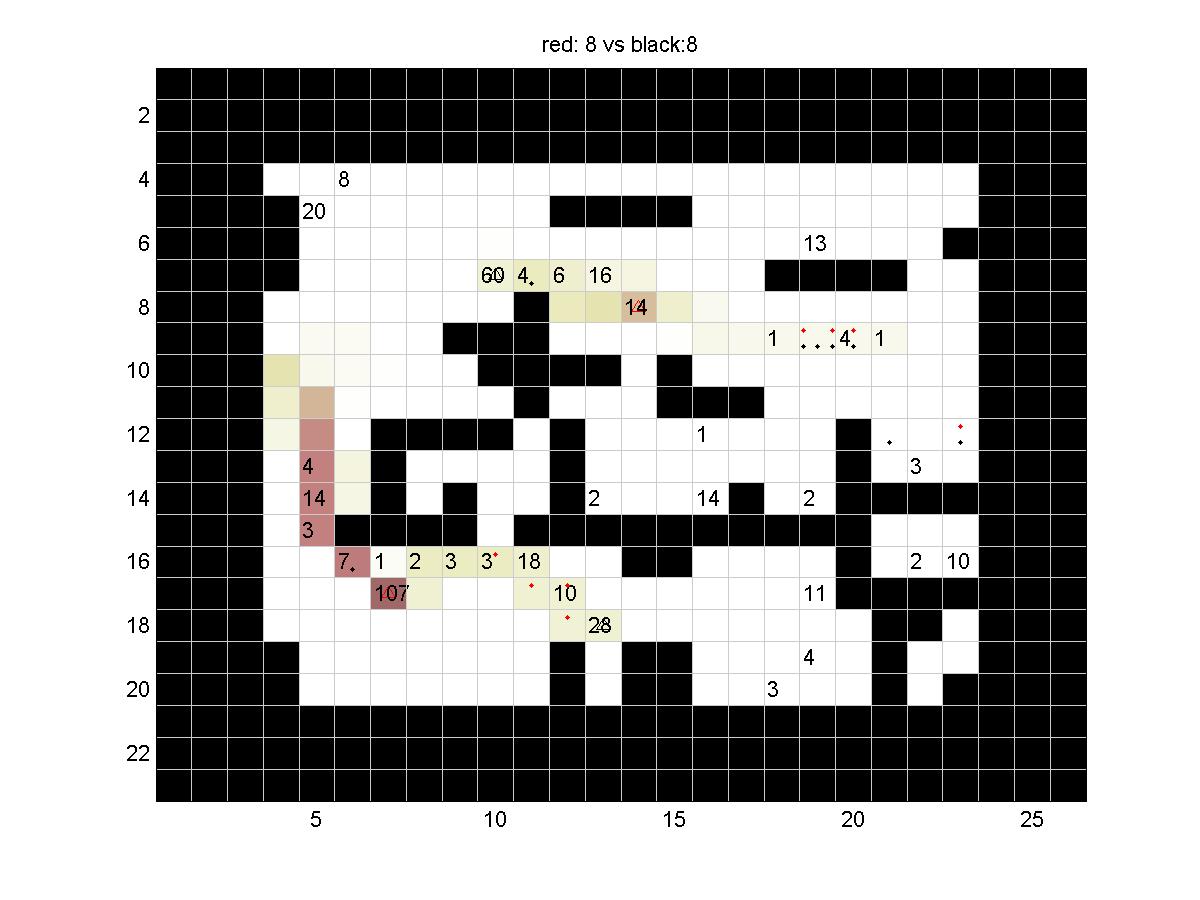
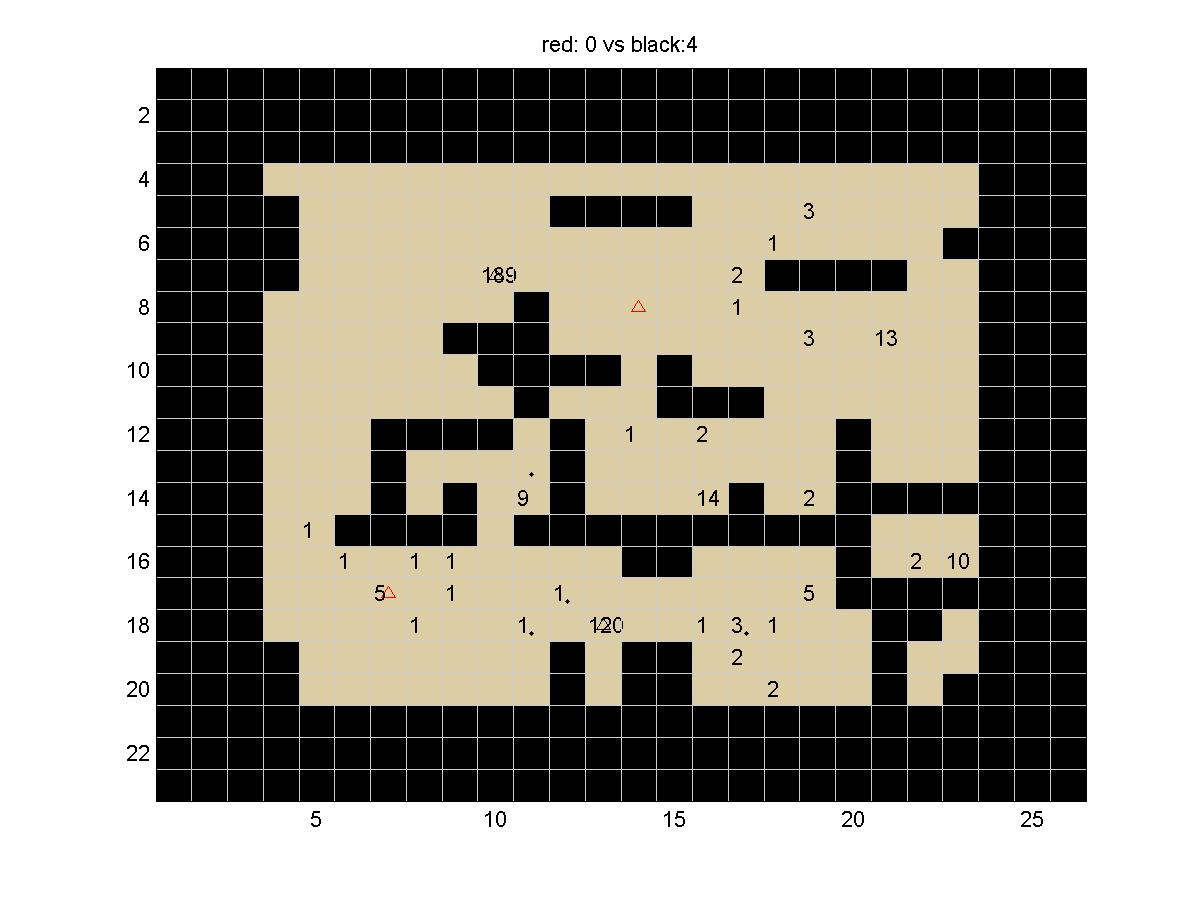
Board: 4
This board has a maze to get through, and a long single file area. Red will need to get through one or both of these to find the sugar. Blocades can work very well on this board for the black army.
|
|---|
| Sample | Jan | Nathan | David | Markus | Nathan | Edin | Fabio |
|---|
| Sample | 0 | 100 | 72 | 100 | 100 | 100 | 100 | 100 |
| Jan | -69 | -71 | -69 | 55 | 46 | -30 | 91 | 100 |
| Nathan | -69 | 3 | -9 | 100 | 100 | NaN | 100 | 100 |
| David | -69 | -69 | -69 | 53 | -3 | -1 | -41 | 12 |
| Markus | -69 | -71 | -69 | 29 | 39 | -1 | -57 | 100 |
| Nathan | -69 | -65 | -63 | 100 | 100 | NaN | 100 | 100 |
| Edin | -69 | -54 | -31 | 100 | 100 | 17 | 88 | 86 |
| Fabio | -69 | -69 | -22 | 100 | 100 | 95 | 100 | 100 |
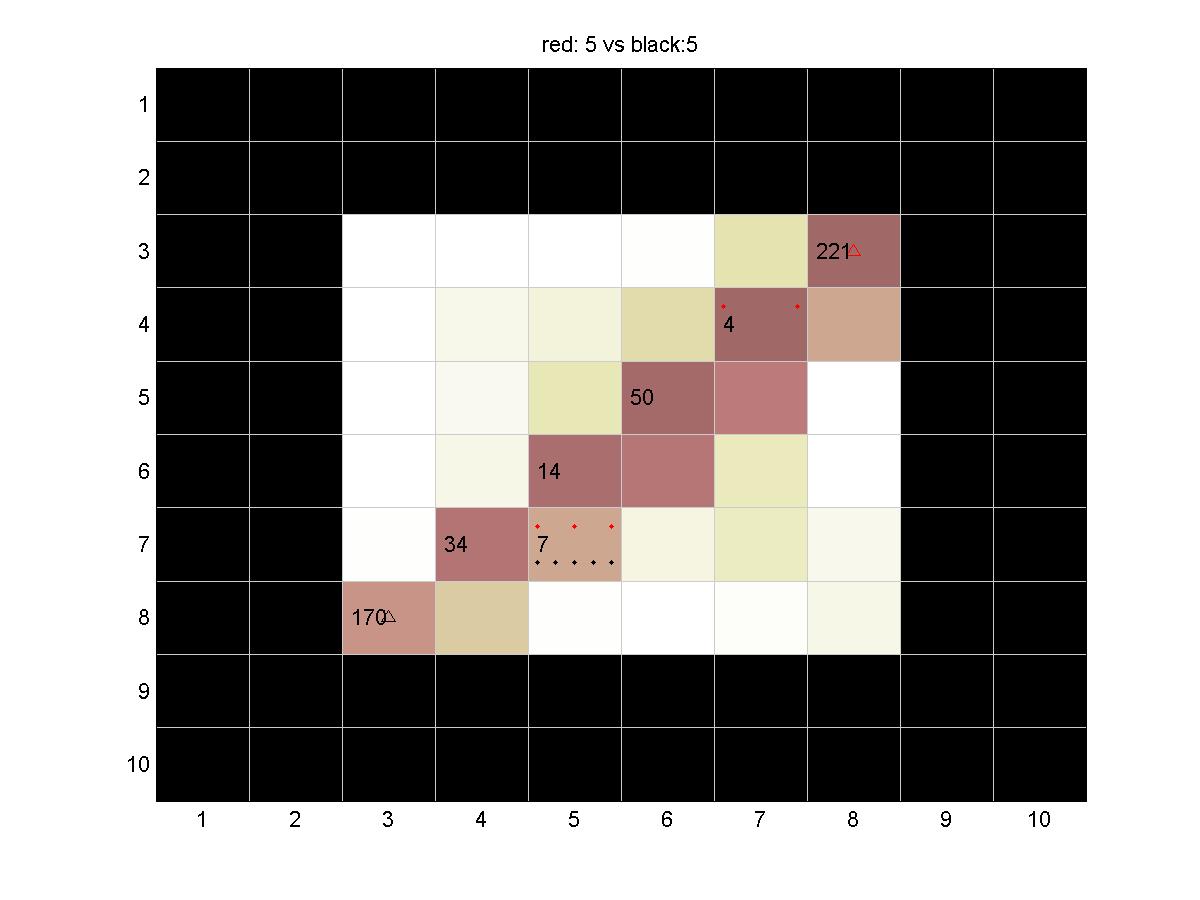
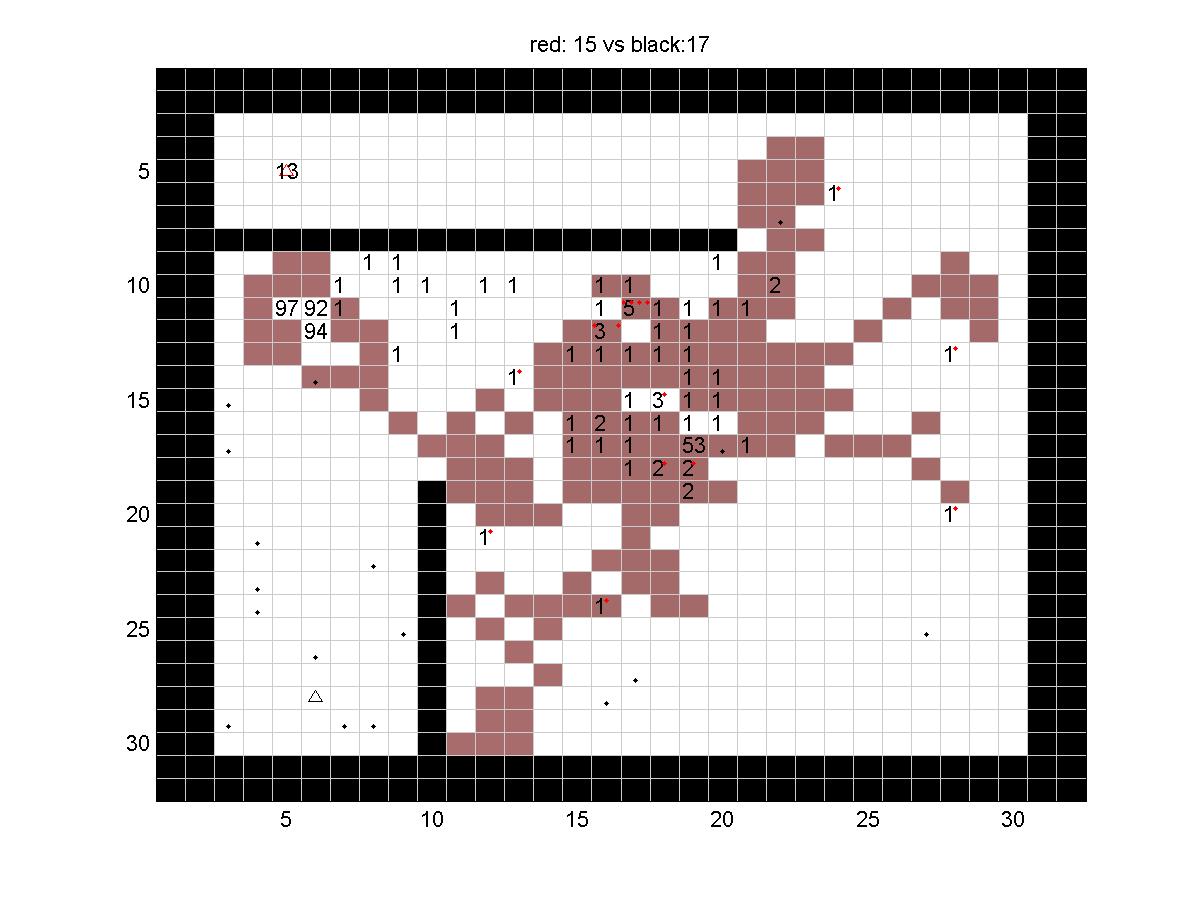
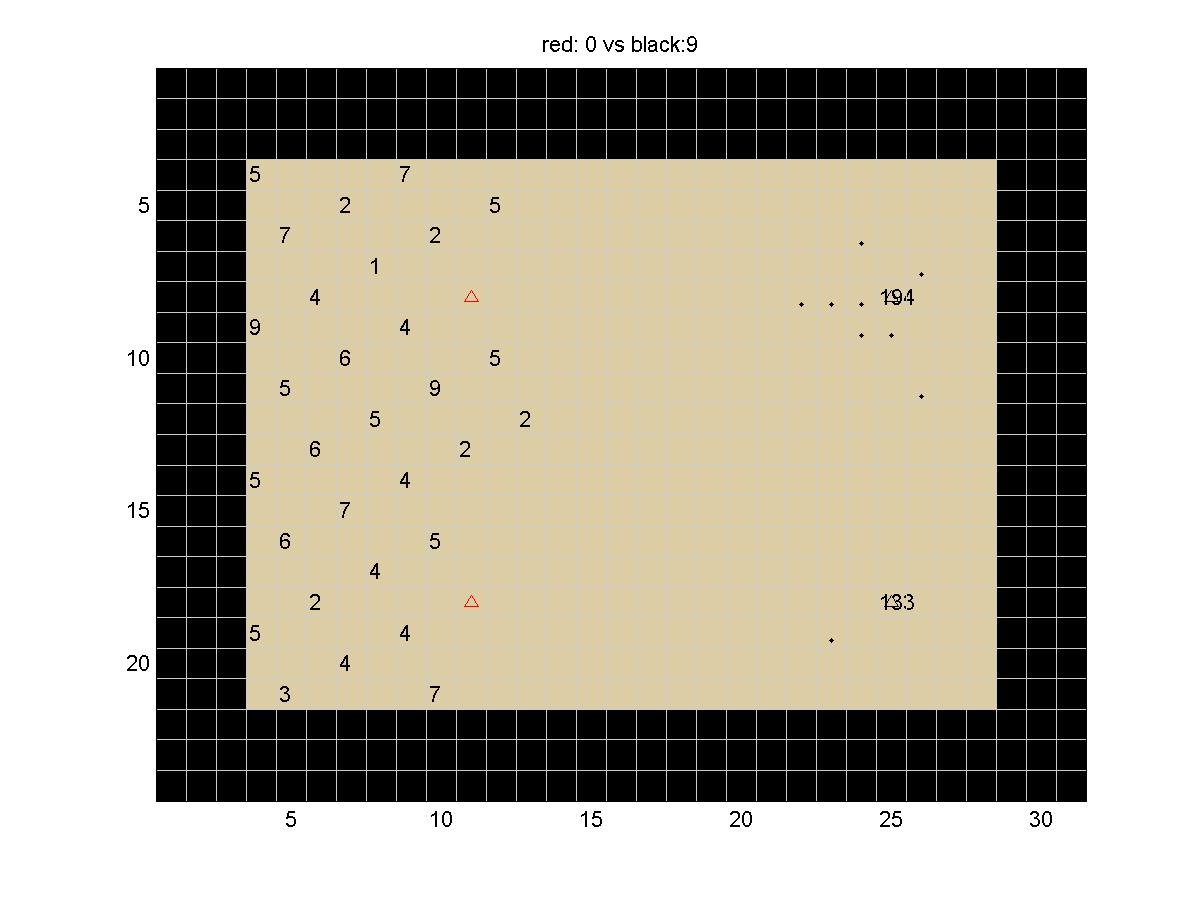
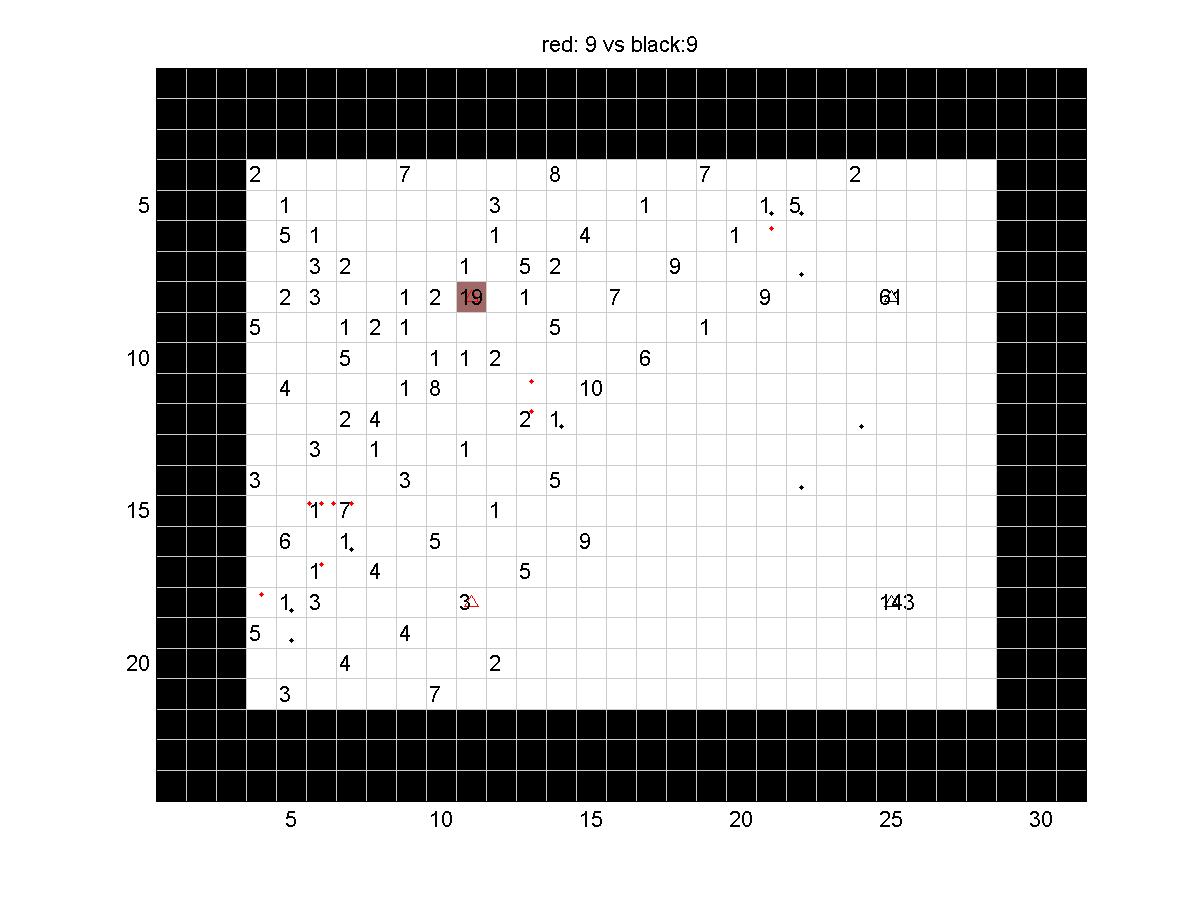
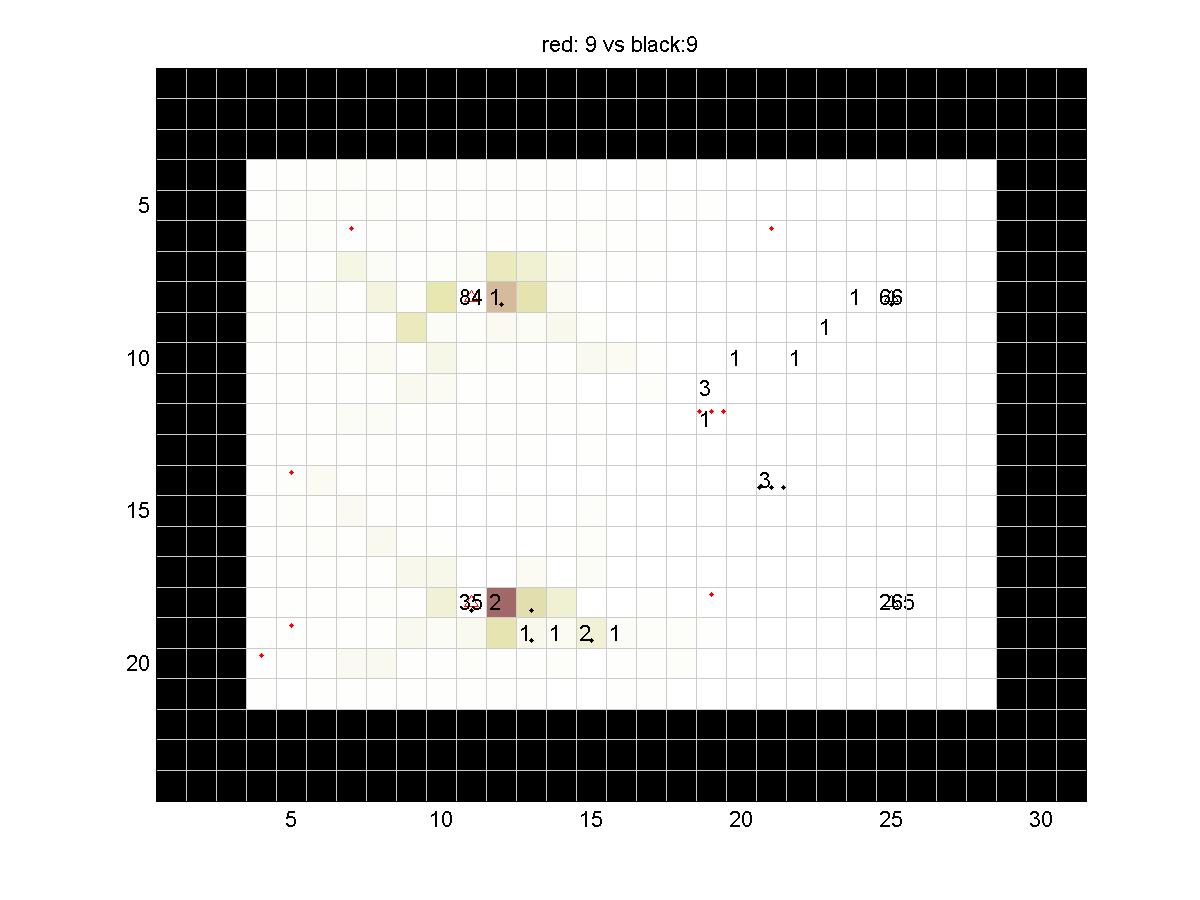
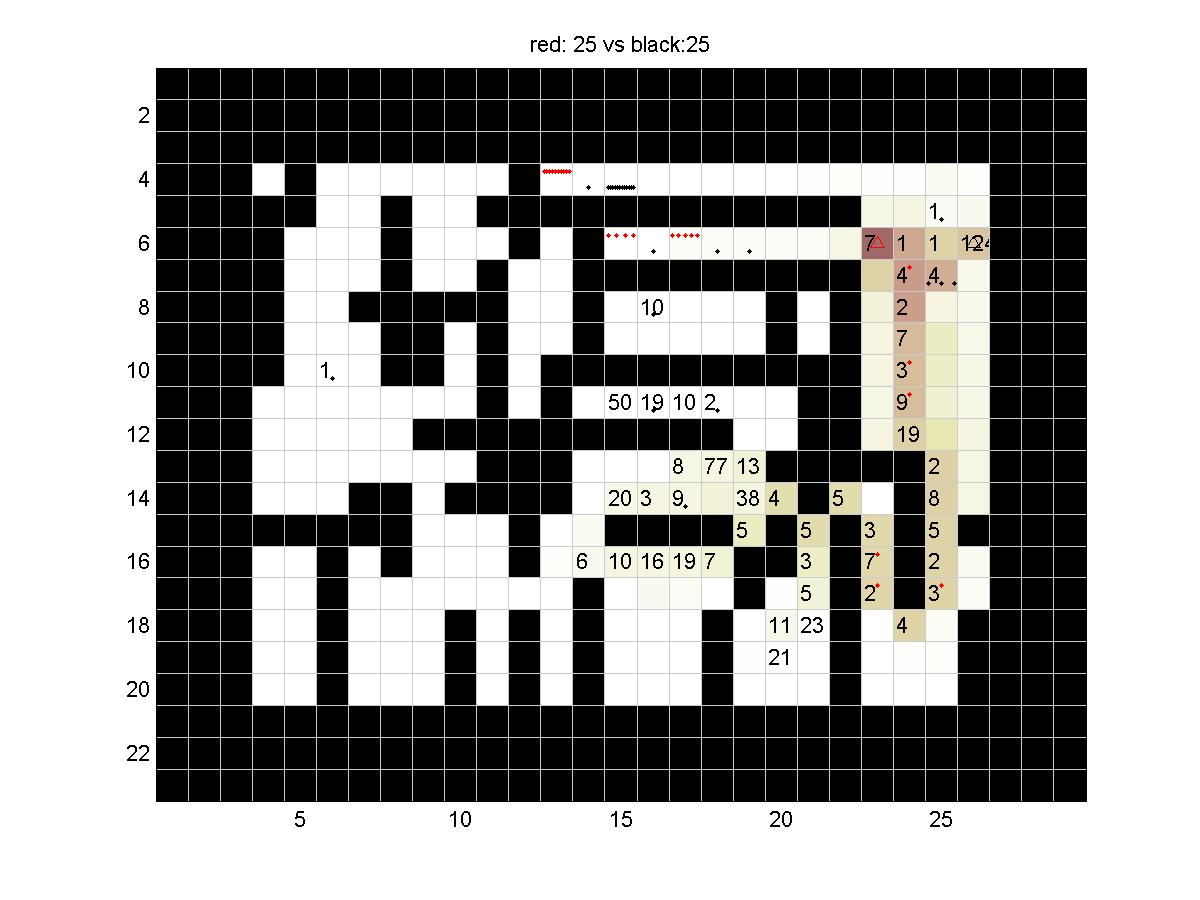
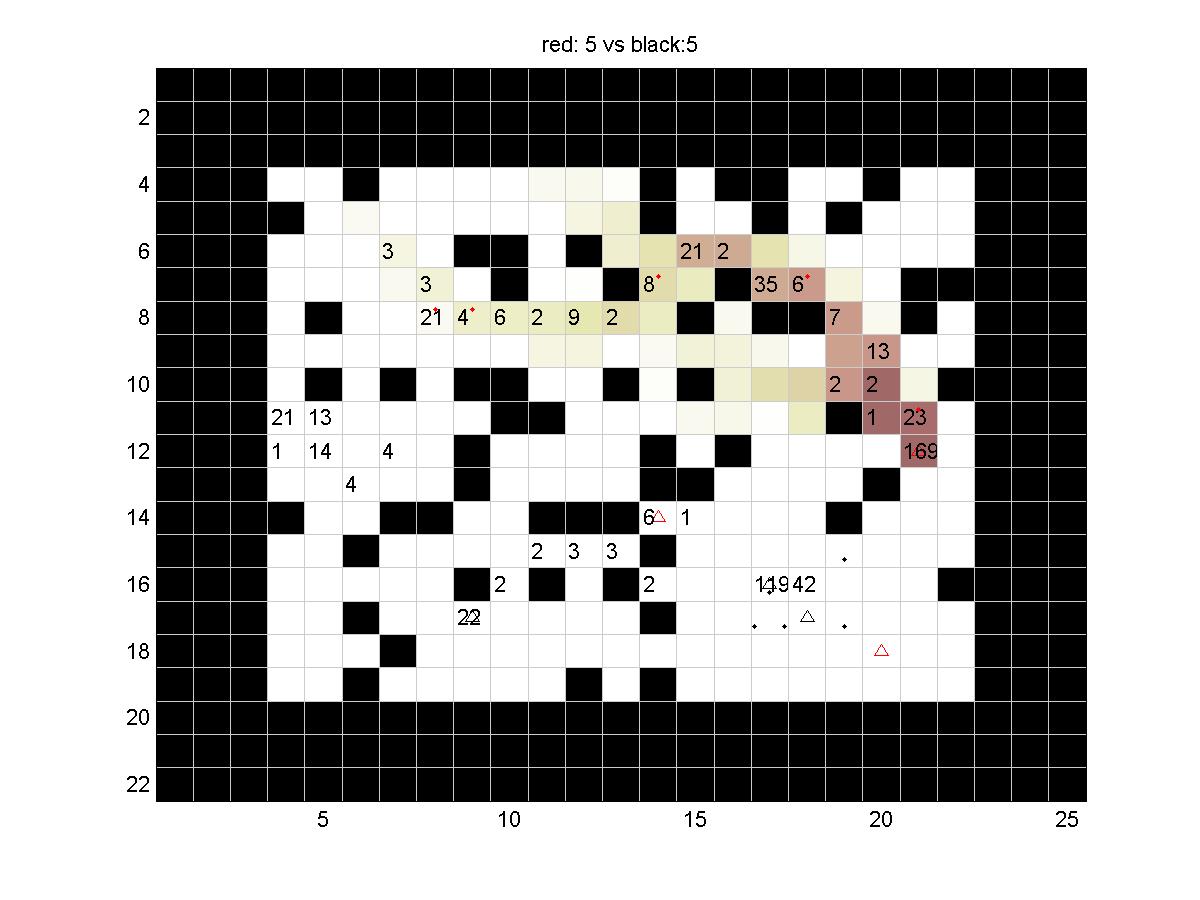
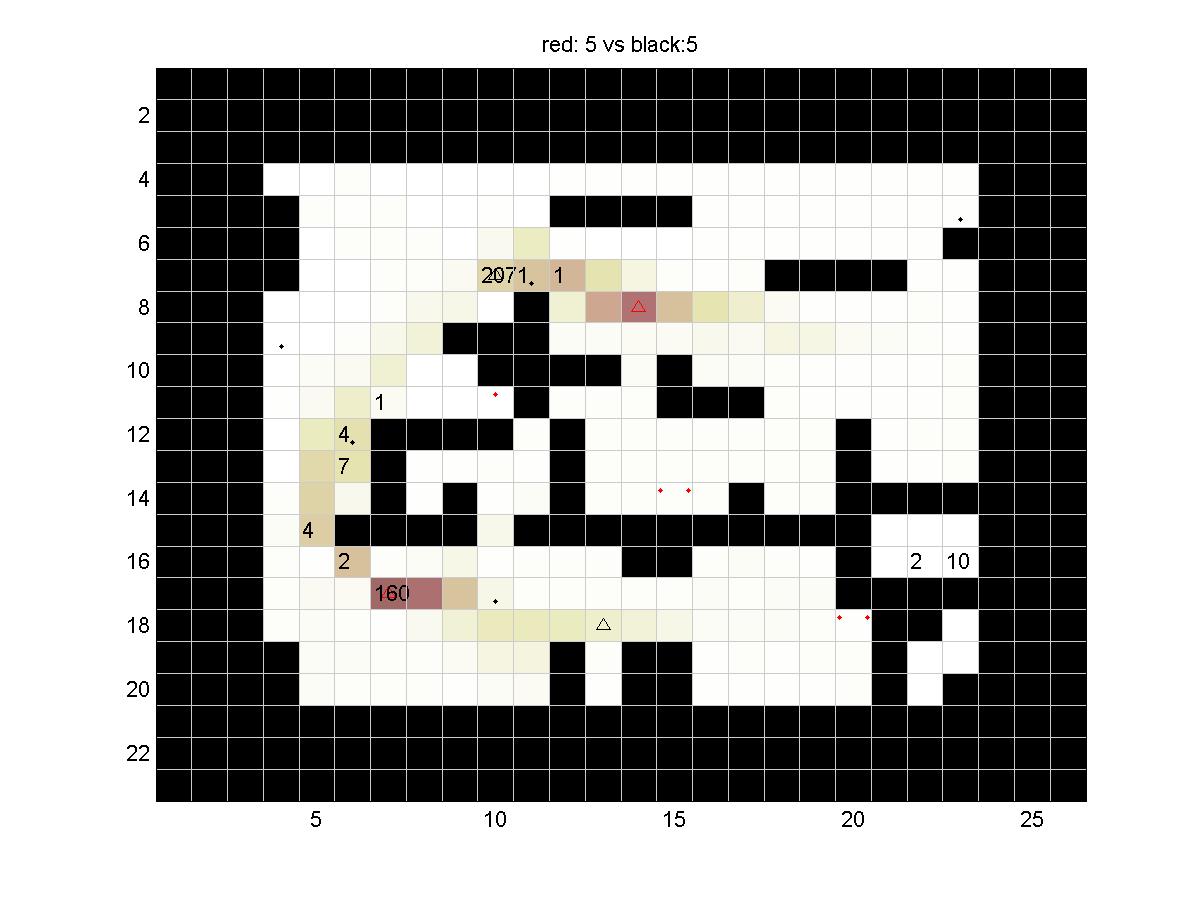
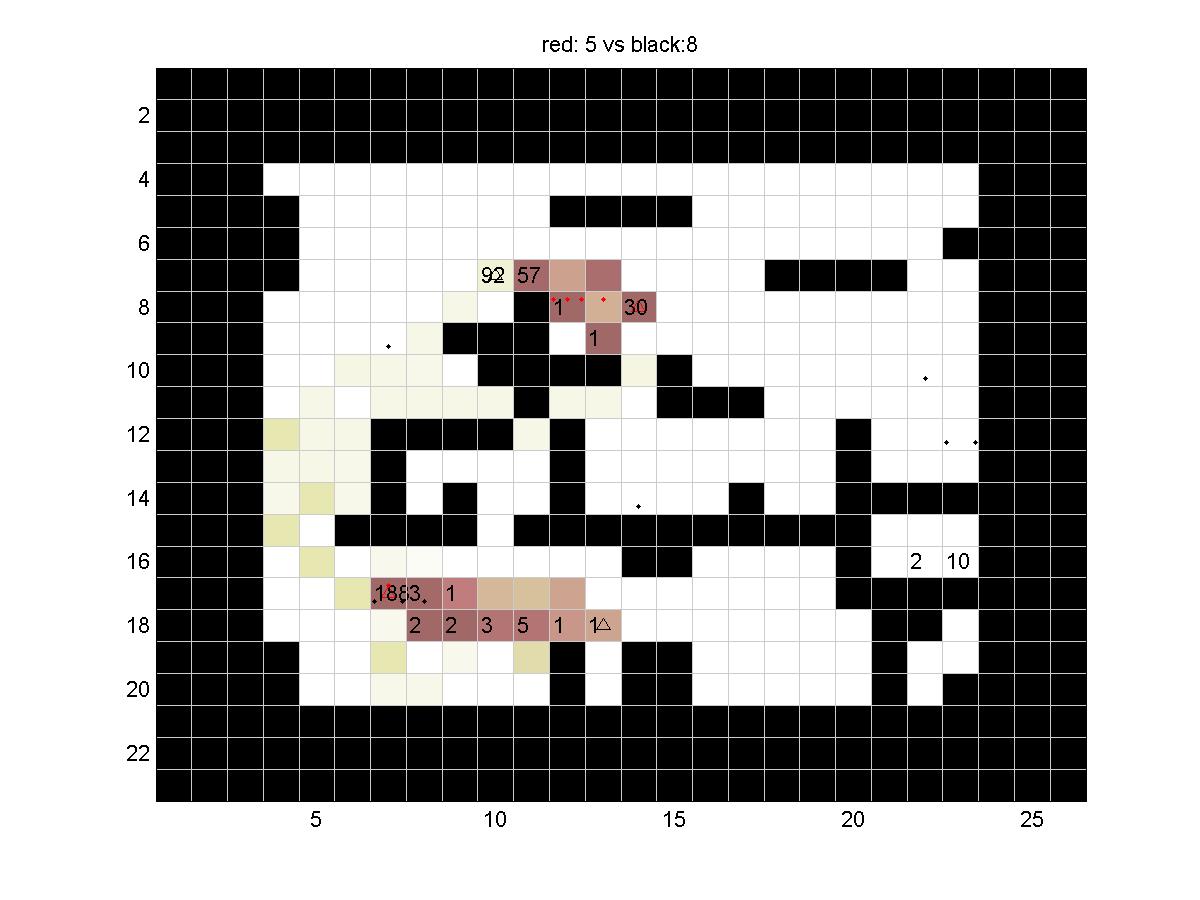
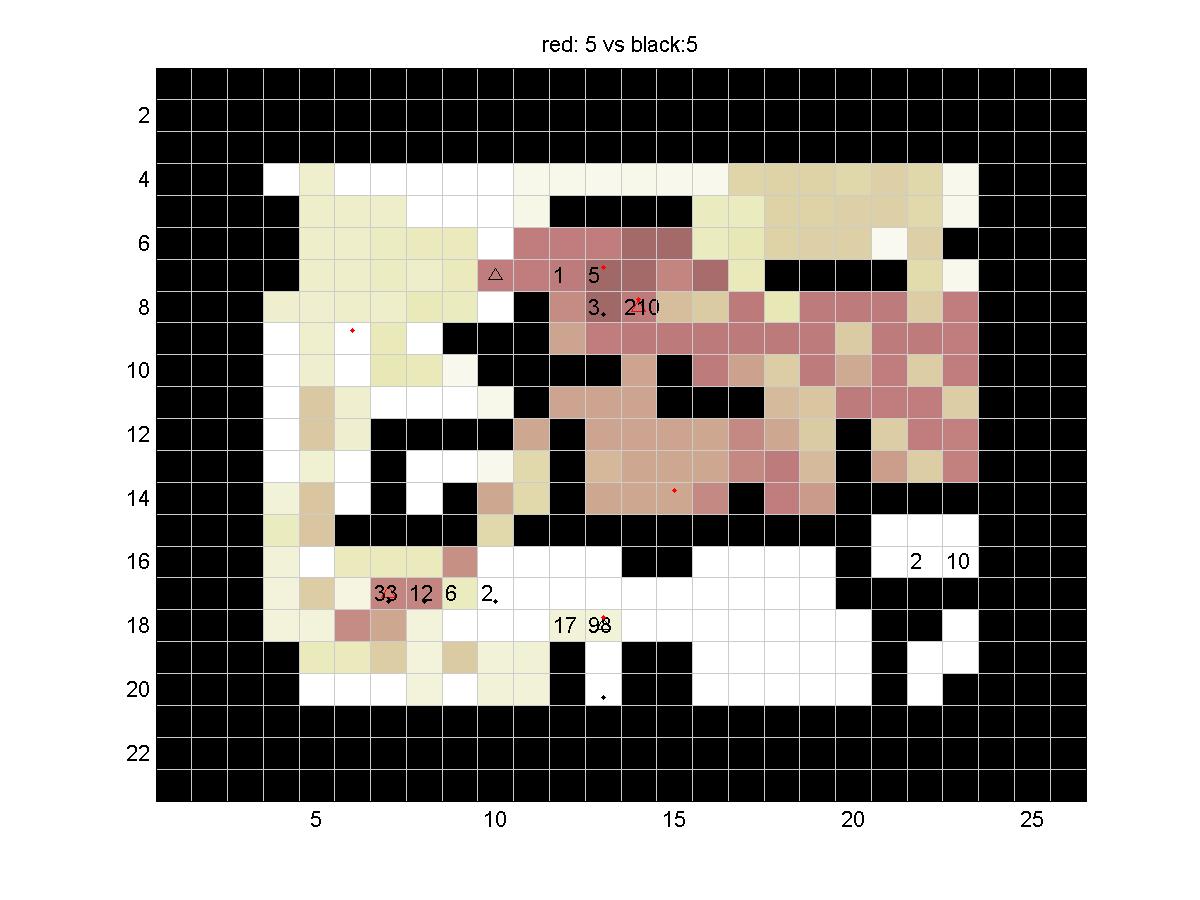
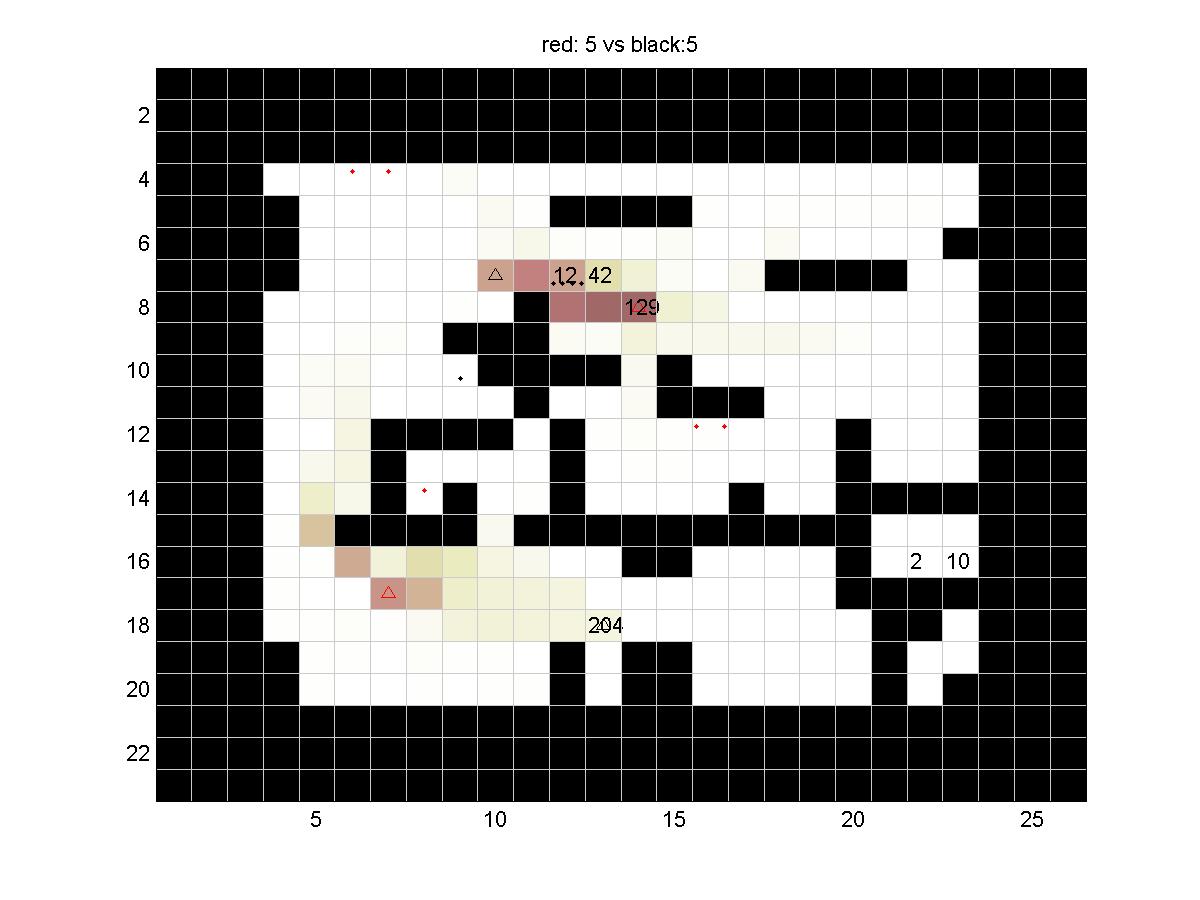
Board: 5
On this board, there are no obstacles to worry about, but there are no big sugar piles either. Everything that black ants do is counter to the goals of red.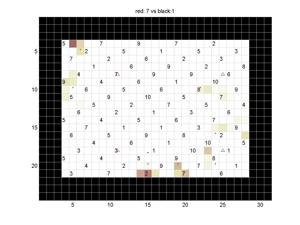
|
|---|
| Sample | Jan | Nathan | David | Markus | Nathan | Edin | Fabio |
|---|
| Sample | 0 | 62 | 39 | 95 | 92 | 94 | 85 | 51 |
| Jan | -38 | 5 | -27 | -8 | 2 | 52 | 67 | 25 |
| Nathan | -9 | 60 | 11 | 91 | 79 | 8 | 13 | 54 |
| David | -37 | -0 | -50 | -0 | 1 | 42 | 50 | 10 |
| Markus | -36 | -0 | -35 | -0 | 1 | 46 | 50 | 13 |
| Nathan | -43 | -25 | 22 | -10 | 8 | 17 | 24 | 22 |
| Edin | -28 | -25 | 44 | -13 | 1 | 18 | 22 | 14 |
| Fabio | -26 | 11 | -12 | 11 | 12 | 22 | 10 | 14 |
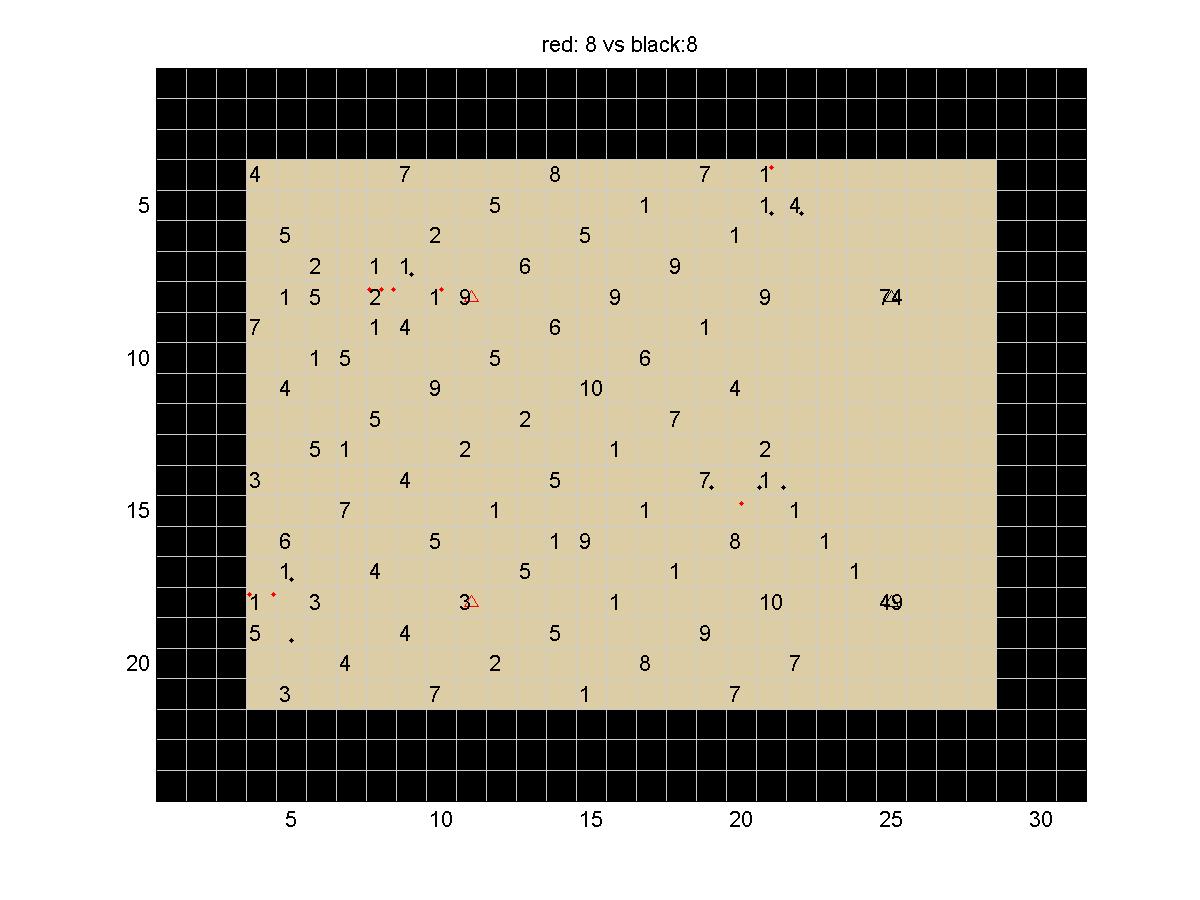
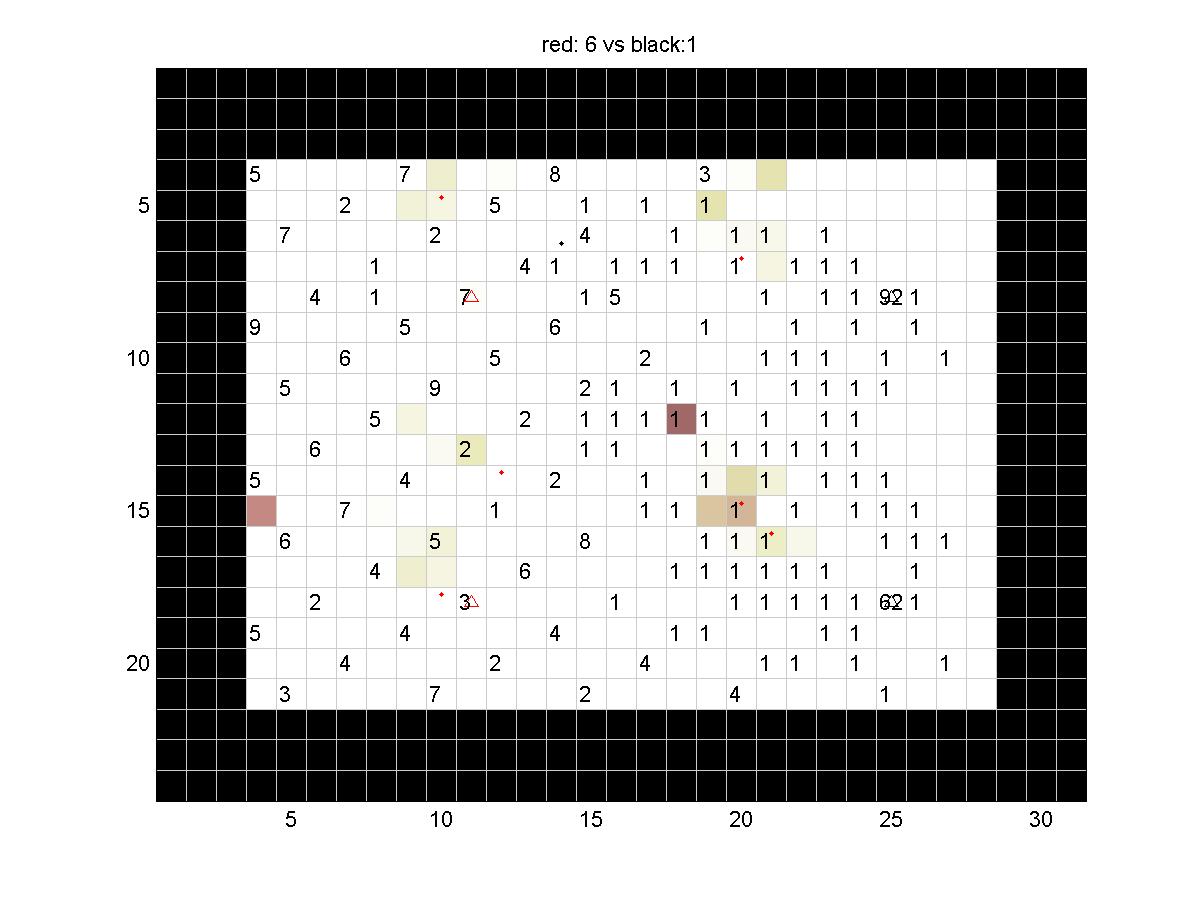
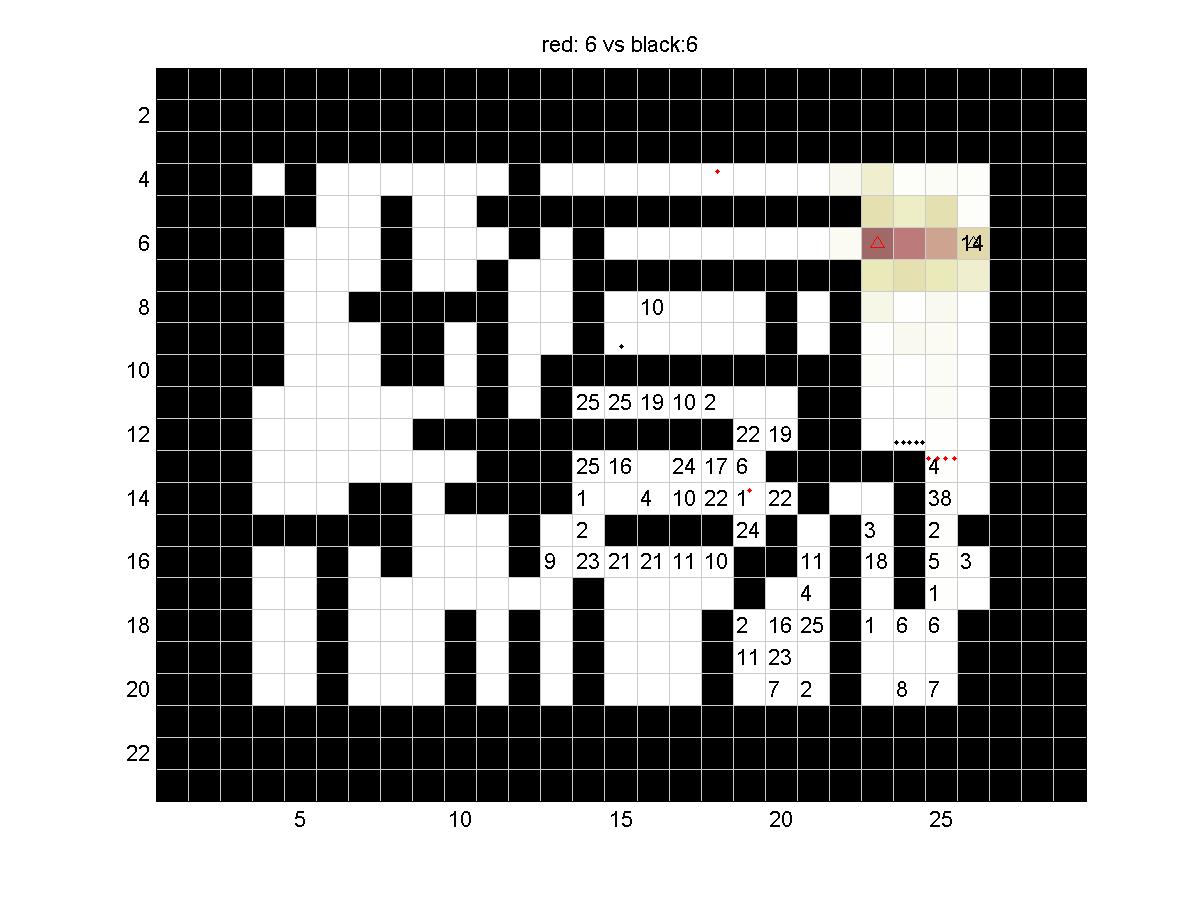
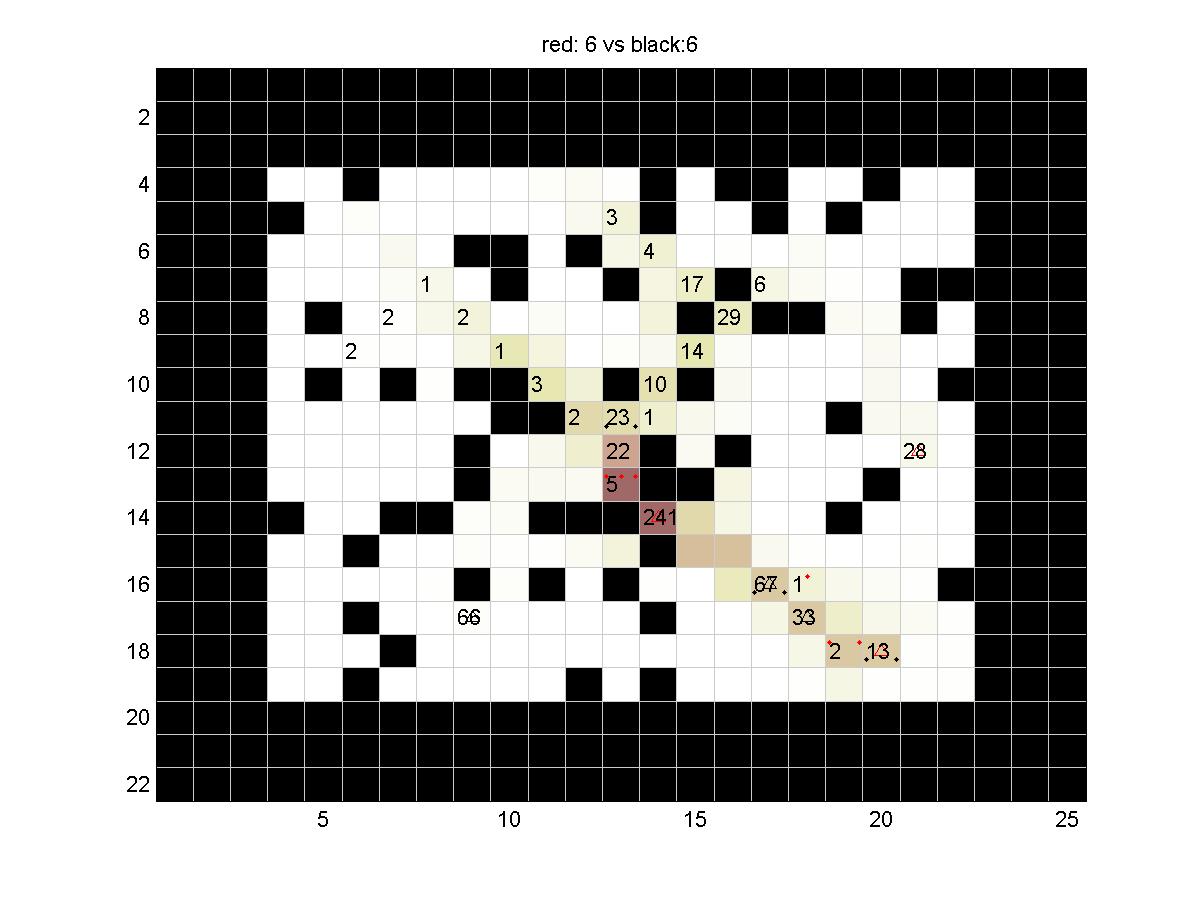
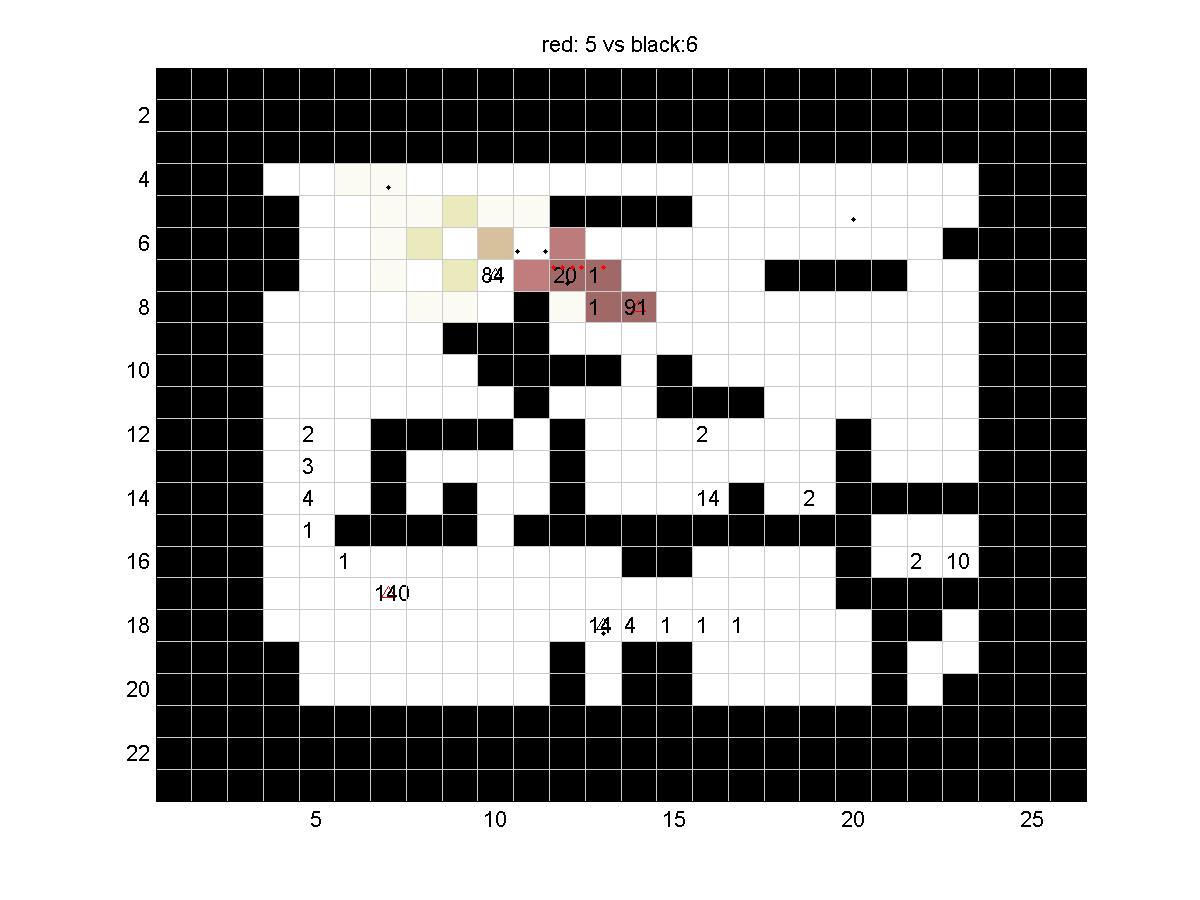
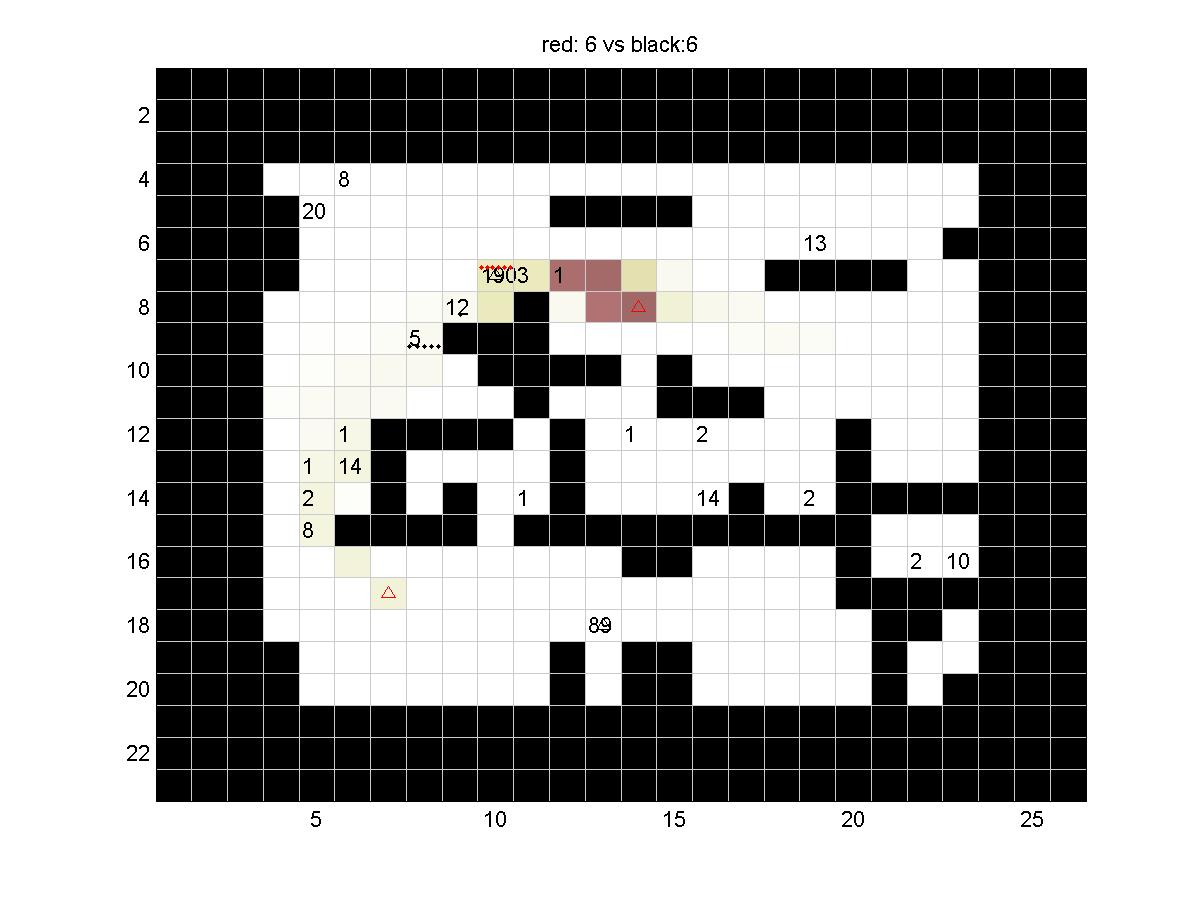
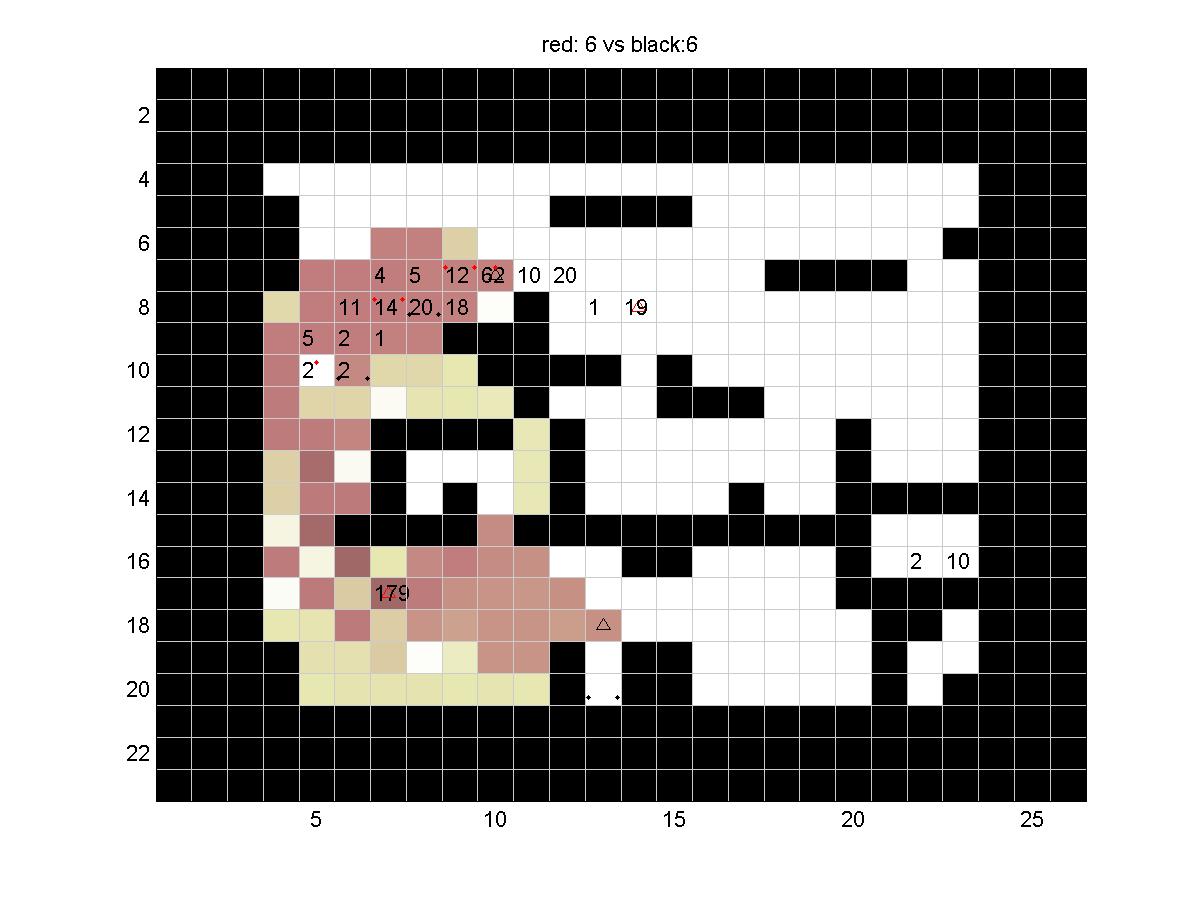
Board: 6
This board is particularly tricky because the goals of the two ants armies are nearly aligned. Also, there are a couple of dead ends that many ants got stuck in. 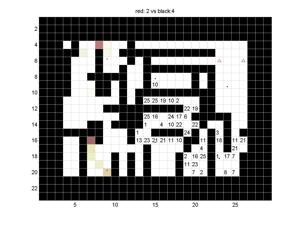
|
|---|
| Sample | Jan | Nathan | David | Markus | Nathan | Edin | Fabio |
|---|
| Sample | 0 | 65 | 1 | 53 | 27 | 25 | 24 | 10 |
| Jan | 52 | 0 | 0 | 0 | 0 | 17 | 20 | 5 |
| Nathan | 12 | 8 | 16 | 30 | 32 | 15 | 49 | 11 |
| David | 31 | -0 | 15 | 1 | 38 | 13 | 41 | 4 |
| Markus | 25 | 10 | 21 | 12 | 0 | NaN | 29 | 18 |
| Nathan | 14 | 11 | 44 | 24 | 18 | 16 | 36 | 20 |
| Edin | 15 | 16 | 33 | 52 | 21 | 13 | 37 | 21 |
| Fabio | 7 | 4 | 6 | 7 | 4 | NaN | 25 | 2 |
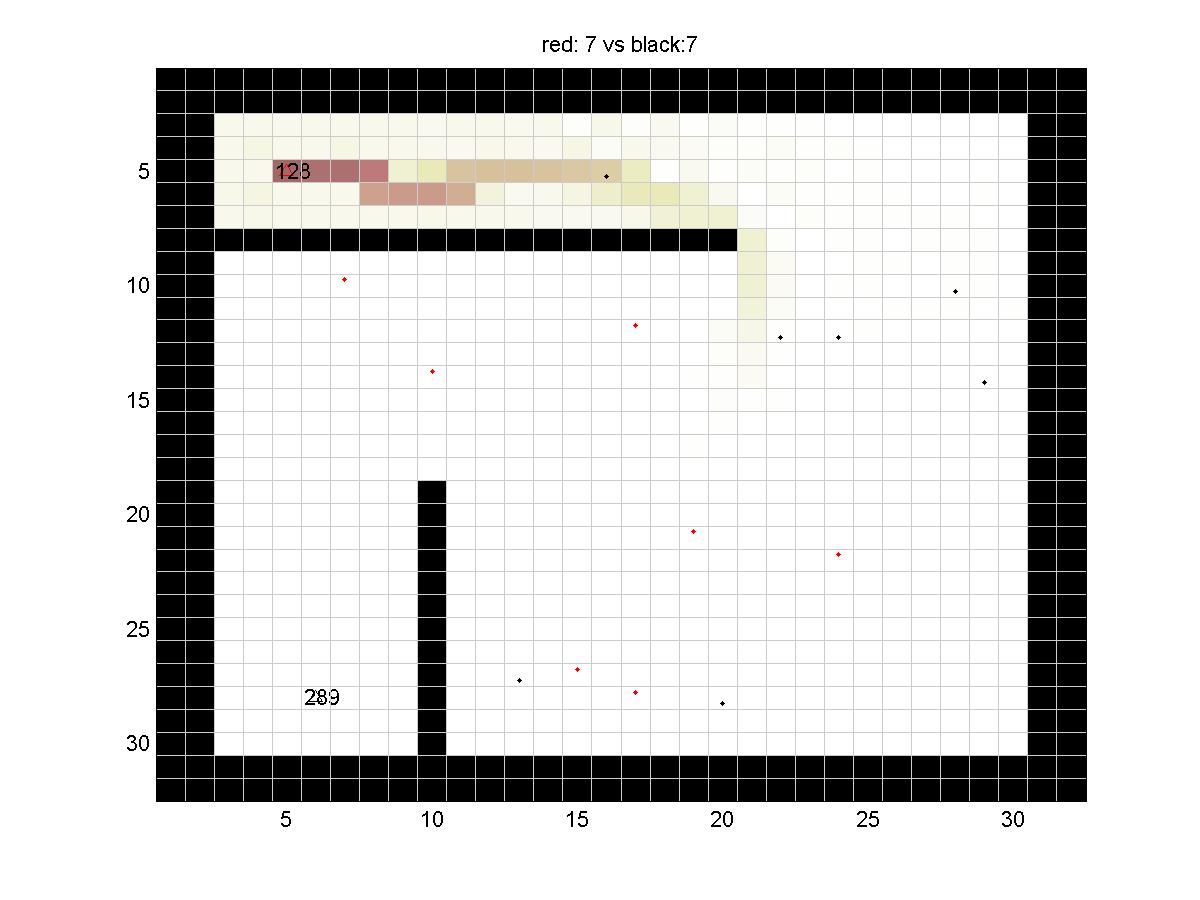
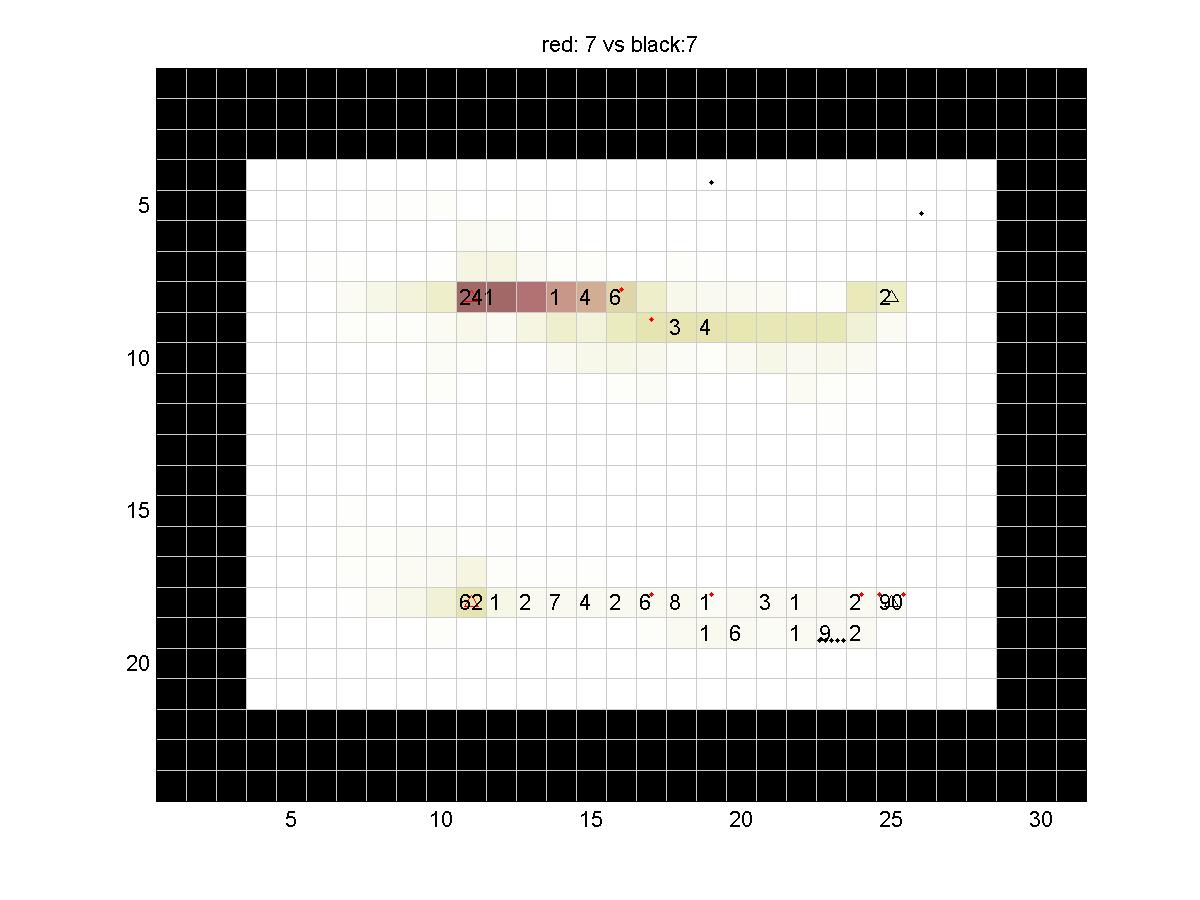
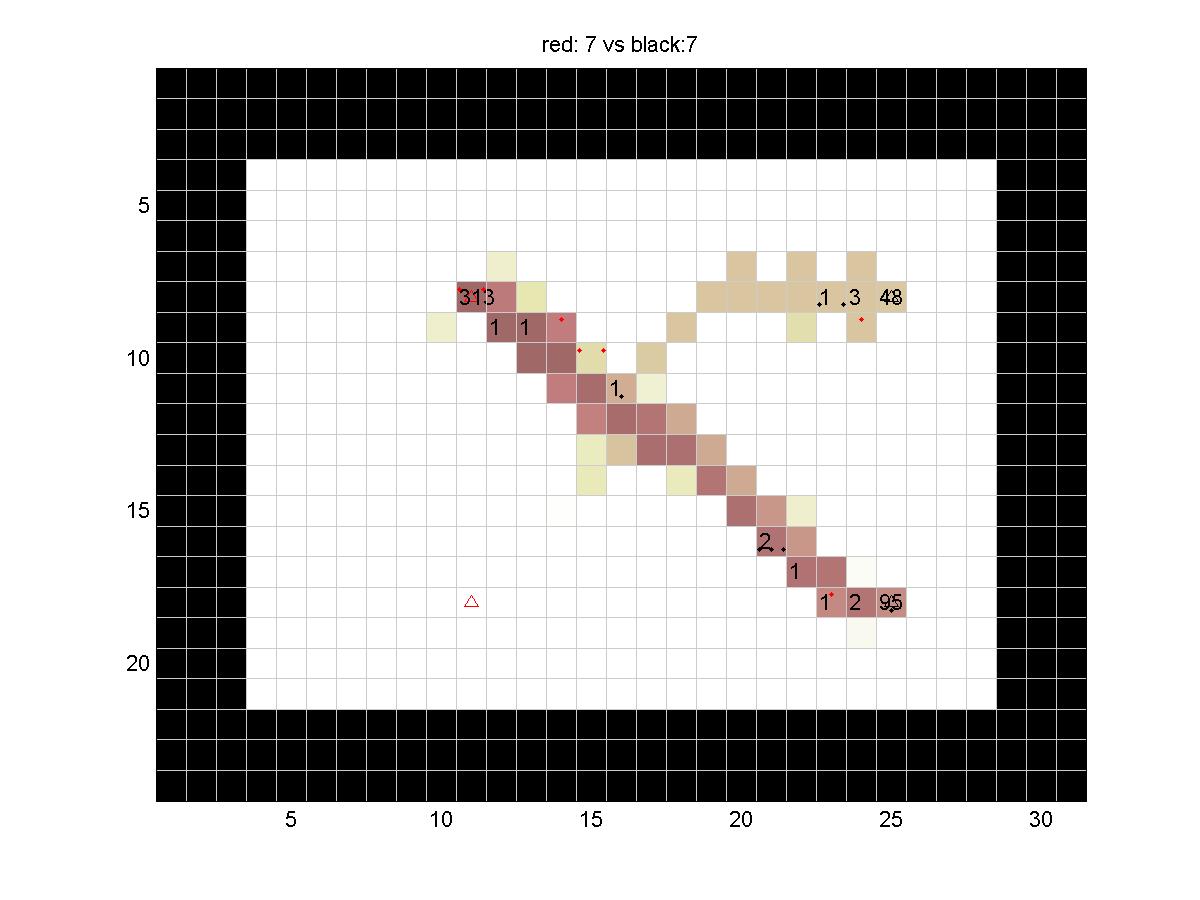
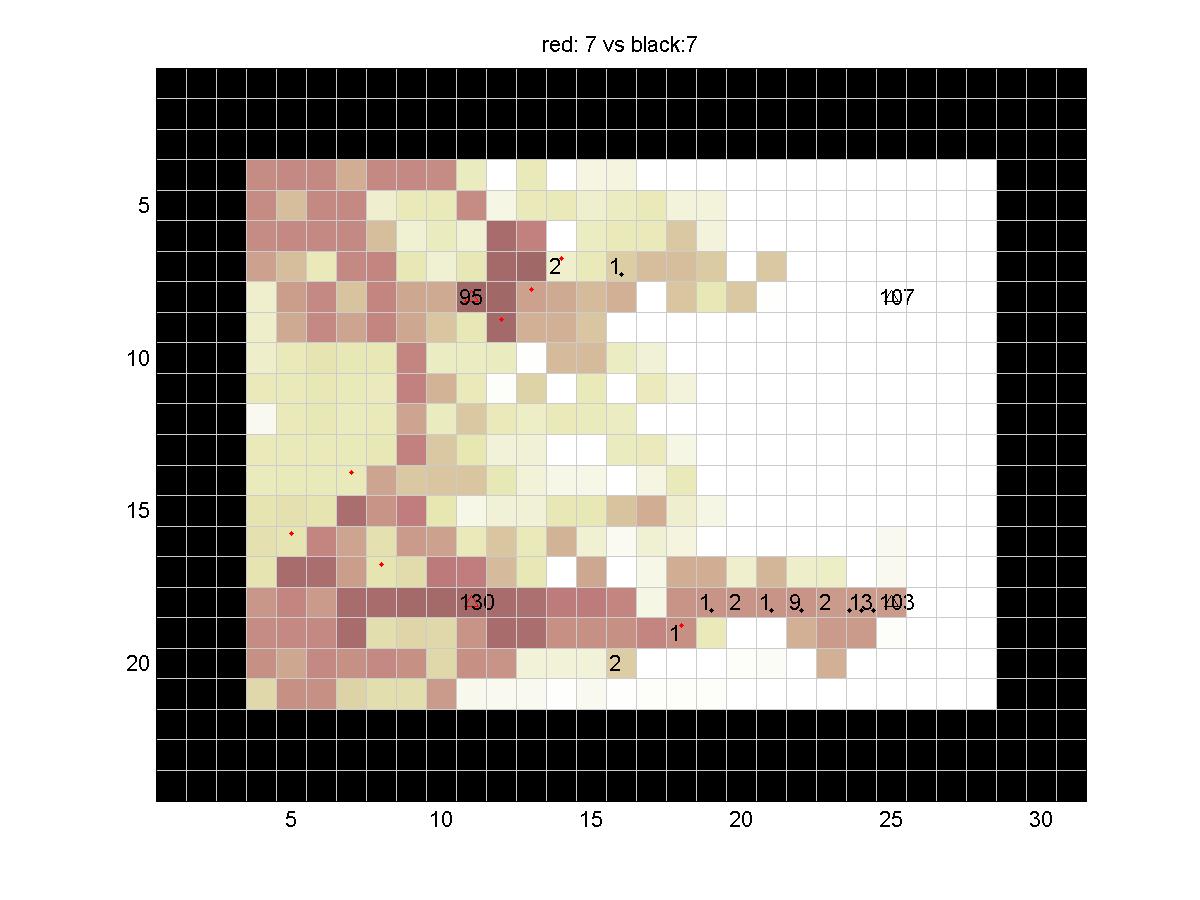
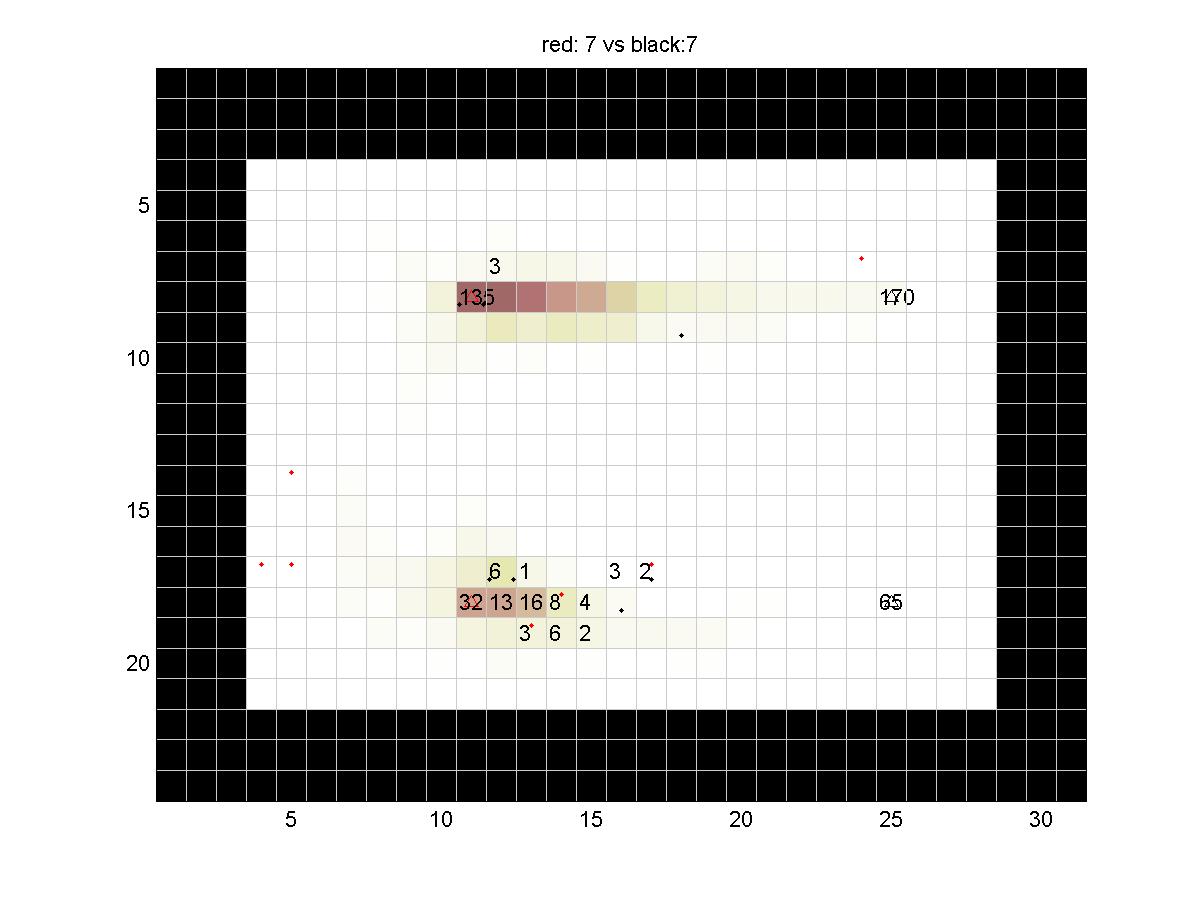
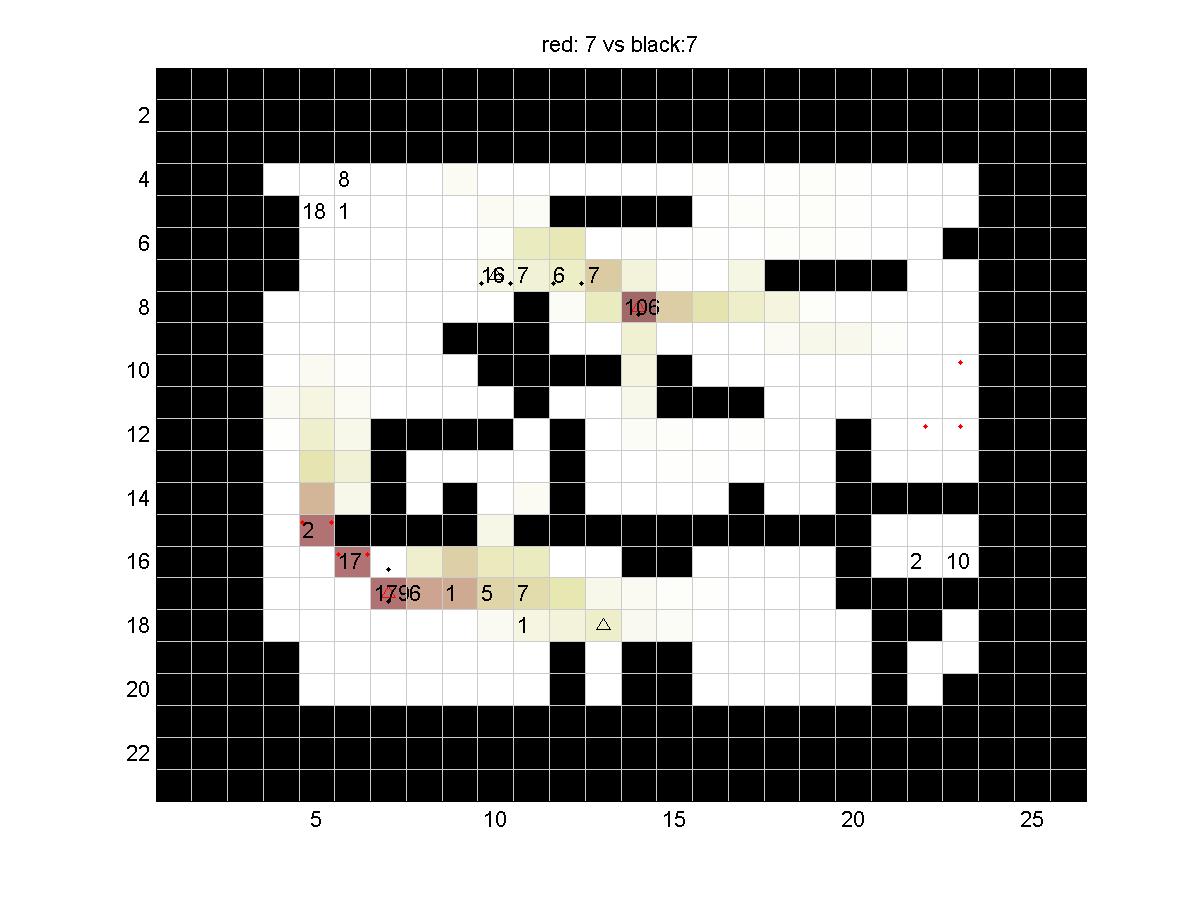
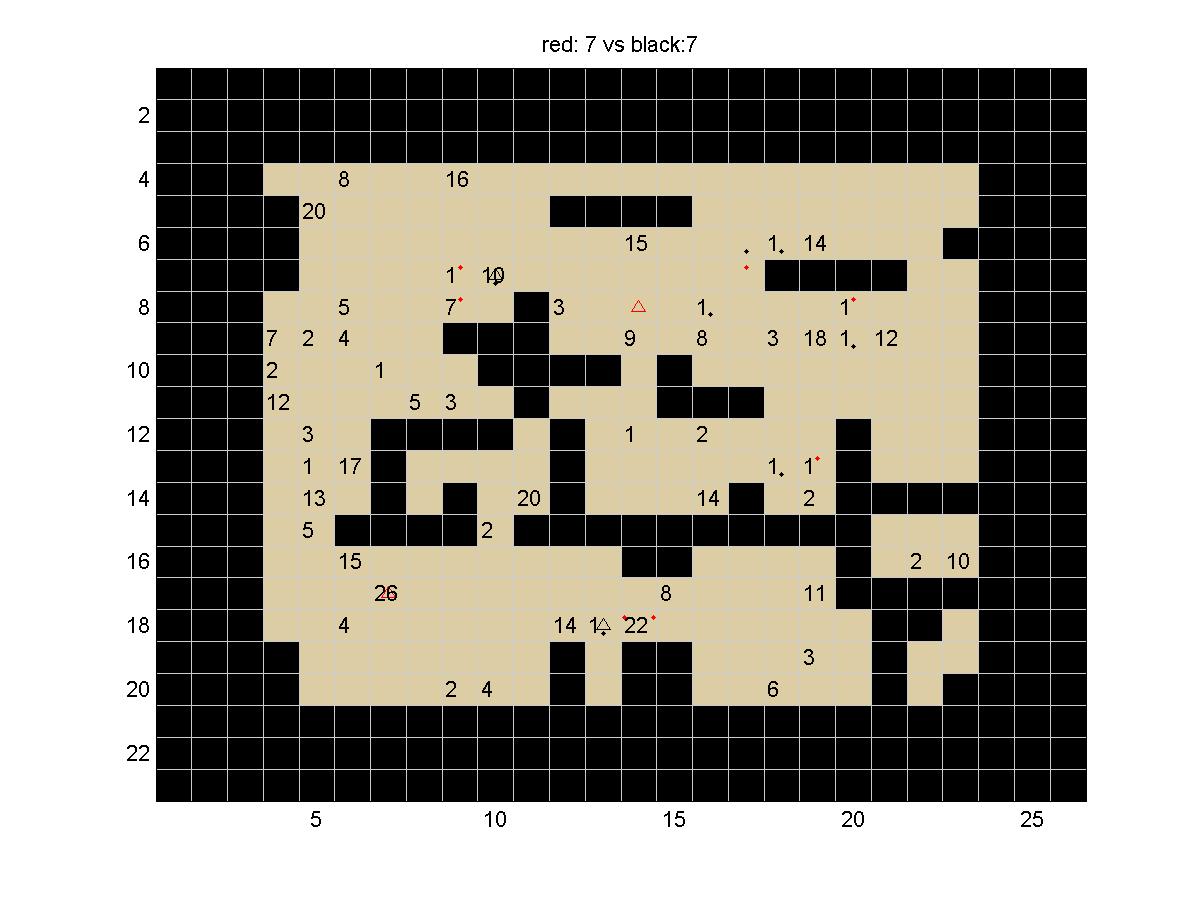
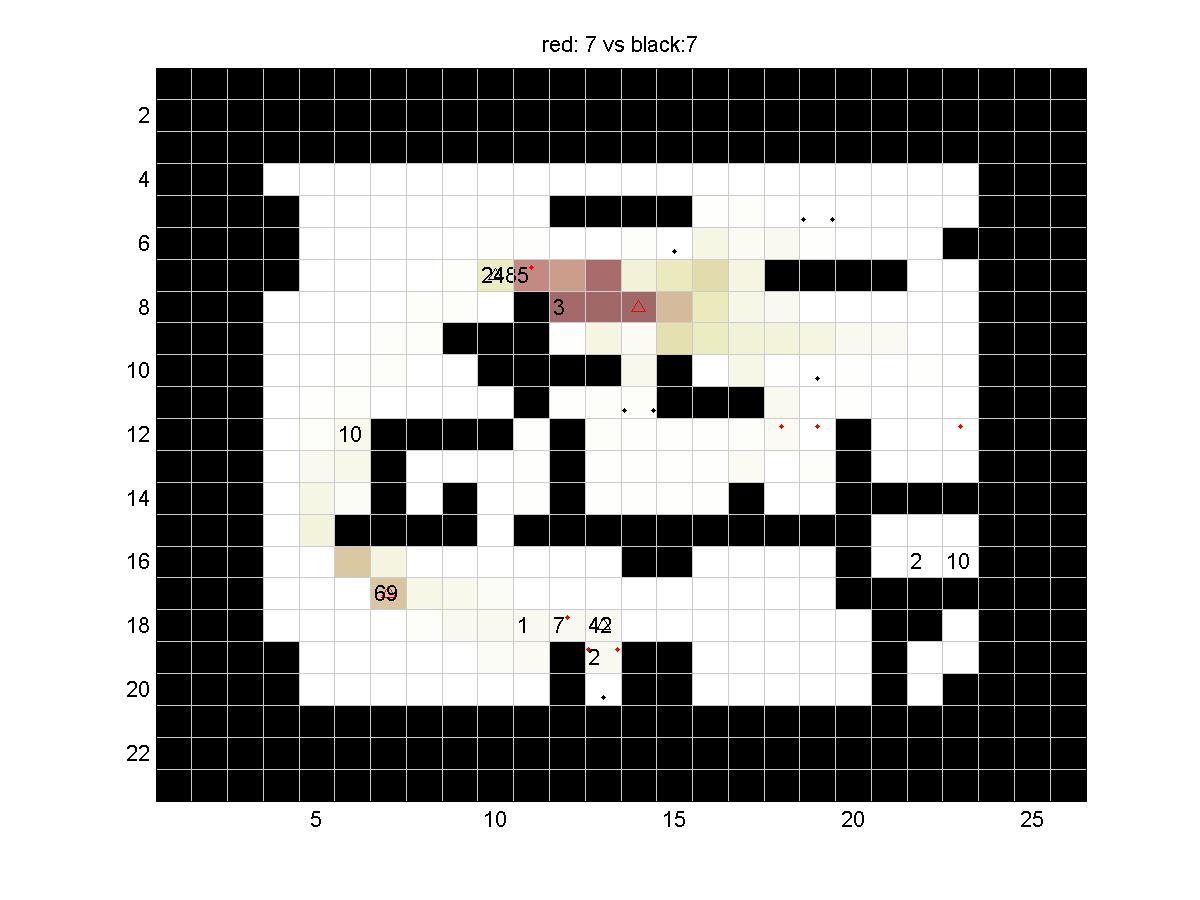
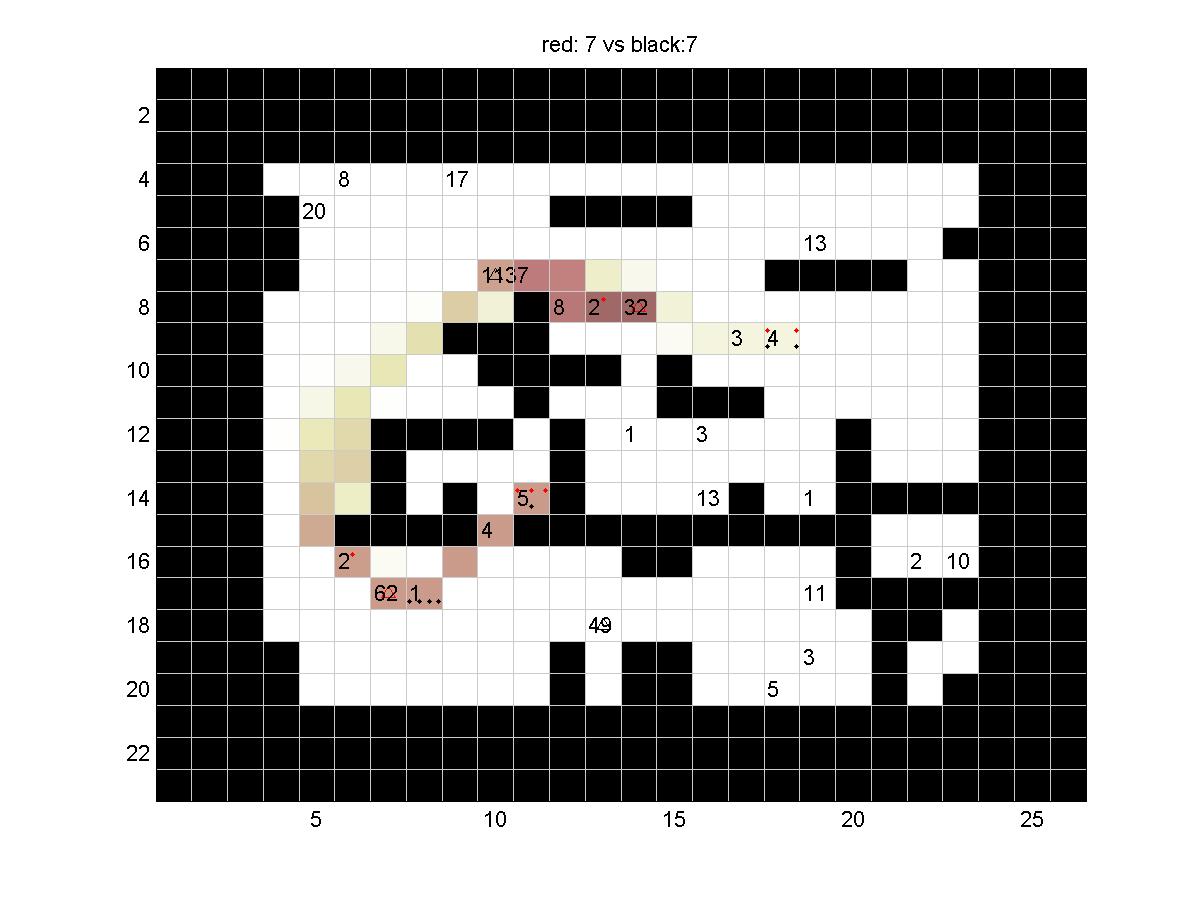
Board: 7
This is a straightforward board, Red and black are fairly aligned in their goals 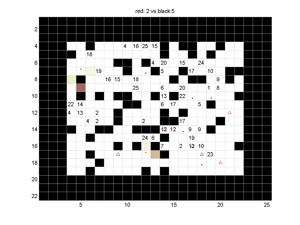 |
|---|
| Sample | Jan | Nathan | David | Markus | Nathan | Edin | Fabio |
|---|
| Sample | 0 | 100 | 7 | 100 | 100 | 100 | 100 | 11 |
| Jan | 15 | -8 | 21 | -2 | 0 | 60 | 73 | 7 |
| Nathan | -4 | 80 | 26 | 100 | 100 | 65 | 44 | 83 |
| David | 36 | -2 | 36 | -0 | -1 | 49 | 36 | 20 |
| Markus | 36 | -2 | 36 | 1 | -2 | 64 | 57 | 14 |
| Nathan | 42 | 28 | 85 | 56 | 52 | 47 | 65 | 68 |
| Edin | 41 | 62 | 100 | 44 | 62 | 53 | 75 | 94 |
| Fabio | 0 | 7 | 22 | 3 | 37 | 44 | 45 | -5 |
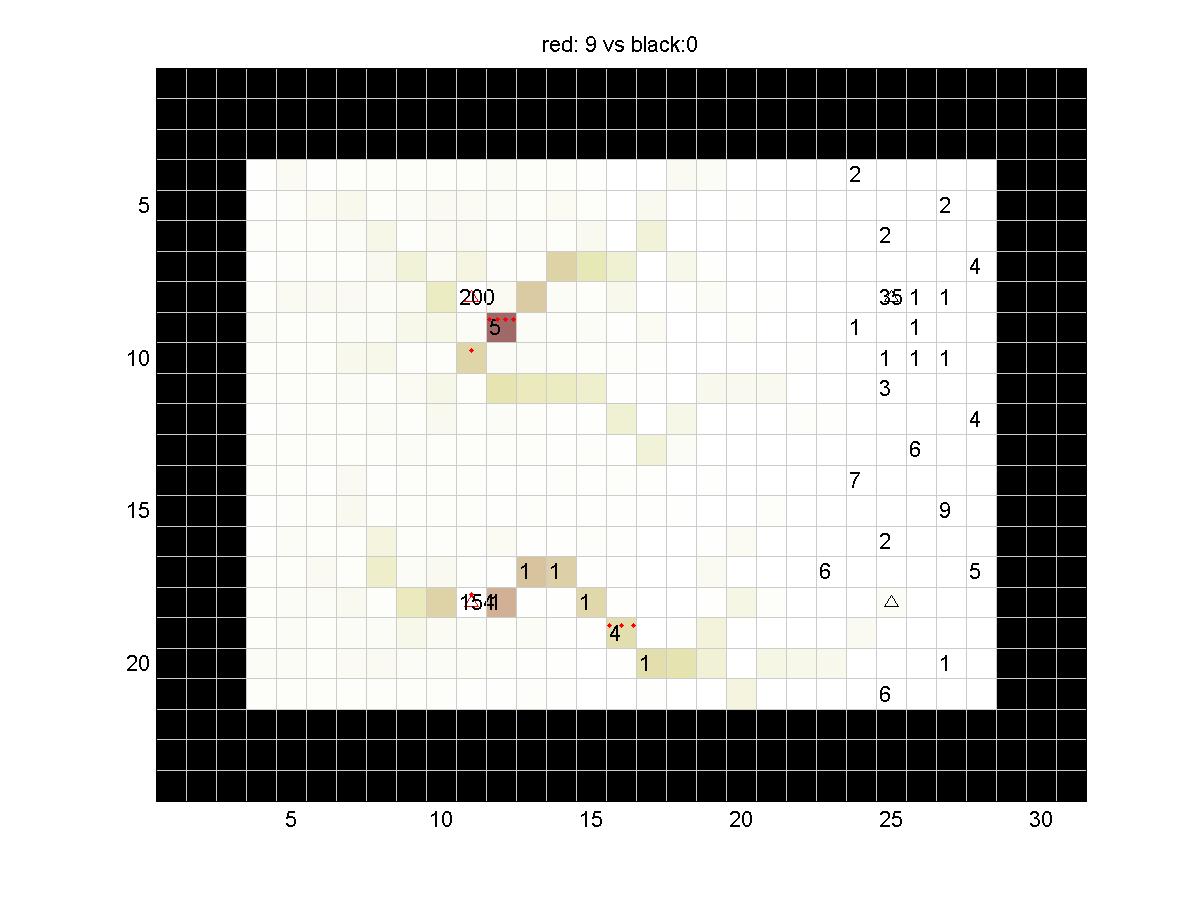
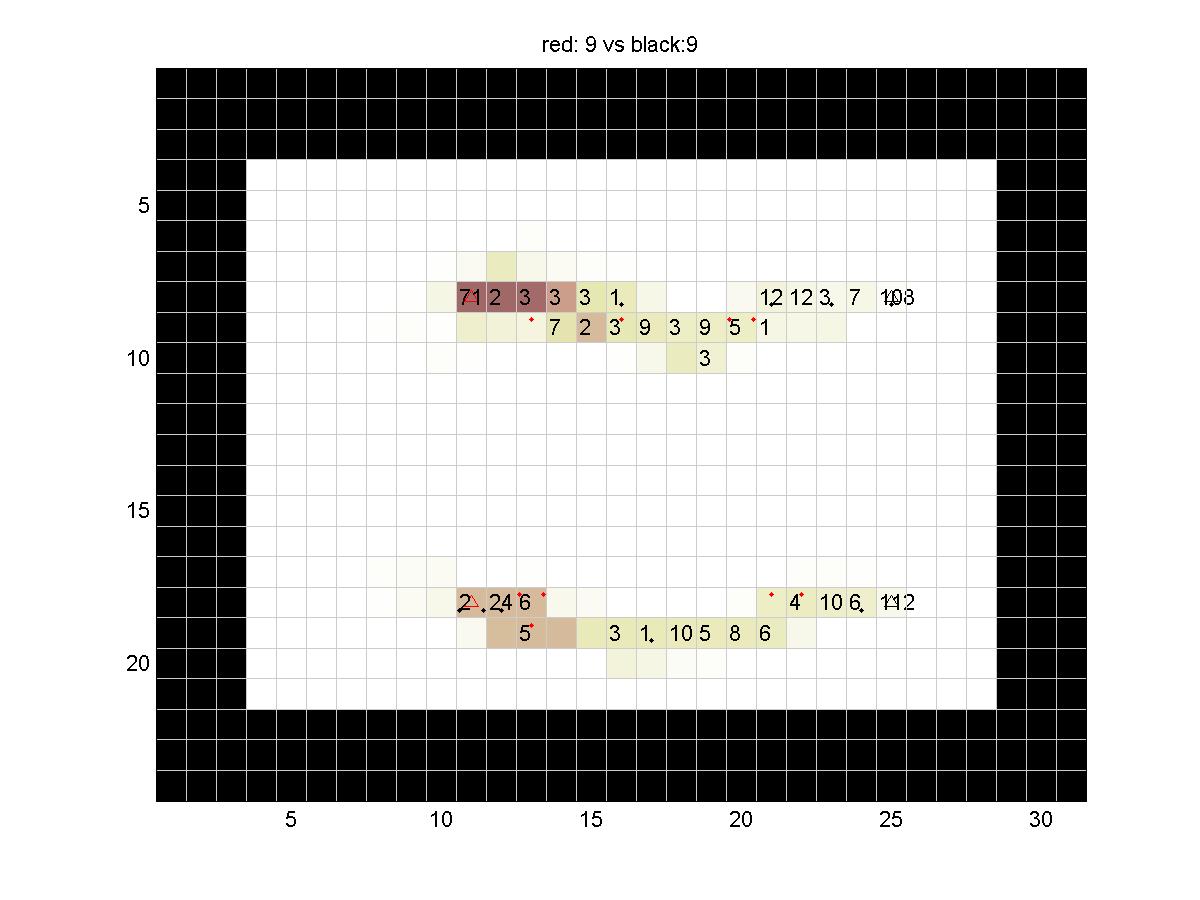
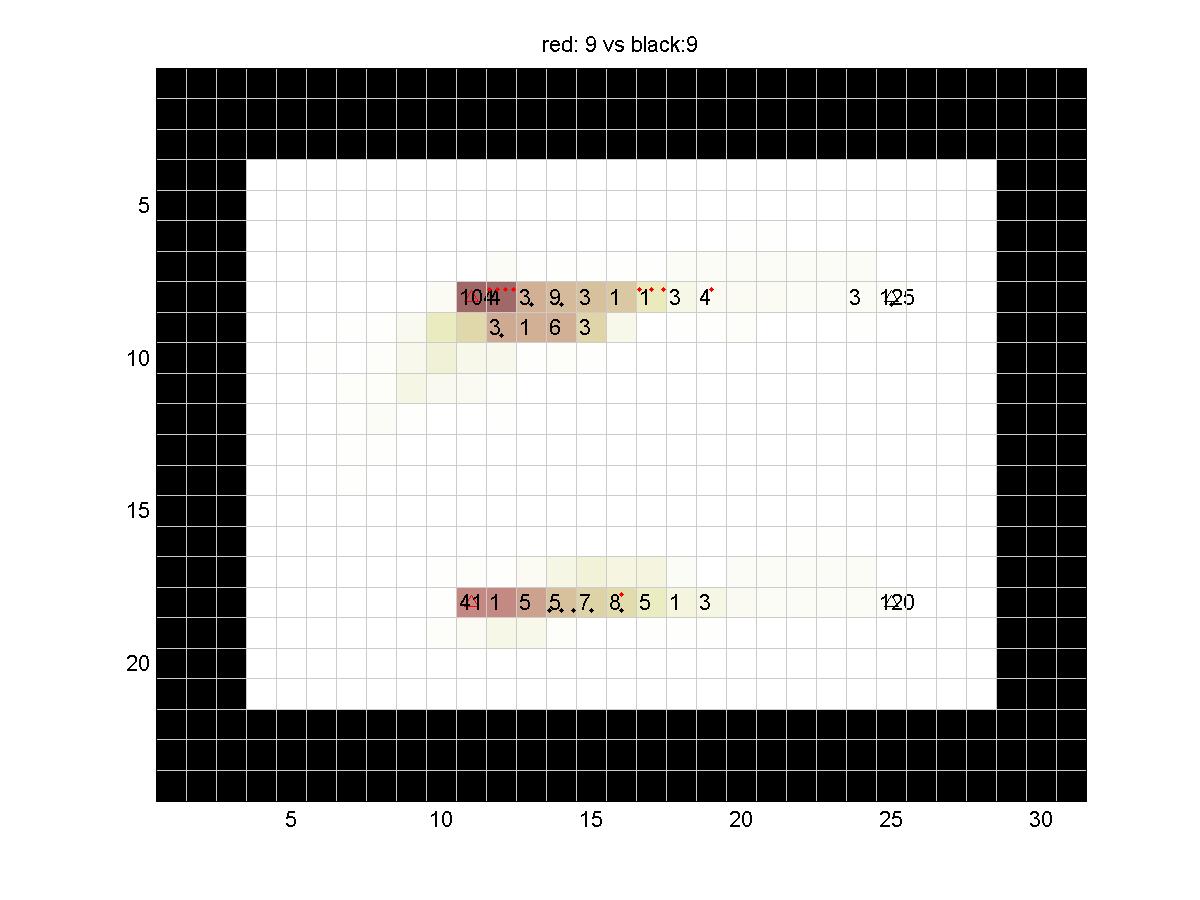
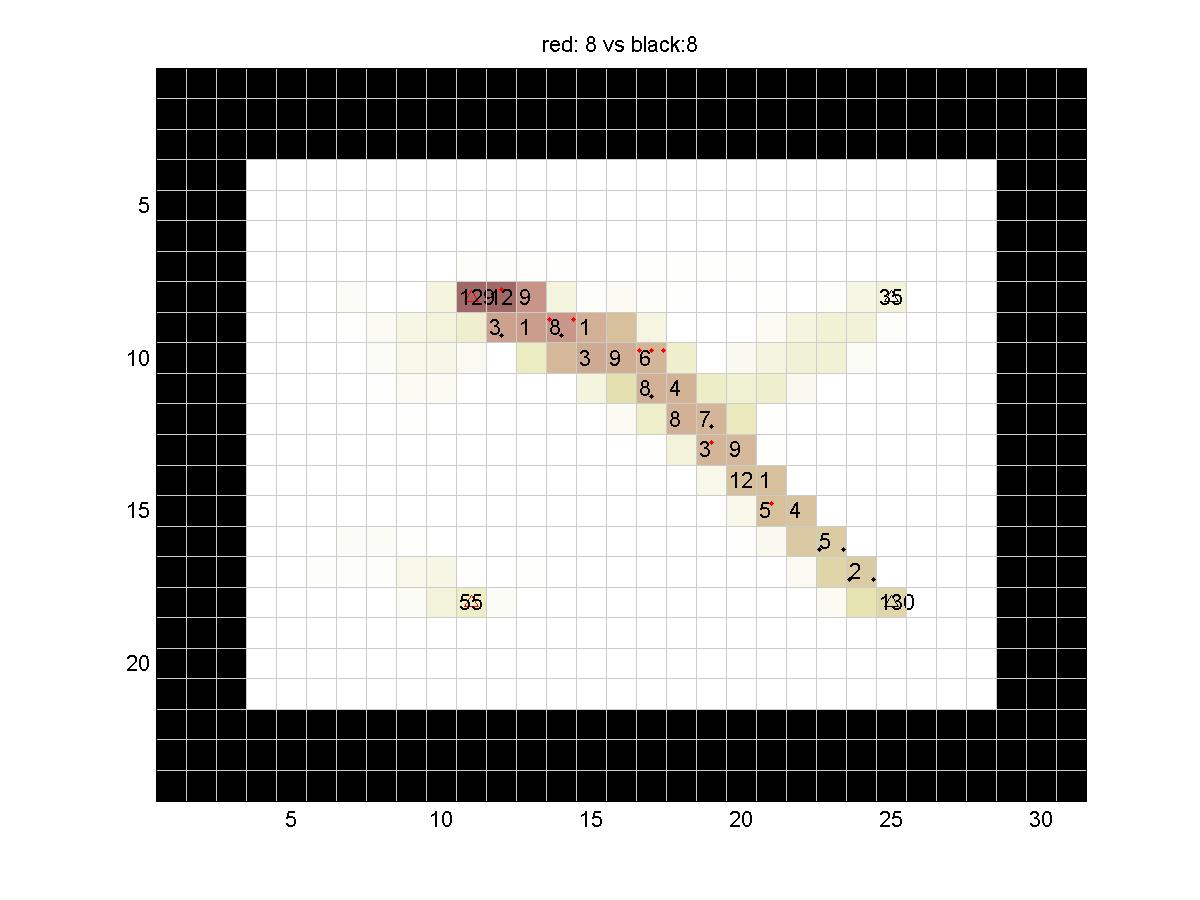
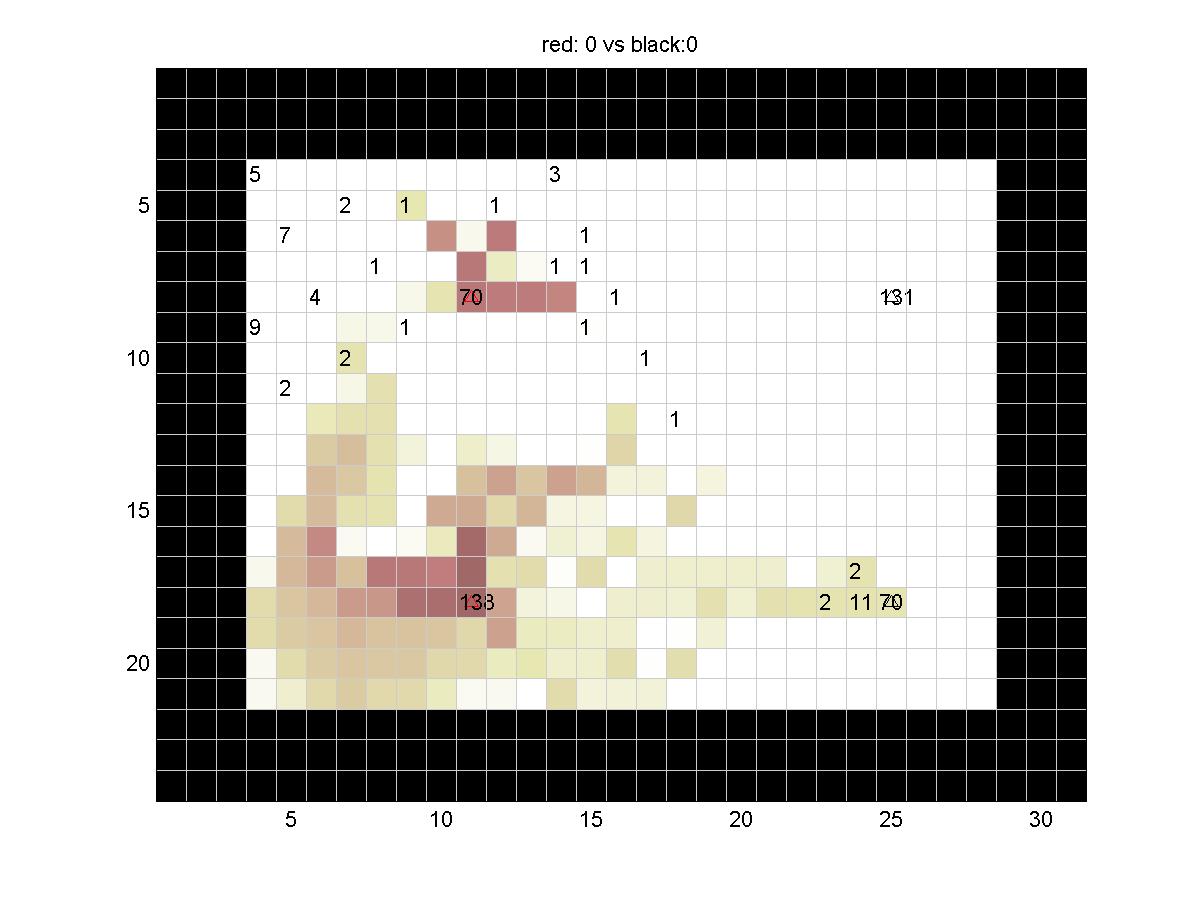
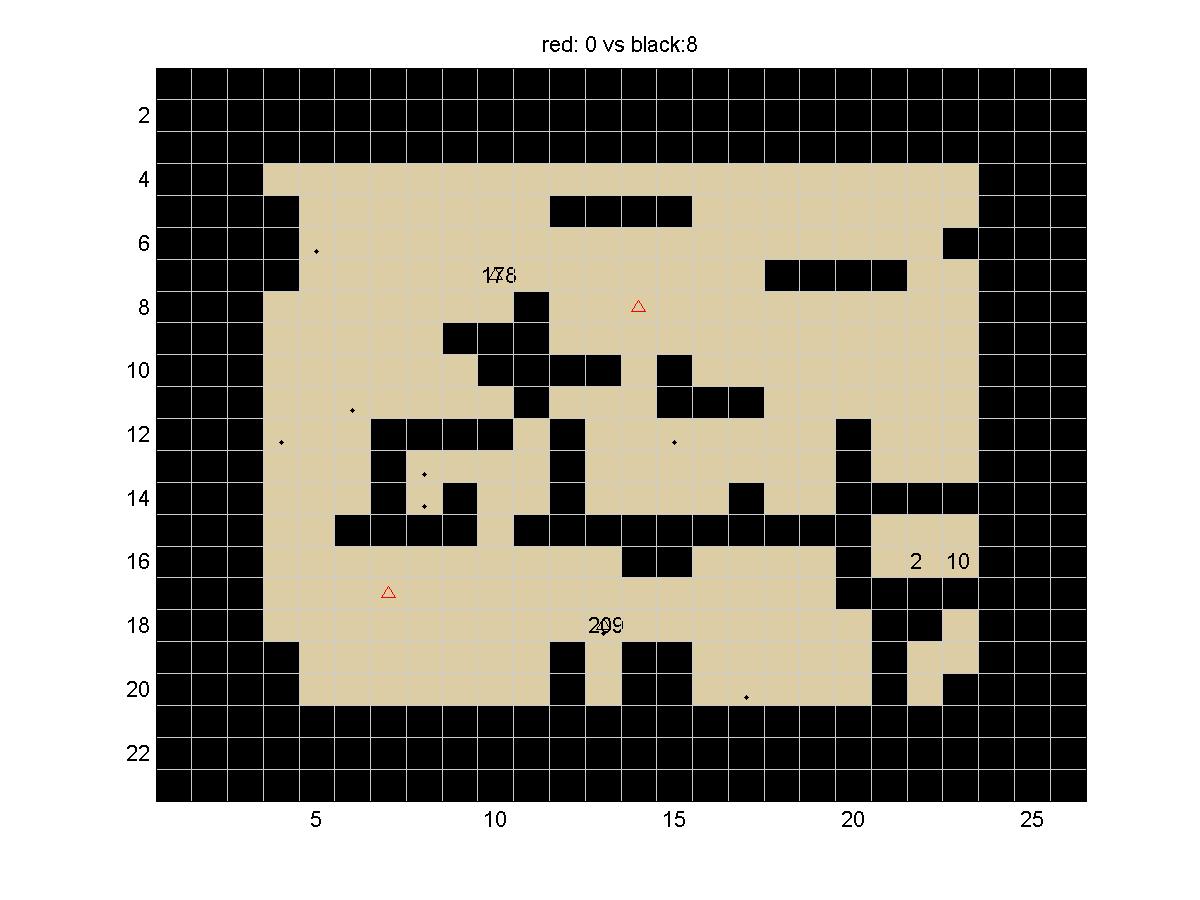
Board: 8
This board is almost split into two boards by a string of obstacles, but not quite.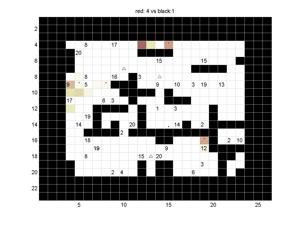
|
|---|
| Sample | Jan | Nathan | David | Markus | Nathan | Edin | Fabio |
|---|
| Sample | 0 | 92 | 53 | 94 | 94 | 94 | 72 | 77 |
| Jan | 4 | 17 | 6 | 1 | 1 | 86 | 58 | 18 |
| Nathan | 1 | 94 | 70 | 94 | 94 | 17 | 53 | 63 |
| David | 10 | 46 | 14 | 17 | 17 | 74 | 79 | 5 |
| Markus | 13 | 17 | 4 | 2 | 2 | 52 | 52 | 10 |
| Nathan | 15 | 34 | 66 | 24 | 37 | 22 | 30 | 61 |
| Edin | 13 | 26 | 63 | 5 | 31 | 21 | 18 | 51 |
| Fabio | 6 | 52 | 5 | 38 | 44 | 65 | 34 | 33 |