
MATLAB on Google Colab: Train a model in MATLAB, export to TensorFlow, and test in Python
As you might have read from my dear colleague Mike on the MATLAB blog, MATLAB now slots neatly into Google® Colab. Google Colab is a great sandbox for demos, workshops, or quick experiments. Students often ask us if they can leverage this infrastructure for their MATLAB project. Now you can!
Let me walk you through how you can leverage MATLAB on Google Colab for training an AI model and export it to TensorFlow (or ONNX) to call it from Python®.
Below is a walkthrough that turns those pieces into a complete deep learning workflow.

 In order to verify that you are indeed connected to a backend that has access to a GPU, you can run the following command in a cell (using the ! bang symbol to signal that it is a shell command, not a python command).
 Users were always able to run shell commands as shown above in a notebook cell, but what is new is the ability to do the same from the convenience of a terminal in the free tier.
 You have access to the underlying file system in which the session runs. When opening the terminal, you are brought in /content, at the root of your ephemeral virtual machine (bear in mind that anything in this machine won’t persist automatically, you need to store your valuable data and results in Google Drive, that needs to be mounted manually.
Here, I provide you with a script that automates the installation of MATLAB using MPM.
It should take 2-3 min to install MATLAB (no toolboxes at this stage). The magic trick is the following code cell to serve the MATLAB desktop in another window of your web browser.
You have access to the underlying file system in which the session runs. When opening the terminal, you are brought in /content, at the root of your ephemeral virtual machine (bear in mind that anything in this machine won’t persist automatically, you need to store your valuable data and results in Google Drive, that needs to be mounted manually.
Here, I provide you with a script that automates the installation of MATLAB using MPM.
It should take 2-3 min to install MATLAB (no toolboxes at this stage). The magic trick is the following code cell to serve the MATLAB desktop in another window of your web browser.
 You might get warning messages in red. Do not worry, those are not errors, I’ll get to that at the end of the post.
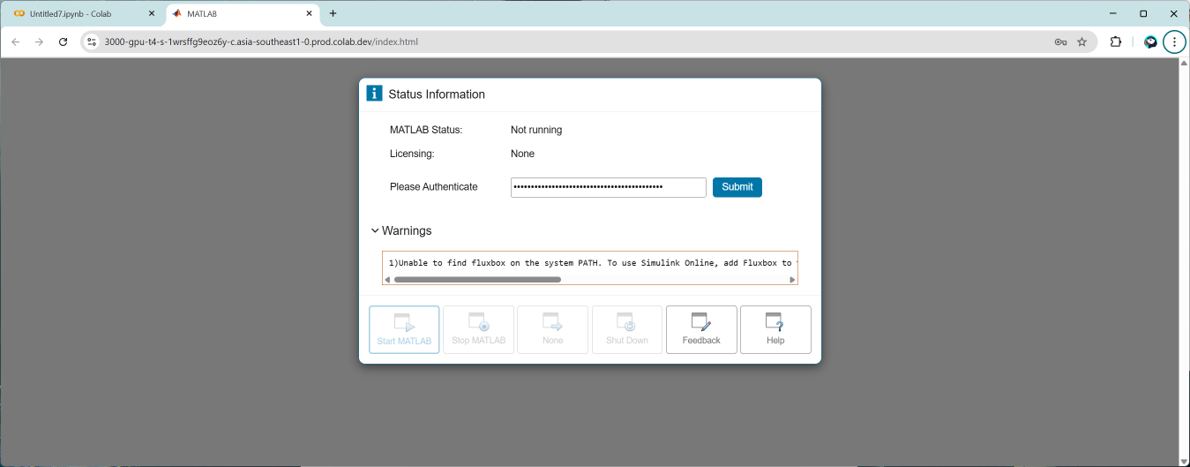 The first time you open MATLAB, you will be prompted for your MathWorks credentials.
 Don’t panic, you can install toolboxes as you go.
Each package name is the exact product code shown on the MathWorks website, on the products list page. Underscores replace spaces, but be careful to spell correctly because mpm is case sensitive!
Remember: Restart MATLAB after adding new toolboxes so they land on the path.
The following graph is generated if you run the entire live script. It illustrates the prediction of an electrical signal (simple periodic step function with some noise) in closed loop, meaning that after the first prediction of the last point of the signal, you “roll forward” by feeding this prediction back into the model.
Don’t panic, you can install toolboxes as you go.
Each package name is the exact product code shown on the MathWorks website, on the products list page. Underscores replace spaces, but be careful to spell correctly because mpm is case sensitive!
Remember: Restart MATLAB after adding new toolboxes so they land on the path.
The following graph is generated if you run the entire live script. It illustrates the prediction of an electrical signal (simple periodic step function with some noise) in closed loop, meaning that after the first prediction of the last point of the signal, you “roll forward” by feeding this prediction back into the model.
 The part of the code that I want to highlight here is the creation of the LSTM architecture (LSTM stands for Long Short-Term Memory).
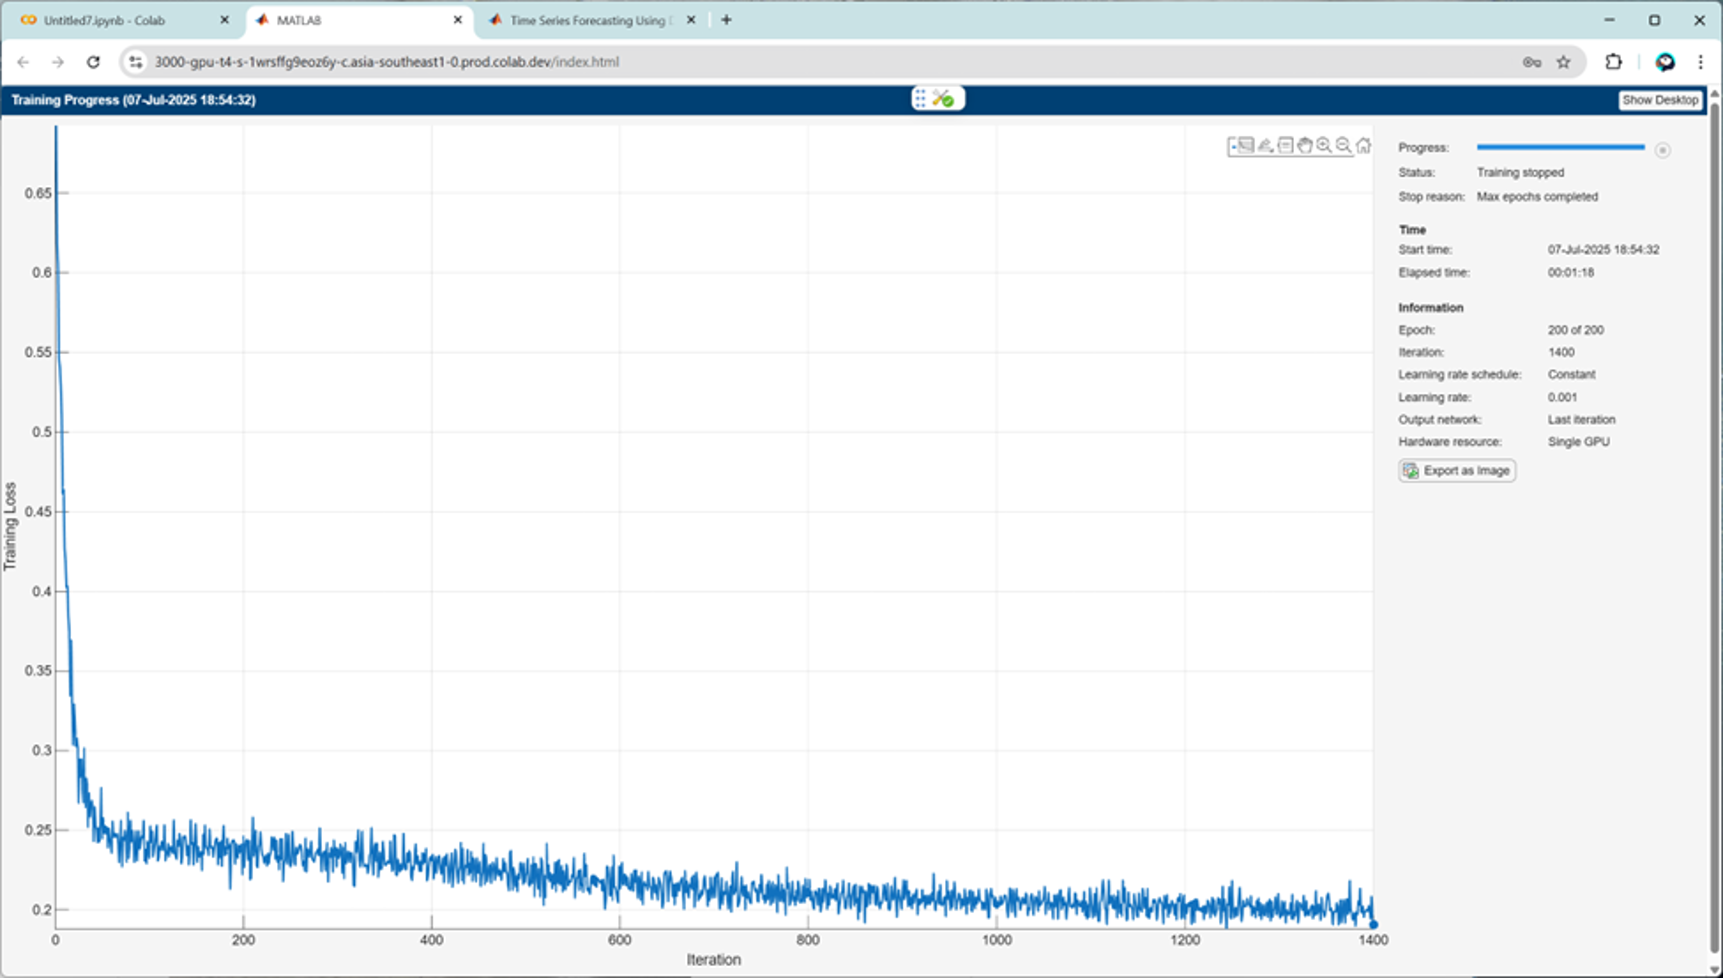
You will then need to specify training options and kick off the training of the network. On the T4 the training finishes in ~1 min.
The part of the code that I want to highlight here is the creation of the LSTM architecture (LSTM stands for Long Short-Term Memory).
You will then need to specify training options and kick off the training of the network. On the T4 the training finishes in ~1 min.
 To export the network to TensorFlow, type:
forecast_timeseries (a folder + HDF5 file) now lives under /content.
To export the network to TensorFlow, type:
forecast_timeseries (a folder + HDF5 file) now lives under /content.
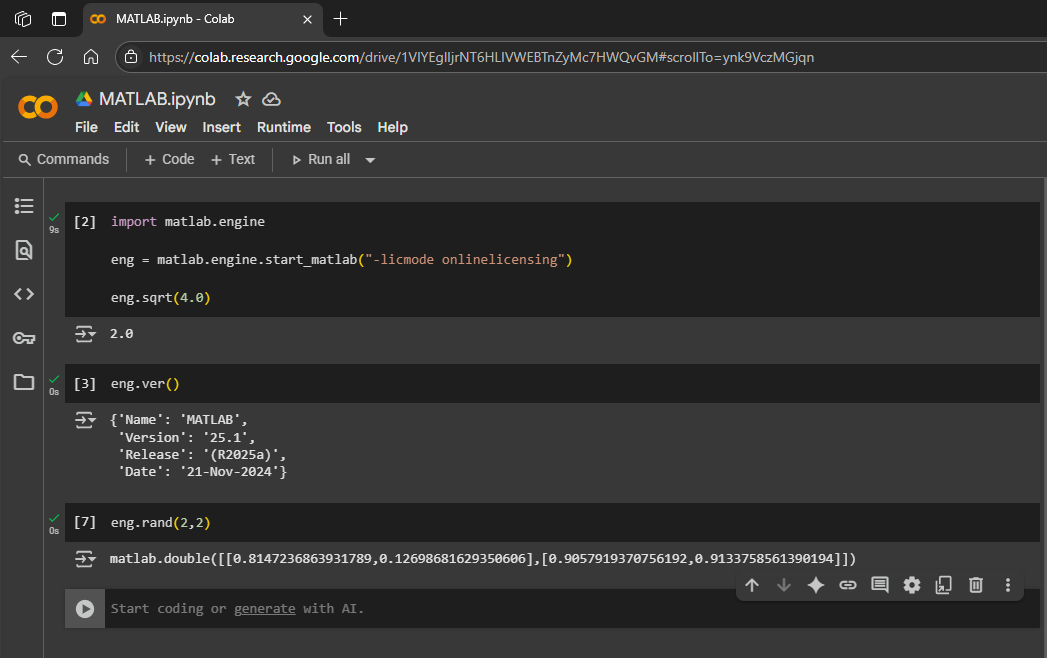
 Grab the same test signal from MATLAB via the MATLAB Engine for Python (already installed by the previous terminal commands). Initiate a connection to the engine running in the Google Colab session, by entering matlab.engine.shareEngine in the MATLAB command window.

| What’s new | Why it matters |
| Integrated Terminal in Colab | You get a full Bash shell, perfect for running installers or checking GPU status with nvidia-smi |
| MATLAB Package Manager (mpm) | With MPM you can install programmatically MATLAB plus any toolbox or support package via the terminal. In just one line: mpm install matlab |
1. Connect your notebook to a runtime with a GPU
Once you arrive on a new Colab notebook, the first thing to do is change the runtime type to T4 GPU, from the drop-down arrow next to the RAM and Disk consumption graphs.
In order to verify that you are indeed connected to a backend that has access to a GPU, you can run the following command in a cell (using the ! bang symbol to signal that it is a shell command, not a python command).
# In a Colab cell

!nvidia-smi
Users were always able to run shell commands as shown above in a notebook cell, but what is new is the ability to do the same from the convenience of a terminal in the free tier.
2. Open the terminal to install MATLAB in two lines
Click Terminal on the bottom left of the page. This will open a new panel on the right, next to your notebook. You can run commands directly like nvidia-smi.
You have access to the underlying file system in which the session runs. When opening the terminal, you are brought in /content, at the root of your ephemeral virtual machine (bear in mind that anything in this machine won’t persist automatically, you need to store your valuable data and results in Google Drive, that needs to be mounted manually.
Here, I provide you with a script that automates the installation of MATLAB using MPM.
wget https://www.mathworks.com/mpm/glnxa64/mpm && \
chmod +x mpm && \
./mpm install --release=R2025a --destination=/opt/matlab --products=MATLAB && \
ln -fs /opt/matlab/bin/matlab /usr/local/bin/matlab && \
MATLAB_DEPS_URL="https://raw.githubusercontent.com/mathworks-ref-arch/container-images/main/matlab-deps/r2025a/ubuntu22.04/base-dependencies.txt" && \
MATLAB_DEPENDENCIES=base-dependencies.txt && \
wget ${MATLAB_DEPS_URL} -O ${MATLAB_DEPENDENCIES} && \
xargs -a ${MATLAB_DEPENDENCIES} -r apt-get install --no-install-recommends -y && \
export LD_LIBRARY_PATH=$LD_LIBRARY_PATH:/opt/matlab/bin/glnxa64 && \
python3 -m pip install jupyter-matlab-proxy matlabengine==25.1.2 && \
env MWI_APP_PORT=3000 MWI_ENABLE_AUTH_TOKEN=False matlab-proxy-app &from google.colab import output output.serve_kernel_port_as_window(3000, path='/')
You might get warning messages in red. Do not worry, those are not errors, I’ll get to that at the end of the post.
The first time you open MATLAB, you will be prompted for your MathWorks credentials.
3. Add Deep Learning Toolbox (and friends)
Check that you can access the GPU by typing gpuDevice, only to realize that you might be missing a few dependencies.
Don’t panic, you can install toolboxes as you go.
./mpm install --release=R2025a --destination=/opt/matlab --products=Deep_Learning_Toolbox Statistics_and_Machine_Learning_Toolbox Parallel_Computing_Toolbox
4. Launch MATLAB (again) & Verify the GPU
This is the expected result of the previous command with everything installed correctly.>> gpuDevice ans = CUDADevice with properties: Name: 'Tesla T4' Index: 1 (of 1) ComputeCapability: '7.5' DriverModel: 'N/A' TotalMemory: 15828320256 (15.83 GB) AvailableMemory: 15720382464 (15.72 GB) DeviceAvailable: true DeviceSelected: true Show all properties.You should see the CUDA-enabled T4 appear in the output (or whatever GPU was assigned by Colab).
5. Hands-on Example: Time-Series Forecasting with an LSTM
One of my favorite applications of AI with MATLAB is predicting the future of a numerical sequence. In order to illustrate how you can leverage GPUs to speed up training of a neural network, I would like to point you to this example from the Deep Learning Toolbox documentation: Time Series Forecasting Using Deep Learning You can open it directly in MATLAB with the following command:openExample('nnet/SequenceForecastingUsingDeepLearningExample')
The part of the code that I want to highlight here is the creation of the LSTM architecture (LSTM stands for Long Short-Term Memory).
layers = [
    sequenceInputLayer(numChannels)
    lstmLayer(128)
    fullyConnectedLayer(numChannels)];
6. Export the network to TensorFlow
Install the Deep Learning Toolbox Converter for TensorFlow Models support package (no need to restart MATLAB in this case).
To export the network to TensorFlow, type:
exportNetworkToTensorFlow(net,"forecast_timeseries");
7. Round-trip test in Python
Back in a notebook cell, type the following.import forecast_timeseries model = forecast_timeseries.load_model() model.summary()
Grab the same test signal from MATLAB via the MATLAB Engine for Python (already installed by the previous terminal commands). Initiate a connection to the engine running in the Google Colab session, by entering matlab.engine.shareEngine in the MATLAB command window.
import matlab.engine

eng = matlab.engine.find_matlab()[0]    # attach to running session

m = matlab.engine.connect_matlab(eng)
Then cast the variable from the MATLAB workspace into Numpy arrays in the Colab Notebook.
import numpy as np

X = m.workspace['X']

X = np.array(X)

X = np.expand_dims(X, axis=0)

# X.shape

Y = model.predict(X)
Finally, plot Y against the MATLAB reference to confirm fidelity.
8. Gotchas & pro tips
- Session restarts: Colab VMs expire after ~12 h. Keep the install script in a cell so you can re-run everything quickly.
- Serving the MATLAB web desktop: The matlab-proxy Python package, installed via pip, provides the matlab-proxy-app executable. When launched, it sets up a lightweight web server that forwards a MATLAB session to your browser. The UI includes controls for starting/stopping MATLAB.
- Forwarding ports: The helper script forwards the MATLAB desktop as another browser window through another port of the same machine. If it stalls, verify the port isn’t blocked. This is an advanced maneuver that Google Colab offers for running servers like Flask or TensorBoard in another tab: advanced_outputs.ipynb
- Support packages vs. toolboxes: Toolbox installs require a MATLAB restart; add-on support packages (e.g., the TensorFlow converter) do not.
- Licensing: An Individual or Campus-Wide license works fine. Trial licenses also work—just watch the 30-day timer.
Wrapping up
In under ten minutes you can:- Provision a free GPU in Colab.
- Spin up full MATLAB with mpm (to run via the web desktop or with the MATLAB Engine for Python as mentioned in Mike’s post).
- Train a deep learning model on the GPU.
- Export the network to TensorFlow.
- Validate it side-by-side in Python—all within the same environment.


댓글
댓글을 남기려면 링크 를 클릭하여 MathWorks 계정에 로그인하거나 계정을 새로 만드십시오.