Johanna Pingel is a Product Marketing manager at MathWorks who contributes to content and discovery initiatives spanning artificial intelligence and deep learning.
The following post is from Sivylla Paraskevopoulou, Product Marketing Manager at MathWorks, and Yann Debray, Product Manager at MathWorks.
This blog post talks about how MATLAB, PyTorch®, and TensorFlow™ can be used together.
Deep learning models commonly exist within a complete AI system, which can involve preparing the data, building the model, designing the system on which the model will run, and deploying to hardware or production. MATLAB provides tools to help you at each step of the AI system design.
You can get a pretrained deep learning model from the MATLAB Deep Learning Model Hub, or from TensorFlow, PyTorch, or ONNX™ repositories. We will show here you how to quickly compare PyTorch image classification models without leaving the MATLAB environment.
Figure: Adding an extra step to my existing workflow in order to find the right PyTorch model
Our image classification workflow includes loading and preprocessing an image, importing an image classification model from PyTorch, and using the imported network to predict the image label. This workflow is presented in the documentation example Import Network from PyTorch and Classify Image.
Let’s assume the most important selection factor for the classifier model is the model’s prediction speed. The torchvision.models library alone has 12 models to choose from. It would be quite cumbersome to import each of these 12 models for our comparison test. We will show you here how you can call PyTorch from MATLAB to run an inference speed test quickly on multiple PyTorch models.
In this blog post we won’t show you all the details for each step. You can find the detailed example at Call Python from MATLAB to Compare PyTorch Models for Image Classification. Instead, here we are focusing on key takeaways on exploring PyTorch models with co-execution from MATLAB.
Preprocess Image
Read the image you want to classify. Resize the image to the input size of the network.
You must preprocess the image in the same way as the training data. For more information, see Input Data Preprocessing.
Rescale the image. Then, normalize the image by subtracting the training images mean and dividing by the training images standard deviation.
Permute the image data from the Deep Learning Toolbox dimension ordering (HWCN) to the PyTorch dimension ordering (NCHW), where H is the height of the images, W is the width of the images, C is the number of channels, and N is the number of observations. This is a necessary step to use the image for prediction with a PyTorch model (before importing it into MATLAB).
imgForTorch = permute(img,[4 3 1 2]);
For more information on input dimension data ordering for different deep learning platforms, see Input Dimension Ordering.
Takeaways:
Data preprocessing for prediction must match the training data preprocessing.
Permute the data from MATLAB to PyTorch dimension ordering to use the input data with a PyTorch model.
Install Python and Libraries
You might have multiple versions of Python installed on your desktop. For example, a MacBook has a pre-installed Python version 2.7, which is likely not the version you want to use. So, it is good practice to create a virtual environment for your project to be in control of the Python version and libraries that you are using.
The following commands show how you can setup a virtual environment on a MacBook. If you are using a Windows machine, the commands might be slightly different.
Go to your working folder. Create and activate the Python virtual environment env in your working folder.
python3.10 -m venv env
source env/bin/activate
Install the necessary Python libraries for this example. Check the installed versions of the libraries.
pe = pyenv(ExecutionMode="OutOfProcess",Version="./env/bin/python3.10");
Now, you are ready to call Python from MATLAB.
Takeaways:
Create a Python virtual environment in your working folder.
Be aware of Python and library versions.
Explore PyTorch Models
Get three pretrained PyTorch models (VGG, MobileNet v2, and MNASNet) from the torchvision library. For more information on each model and how to load it, see torchvision.models.
You can access Python libraries directly from MATLAB by adding the py. prefix to the Python name. For more information on how to access Python libraries, see Getting Started: Access Python Modules from MATLAB.
Convert the image to a tensor in order to classify the image with a PyTorch model.
X = py.numpy.asarray(imgForTorch);
X_torch = py.torch.from_numpy(X).float();
To find the fastest PyTorch model by calling Python from MATLAB, predict the image classification label multiple times for each of the models. We run the speed test on all models, but we are showing here only how to compute the average speed for the MNASNet model.
N = 30;
for i = 1:N
    tic
    model3(X_torch);
    T(i) = toc;
end
mean(T)
ans = 0.1096
This simple test showed that the fastest model in predicting is MNASNet. You can run different tests on PyTorch models easily and fast with co-execution to find the model that best suits your application and workflow.
To import the PyTorch model into MATLAB, you first must trace the model and save it, which you can also do by co-executing Python from MATLAB. Execute Python statements in the Python interpreter directly from MATLAB by using the pyrun function. The pyrun function is a stateful interface between MATLAB and Python, which saves the state between the two platforms.
Save the fastest PyTorch model, among the three models compared. Then, trace the model. For more information on how to trace a PyTorch model, see Torch documentation: Tracing a function.
inputLayer = imageInputLayer(InputSize,Normalization="none");
net = addInputLayer(net,inputLayer,Initialize=true);
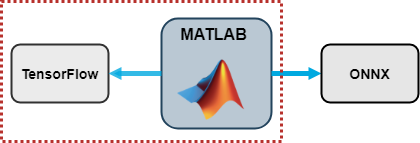
Here a simple image classification was shown . By converting a PyTorch or TensorFlow model into a MATLAB network, you gain access to all the deep learning workflows that MATLAB supports for building complete AI systems.
For more information on working with models imported versus co-execution, see the ‘Comparison of capabilities for working with deep learning models in MATLAB’ table in our previous blog post: Importing Models from TensorFlow, PyTorch, and ONNX (Summary section).
Takeaways:
The importNetworkFromPyTorch function can import image classification models into MATLAB.
By importing your model of choice into MATLAB, you can integrate the deep learning model into an AI system.
Conclusion
Key takeaways were presented for each step of the workflow. If we had to pick the three key takeaways…
Key Takeaways:
Co-execution and model import are MATLAB tools that enable MATLAB and PyTorch to be used together.
Co-execution of MATLAB and PyTorch can be an efficient way to determine which PyTorch model to import.
Access Python libraries by adding the py. prefix and execute Python statements by using pyrun.
For more examples on co-execution between MATLAB, TensorFlow, and PyTorch, check out:

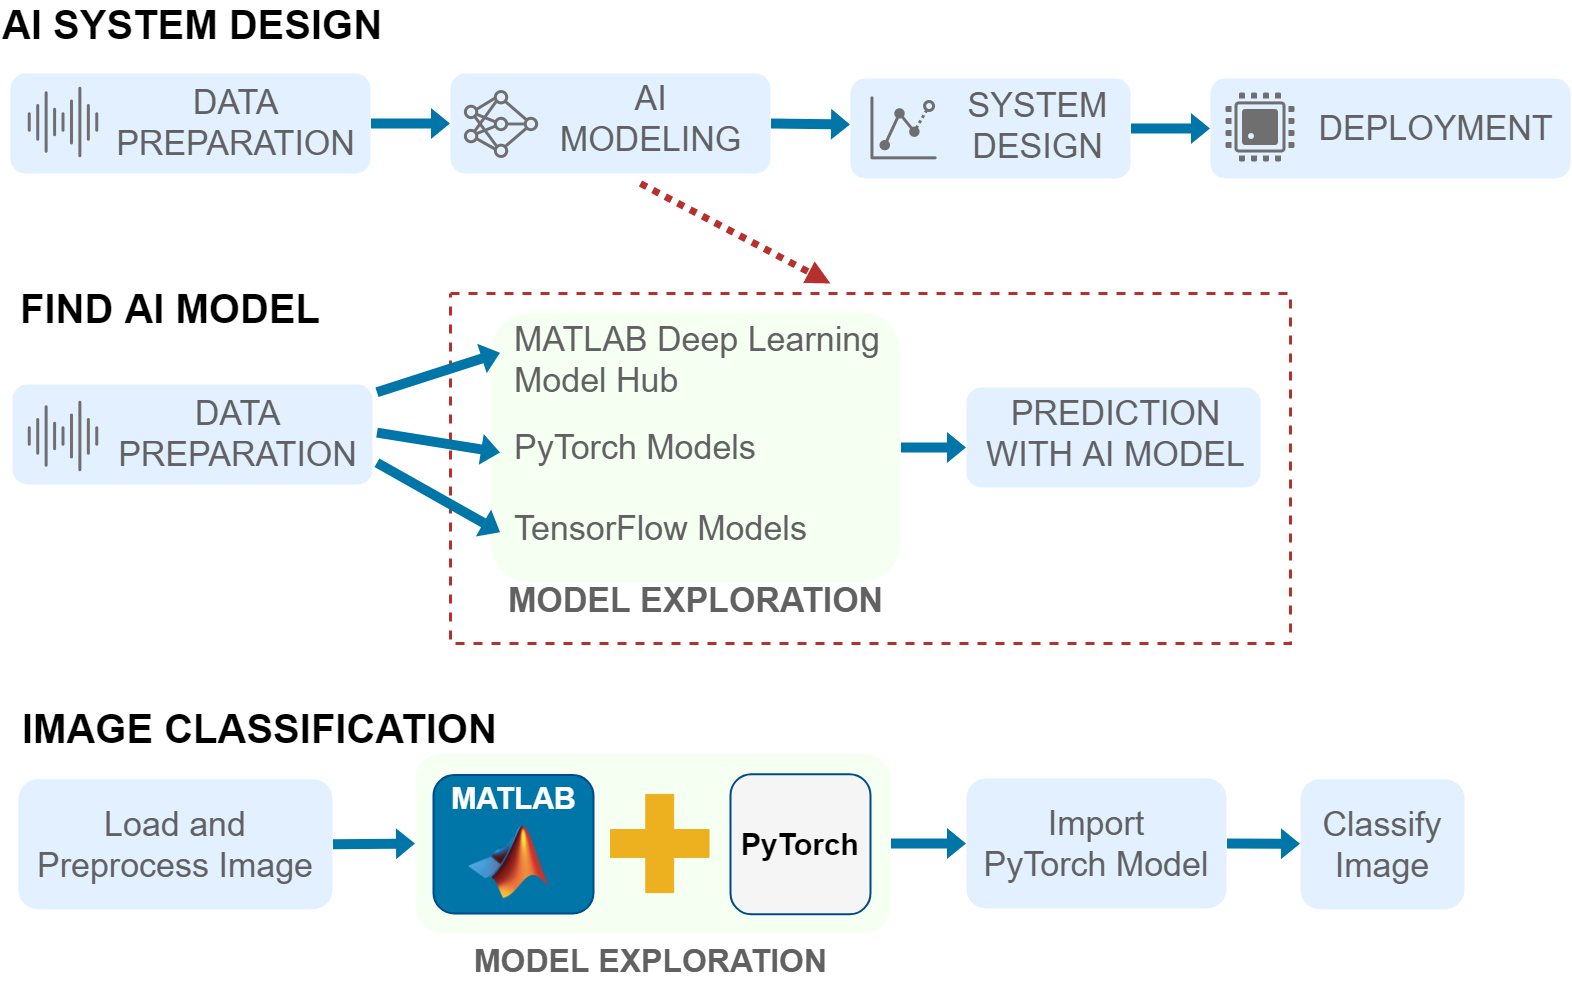 Figure: Adding an extra step to my existing workflow in order to find the right PyTorch model
Our image classification workflow includes loading and preprocessing an image, importing an image classification model from PyTorch, and using the imported network to predict the image label. This workflow is presented in the documentation example Import Network from PyTorch and Classify Image.
Let’s assume the most important selection factor for the classifier model is the model’s prediction speed. The torchvision.models library alone has 12 models to choose from. It would be quite cumbersome to import each of these 12 models for our comparison test. We will show you here how you can call PyTorch from MATLAB to run an inference speed test quickly on multiple PyTorch models.
In this blog post we won’t show you all the details for each step. You can find the detailed example at Call Python from MATLAB to Compare PyTorch Models for Image Classification. Instead, here we are focusing on key takeaways on exploring PyTorch models with co-execution from MATLAB.
Figure: Adding an extra step to my existing workflow in order to find the right PyTorch model
Our image classification workflow includes loading and preprocessing an image, importing an image classification model from PyTorch, and using the imported network to predict the image label. This workflow is presented in the documentation example Import Network from PyTorch and Classify Image.
Let’s assume the most important selection factor for the classifier model is the model’s prediction speed. The torchvision.models library alone has 12 models to choose from. It would be quite cumbersome to import each of these 12 models for our comparison test. We will show you here how you can call PyTorch from MATLAB to run an inference speed test quickly on multiple PyTorch models.
In this blog post we won’t show you all the details for each step. You can find the detailed example at Call Python from MATLAB to Compare PyTorch Models for Image Classification. Instead, here we are focusing on key takeaways on exploring PyTorch models with co-execution from MATLAB.


Comments
To leave a comment, please click here to sign in to your MathWorks Account or create a new one.