
Get Invisible! Design an Invisibility Cloak using MATLAB and Simulink
In today’s post, Maitreyee Mordekar joins us to talk about designing an invisibilty cloak. Over to you, Maitreyee..
Let’s get ready to design an invisibility cloak illusion! In this blog, we will go over the process of implementing an illusion of an Invisibility Cloak using a simple image processing technique of color-based thresholding and segmentation. The solution implements the concepts of performing image segmentation and analysing the regions of interest using interactive apps. At this point, I solemnly swear that I am up to no good 😉

Fig 1: Showcasing the Simulink model
Unlocking the Algorithm (Alohamora Algorithm)
The illusion works on the concept of color-based segmentation and image multiplication. For all of you who are looking for the magical invisibility cloak, it is located here (Don’t be disappointed to find just the code and not a cloak here 😉 ).
The algorithm multiplies a colour thresholder mask to a pre-configured background image to display the background in the coloured cloak area giving an illusion of invisibility. If the above sentence was a little overwhelming to understand, don’t worry. We will go over this step by step!
The illusion of creating an invisibility cloak has 3 parts:
- Setup of the Background Image
- Tune the foreground color (aka creating our invisible cloth)
- Manipulate the image from the camera video stream
1. Setup of the Background Image
The very first step would be to for us to capture a background image with a stationary camera and a stationary background. For this, we would have to ensure that we have a camera connected to our system and have the MATLAB Support Package for USB Webcams installed. Then we set it up using the following command in the MATLAB Command Window:
cam = webcam;
Once the camera is setup, we take a snapshot of the background and save it into the MATLAB Workspace. Let’s say following is the image that is captured.
backgroundImage = snapshot(cam);
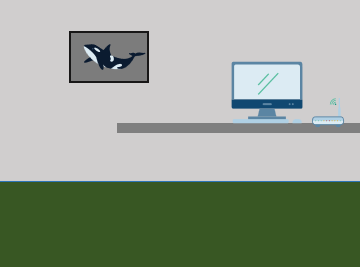
Fig 2: The background image
Save this as backgroundImage.
save(‘backgroundImage’,‘backgroundImage’);
2. Tune the Foreground Color
Now, we must tune to detect and segment colors from the cloth that we would like to use as our invisibility cloak. For this example, we are using an orange object.
Let’s detect the colors of the orange object using the Color Thresholder App.

Fig 3: Tuning the orange-colored foreground
colorThresholder
You can use the image with the colored object in the App and adjust the sliders to detect only the orange color. You can export the detected color mask and then use it in Simulink.
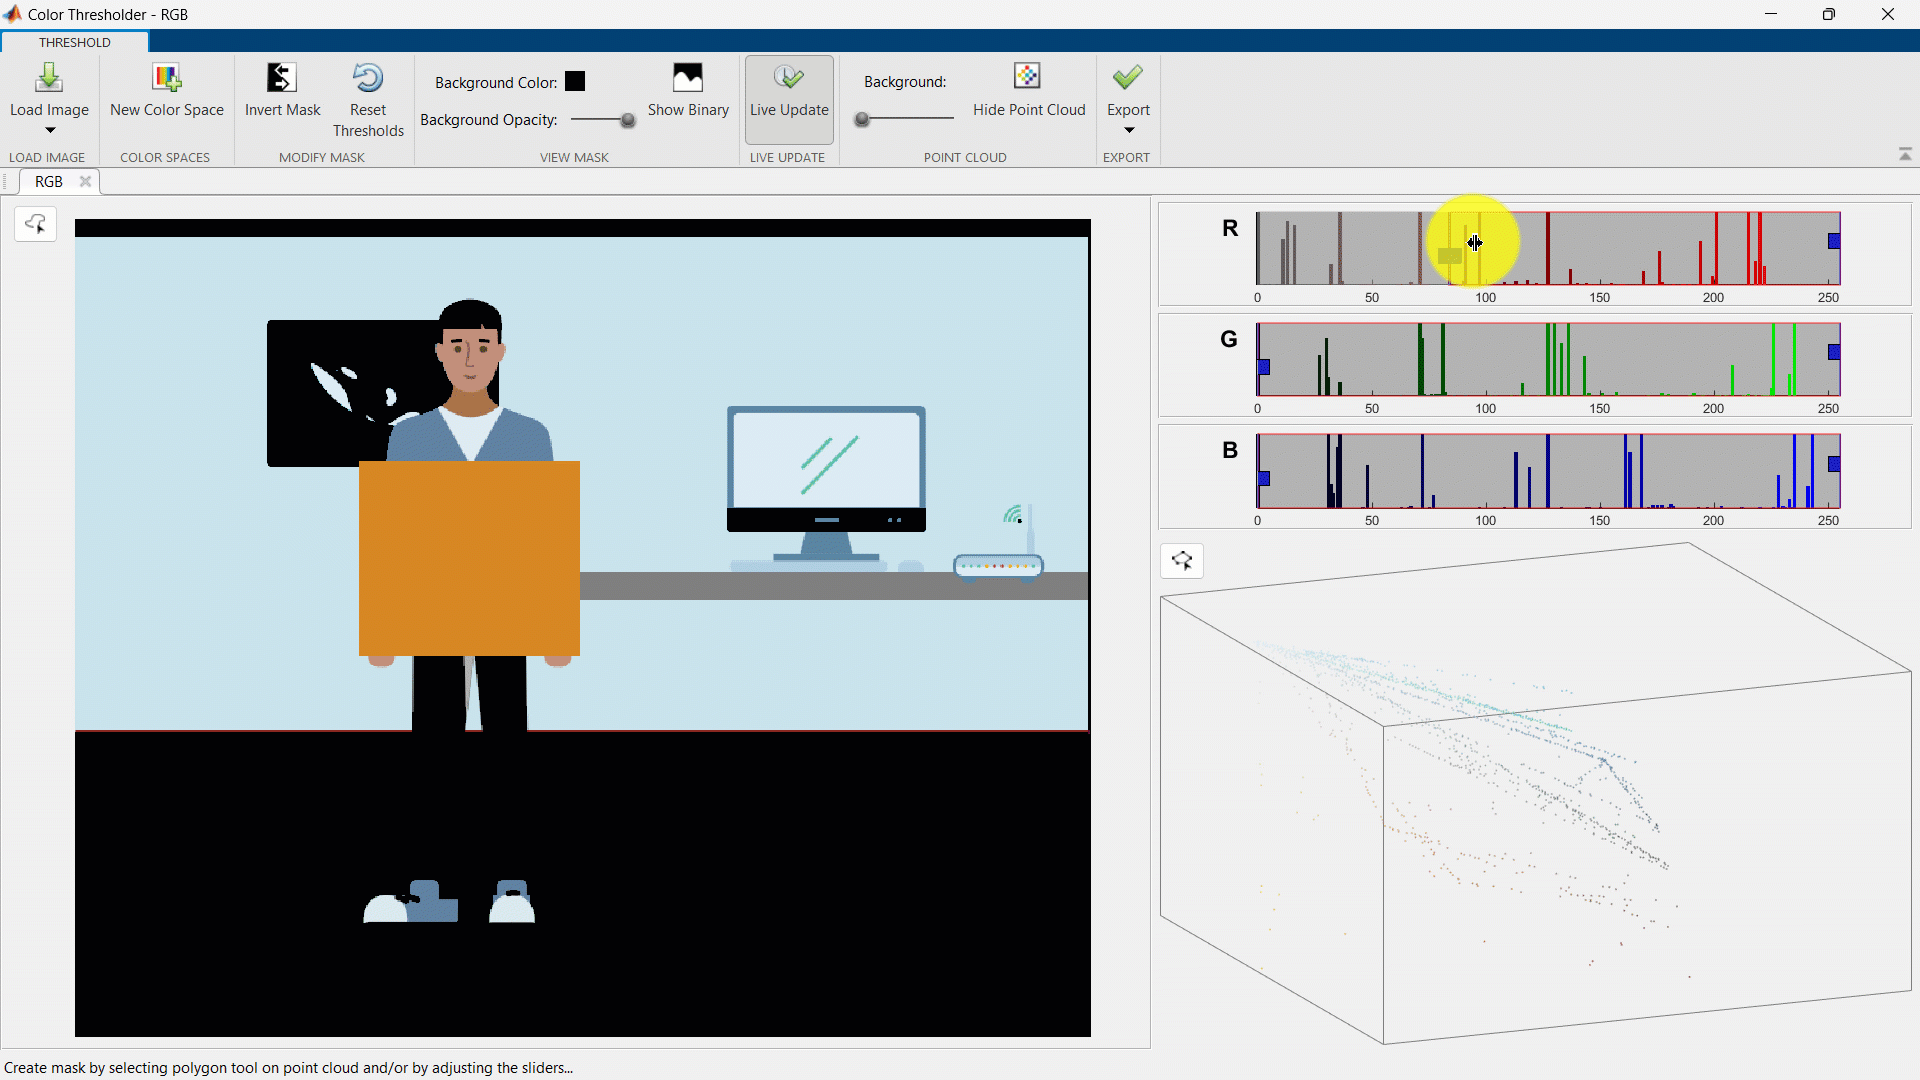
Fig 4: Segmenting the foreground color using Color-Thresholder App
Also, if there are regions falsely detected as the cloak color, you can refine the detected mask using Image Segmenter App.
imageSegmenter
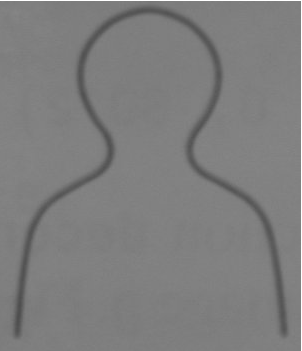
The white pixels represent the areas that are detected as orange and the black are areas that are detected as not orange.
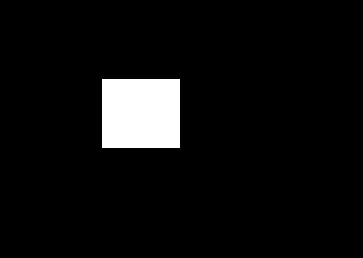
Fig 5: Segmented, orange-colored object
To understand the implementation in detail, you can watch the video on Making Vehicles and Robots See: Image Segmentation and Analysis that introduces the concepts of performing image segmentation and analysing the regions of interest using interactive apps.
3. Image Manipulation of the Camera Video Stream
The above two steps were carried out to setup the system by using the MATLAB Command Window. This step is the image manipulation to help us get the illusion will be performed using Simulink. Here, our foreground is the orange-colored object, and the background is everything else in an image.
The method adds up two images which are separate from each other that eventually leads us an illusion of invisibility.
Revealing the background (Revelio Background)
In the first image, we take the background and multiply it with the orange-colored object mask. That leaves us with an image which has the background image at the region of the image frame which had the orange object. The rest of the image would have pixels which are black (i.e. a pixel value of 0).
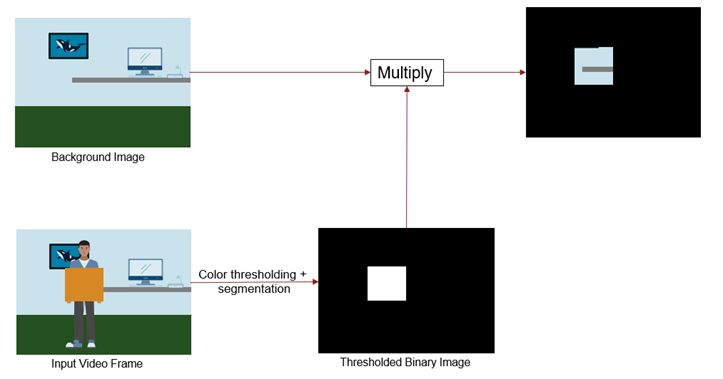
Fig 6: Algorithm for revealing the background
Obscuring the foreground (Obscuro Foreground)
For the second image, we manipulate the streaming input video to stream everything except the part of the image which we have in Image 1. For this, we work with an operation that is an inversion of the mask that we used in the last image. We use the not operation so that the 0s in the image become 1s and vice versa. We finally multiply this image with the incoming video frame.
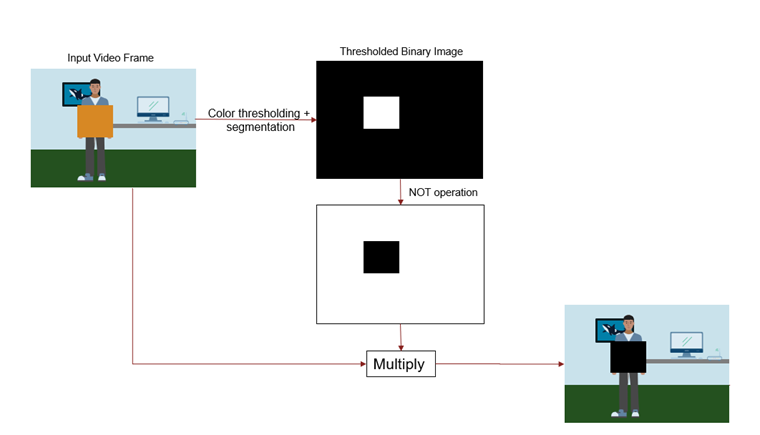
Fig 7: Algorithm for obscuring the foreground
Adding the Images (Confirmarum Images)
The last step is to add the two images together. Here, we add the foreground and the background images to give us the invisibility cloak illusion.
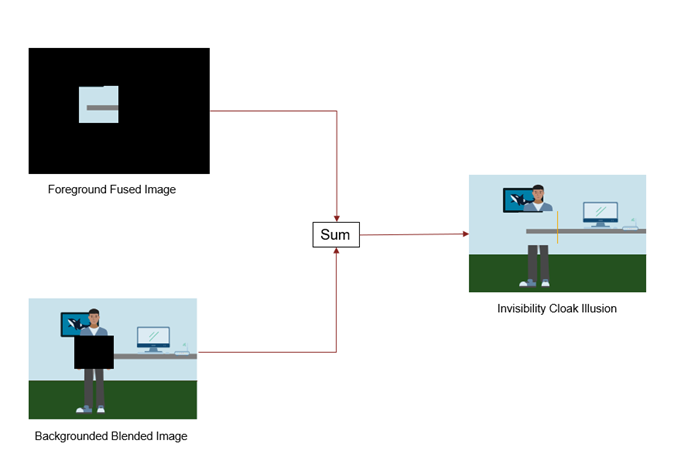
Fig 8: Adding the background and foreground images
Final Simulink Model
Now that we have understood the algorithm, the next step is to configure it all and run it to become invisible. You can find the models in this File Exchange submission.
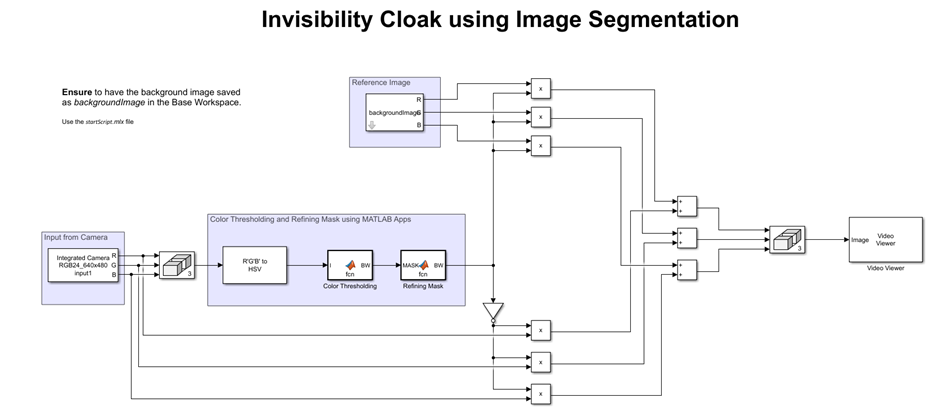
Fig 9: Final Simulink model
Assumptions
Now, the big question is, at what instances does this algorithm work – what have we assumed? This is a simple algorithm that performs color thresholding. We assume that:
- The web camera is stationary
- The background of the image is stationary does not have any moving objects
- The lighting conditions do not change
Do check the example out to have some fun with image processing and make yourself invisible 🙂 . Mischief managed!


Comments
To leave a comment, please click here to sign in to your MathWorks Account or create a new one.