How Do You Modify the Background of an Image?
Today I'd like to introduce guest blogger Brett Shoelson. Some of you may know Brett through his File Exchange submissions, or through his involvement with the Pick of the Week blog, or from occasional guest posts on Steve’s blog on image processing.
Contents
"The visa problem"
Loren recently told me she had a pending international trip that requires a visa. She had a photograph taken against a background that was unsuitable for use in her visa document, and she asked: "How would I go about changing the background to white?"
The original photo
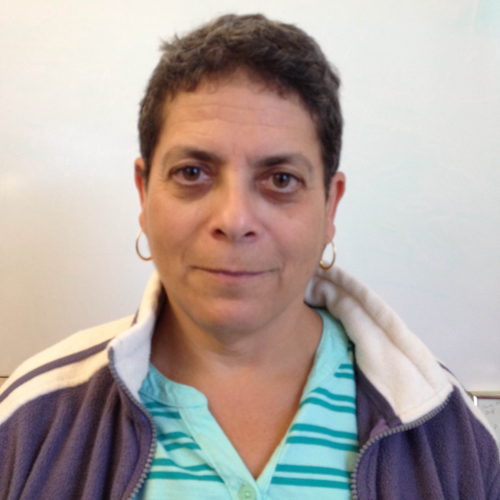
First question: how do we isolate the background?
"I wonder if this will entail creating a manual mask?", Loren asked.
Great question! I can certainly come up with an automated approach to masking (or "segmenting") the region of interest ("ROI"). For instance:
img = imread('LorenVisaImage.png');
gray = rgb2gray(img);
SE  = strel('Disk',1,4);
morphologicalGradient = imsubtract(imdilate(gray, SE),imerode(gray, SE));
mask = im2bw(morphologicalGradient,0.03);
SE  = strel('Disk',3,4);
mask = imclose(mask, SE);
mask = imfill(mask,'holes');
mask = bwareafilt(mask,1);
notMask = ~mask;
mask = mask | bwpropfilt(notMask,'Area',[-Inf, 5000 - eps(5000)]);
showMaskAsOverlay(0.5,mask,'r');
%(showMaskAsOverlay is my helper function, available on the MATLAB Central File Exchange.)
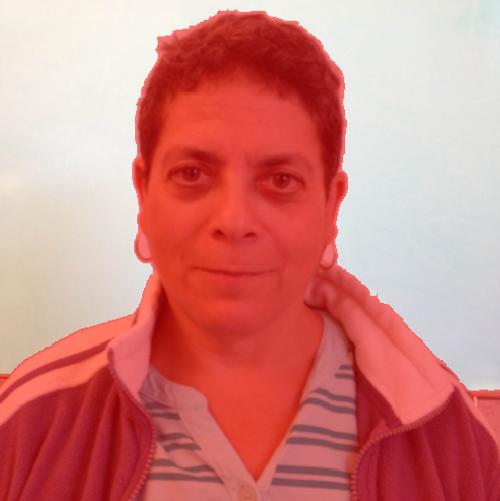
However, that was complicated by the fact that border portions of Loren's jacket are almost exactly the same color as the background. If she had been standing against a green or blue screen instead, it would have been much easier to automate some chroma key compositing to manipulate the background. Instead, I had to jump through some hoops to get there.
Is the effort of automation justified?
Whenever you are faced with a task like this, it's worth thinking for a moment about the potential return on the investment that automating the task will require. If you need to process many similar images--if this were a frame of a video, for instance--you might indeed want to spend the effort required to automate the segmentation process. On the other hand, if the task is a one-off (as in this case), it might indeed be easier, faster, and potentially more accurate to do things manually. For that, the >createMask method of our imroi tools facilitates the process.
Creating the code snippet above took a bit of effort. Recreating it with impoly took a few minutes:
h = impoly(imgca,'closed',false);
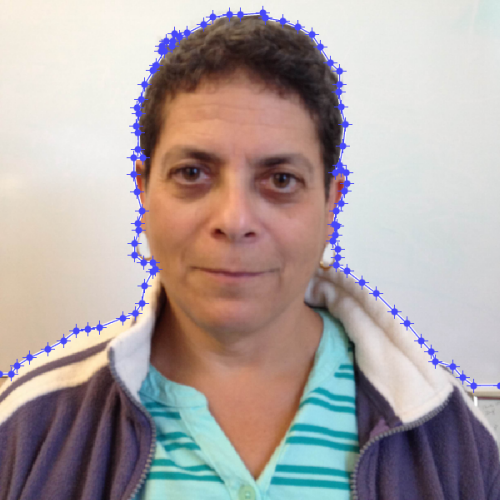
I much prefer working with impoly to working with imfreehand, because the former is much easier to adjust after the fact. With imfreehand, I find myself tracing borders many times, trying to get it right. But with impoly, I can click along, and then adjust individual vertices. I can even delete or add vertices (by pressing the "A" key) as needed to follow difficult contours.
I also prefer working with open imroi regions for a couple reasons. First, the masks created by imroi.createMask are automatically closed by default anyway:

Improving the mask
Hmmm. That doesn't quite get me the mask I want need. I'm going to modify the impoly object by constraining it to the image region:
fcn = makeConstrainToRectFcn('impoly',get(imgca,'XLim'),get(imgca,'YLim'));
setPositionConstraintFcn(h,fcn);
Then I'm going to add a couple of vertices, and bring them down to the bottom corners:
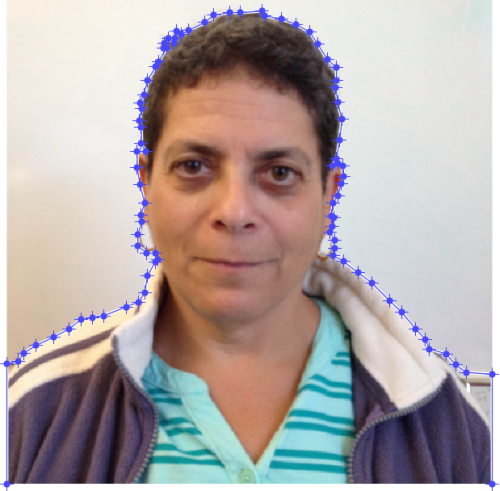
Now the mask looks more appropriate for my task:

(I added the red border just to clarify how the mask changed.)
Modifying the background
Now, of course, setting the background to white is relatively easy in MATLAB. For a grayscale image, we can just use the mask directly:
gray = rgb2gray(img);
gray(~mask) = 255;
imshow(gray)
%(The image is of class uint8; 255 is the value of "white" for uint8 images.)
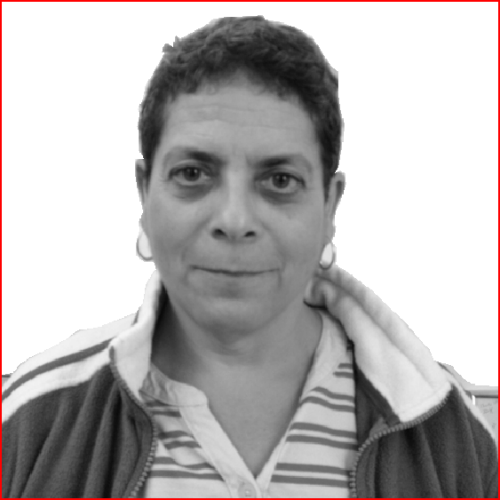
Two problems remain...
First, Loren's image isn't grayscale. We'll need to apply that masking function planewise. Second, even for carefully drawn impoly regions, the interface between the region we want to keep (i.e., Loren) and the background is pretty blocky, and not very satisfying:
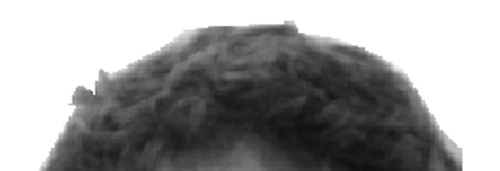
(Okay, maybe it's good enough for a 2"x2" visa picture. But for our purposes here, let's say we're not satisfied with that.)
Planewise manipulations
For the first problem, we can readily break the image into its planewise components, apply the mask, and then reconstruct the color image:
% Break down and mask the planes:
r = img(:,:,1);
g = img(:,:,2);
b = img(:,:,3);
r(~mask) = 255;
g(~mask) = 255;
b(~mask) = 255;
% Reconstruct the RGB image:
img = cat(3,r,g,b);
imshow(img)
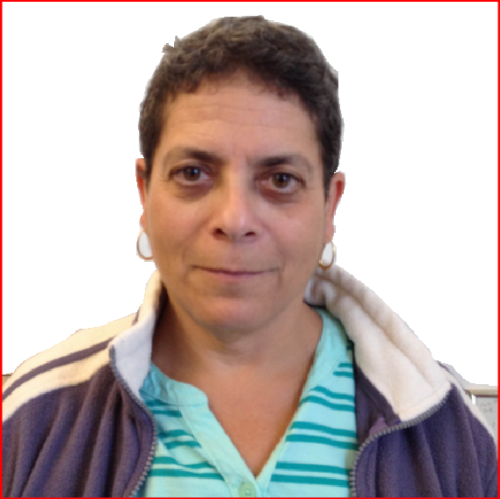
Fixing the interface
To address the second problem (the blocky interface), I'm going to recall a recent discussion I had on the Pick of the Week blog. Capturing the code I discussed in that blog post as a function, and using the same impoly I created above, I can create a custom "shell mask" of the Loren-background interface:
shellMask = createShellMask(h,'thickness',3);
imshow(shellMask);

So why would I do that? Because now I can use the excellent regionfill function of the Image Processing Toolbox to interpolate inwards using that mask:
r = regionfill(r,shellMask);
g = regionfill(g,shellMask);
b = regionfill(b,shellMask);
img = cat(3,r,g,b);
imshow(img)
Et voila! We have successfully "softened" the interface and created a more natural-looking photograph:

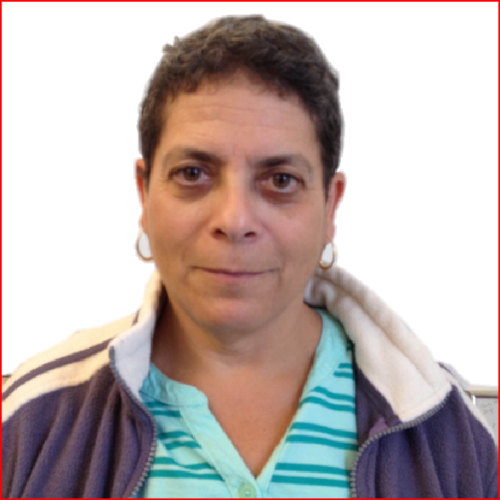
A final note
I am interested in hearing whether createShellMask is useful for others, and whether I should share it on the File Exchange. Also, the approach I took to the planewise analyses above (masking, and regionfill) is fairly generic, and easily converted into a function:
imgout = planewise(fcnhandle,rgbimg,varargin)
If that looks useful to you, let me know and I'll post that as well! Let me know here.
Happy MATLABbing!
- 类别:
- Image Processing




评论
要发表评论,请点击 此处 登录到您的 MathWorks 帐户或创建一个新帐户。