
Decomposing Embedded Images
Today I’d like to introduce a guest blogger, Jiro, who is an application engineer here at The MathWorks. Some of you may know him as one of the bloggers for the File Exchange Pick of the Week.
Contents
I recently presented to a group of freshman engineering students at Virginia Commonwealth University. I wanted to show something that was fun, eye-catching, and relatively easy to explain. So I created this image-related demo. I am not an expert in image processing, but I certainly had a lot of fun working on this example. For anyone interested in hardcore image processing, I would suggest also taking a look at Steve's Image Processing blog.
This example demonstrates how to embed an image into another image and how to decompose the images. The embedded image is created by storing two 8-bit RGB image as 16-bit RGB image. The primary image is stored in the most significant byte, while the secondary image is stored in the least significant byte. (See the section titled "Embed Function & Decode Function" of this post for the code). With this method, the secondary image can be concealed inside the primary image, without any loss of information.
This post focuses on the decomposition part of the demo.
This demo uses functions from the Image Processing Toolbox.
Setup
curImshowBorder = iptgetpref('ImshowBorder');
iptsetpref('ImshowBorder', 'tight');
Show Images
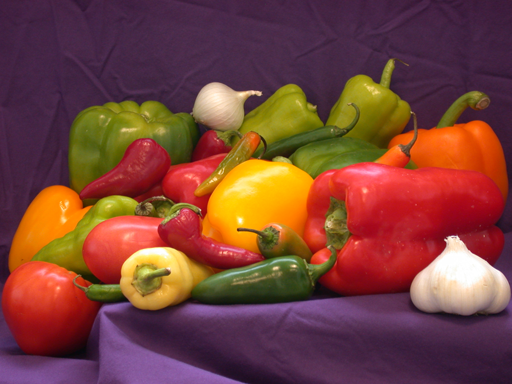
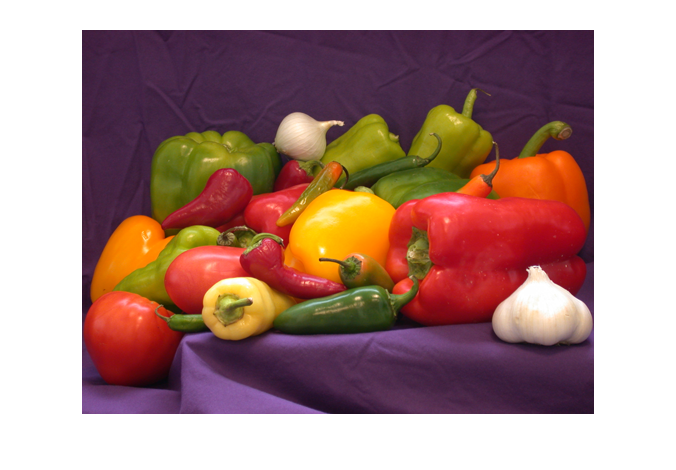
Here are two images that look the same. But are they??
- peppers_BlueHills.png

- peppers_trees.png

Would you believe me if I say these were very different images? Perhaps you'll believe MATLAB:
isequal(imread('peppers_BlueHills.png'), imread('peppers_trees.png'))
ans =
     0
In fact, they have completely different images embedded in them. You just can't tell with the naked eye.
Image Decomposition
Let's try to decompose the image and see what's hidden inside.
These are 16-bit RGB images. See the "Embed Function & Decode Function" section of this report to see the function that I used for creating these images.
imData = imread('peppers_BlueHills.png');
whos imData
  Name          Size                 Bytes  Class     Attributes

  imData      384x512x3            1179648  uint16
The image contains two 8-bit images. The primary image is stored in the most significant byte and the secondary image is stored in the least significant byte.
Convert RGB 3-D Array to a Vector
We'll be using TYPECAST to convert the data type, and the function requires a vector.
pixelVals = imData(:);
pixelVals(1:10)
ans =
  16097
  16352
  16862
  16348
  16346
  16344
  16087
  16854
  16082
  15822
Convert UINT16 to UINT8
Next, convert the data type from UINT16 to UINT8. In doing so, we'll use TYPECAST (instead of CAST) to preserve the data.
pixelValsConv = typecast(pixelVals, 'uint8');
whos pixelVals*
  Name                     Size              Bytes  Class     Attributes

  pixelVals           589824x1             1179648  uint16
  pixelValsConv      1179648x1             1179648  uint8
Notice that pixelValsConv has twice as many elements. This is because there are two 8-bit values to a 16-bit value.
Separate Two Images
We'll reshape them to separate out the least and the most significant bytes.
pixelValsConv = reshape(pixelValsConv, 2, [])';
pixelValsConv(1:10, :)
ans =
  225   62
  224   63
  222   65
  220   63
  218   63
  216   63
  215   62
  214   65
  210   62
  206   61
On a system with "little-endian" architecture, the first column is the least significant byte and the second column is the most significant column.
(first pixel) 62*256 + 225 = 16097
On a "big-endian" architecture system, the order is switched.
[cmp,maxsize,endian] = computer

if strcmp(endian, 'L')
  imOrder = [2 1];
else
  imOrder = [1 2];
end
cmp =
PCWIN
maxsize =
  2.1475e+009
endian =
L
We'll take each column and reshape them as the primary and secondary images.
imDataPrimary   = reshape(pixelValsConv(:, imOrder(1)), size(imData));
imDataSecondary = reshape(pixelValsConv(:, imOrder(2)), size(imData));
We can see that we end up with two images, both of which are now UINT8 images.
whos imData*Name Size Bytes Class Attributes imData 384x512x3 1179648 uint16 imData2Primary 384x512x3 589824 uint8 imData2Secondary 384x512x3 589824 uint8 imDataPrimary 384x512x3 589824 uint8 imDataSecondary 384x512x3 589824 uint8
Show Primary and Secondary Images
figure;imshow(imDataPrimary);
figure;imshow(imDataSecondary);

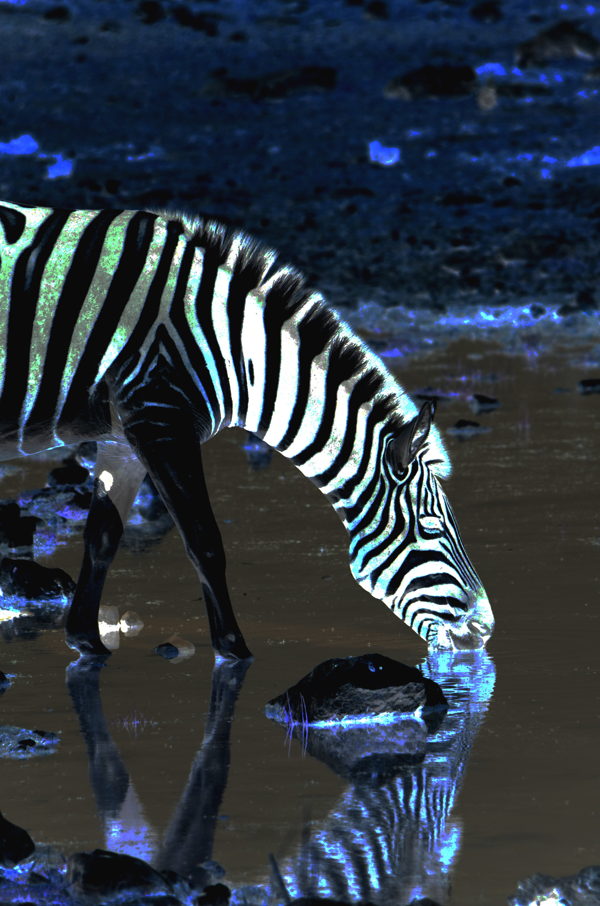
Decomposing the Second Image
We'll do the same thing for the second image we read in. Let's see what's embedded in that one. We'll use decodeImage.m which is a function with the above algorithm.
[imData2Primary, imData2Secondary] = decodeImage('peppers_trees.png');
figure; imshow(imData2Primary);
figure; imshow(imData2Secondary);

How It Works
So, how does this work? Why is the secondary image unrecognizable by the naked eye? That's because the secondary image is stored in the least significant byte.
To understand this, let's take a look at a single row of pixels in one of the RGB planes. We'll look at row 150 of the red plane.
pixelRow16 = imData(150, :, 1); % row 150, red planeWe covert this vector to UINT8 using TYPECAST:
pixelRow8 = typecast(pixelRow16, 'uint8');
pixelRow8 = reshape(pixelRow8, 2, []);
pixelRow8(:, 1:10)
ans = 64 60 61 61 57 60 61 61 61 61 67 70 71 70 70 72 74 69 63 63
On a little-endian architecture system, the first row is the secondary image, and the second row is the primary image. Next, we'll create a UINT16 vector with only the primary image.
% set the secondary image vector to ZERO
pixelRow8Main  = [zeros(1, size(pixelRow8, 2), 'uint8'); pixelRow8(2, :)];
pixelRow16Main = typecast(pixelRow8Main(:)', 'uint16');
Now, let's compare the values of the total image vector with those of the primary image vector.
figure;
ax1 = axes;hold on;
plot(pixelRow16);
plot(pixelRow16Main, 'r');
xlabel('Pixel Count'); ylabel('Pixel Value (UINT16)');
legend('Total Image', 'Primary Image', 'Location', 'NorthWest');
rectX = 160; rectY = 15000; rectW = 30; rectH = 3500;
rectangle('Position', [rectX, rectY, rectW, rectH]);
dar = get(ax1, 'DataAspectRatio'); dar = dar(2)/dar(1);
w = .3; h = w*(rectH/rectW)/dar;
ax2 = axes(...
  'Units', 'Normalized', ...
  'Position', [.6 .2 w h], ...
  'Box', 'on', ...
  'LineWidth', 2, ...
  'XTick', [], ...
  'Ytick', [], ...
  'Color', [.95 .95 .95]);hold on;
xlabel('Magnified Region');
plot(pixelRow16);
plot(pixelRow16Main, 'r');
xlim([rectX, rectX+rectW]);
ylim([rectY, rectY+rectH]);
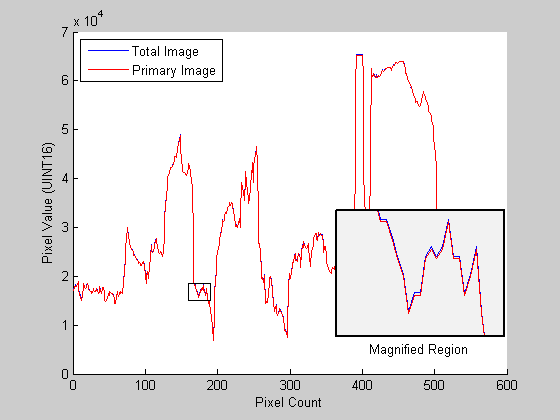
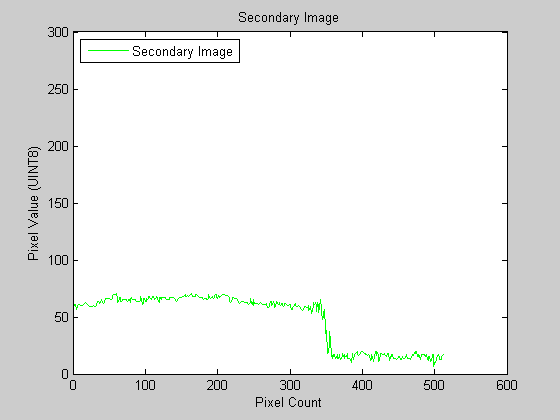
As this figure shows, the primary image represents the majority of the information. The information for the secondary image is much smaller relative to the primary image. But if we look at the data for the secondary image by itself, you see that we have the full 8-bit information.
figure;
plot(pixelRow8(1, :), 'g'); ylim([0 300]);
legend('Secondary Image', 'Location', 'NorthWest');
title('Secondary Image');
xlabel('Pixel Count'); ylabel('Pixel Value (UINT8)');
The following animations show how the secondary image data becomes more apparent as we subtract out the primary image data. Animations created using ANYMATE.
- 2-D Animation

- 3-D Animation

Embed Function & Decode Function
These are the actual functions for creating and decoding embedded images.
help embedImage EMBEDIMAGE Embed an image into another image
EMBEDIMAGE(PRIMARYIMAGE, IMAGETOEMBED) embeds the image file
IMAGETOEMBED into the image file PRIMARYIMAGE. Both PRIMARYIMAGE and
IMAGETOEMBED must be valid file names.
The image files must be 8-bit images. The output image file will be a
16-bit PNG image, named PRIMARYIMAGE_IMAGETOEMBED.png. The primary
image data will be stored in the most significant byte and the
embedded image data will be stored in the least significant byte.
Example:
embedImage('trees.tif', 'football.jpg');
See also DECODEIMAGE.
Jiro Doke
Jan 24, 2009.
help decodeImage DECODEIMAGE Decode embedded image.
DECODEIMAGE(IMAGEFILE) decodes embedded image file IMAGEFILE.
IMAGEFILE must be a valid file name. It will display a figure with 3
axes. The top axis is the original image. The bottom left is the
primary image, and the bottom right is the embedded hidden image.
[PRIMARY, HIDDEN] = DECODEIMAGE(IMAGEFILE) returns the primary image
and the hidden image data as RGB data.
This function only works on images created by embedImage.m.
Example:
% create embedded image
embedImage('trees.tif', 'football.jpg');
decodeImage('trees_football.png');
See also EMBEDIMAGE.
Jiro Doke
Jan 24, 2009.
Cleanup
iptsetpref('ImshowBorder', curImshowBorder);Comments?
I hope you liked this example. Images make nice examples because they are visual. Let me know if you have other fun, pedagogical examples that involve graphics. Put them on the File Exchange, and I'll be sure to take a look at it as a potential Pick of the Week!
- Category:
- Image Processing


Comments
To leave a comment, please click here to sign in to your MathWorks Account or create a new one.