Design Oriented Trebuchet Model with SimMechanics
We've all been there: wanting the glory of owning a trebuchet but unable to fulfill our dream due to a lack of time, budget, and firing range access. Well James has given us the next best thing with a virtual trebuchet. Configure the parts, run the simulation, and watch your projectile fly.
The model is constructed of about 270 Simulink blocks.
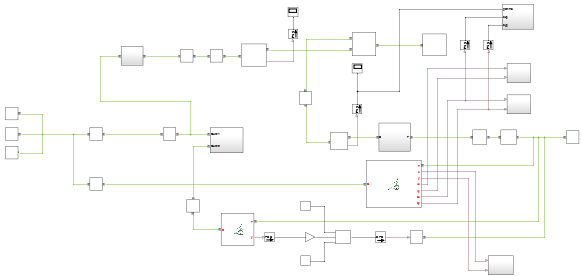
The "meat" of the model is in 46 blocks from the Physical Modeling tool SimMechanics. We can observe the blocks for the counterweight, sling, and projectile if we zoom in on a portion of the model.
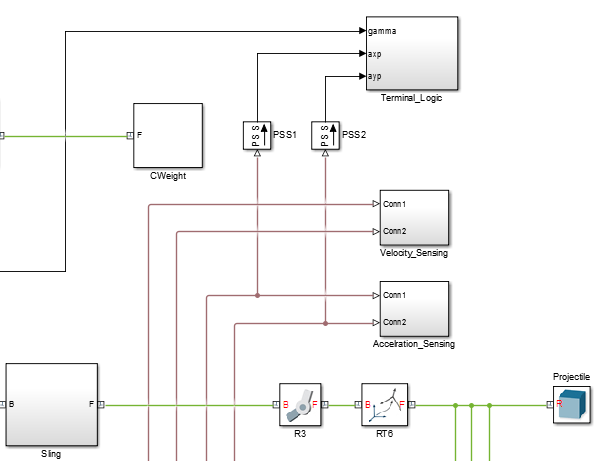
Some of these blocks specify the properties of the component. Double-clicking on the projectile reveals that James opted for a 0.624 inch radius sphere with a density of 3000 kilograms per cubic meter (about the density of aluminum). Other blocks specify the physical relationship between components, like the R3 revolute joint that defines a degree of freedom between the sling and projectile.
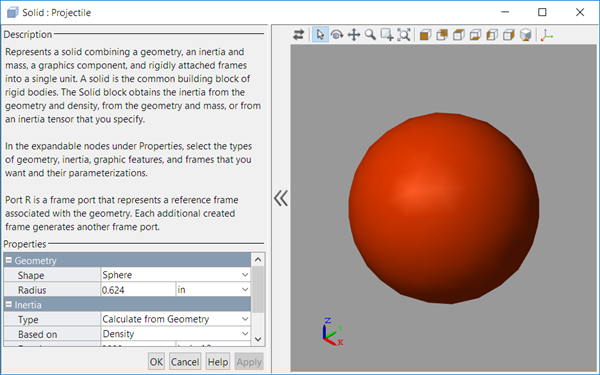
If we change the properties of these blocks, we will get a different result when we run the simulation. But rather than hunting and pecking for properties of interest, James has provided a user interface for commonly adjusted properties.
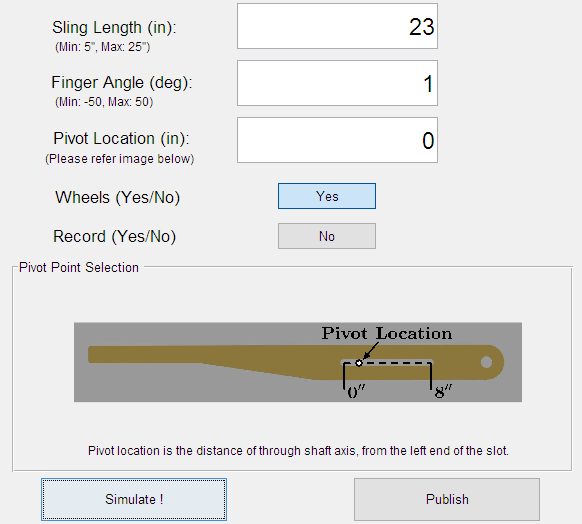
With this configuration, I was able to throw my projectile 123 feet. Can you do any better? One setting that helped was the addition of wheels. In an equation-based simulation, a lengthy derivation could potentially be required every time we altered the mechanical configuration like this. But with SimMechanics, you aren't burdened with deriving equations. All you have to do is add new blocks, specify their properties, and get right back to simulating.
So how does James get from the SimMechanics diagram to the animation at the top of the blog? He's tapping into SimMechanics' animation feature to pull it off. Getting animation of a sphere or cylinder is straightforward, but his counterweight, uprights, arms, and base all have unusual, custom geometries. He's able to incorporate the geometries into the animation thanks to STL files. He must have designed these pieces in a CAD tool and imported them into SimMechanics.
All in all, this is a very well assembled File Exchange contribution. Kudos to James on a job well done!
Comments
Let us know what you think here or leave a comment for James.
 Cleve’s Corner: Cleve Moler on Mathematics and Computing
 The MATLAB Blog
 Guy on Simulink
 MATLAB Community
 Artificial Intelligence
 Developer Zone
 Stuart’s MATLAB Videos
 Behind the Headlines
 File Exchange Pick of the Week
 Hans on IoT
 Student Lounge
 MATLAB ユーザーコミュニティー
 Startups, Accelerators, & Entrepreneurs
 Autonomous Systems
 Quantitative Finance
 MATLAB Graphics and App Building




댓글
댓글을 남기려면 링크 를 클릭하여 MathWorks 계정에 로그인하거나 계정을 새로 만드십시오.