Three-Way Model Merge and Git
In R2016a, a new Three-Way Model Merge functionality got introduced. You can find a clear description of this feature in the following documentation pages:
In those documentation pages, the workflow always begins with right-click on the conflicted model file and select View Conflicts.

In this blog post, I will try to provide a bit of additional information to complement the workflow described in the above links.
Creating a Conflict
I created a simple project under Git source control. I could have used GitHub, but I decided to use a Git server we have at MathWorks. At the Git command-line, I cloned two identical repositories:


In the first repository, I make some modifications to the model. I go in the Modified Files view of the Simulink Project, commit the modified files and push the changes to the remote repository

I close the first project, navigate to the second repository, open the Simulink Project there, and modify the model in a different way.
Resolving the Conflict
Before trying to commit and push changes as done in the first repository, it is always a good idea to click the Fetch button to get the latest from the remote repository. Once this is done, you can see if the remote master branch has new submissions. If it does, you want to merge with it before pushing your changes.

Because of the conflict, you will receive this error:

If you go back to Simulink Project, the conflicting files will look like:

Right click on the file and select View Conflicts to launch the Three-Way Model Merge tool. You will then be able to see:
- The original model
- The latest model in repository 1
- The latest model in repository 2
- A target model automatically generated by Simulink, attempting to do its best guess at merging the three previous models.
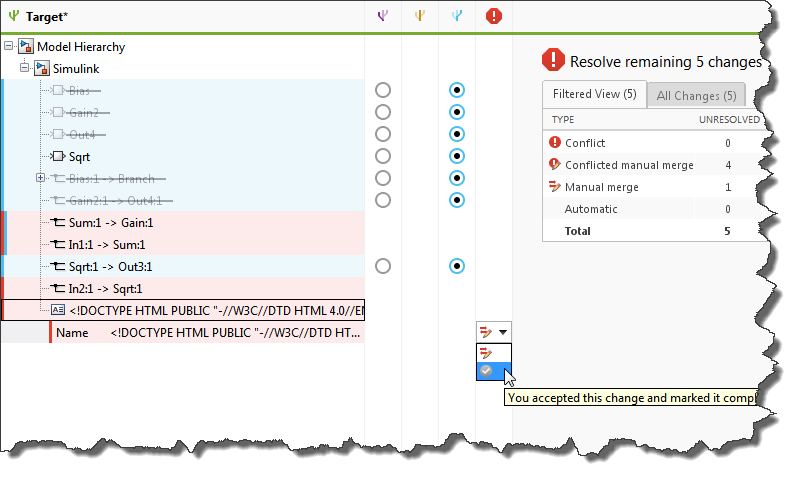
In the bottom left section of the Three -Way Model Merge, for each block and signal, you can select which version you want to be merged in the target model. For conflicts that cannot be automatically merged, you can manually fix them in the target model and individually mark them as resolved.
Since the versions from repository 1, repository 2 and the target model can all be opened at the same time, this makes the manual resolution of conflicts quite easy.

Once you are satisfied with the target model, click the Accept & Close button:

You will then be able to Commit the modified files and push the changes to the repository. If you click the Manage Branches button, you should see how the project got branched and merged back.

One more tip...
In most cases, this kind of merging challenges happen within the context of a project under source control. However if you just want to launch the tool without any project or source control involved, you can use the following syntax:
slxmlcomp.slMerge(baseFile, mineFile, theirsFile, targetFile);
where the 4 inputs are four model files.
Now it's your turn
How do you manage branching? Give a try at the Three-Way Model Merge and let us know what you think by leaving a comment here.


评论
要发表评论,请点击 此处 登录到您的 MathWorks 帐户或创建一个新帐户。