
Unifying MATLAB and Simulink: A User Story Part 5
This week, I am introducing a set of two examples implemented using the workflow described in this blog post series.
- Unifying MATLAB and Simulink: A User Story Part 1: Parameterizing a model with MATLAB objects
- Unifying MATLAB and Simulink: A User Story Part 2: The slPart class, block template and data variants
- Unifying MATLAB and Simulink: A User Story Part 3 :Controlling variants with MATLAB objects
- Unifying MATLAB and Simulink: A User Story Part 4: Post-processing and visualizing logged data
- Unifying MATLAB and Simulink: A User Story Part 5: Larger examples
This week's examples are larger and more complex than the examples previously introduced in this series. Hopefully, they will help better illustrate the advantages of this workflow.
Overview
Once you download and unzip the File Exchange submission, you will find the following:
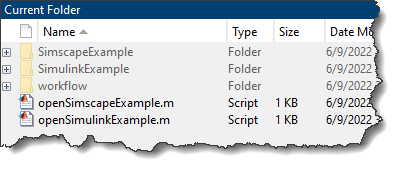
workflow Project
This folder contains a Project made of the core workflow files, including the slPart class and the template library described in previous posts. It also contains an App Designer app I developed to manipulate the object configuring the model. This project is used as a referenced project by the two projects described in the next two sections.
openSimulinkExample.m
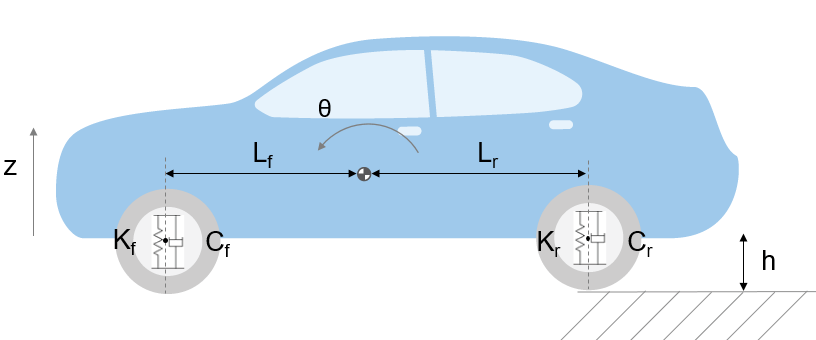
This script opens the example located in the SimulinkExample folder. As its name implies, this example is implemented using only Simulink (no additional toolboxes). For this example, I combined features from the examples Automotive Suspension and model sldemo_suspn_3dof, which is used in multiple examples, such as Multiple Simulations Workflow Tips.
This example simulates the dynamics of a vehicle suspension and can be configured to simulate multiple types of suspensions with different degrees of freedom. Here is a diagram for the two degrees of freedom longitudinal configuration:
openSimscapeExample.m
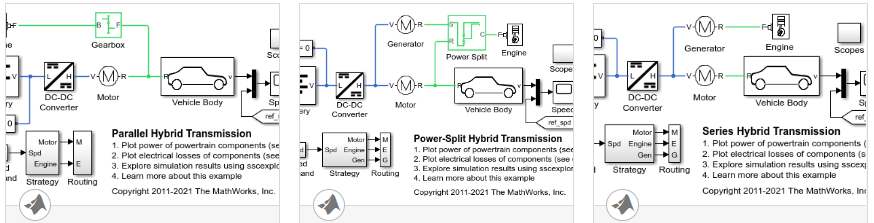
This script opens the example stored in the folder SimscapeExample. I implemented this example by combining three examples from Simscape Driveline:
This example allows you to simulate the acceleration of a vehicle with different types of hybrid drivetrains.
I decided to include this example for a couple of reasons. First, I find that this workflow fits particularly well with Simscape physical components. Second, this illustrates that the same workflow core functionalities, the slPart class and the system configurator app, work for different projects.
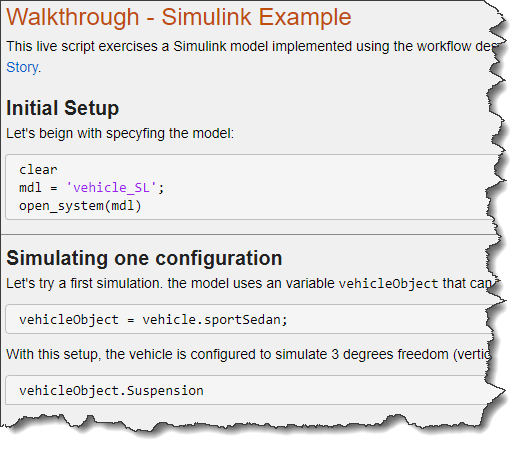
Each project contains a live script (walkthroughSL.mlx or walkthrough_SSC.mlx) to guide you through the steps of how to use the model.
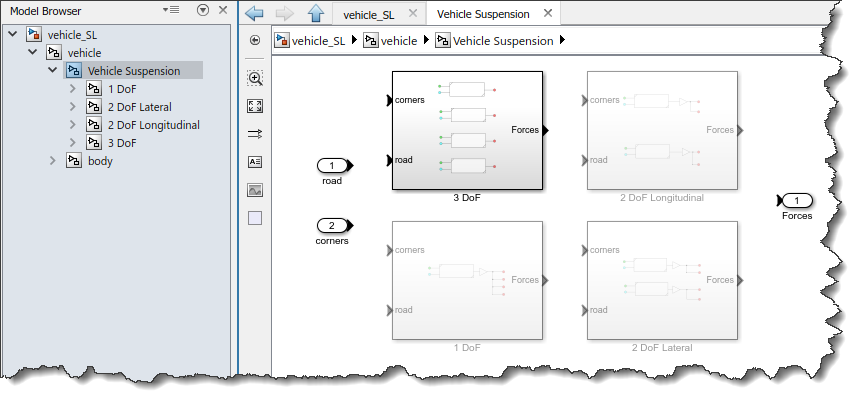
Model and Data Hierarchy
One of the main takeaways from this example is that each slPart is made of a Simulink Subsystem and a MATLAB class. When assembled in a simulation, this results in a hierarchy of MATLAB classes corresponding to the hierarchy of Subsystems in the model.
When you open the main model in the project, you will see that it contains one Subsystem that takes as parameter an object named vehicleObject
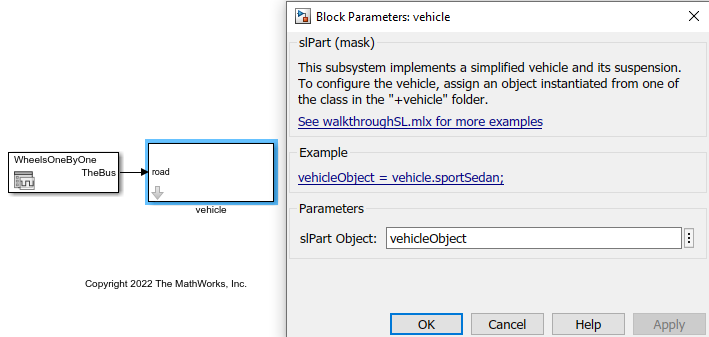
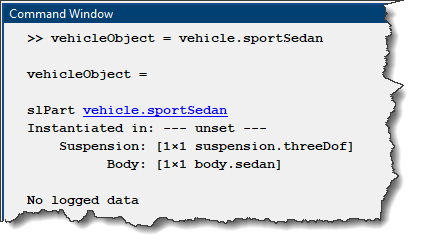
In MATLAB, define this variable by instantiating one of the classes in the +vehicle package:
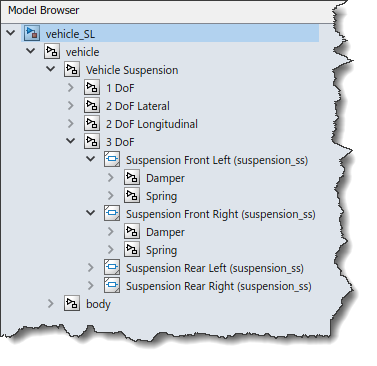
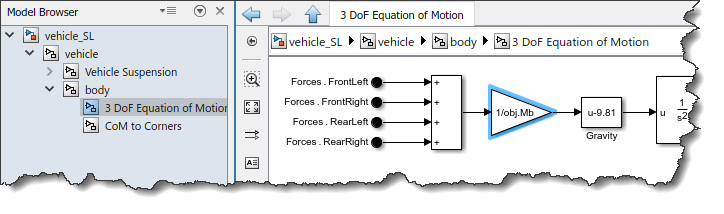
Here is what the hierarchy of Subsystems looks like in the model:
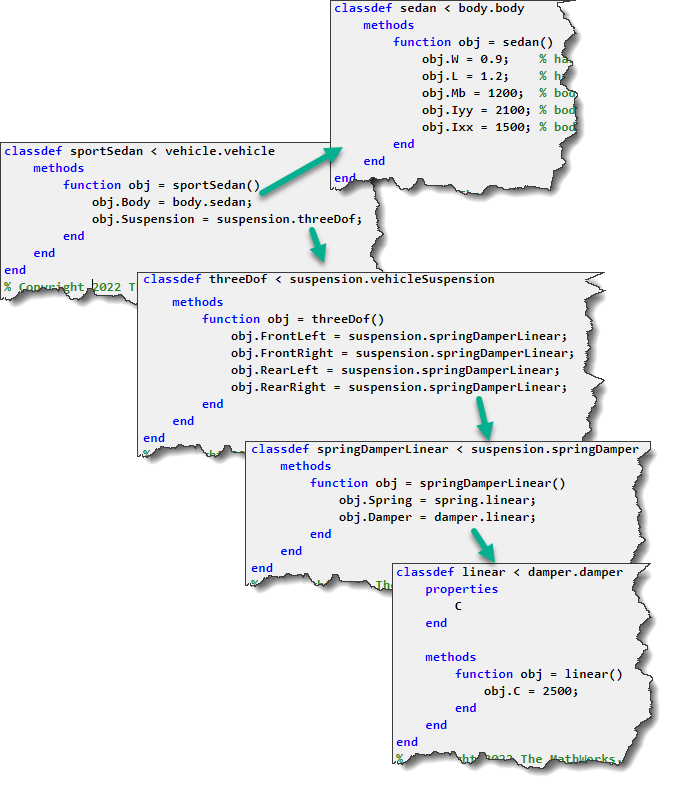
and the corresponding hierarchy of MATLAB classes:
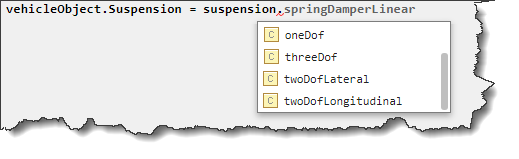
In the model, you can find Variant Subsystems:
In MATLAB, tab-completion lists the same available variants, and you can choose the active one by assigning it to the corresponding property of the parent object:
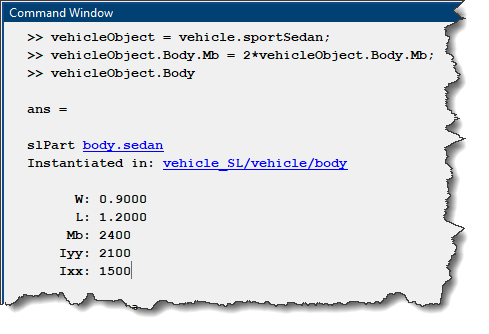
You can also tweak parameter values. For example, the mass of the vehicle in Simulink
can be modified in MATLAB through the vehicle object:
See the walkthrough.mlx live script in each project for more example MATLAB code interacting with the model through the vehicleObject variable.
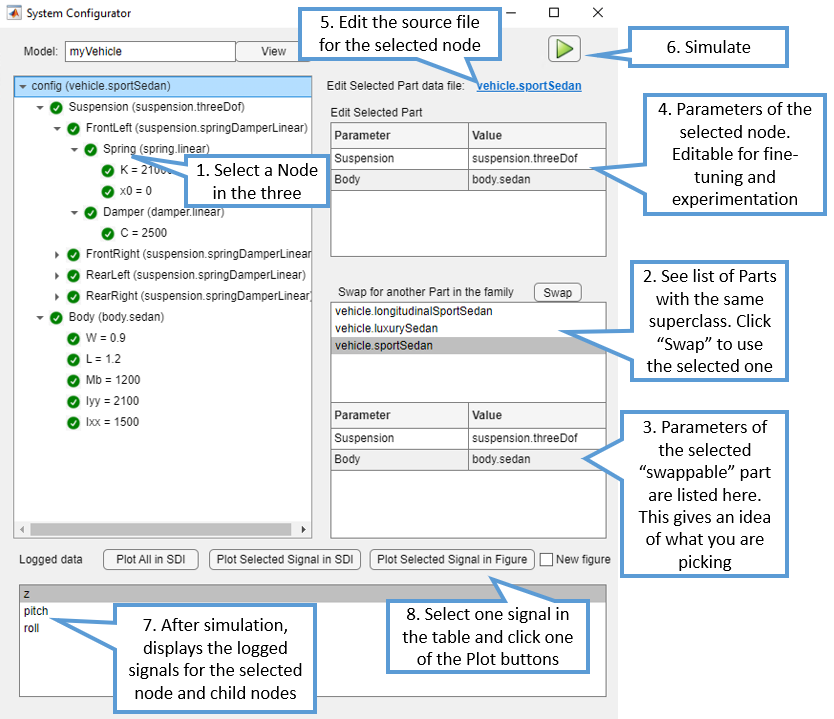
Configuring the Simulation Using the MATLAB App
For convenience, I also included in the project a MATLAB app that I created using App Designer. The app allows you to configure the MATLAB object representing the system. This app allows you to select one slPart in the hierarchy, and edit its properties or swap with another slPart of the same family. Note that the vehicleObject variable in the MATLAB workspace will be updated by the app.
To get started with app, I am giving you two options, depending on your preferences:
- Dowload and watch this 5 minutes video where I walk you through how the app works
- Use the following image as a "cheat sheet" to get started:
Now it's your turn
Download the example from MATLAB File Exchange, or clone the repository on GitHub and let us know what you think in the comments below. If you like the workflow, let us know in the comments below what kind of enhancements or new features you think MathWorks should provide to make this workflow simpler and more robust.


コメント
コメントを残すには、ここ をクリックして MathWorks アカウントにサインインするか新しい MathWorks アカウントを作成します。