Guy and Seth on Simulink

February 21st, 2012

Sous-Vide Cooking with Simulink Part 1

This week I am sharing the first part of a story about what I do with Simulink during weekends!

Introduction

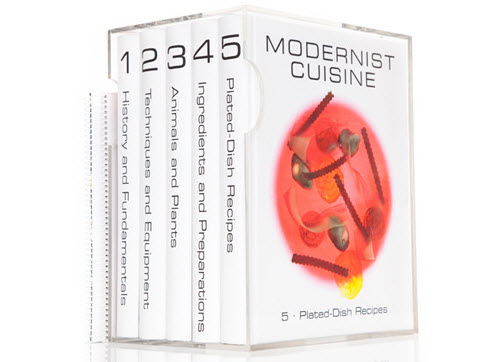
Last Christmas, I received the book Modernist Cuisine - The Art of Science of Cooking.

Modernist Cuisine

Throughout the book, the author Nathan Myhrvold puts a lot of emphasis on a cooking technique called sous-vide.

In you are not familiar, sous-vide is a method of cooking food sealed in airtight plastic bags in a water bath for a long time at an accurately determined temperature much lower than normally used for cooking. This results in tender and juicier meats.

I have to try...

The Research

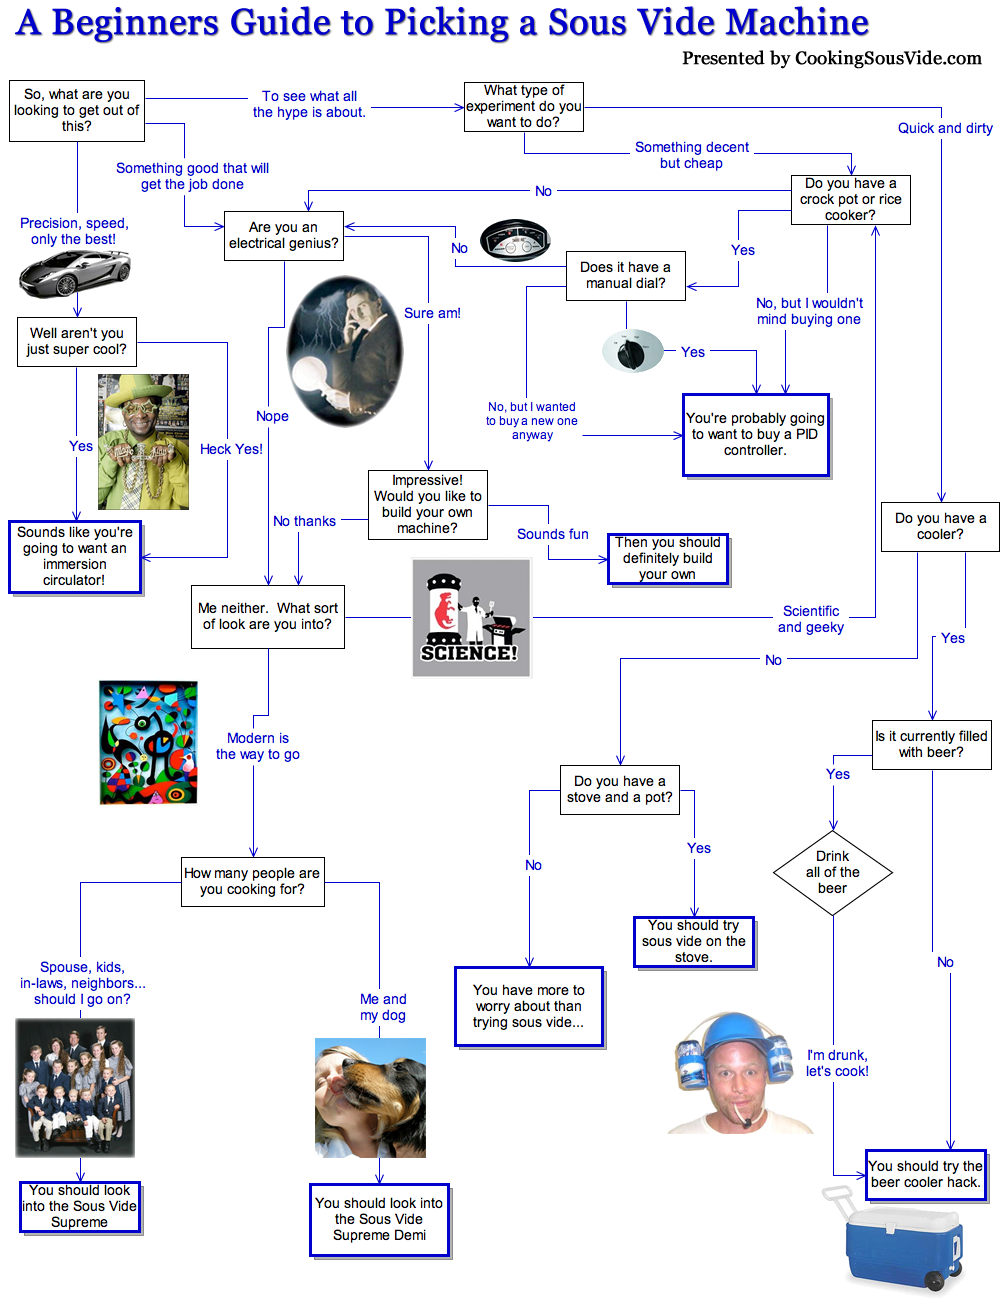
I did some research to figure out how I could try this at home and found this amazing flowchart about how to choose a Sous Vide Machine. Give a look, and post a comment below if you are also an electrical genius.

After studying all my options, I decided that, even if I could afford a nice expensive machine like the SousVide Supreme, I am going to build my own... and this will involve Simulink.

The Plan

So I began thinking about the details.

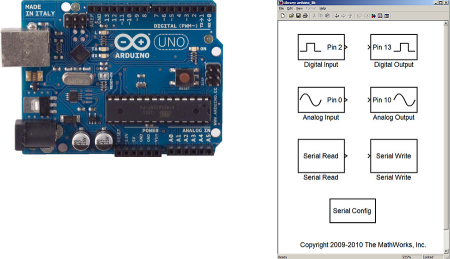
To keep my water bath at a fixed temperature, I will use a cheap, easy to use, micro-controller called an Arduino Board. I have never used one before, but I found the Simulink Support for Arduino Boards under Hardware for Project-Based Learning in the Academia page.

Arduino board and the Simulink support package library

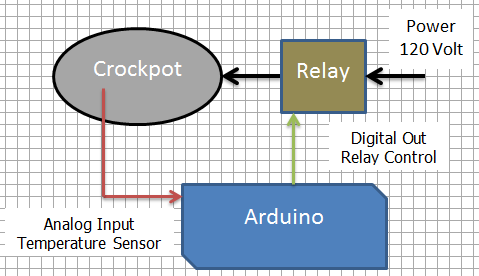
To measure the temperature of the water bath, I will use a cheap temperature sensor chip, (like the LM35), solder a cable to it and isolate the extremity with silicone so I can drop it in the water bath.

Now... the water bath. For this part I hesitated a bit. After some reflection, I decided that will use a crockpot I already own and will switch it On and Off using a relay. If found on the web a device called PowerSwitch Tail that will be perfect for that.

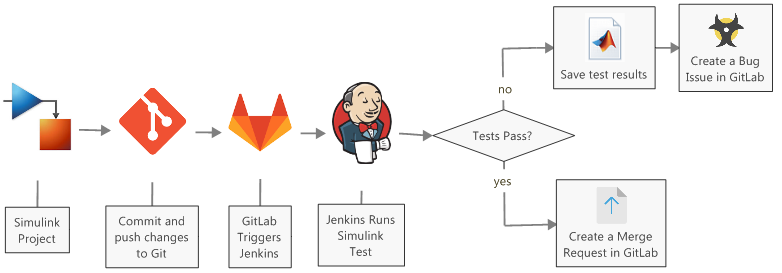
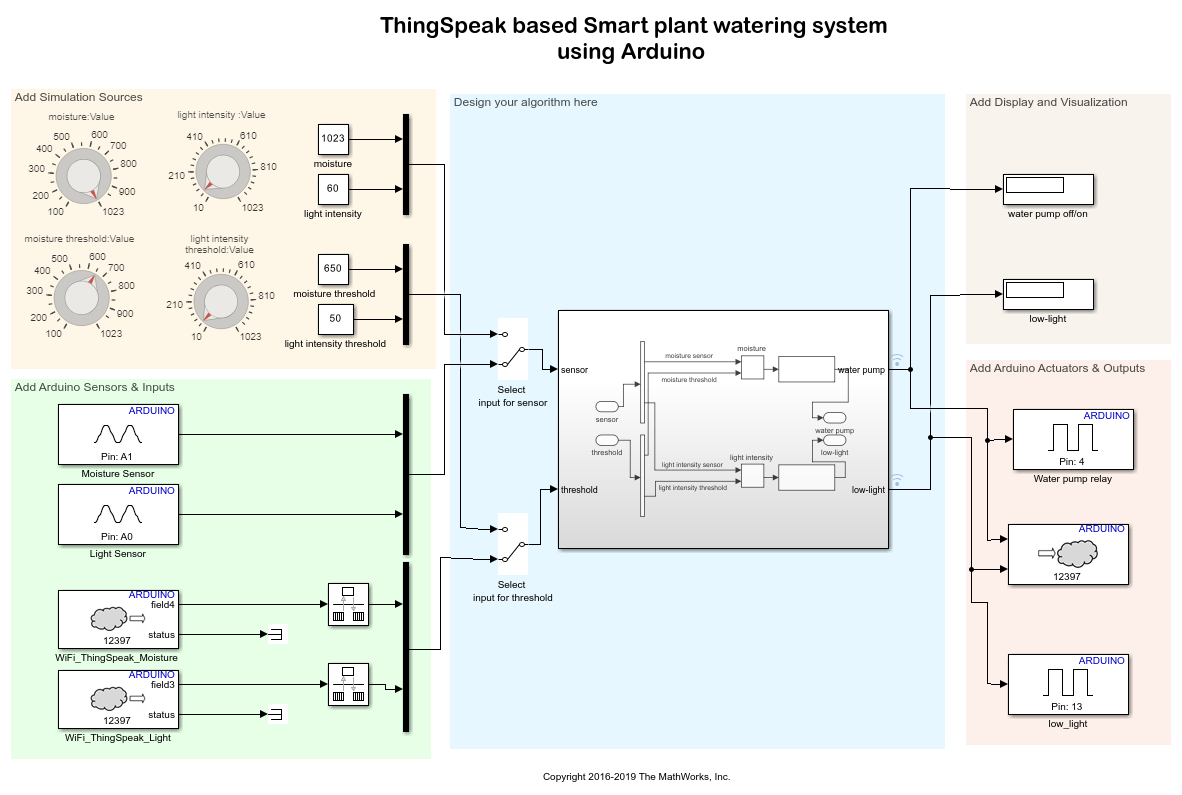
The following schematics gives an overview of my project:

Schematic of my sous-vide setup

What's Next?

I ordered all the stuff needed online and now I am waiting. If everything goes fine, next week I will follow up with the implementation and testing of my Simulink sous-side cooking system.

I can't wait to try the 24 hours pork ribs!

Update: Click here to see part 2

Now it's your turn

Please share any tips and suggestions to help with my sous-vide system. Leave a comment here.

7 Responses to “Sous-Vide Cooking with Simulink Part 1”

  1. KE replied on :

    try
    sim(‘sous_vide.mdl’)
    catch
    botullism
    end

  2. KE replied on :

    …just kidding, have fun and I hope the ribs are great.

  3. Robert replied on :

    For best results you might need use something other than convection to distribute the heat. Best of luck.

  4. martin replied on :

    Heat transmission mechanisms are convection, conduction and radiation. My understanding is that convection is the best way to transport heat.

    http://en.wikipedia.org/wiki/Convective_heat_transfer

    Am I not understanding something?

  5. Robert replied on :

    Martin, you are correct that convection is the best way to transfer heat from one medium to another (i.e. liquid/solid). I was suggesting that he might need to use a mechanical device such as a motor/propeller to create more motion in the water than you get from pure convection due to density differences that arise from the temperature gradient to get a more even distribution of the heat. I believe that the more expensive sous-vide machines have this feature and can keep the temperature difference between the low and high temperature of the water down to 0.1 degrees. However, it seems that he got pretty good results as is.

  6. Guy Rouleau replied on :

    @Robert, Thanks for the clarification. From what I have seen, you are correct when saying that most expensive devices have some circulation system. This could definitely help keeping a more even temperature. I’ll keep that in mind if some day I decide to go for a version 2!

  7. yang jun replied on :

    Dear Sir:
    I am interested what you are doing.I am a teacher in China , I teach mcu class, I using MSC 51(very old mcu) in calss.
    I want to using model driven method in class, so can you give me some advice on using simulink in class ? How the Arduino Board package is designed?
    In model driven method, by my understanding, one should only try to model the process, the hardware detail is behand programer. But in MCU, if I want to using some hardware related function, for example, using interrupt, how I model it? or change the code by hand?
    Do you have some detailed example in using mcu (only mcu,not periphera)? using some typical function(timer, external interrupt). How the generated code is getted?

Leave a Reply

Wrap code fragments inside <pre> tags, like this:

<pre class="code">
a = magic(3);
sum(a)
</pre>

If you have a "<" character in your code, either follow it with a space or replace it with "&lt;" (including the semicolon).


MathWorks
Guy Rouleau and Seth Popinchalk are Application Engineers for MathWorks. They write here about Simulink and other MathWorks tools used in Model-Based Design.

These postings are the author's and don't necessarily represent the opinions of The MathWorks.