My Introduction to Embedded Coder
This week, I want to share the example which helped me, a long time ago, to get started with Embedded Coder. For readers who never used it, I hope this example will be as useful for you as it has been for me.
The Problem
If you ask me what is the difference between Simulink Coder and Embedded Coder, I would tell you that Simulink Coder allows you to generate code from a Simulink model, and Embedded Coder allows you to configure how the code looks like.
To illustrate that, we will start with a simple hand-written program, and see how to configure a model so that the code generated from it integrates without modification.
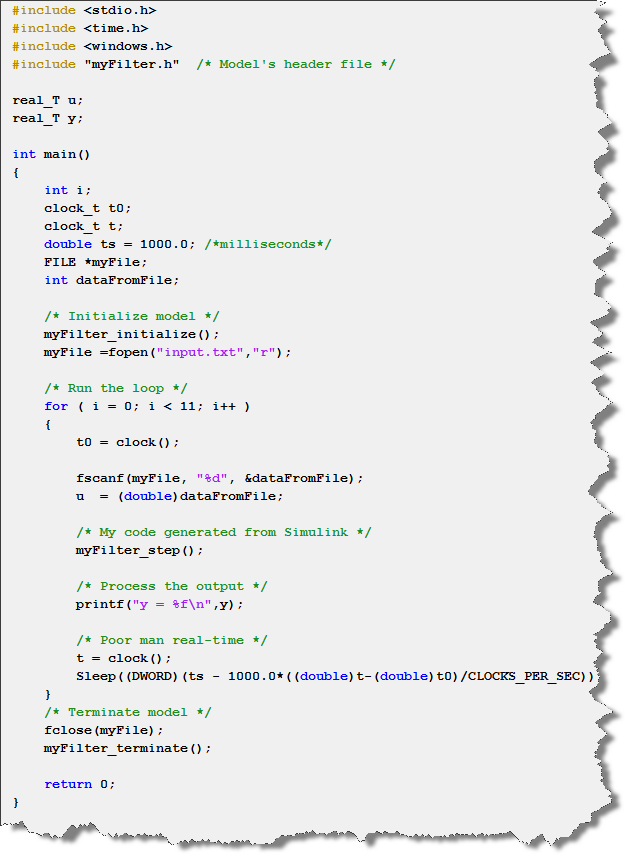
In this simple main, at every second, the program reads data from a text file and stores it in a global variable u. We want our auto-generated code to access this variable, and use it to compute value of another global variable y to be used later in the code.
Configuring the Model
For this example, let's use the following simple model:.

By default, if we generate code for this model we get something that looks like:
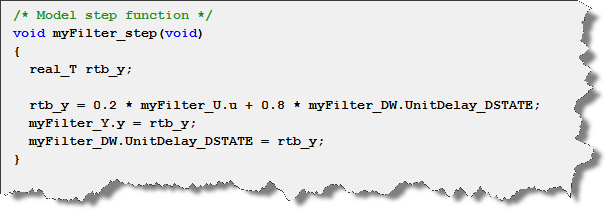
It is obvious that modifications are necessary to map the values of u and y in the hand-written code to the input and output of the generated code.
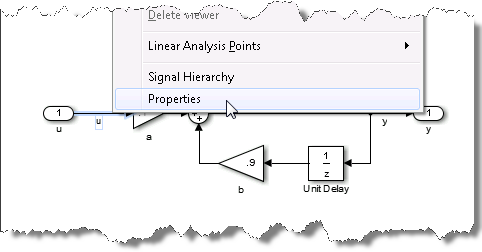
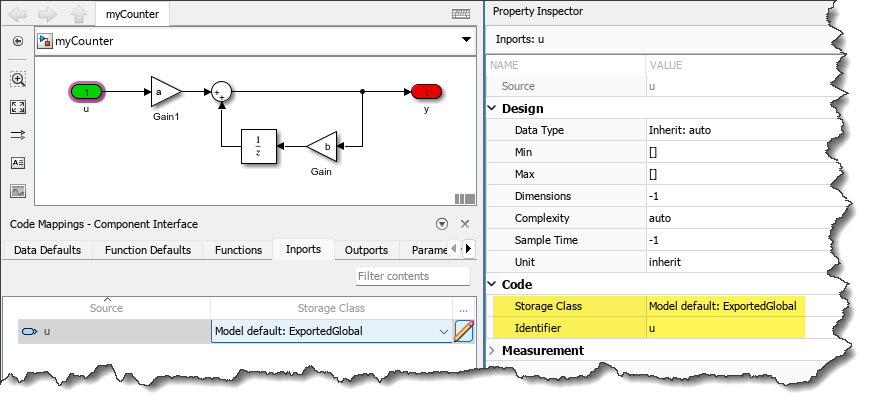
To configure the look of the code, the first step is to name the input signal u and the output y. Then we need to tell Embedded Coder that u and y are external variables, already defined outside of the generated code, in the hand-written code.
For that, right-click on the signal line and select Properties:
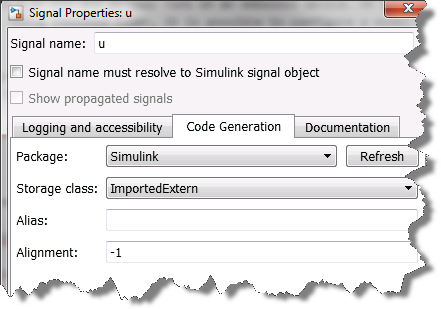
Go to the Code Generation tab, and set the storage class to ImportedExtern (Note that the storage class and a lot more could also have been specified using a data object).
Generated Code
Generate code for the model, and you should get something which looks like this:
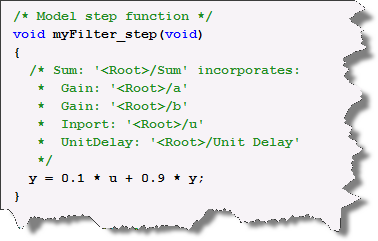
Where u and y are declared as extern:

With this modification, the generated code integrates in the hand-written application, I can build the main program without errors.
Now it's your turn
There are many of ways to customize the code generated by Embedded Coder. This example is probably the simplest one possible, but I hope this gives you a good idea of how to get started. Let us know how you got started with the coders by leaving a comment here.
- 범주:
- Code Generation




댓글
댓글을 남기려면 링크 를 클릭하여 MathWorks 계정에 로그인하거나 계정을 새로 만드십시오.