Creating Test Harnesses with Simulink Test!
In R2015a, we introduced a new product called Simulink Test. This product offers many great features like a Test Sequence block, various ways to test results of a model against validated data, and a test manager interface.
Among all the feature of Simulink Test, the one that I am the most interested in is the Test Harness. I think this will make developing and debugging models more efficient. Let's see how this works.
What is a Test Harness?
Let's say I am developing or debugging a model with multiple components. To illustrate the harness concept, we will use an example model I like: sf_electrohydraulics. This example is great because it contains multiple components of various domains: electrical, hydraulics, mechanical, etc.

Before R2015a, when a model like this one was giving me unexpected results, what I ended up doing is pasting the component I suspected to be problematic in a new empty model and feed it known inputs to see if I get the output I expect.
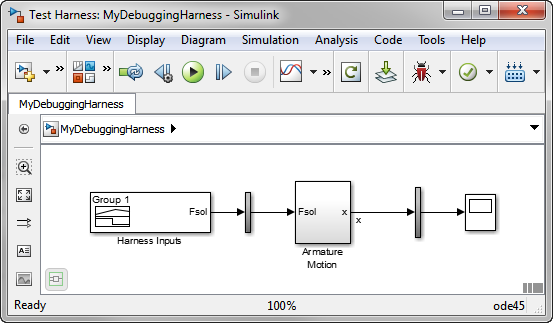
With the Simulink Test Test Harness feature, this test or debug model can now be part of the original model, making it very easy to manage (no additional files), and to switch between the large model and the test harness.
Creating a Harness
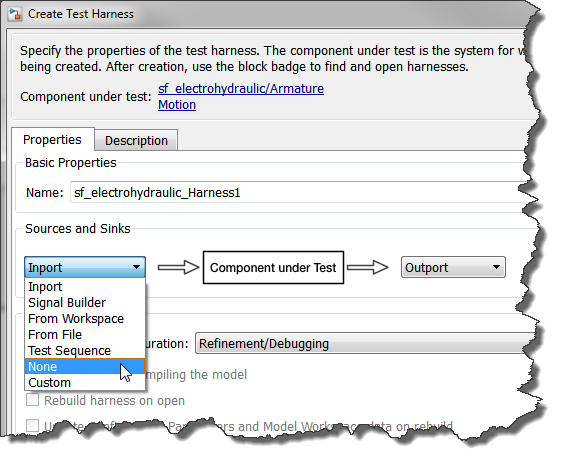
To get started, right-click on a subsystem and select Create Test Harness:

A dialog will open where you can set the properties of the harness. When the harness is created, it can be created with standard blocks like Inport, Signal Builder, From Workspace, etc.

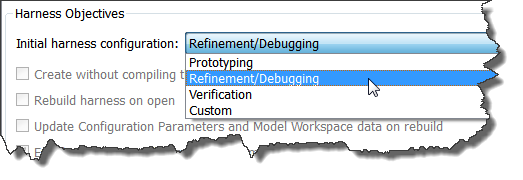
Then you select the harness objective.

What is the meaning of those objective?
- Prototyping: If your original model does not compile, that's what you need. The harness will be created without knowledge of input/output signals properties like dimensions and data type. This should allow you to debug and figure out why the original model does not update.
- Refinement/Debugging: In this case, the original model will be compiled and blocks will be inserted in the harness to ensure the input and output signals have the same properties, dimensions, data types, etc.
- Verification: In the harness, the subsystem will be marked as read-only so it can be validated, but not modified. In addition, SIL and PIL mode verification options are enabled for the component under test. The harness is also rebuilt each time it is opened so that the compiled attributes enforced in the harness are re-computed from the main model and brought up-to-date.
- Custom: Four independent checkboxes will be enabled for you to combine the properties of the three above ojectives the way you want.
When you click OK the test harness opens.

Navigating Between the Harnesses and the Model
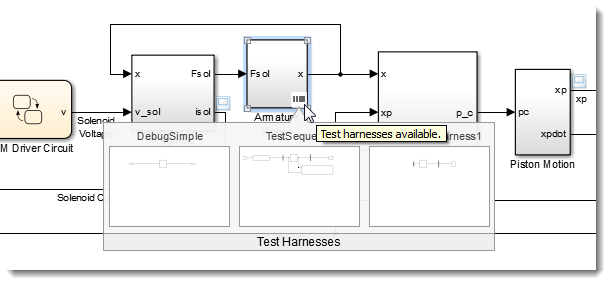
When a subsystem has harnesses, you will notice a new icon on its bottom right corner. Clicking on it will list the harnesses.

To avoid confusions, you can open only one harness at a time and the original model cannot be edited when a harness is open. In the harness, you can modify the subsystem as you wish, and the changes will be propagated to the original model as soon as you close the harness.
Now it's your turn
Do you think the Test Harness feature will be useful for you? Let us know how you plan to use it by leaving a comment here.
- Category:
- Analysis,
- Verification & Validation,
- What's new?


Comments
To leave a comment, please click here to sign in to your MathWorks Account or create a new one.