Sous-vide Cooking with Simulink Part 2
Here is the continuation of my sous-vide cooking story I began to tell in the last post.
Hardware Implementation
As described last week, I finally received everything I ordered:
 Yeah... I know, a Tupperware is not the best container for a micro-controller. But I thought it would help avoiding to drop water on the Arduino.
Software Implementation
With everything connected to the Arduino, all that remained was to program a controller. I installed the Simulink Support Package for Arduino.
Update: This model was created using MATLAB R2011b. Since R2012a Simulink provides built-in support for prototyping, testing, and running models on low-cost target hardware, including Arduino®, LEGO® MINDSTORMS® NXT, and BeagleBoard.
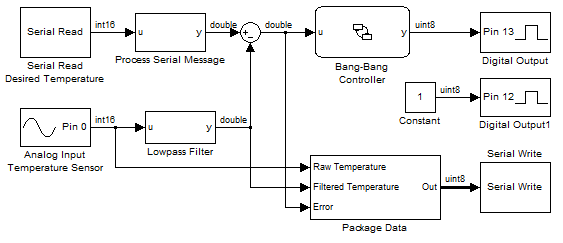
Within just a few minutes, I created the following model and uploaded it on the Arduino:
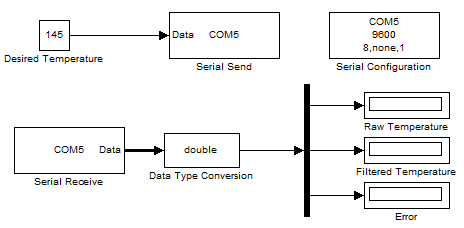
 While this is running on the target, I can monitor the process on my PC using another model:
 Cooking Time
I mixed a nice rub and vacuum-sealed a bunch of pork ribs.
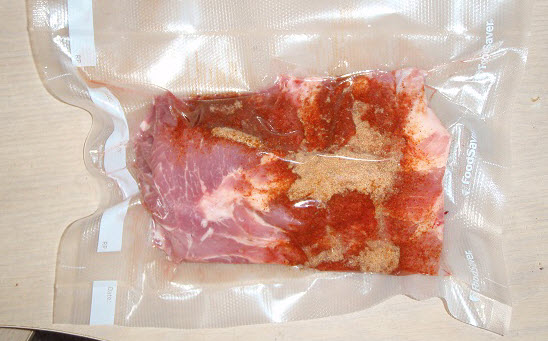 I left them to cook for 24 hours at 140 degrees Fahrenheit.
 I was so excited when it was time to take them out that I forgot to take pictures. I put them in the oven at broil for 2 minutes, just to give a little crunch on the top.
Believe me... that was totally worth the effort. Next time I'll try the 72 hours brisket!
Now it's your turn
Do you use Simulink on the weekend? What is your most unexpected usage of Simulink? Leave a comment here.
- Arduino Uno microcontroller
- LM35 temperature sensor
- PowerSwitch Tail
 Yeah... I know, a Tupperware is not the best container for a micro-controller. But I thought it would help avoiding to drop water on the Arduino.
Software Implementation
With everything connected to the Arduino, all that remained was to program a controller. I installed the Simulink Support Package for Arduino.
Update: This model was created using MATLAB R2011b. Since R2012a Simulink provides built-in support for prototyping, testing, and running models on low-cost target hardware, including Arduino®, LEGO® MINDSTORMS® NXT, and BeagleBoard.
Within just a few minutes, I created the following model and uploaded it on the Arduino:
 While this is running on the target, I can monitor the process on my PC using another model:
 Cooking Time
I mixed a nice rub and vacuum-sealed a bunch of pork ribs.
 I left them to cook for 24 hours at 140 degrees Fahrenheit.
 I was so excited when it was time to take them out that I forgot to take pictures. I put them in the oven at broil for 2 minutes, just to give a little crunch on the top.
Believe me... that was totally worth the effort. Next time I'll try the 72 hours brisket!
Now it's your turn
Do you use Simulink on the weekend? What is your most unexpected usage of Simulink? Leave a comment here.





评论
要发表评论,请点击 此处 登录到您的 MathWorks 帐户或创建一个新帐户。