
Optimizing Data Types with the Fixed-Point Tool
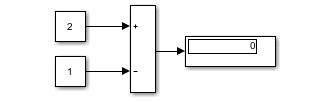
Have you ever had one of those days... ?
The Explanation
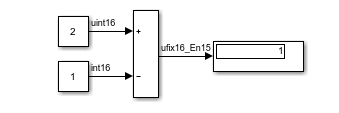
When I see things like that, my first reflex is usually to turn on most of the items in the Display menu. In this case, displaying the port data types helps a bit with understanding what is happening:
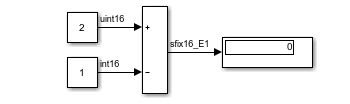
In this case, the data type of the output signal is sfix16_E1. This means that it is a 16 bits integer with a fraction length of -1. See the documentation for fixdt for more information on the possible ways to specify fixed-point data types in Simulink.
This data type, sfix16_E1, can only represent 0 and 2, not 1. This is why the output is zero.
Why?
Now... you are probably wondering why the data type of the Sum block is sfix16_E1.
First, let's look at its block parameters:
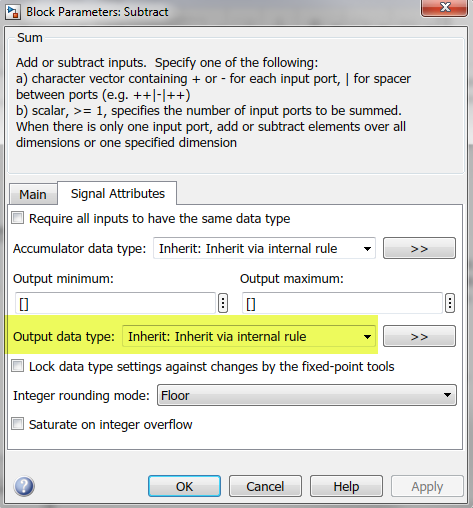
As you can see, its output data type is set to "Inherit via internal rule". When the time comes to automatically choose a data type, Simulink has to make a trade-off between range and precision. In most cases, by default Simulink will tend to favor range over precision. In this case, the fraction length of -1 is the most precise option allowing the Sum block to cover the entire potential range of the sum of the input signals data type.
If you want us to find a better trade off, here are two options using the Fixed-Point Tool, a very useful tool included with Fixed-Point Designer.
Fixed-Point Tool - Simulation Workflow
Right-clicking in the model window gives you the option to launch the Fixed-Point Tool. If you click on the Collect Ranges, it will simulate the model and collect data about the ranges of signals in the model.
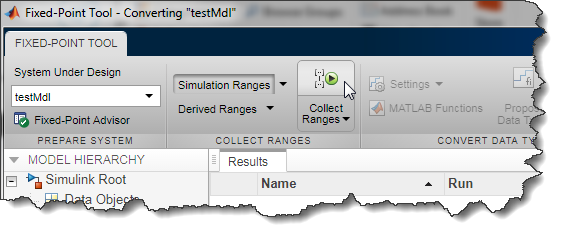
Note that you have many options when collecting ranges, like aggregating results from multiple simulations and using double data type during the collection.
Once this is done, click Propose Data Types
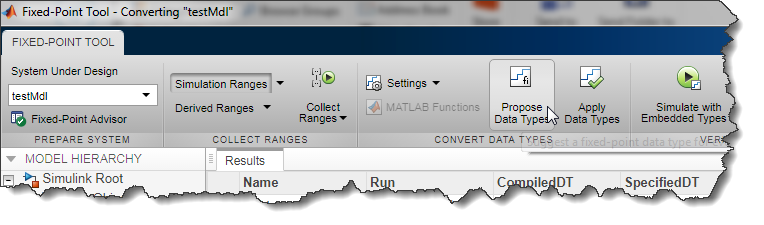
And now magic happens!
You can inspect the proposed types and decide whether to accept each one individually. In my case, I accepted the data type proposed for the Sum block output, which was ufix16_En15.

After I apply the results, I simulate the model again and get the desired result: 2-1=1.
Fixed-Point Tool - Range Analysis Workflow
If you know the ranges that the signals in your model are expected to take, you can specify them in block dialogs and those ranges will be used:
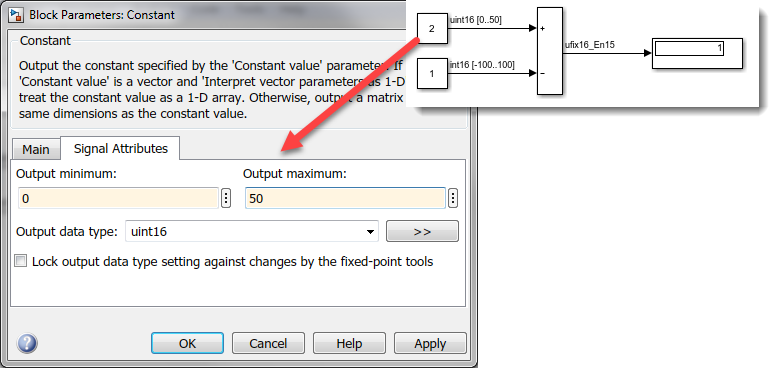
In the Fixed-Point Tool, click on Derived Ranges to use those values.

Once this is done, follow the same workflow as above: Collect, Propose, Apply. We'll take care of the rest!
Now it's your turn
Are you taking advantage of simulation results and specified ranges to optimize fixed-point properties in your models? Let us know in the comments below.
If you are not using it already, I recommend reading more about Fixed-Point Designer. What I showed in this post is only a small example of what it can do for you.


See Also
-
Floating-Point Numbers
Blogs
-
-
-

Comments
To leave a comment, please click here to sign in to your MathWorks Account or create a new one.