
Overview Of Recent Projects Features
Today I am happy to welcome guest blogger Quique Hernandez Hurtado Esquilas.

Quique recently completed a project where he updated many examples using Projects to leverage new features added in the last few releases. If you have been using Simulink Projects for many years, keep reading to see if your projects are leveraging those new additions.
Note: In case you did not notice, starting in R2019a, Simulink Projects are not Simulink Projects anymore but simply Projects. You can now take advantage of the useful project management features directly from MATLAB.
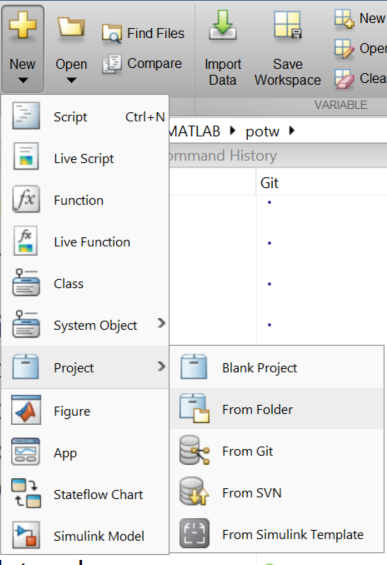
Through this post, we will be using the Airframe example included with Simulink, which can be launched by executing sldemo_slproject_airframe in MATLAB.
Shortcuts
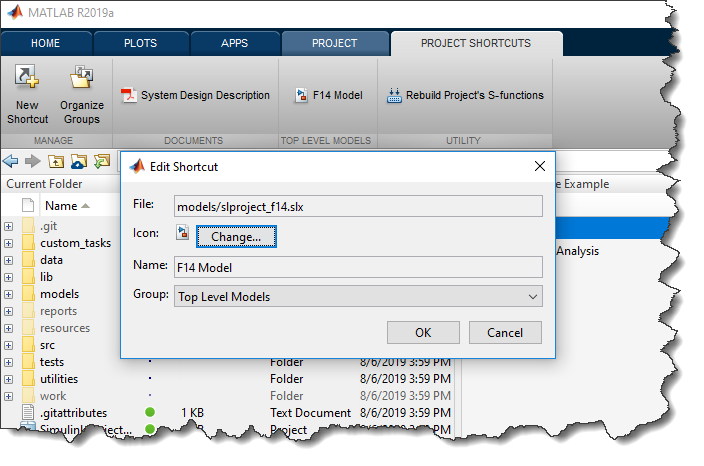
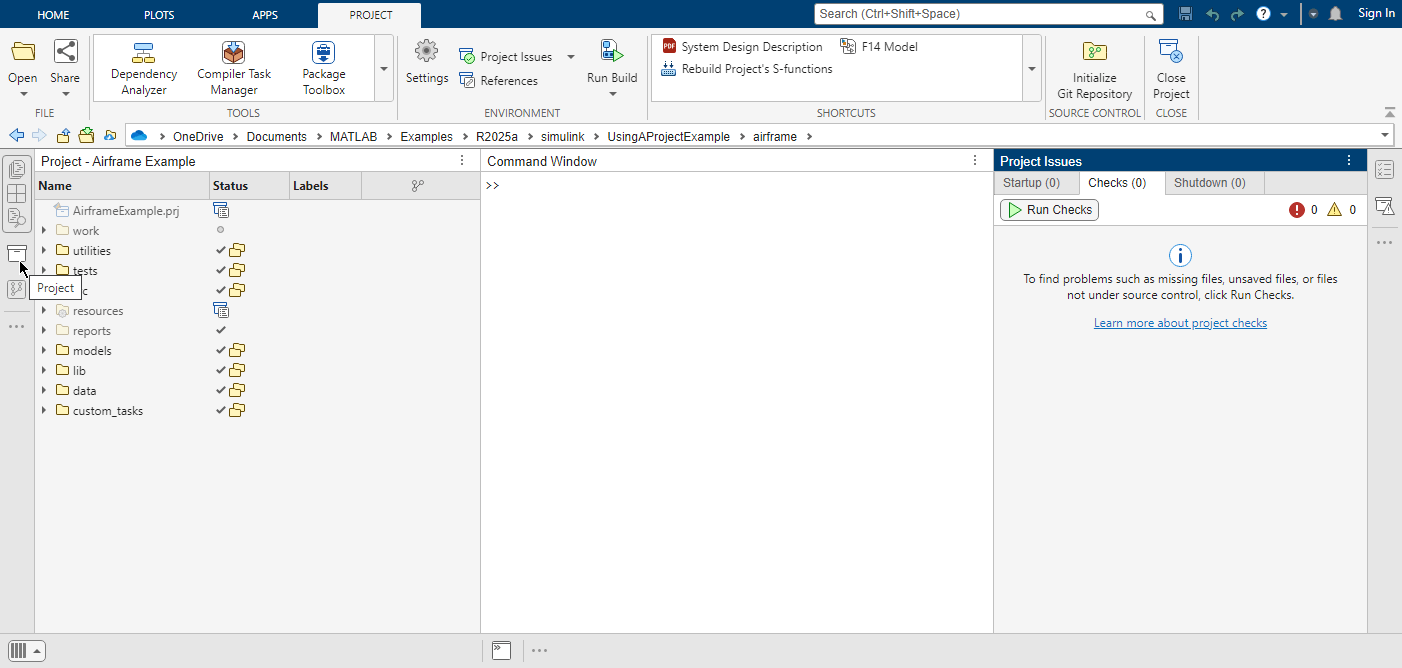
After opening the project, you will notice several shortcuts in the MATLAB toolstrip. These represent an easy way to access important files inside the project. Shortcuts can be arranged in groups, and the name displayed for the shortcut can be customized. Therefore, it is recommended to select a descriptive name that may be distinct from the file name. This will make it easy for new members of your team to identify important files in the project.
Details
If you switch to the Project tab in the MATLAB toolstrip, you will notice a Details button.

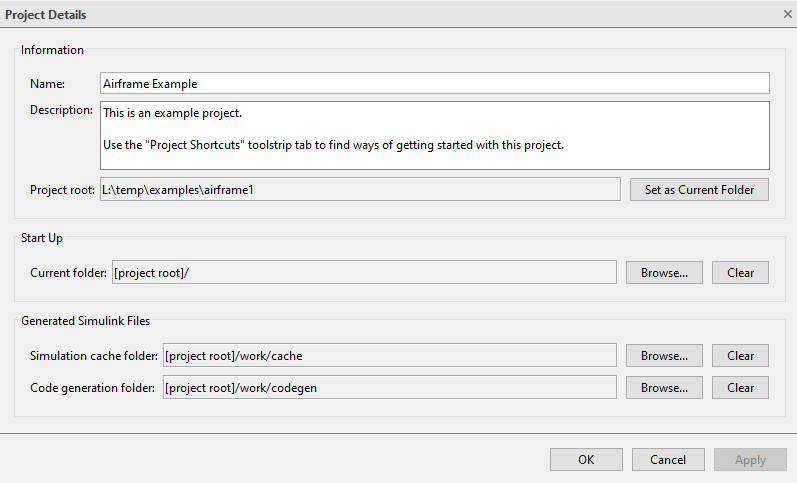
This window allows you to enter useful project information, such as Name and Description. It is always recommended to fill in this information for your project. This helps put some context into the project, which is very useful when working in a collaborative environment.
Folders for Generated Simulink Files
As you probably noticed in the previous image, the Details window is also where you can specify a path for both the simulation cache and the code generation folders for the Project. The recommended general workflow is to use a “work” folder inside the project root directory. You can then create your own folders inside of it for each of the options.
This is a great improvement compared to a few years ago, where you had to use Simulink.fileGenControl in a startup script.
Project Path
Similar to the folders for generated Simulink files, a few releases ago you had to use addpath and rmpath in startup/shutdown scripts to manage the path of your project.
In recent releases, the Project Path window allows you to manage those paths in just a few clicks:
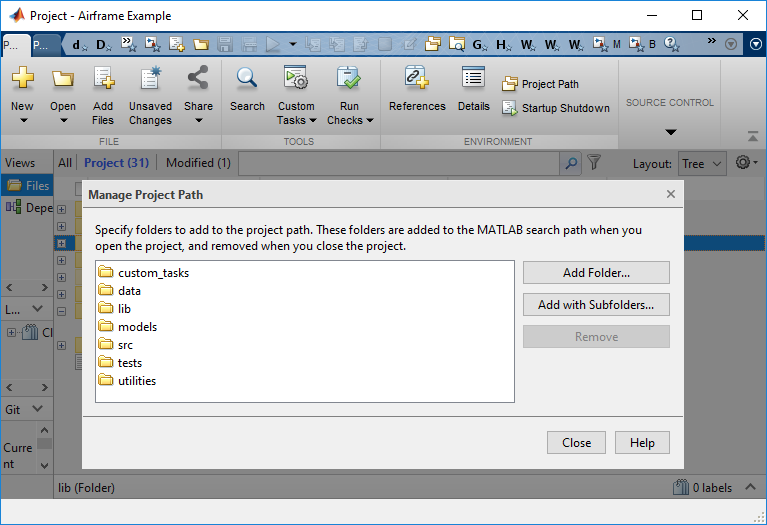
It is significant to note that all of the paths for your project are relative – that is, they are relative to the project root. This is a big benefit, as it ensures that the paths will be set up correctly regardless of where in your file system you (or other members of your team) choose to put the project.
Startup Shutdown
The “Startup Shutdown” button from the toolstrip allows selecting files that will be automatically executed when starting or closing the project. In this window, you can select MATLAB scripts to be executed, Simulink models to be opened and MAT-files to be loaded.
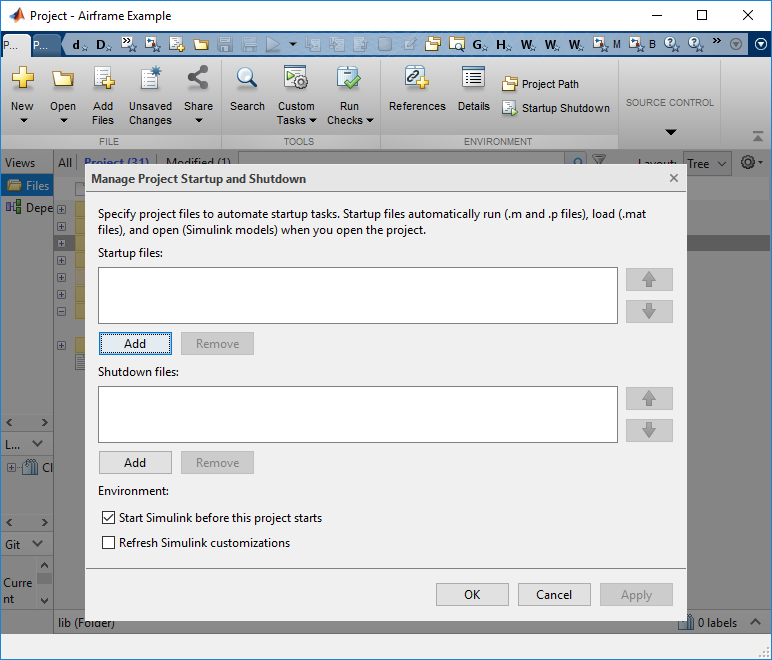
As shown in the above image, it is also possible to set up the environment by starting Simulink automatically when launching the project, as well as to refresh the Simulink customizations. This means that you can include project-specific Simulink customizations in the project itself. If your project includes Simulink models, it is recommended to check the box for starting Simulink. This will have all the environment already loaded and will speed up the process of getting to work editing and simulating your models.
Now it's your turn
What's is your favorite feature of Projects? Let us know in the comments below.
- Category:
- Model-Based Design,
- What's new?


Comments
To leave a comment, please click here to sign in to your MathWorks Account or create a new one.