
Halloween special: The Pumpkin Chunkin Simulator!
How do you feel about a pumpkin chunkin simulator today?

Earlier this week, I noticed the latest post on the MATLAB Community blog: Flying Pumpkins, Dancing Pumpkins. While Ned and Eric's post is about drawing pumpkins using MATLAB graphics, I thought it would be fun to put together a simulation of one of those Pumpkin Chunkin machines.
In order to get some inspiration, I did a bit of research on MATLAB Central File Exchange and quickly found a submission from 2016 titled Design Oriented Trebuchet Model with SimMechanics, which turns out to be from a former colleague, James Allison.
For today's post, I decided to take James' submission and update it to leverage new features introduced in the latest releases. This will include:
- Joint Disengagement in Simscape Multibody
- Spatial Contact Force in Simscape Multibody
- Multiple Simulation Panel
- Customizable Knob and Slider
Let's look at the details!
Ground Contact
At the beginning of the simulation, the projectile lays on the ground until the trebuchet swings it in the air.

To simulate this, the original model was sensing the height of the projectile and implemented a custom force law using Simulink blocks that would keep the projectile above ground using an External Force and Torque block.
In R2021b, we now have the Spatial Contact Force block that makes implementing this sort of contact significantly easier. All you have to do is export the geometry of the solid blocks between which you want the contact dynamics to be computed.

Once the Geometry ports are exposed, you can connect them together using the Spatial Contact Force block. In this case, I used an Infinite Plane block to model the ground and a Spherical Solid for the projectile:

Launching the Projectile
The original model was simulating the trebuchet only up to the time when the projectile was released. At that moment, the simulation was stopped, the motion of the projectile was saved, and a second simulation, implemented in MATLAB using the ode45 function, computed the parabolic trajectory of the free-flying projectile.
The capability to disengage joints was added to Simscape Multibody in MATLAB R2019b. To leverage this capability, I introduced a Weld Joint between the projectile and the rest of the trebuchet, and set its engagement mode to be specified by an input signal. That way, I can sense the sling angle and disengage the Weld Joint - releasing the projectile - using the same logic that was stopping the simulation in the original model:

Here is what the projectile launch looks like animated in the Mechanics Explorer:

The Pumpkin Projectile
In the first animation at the top of this post, you can see that the projectile has the look and shape of a pumpkin (well, a spooky pumpkin). To make that happen, I used the File Solid and specified an STL file I found online. (Tip: 3D printing websites are very useful to find these kinds of files)

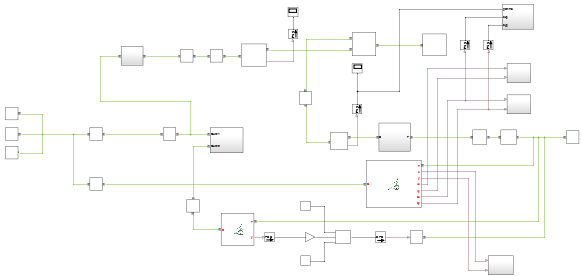
I specified zero inertia for this block and connected it rigidly to my actual projectile Solid block with appropriate mass and inertia. Here is what the final model looks like:

Simulating the model for Multiple Finger Angles
In R2021b, a new Multiple Simulations Panel has been added to Simulink. This panel allows you to interactively create experiments like what you would typically do with MATLAB code using parsim.
For this example, I was curious to simulate the model for multiple finger angles and see which angle would throw the projectile the farthest.
The Multiple Simulations panel can be launched from the Prepare gallery of the Simulation tab. My favorite way to launch it is to hit the shortcut "Ctrl+." and start typing.

In the Multiple Simulations panel, I created a new study, added the variable corresponding to the final finger angle and specified a vector of 20 linearly spaced values:

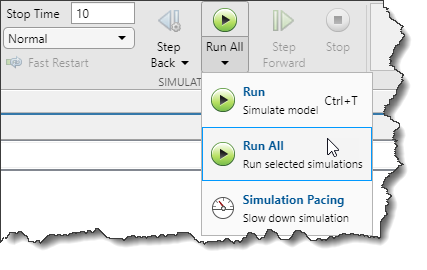
Once this is done, you will notice that the Run button now has a Run All option allowing you to launch all the simulations in one click.
Once the runs are started, you can monitor the process in the Simulation Manager. For this example, I chose to display the finger angle on the X axis and the final position of the projectile on the Y axis.

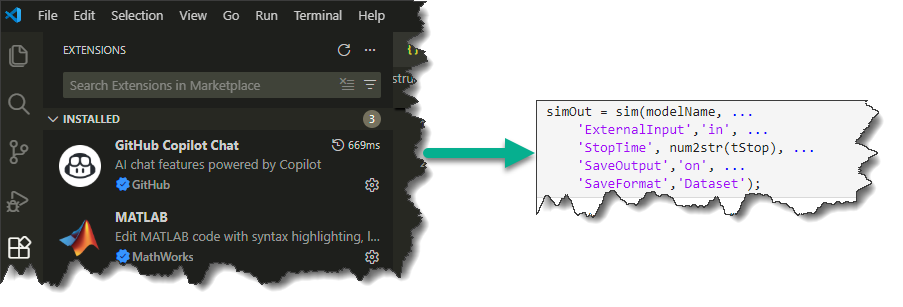
Once the runs are completed, an array of SimulationOutput objects will be returned in the MATLAB base workspace for further post-processing. Here is simple code plotting the 20 trajectories. (Yes, in the first simulation the projectile went backward!)

Customizable Dashboard Control
Finally, I decided to give a try at the new customizable dashboard blocks available in R2021b. In the following animation, you can see the Customizable Horizontal Slider used to control the pivot point location, and the Customizable Knob used to control the finger angle.

I am not describing how I created those in this post because it is already getting long, but the process is similar to the one I described in this blog post where I created custom gauges a few releases ago. Let me know in the comments below if you would like to read more on that topic in a follow-up post.
Now it's your turn!
Have you tried any of those new features? Are you planning to chuck pumpkins this Halloween? Let us know in the comments below!
- Category:
- Fun,
- What's new?


Comments
To leave a comment, please click here to sign in to your MathWorks Account or create a new one.